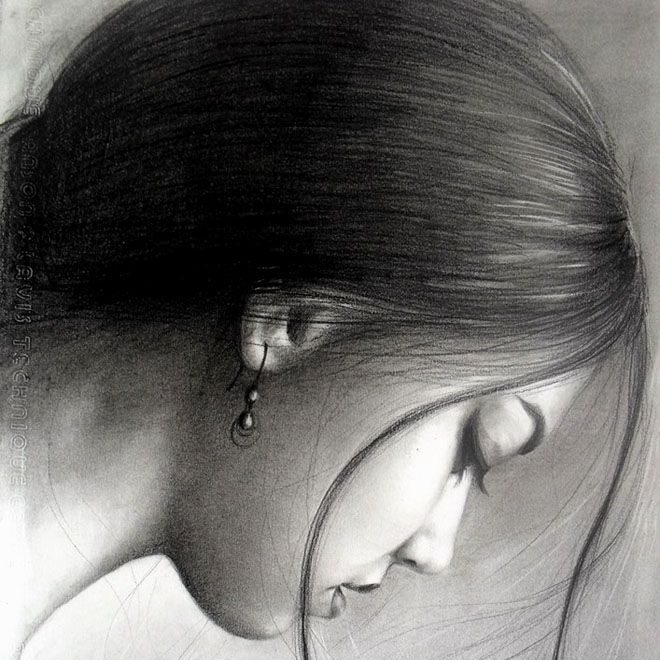
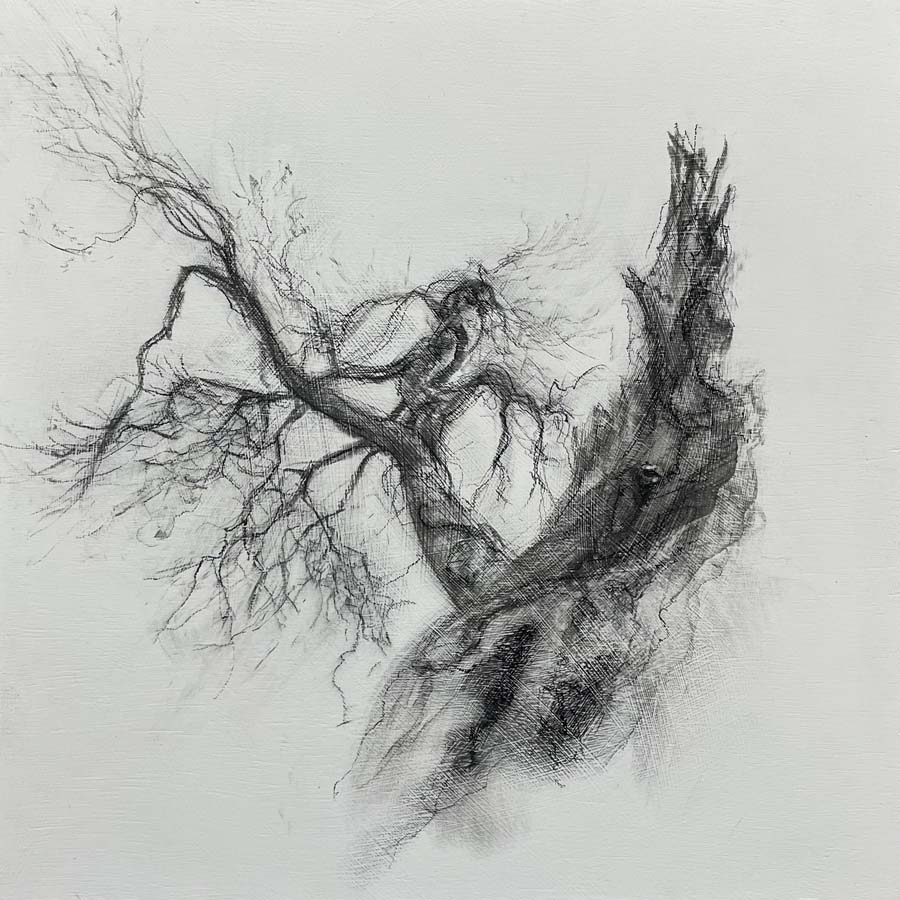
Transforming a photo to charcoal drawing is a creative process that allows you to interpret and stylize an image in a unique way. Whether you are an aspiring artist or a seasoned pro, understanding the right tools and techniques can elevate your work significantly. In this article, we’ll explore the essential tools you need, various techniques to master, and tips for achieving stunning charcoal drawings from photos.
Essential Tools for Charcoal Drawing
Types of Charcoal
The first step in creating charcoal drawings is to select the right type of charcoal. The most common types include compressed charcoal, vine charcoal, and charcoal pencils.
- Compressed Charcoal comes in sticks and is dense, providing deep, rich dark tones. It’s ideal for filling in large areas but can be harder to erase.
- Vine Charcoal is lighter and softer, making it easier to blend and perfect for creating softer lines and textures. It’s also easier to erase, allowing for corrections and adjustments.
- Charcoal Pencils offer more control and precision, making them useful for detailed work or fine lines. They are essential for adding details in areas that require accuracy.
Each type of charcoal has its own unique characteristics, and using a combination can enhance your drawing’s overall texture and depth.
Supporting Materials
In addition to charcoal, you’ll need a few other materials to support your drawing.
- Drawing Paper: Choose paper specifically designed for charcoal, such as heavyweight drawing paper or textured paper. The texture helps hold the charcoal, permitting more intricate lines and details.
- Erasers: A kneaded eraser is particularly useful for charcoal drawings. This type of eraser can be shaped to a fine point for detailed work and can lift charcoal without smudging.
- Blending Stumps: These tools are essentially rolled paper sticks that help blend and smooth out the charcoal. Blending creates depth and dimensionality in your drawing.
- Fixative Spray: A workable fixative helps preserve your finished drawing and prevent smudging. Make sure to use it in a well-ventilated area.
Preparing Your Workspace
Setting Up
Creating a comfortable and functional workspace is essential for any artist. You’ll need a flat surface, such as a drawing table or desk, where you can comfortably work on your drawing. A well-lit area is crucial—natural light is best, but adjustable lamps can mimic daylight and reduce eye strain.
Organizing Your Tools
Organize your tools for easy access. Keep your charcoals, erasers, blending stumps, and paper close at hand. A simple tray or container can help avoid clutter and ensure you have what you need without interrupting your flow. Consider keeping a sample piece of paper nearby for testing strokes and blending techniques before applying them to your main drawing.
Selecting a Photo Reference
Choosing the Right Photo
Selecting an engaging photo is critical for your charcoal drawing. Look for images with strong contrasts, dramatic lighting, and interesting textures—these elements translate well into charcoal. Portraits or landscapes can be great subjects, but avoid overly complex images to start with.
Simplifying the Image
Once you’ve chosen your photo, analyze it and determine the essential elements to include in your drawing. You can convert the image to black and white to assess contrasts better. Consider simplifying the composition by focusing on strong lines and shapes rather than intricate details. This simplification will make the drawing process smoother and more effective.

Basic Charcoal Techniques
Creating an Under-drawing
Start by loosely sketching the basic outline of your drawing using light strokes, especially if you’re using vine charcoal. Don’t apply heavy pressure—use this phase to capture the proportions and main features of your subject. The under-drawing should act as a guide, and you can build upon it as you progress.
Building Up Layers
With charcoal, layering is key to creating rich textures and depth. Begin with lighter tones using vine charcoal, adding layers gradually. Use your blending stump to smooth transitions between light and dark areas. As you layer additional charcoal, shift to compressed charcoal for deeper shadows. Remember to keep the highlights in mind; they add dimension and a focal point to your piece.
Advanced Techniques for Depth and Texture
Shading and Blending
Shading is fundamental to achieving depth in your charcoal drawing. Use varying pressure with your charcoal to create gradients from dark to light. For blending, use your fingers or blending stumps to soften harsh lines and create smooth transitions. Be careful not to over-blend, as some areas should maintain texture and definition.
Adding Detail and Contrast
As you refine your drawing, incorporate more intricate details, such as textures on surfaces or subtle changes in tones. Charcoal pencils are excellent for this phase as they offer precision. Don’t hesitate to erase small areas to create highlights and details, enhancing contrast. Consider using a kneaded eraser to lift charcoal for lighter areas effectively, adding realism to your work.
Final Touches
Assessing Your Work
Before adding final touches, step back and assess your drawing from a distance. This perspective can help you identify areas that require more contrast or detailing. Look for balance in your composition, ensuring no section feels heavier or neglected compared to others.
Applying Fixative
Once you’re satisfied with your drawing, it’s time to apply a fixative. Hold the spray can 12 to 14 inches away from the drawing and spray in light, even coats. This process preserves your work and prevents smudging. Allow each coat to dry before applying another for the best results.
Tips for Continuous Improvement
Experiment and Practice
The journey to mastering photo to charcoal drawing is all about experimentation and practice. Try drawing from different subjects, styles, and techniques to broaden your skill set. Don’t be afraid to make mistakes; they’re an essential part of the learning process.
Seeking Feedback
Engaging with other artists or joining art communities can provide valuable insights and critiques. Share your work, seek advice, and learn from others who have experience with charcoal. Constructive feedback can offer fresh perspectives and inspire further creativity.
Taking Continuing Education Classes
If you’re serious about improving your skills, consider enrolling in art classes focused on charcoal drawing. Formal education offers structured learning, professional guidance, and the opportunity to explore various techniques. Many local art studios and online platforms offer courses tailored to different skill levels.
Celebrating Your Work and Sharing It
Showcasing Your Art
Once you’ve completed your charcoal drawing, don’t forget to celebrate your achievement. Consider framing your artwork to protect it and showcase it in your home or office. A well-chosen frame can enhance the visual impact of your drawing and encourage you to take pride in your work. If you’re sharing your art in a gallery or online, be sure to photograph it under good lighting to capture the details and textures accurately. High-resolution images allow your audience to appreciate the intricacies of your charcoal drawing.
Engaging with the Artistic Community
Engaging with the artistic community can be incredibly rewarding. Share your work on social media platforms and art communities like Instagram, Pinterest, or DeviantArt. These platforms not only allow you to showcase your talents but also connect you with fellow artists who share similar interests. Participate in challenges, workshops, and exhibitions to expose your art to a broader audience. By sharing your journey and progress, you provide inspiration to others while receiving valuable feedback that can further improve your skills. Remember, art is a communication medium, and sharing your work can open up new dialogues and opportunities.
Conclusion
Creating photo to charcoal drawing is a rewarding process that combines artistic expression with technical skill. By gathering the right tools and following the techniques outlined in this guide, you can bring your images to life with incredible depth and texture. Whether you’re just starting or looking to refine your skills, practice and experimentation are keys to success. Embrace the learning journey, and soon you’ll find your charcoal drawings captivating and full of personality. With dedication and creativity, you’ll elevate your artwork from mere reproductions to unique interpretations.