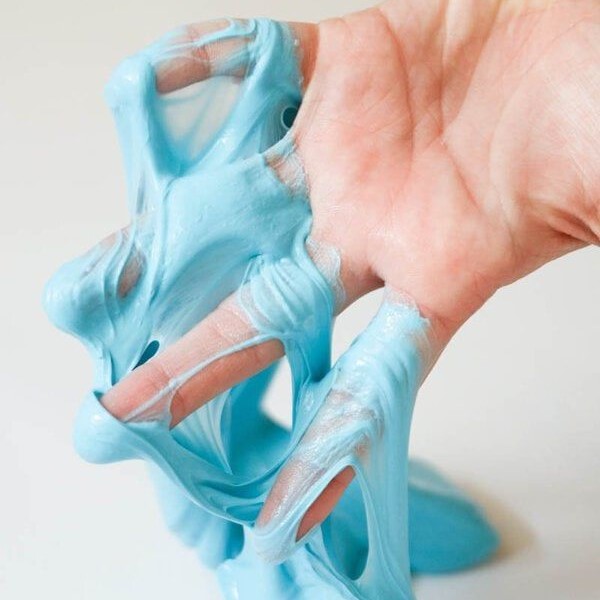
What Is Slime and Why Use a Glue Stick?
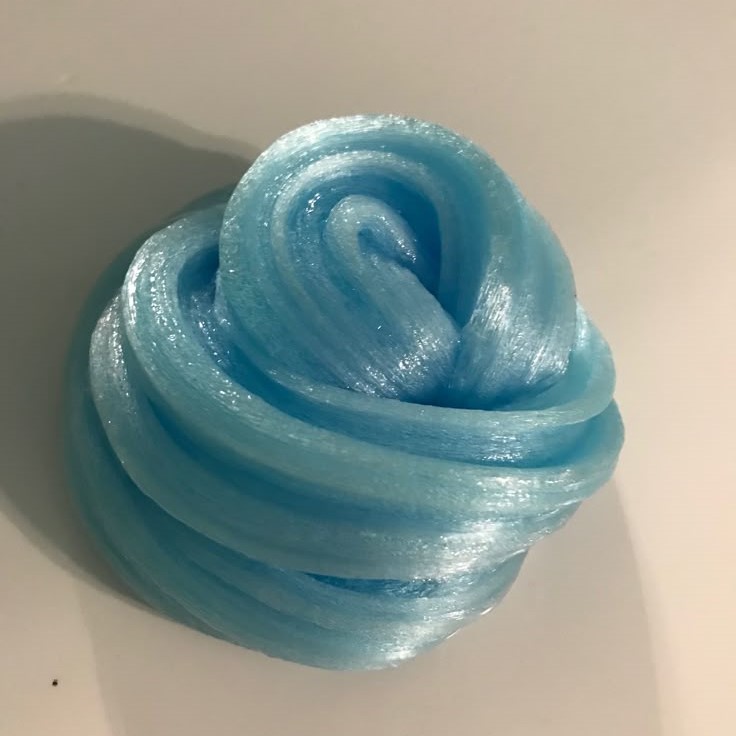
How to make slime with a glue stick? Slime is a stretchy, gooey substance that people love to play with. It’s not a solid or a liquid—it’s somewhere in between, which makes it so fun to touch and mold. Many people use glue sticks to make slime because they’re easy to find, affordable, and safe for children. Unlike traditional slime recipes that require borax or contact lens solution, the glue stick method is much simpler and safer.
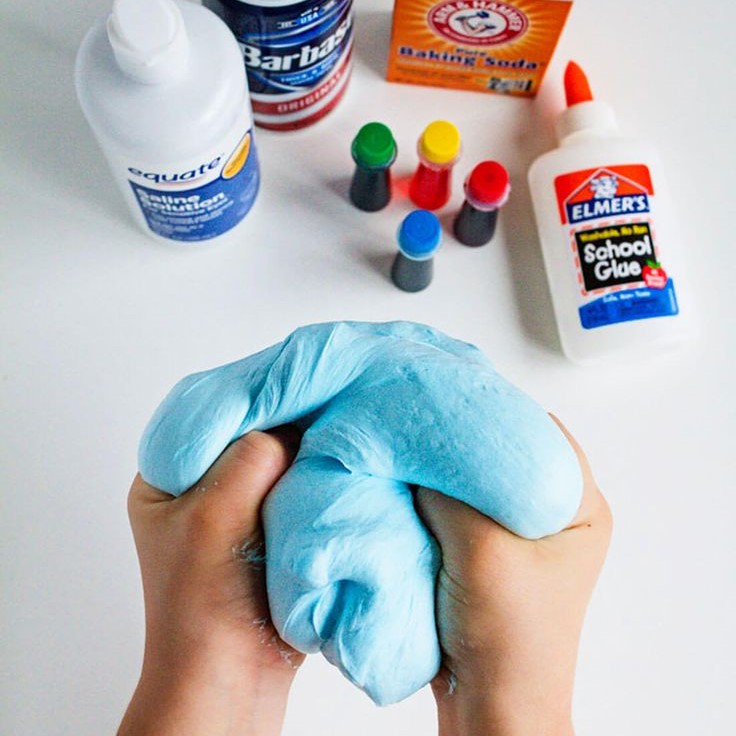
The main ingredient is a white school glue stick, which acts as the base for the slime. Other ingredients like water, baking soda, and food coloring are often used to customize the texture and color. This method is great for beginners who want to try making slime without worrying about complicated steps or dangerous chemicals. Plus, it’s a perfect way to teach kids about mixing and chemical reactions in a safe environment. If you’re asking how to make slime with only a glue stick and water?, this guide will show you exactly how to do it.
Essential Ingredients for Glue Stick Slime
How to make slime with a glue stick? Creating slime using glue sticks is quick and fun. To get started, you’ll need a few basic ingredients. Below are the essentials:
- Glue Stick: Choose a standard-sized glue stick. Clear or colored glue sticks work best.
- Water: You’ll need water to mix with the glue. Warm water helps dissolve the glue faster.
- Activator: Use liquid starch, borax solution, or contact lens solution to create the slime texture.
- Optional Coloring: Add food coloring or paint for vibrant colors.
Each ingredient plays a key role in slime creation. Without these, the slime won’t form or hold together. Ensure quality products for the best results.
Tools Need for the Process
Before starting the slime-making process, gather the right tools. These tools make the process easier and mess-free.
Mixing Bowl: A small or medium-sized bowl is ideal for combining ingredients efficiently.
A mixing bowl is essential when making slime because it provides a dedicated space to mix all the ingredients together. A small or medium-sized bowl works best because it allows you to control the amount of mixture and prevents spills. The bowl should be deep enough to hold all the ingredients without overflowing. It’s also important to use a clean bowl to avoid any contamination from leftover substances. Whether you’re using a glue stick or liquid glue, the bowl helps keep everything organized and makes the mixing process easier and more efficient.
Spoon or Stirrer: Use a sturdy spoon or stirrer for mixing the glue and activator.
A sturdy spoon or stirrer is necessary to thoroughly mix the glue and activator. The tool should be strong enough to handle the thick consistency of the glue without bending or breaking. A wooden or plastic spoon is usually a good choice because it doesn’t rust or react with the chemicals in the glue. If you’re using a glue stick, a stirrer can help break it down more easily. Make sure the tool is long enough to reach the bottom of the bowl and mix everything evenly. Using the right utensil ensures that the slime forms properly and has the right texture.
Measuring Cups: Accurate measurements ensure the slime turns out with the perfect consistency.
Measuring cups are important because they help you get the right amounts of each ingredient. Too much or too little of an ingredient can change the texture of the slime, making it either too sticky or too runny. For example, if you use too much baking soda, the slime might become hard and difficult to stretch. On the other hand, if you use too little, the slime may not form at all. Measuring cups allow you to follow the recipe accurately and increase the chances of success. Even small differences in measurement can affect the final result, so it’s always better to measure carefully.
Scissors: If using glue sticks, scissors can help cut them into smaller pieces.
If you’re using a glue stick instead of liquid glue, scissors can be very useful. They help you cut the glue stick into smaller pieces, which makes it easier to mix with water. This step is especially helpful if the glue is too thick or hard to work with. Cutting the glue into smaller sections also helps it dissolve faster and mix more evenly. Scissors should be sharp and easy to handle, so you can cut the glue safely and efficiently. Always be careful when using scissors, especially around children, to avoid accidents.
Gloves (Optional): Wear gloves to keep hands clean during the mixing process.
Wearing gloves is not required, but it’s a good idea to keep your hands clean while making slime. Gloves protect your skin from getting sticky or messy, especially if you’re working with a lot of glue or activator. They also help prevent the slime from sticking to your fingers, making it easier to handle. Some people prefer to wear disposable gloves, while others use rubber or kitchen gloves. If you’re making slime for kids, it’s a good idea to wear gloves to avoid any accidental ingestion or skin irritation. While gloves are optional, they add an extra layer of safety and cleanliness to the process.
Having these tools ready saves time and prevents unnecessary mess. Proper preparation ensures a fun DIY experience.
Step-by-Step Instructions to Make Glue Stick Slime
Creating slime with glue sticks is simple and fun. Follow these easy steps to get started:
- Prepare the Glue Stick: Break the glue stick into small pieces using scissors. This helps it dissolve faster.
- Mix with Water: Place the glue stick pieces into a bowl. Add warm water to soften the glue fully.
- Stir Thoroughly: Use a spoon or stirrer to mix the glue and water. Stir until the mixture is smooth.
- Add the Activator: Pour a small amount of your chosen activator. Start with liquid starch, borax solution, or contact lens solution.
- Combine Ingredients: Mix the activator with the glue solution. Keep stirring until slime begins to form.
- Adjust Texture: Add more activator or water if needed. Mix until the slime reaches your desired consistency.
- Add Coloring (Optional): If you want colorful slime, add a few drops of food coloring or paint. Mix evenly.
- Knead the Slime: Remove the slime from the bowl. Knead it with your hands to improve its texture.
By following these steps, you can make slime with ease using glue sticks. Have fun experimenting with colors and textures!
Common Variations and Add-Ins for Custom Slime
Making slime offers endless possibilities for creativity. You can experiment with various variations and add-ins to customize your glue stick slime. Here are some popular ideas:
1. Glitter Slime
Add fine or chunky glitter to your slime for a sparkling texture. Mix evenly for a dazzling effect.
2. Scented Slime
Include a few drops of essential oils or scented extracts. Popular choices are lavender or vanilla.
3. Glow-in-the-Dark Slime
Mix glow-in-the-dark paint or powder into your slime. Let it absorb light before play.
4. Crunchy Slime
Add foam beads, plastic pellets, or small sequins. These give your slime a satisfying crunch.
5. Fluffy Slime
Add shaving cream to your slime mixture. This creates a lighter and softer texture.
6. Confetti Slime
Sprinkle small, colorful confetti into your slime. Mix gently to keep the shapes intact.
7. Stretchy Slime
Use glycerin or a small amount of lotion to make your slime extra stretchy and soft.
8. Magnetic Slime
Incorporate iron oxide powder into your slime. Use a magnet to interact with the slime.
By trying these variations, you can create unique slimes for different moods and occasions. Customize the mixture to suit your preferences and enjoy experimenting with textures, appearances, and scents.
Tips for Achieving the Best Texture
Creating slime with a glue stick is exciting, but texture matters. Follow these tips to get the perfect slime:
- Use Warm Water: Warm water helps dissolve the glue quickly and evenly.
- Measure Ingredients Carefully: Proper ratios of glue, water, and activator prevent overly sticky or stiff slime.
- Mix Gradually: Add activator and stir slowly to control the slime’s consistency and texture.
- Test as You Mix: Check the slime while mixing to find its ideal stretch and softness.
- Add Extras Thoughtfully: Introduce extras, such as glitter or foam beads, gradually to maintain smoothness.
- Knead Thoroughly: Kneading strengthens the slime’s structure and ensures even texture.
- Adjust in Small Steps: Add activator or water incrementally to avoid overcorrecting texture.
- Store Properly: Keep slime in a sealed container to retain its softness and stretch.
By following these simple steps, you can achieve the best slime texture for endless fun.
Troubleshooting Issues While Making Slime
Making slime using a glue stick can sometimes lead to challenges. Here are common issues and solutions:
1. Slime Is Too Sticky
- Problem: The slime sticks to your hands or surfaces.
- Solution: Add a small amount of activator. Mix thoroughly until stickiness reduces.
2. Slime Is Too Stiff
- Problem: The slime feels hard and doesn’t stretch well.
- Solution: Add a few drops of warm water. Knead it until softer.
3. Slime Won’t Form
- Problem: The mixture stays liquid and doesn’t turn into slime.
- Solution: Add more activator gradually while stirring. Ensure you mix well.
4. Slime Falls Apart
- Problem: The slime is crumbly and breaks easily.
- Solution: Knead in lotion or glycerin to improve elasticity.
5. Slime Is Too Watery
- Problem: The slime has a runny consistency.
- Solution: Add more glue stick pieces or activator. Mix until thicker.
6. Slime Loses Color
- Problem: The slime fades after adding food coloring.
- Solution: Use gel-based food coloring for better vibrancy.
7. Slime Stains Hands
- Problem: Coloring leaves stains on your hands.
- Solution: Add a little baby oil to the mixture. This reduces staining.
8. Slime Dries Out Quickly
- Problem: The slime becomes hard after a short time.
- Solution: Store it in an airtight container. Add a drop of water if needed.
By following these quick fixes, you can resolve most slime issues. Practice and adjustments lead to better results.
How to Store and Preserve Your Glue Stick Slime
Proper storage ensures your glue stick slime lasts longer and stays fun to play with. Follow these tips:
Use an Airtight Container:
Always store slime in a clean, airtight container to maintain its moisture levels.
A plastic container with a tight-sealing lid or zip-lock bags are ideal choices as they prevent air from entering.
This helps avoid the slime drying out and becoming unusable over time.
Keep It in a Cool Place:
Avoid placing slime in areas exposed to direct sunlight or heat sources, as they can cause the slime to warp or dry out.
Instead, choose a cool, dry spot in your home for storage.
Ideal locations include cabinets or drawers away from windows and heat vents.
Add Moisture If Needed:
If you notice your slime has started to feel stiff or less pliable, you can revive it by adding a small drop of water.
After adding the water, knead the slime thoroughly to incorporate the moisture evenly.
This process can help restore its original softness and flexibility.
Avoid Dust and Hair:
To keep the slime clean and enjoyable, always store it away from dusty or dirty surfaces.
Dust and other debris can easily stick to the slime, leading to an unpleasant texture when played with.
Consistently using clean surfaces while handling slime will help keep it pristine.
Use Separate Containers for Variations:
If you have multiple types of slime, such as glitter slime or scented slime, store each type in its own separate container.
This helps prevent colors and textures from mixing, which can result in a less appealing slime.
Clearly labeling each container can also aid in easy identification.
Play with Clean Hands:
Before handling slime, always wash your hands thoroughly to remove dirt, oil, or other residues.
Clean hands help maintain the texture and quality of the slime, preventing degradation.
This small step ensures a more enjoyable and hygienic play experience.
Check Regularly:
Periodically inspect your slime for any signs of mold, a bad smell, or significant changes in texture.
If you notice any of these issues, it’s best to dispose of the slime immediately to avoid health risks.
Regular checks ensure you and others can continue to enjoy slime safely and without concerns.
By following these steps, your glue stick slime will stay fresh and enjoyable for weeks!
Final Thoughts on How to Make Slime with a Glue Stick
In conclusion, how to make slime with a glue stick is a simple and fun activity that anyone can try. With just a few basic materials and a little patience, you can create your own stretchy, squishy slime at home. Whether you’re using only a glue stick and water or adding baking soda for extra stretch, the process is both educational and entertaining.
As we’ve seen, how do you make slime stretchy with glue stick? and can you turn a glue stick into liquid glue? are common questions that have straightforward answers. By following the steps carefully and avoiding common mistakes, you can achieve great results every time. Remember, the key to successful slime-making is proper mixing, timing, and attention to detail. So grab a glue stick, gather your supplies, and start experimenting today. With the right approach, you’ll be amazed at how easy it is to make your own how to make slime with a glue stick.