The Basics
Embarking on the journey of clay face sculpture starts with grasping the fundamentals. The interconnected relationship between the quality of your materials and the success of your final piece is undeniable. Whether you’re sculpting for pleasure or aiming for professional creation, knowing the basics lays the foundation for your sculpting skills.

Types of Clay Suitable for Face Sculpting
Selecting the right type of clay is critical for face sculpting. Key options include:
- Earthenware Clay: Often used in pottery, this type can be a good starter for beginners.
- Stoneware Clay: Known for its robustness after firing, making it ideal for sculptures meant to last.
- Polymer Clay: It is versatile and can be baked in a home oven, suitable for intricate details.
Each variety has distinct properties that can affect the texture, drying time, and overall handling. Polymer clay, in particular, offers a range of colors and finishes, which can be advantageous for those wanting to skip the painting stage.
Essential Tools for Clay Face Sculpting
To shape and carve your vision into clay, you need a set of essential tools:
- Sculpting Tools/Wire End Tools: These help in carving out features and creating textures.
- Loop Tools: Useful for removing clay and smoothing out surfaces.
- Rubber Shapers: Ideal for blending and fine-tuning the soft details.
- Needle Tools: Perfect for making precise lines and holes.
Investing in quality tools translates to better control and precision, impacting the overall quality of your clay face sculpture. Be sure to select tools that are comfortable to hold and that suit the size of your project. Remember, patience and practice with these tools will gradually improve your sculpting technique and prowess.
Preparing the Clay for Your Sculpture
Before diving into the intricate process of sculpting, it’s crucial to properly prepare your clay. This initial stage ensures that your medium is pliable and ready to capture the finesse of facial features, allowing for an enjoyable and efficient sculpting experience.
Conditioning the Clay
- Understanding Conditioning: Conditioning the clay is the first essential step in sculpting. This process involves manipulating the clay to make it softer and more malleable. Properly conditioned clay is easier to work with, providing the ideal texture for detailed sculpting.
- Techniques for Polymer Clay: If you’re using polymer clay, begin by kneading it thoroughly until it reaches a soft and uniform texture. This kneading process is vital as it warms the clay through the friction created by your hands, making it more malleable. Consistency is crucial; ensure there are no hard spots or lumps in the clay for optimal results.
- Wedging for Earthenware and Stoneware: For earthenware or stoneware, wedging is a key technique. This method involves kneading the clay in a controlled way to remove air bubbles, which can compromise your sculpture’s integrity. Wedging also contributes to creating an even consistency throughout the clay, ensuring it’s suitable for detailed work.
- Achieving Smoothness: Continue the conditioning process until the clay becomes smooth and supple. The smooth consistency will allow the clay to hold fine details and respond well to various sculpting techniques. Once the clay feels uniform with no visible air pockets or inconsistencies, it’s ready for use.
Tips on Keeping Clay Workable
- Cover With a Damp Cloth: To maintain the moisture of your clay while working, cover it with a damp cloth during short breaks. This simple step will help prevent the surface from drying out and keeps the clay pliable, ensuring it remains easy to manipulate.
- Mist With Water: If you notice that the clay starts to dry out during your sculpting session, lightly mist it with water. Using a spray bottle, apply a fine mist over the clay surface. This quick fix can help restore moisture without overly saturating the material, which could make it too soft or gooey.
- Use a Sealable Bag: When not actively using your clay, store any unused portions in an airtight container or a sealable plastic bag. This approach limits exposure to air, which can dry out the clay and render it unusable over time. If you have leftover clay from a previous project, this storage method will keep it fresh for your next artistic endeavor.
- Work in Sections: To ensure that your clay remains workable throughout the project, focus on smaller sections at a time. This strategy allows you to pay attention to detail without the risk of the rest of the clay hardening. By working in manageable portions, you can maintain the right balance of moisture and consistency.
Importance of Proper Clay Preparation
Following these guidelines will minimize potential issues as you mold and refine the details of your sculpture. Proper preparation of the clay not only enhances your crafting experience but also contributes to the overall quality of the finished product. Creating a successful clay face sculpture hinges on ensuring that your medium is the right consistency and texture to allow for creativity without frustration.
Moreover, investing time in preparing your clay reflects your commitment to the craft. By focusing on these foundational steps, you lay the groundwork for a successful sculpting session, resulting in a detailed and aesthetically pleasing final piece. As you embark on your sculpting journey, remember that these techniques are integral to maintaining the quality of your clay throughout the creative process, allowing you to bring your artistic vision to life with ease.

Step-by-Step Guide to Creating a Clay Face
As you embark on creating a clay face sculpture, it’s essential to follow a systematic approach. This step-by-step guide will help you form the fundamental structure and add features to bring your sculpture to life.
Constructing the Basic Shape
Start by forming a simple oval shape to represent the head. Use your hands to mold the clay, smoothing out any bumps. The size of the oval will determine the scale of the face, so choose wisely. Keep the clay moist to avoid cracking as you work.
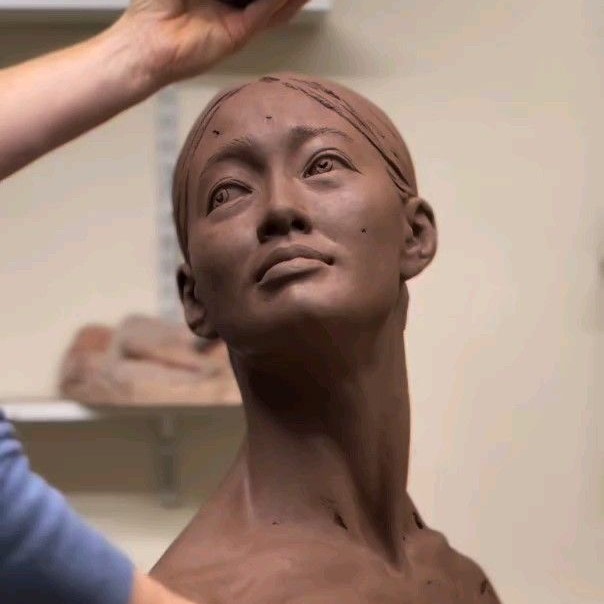
Adding Features: Eyes, Nose, and Mouth
Once the basic head shape is ready, it’s time to add features. Begin with indentations where the eyes will be. For the nose, add a small piece of clay and shape it carefully. The mouth requires a delicate touch—form a slight depression to mark it.
Creating realistic facial features can be challenging. Pay close attention to the placement and proportion of each feature. Use your sculpting tools for refinement.
Sculpting Realistic Ears
For ears, attach small pieces of clay to the sides of the head. Shape them to mimic the ear’s curves and folds. Remember, ears are complex and require time to perfect. Use loop tools to carve out the inner details.
Keep checking your sculpture from various angles. This practice ensures symmetry and proportionality in your clay face sculpture. With patience and detail-oriented work, your clay masterpiece will gradually reveal itself.
Detailing Techniques for Expressive Faces
Achieving expressive faces in clay face sculpture calls for skillful detailing. When you infuse texture into the skin and craft lifelike hair, your sculpture gains character and depth. Below, find techniques that can help in refining those fine details.
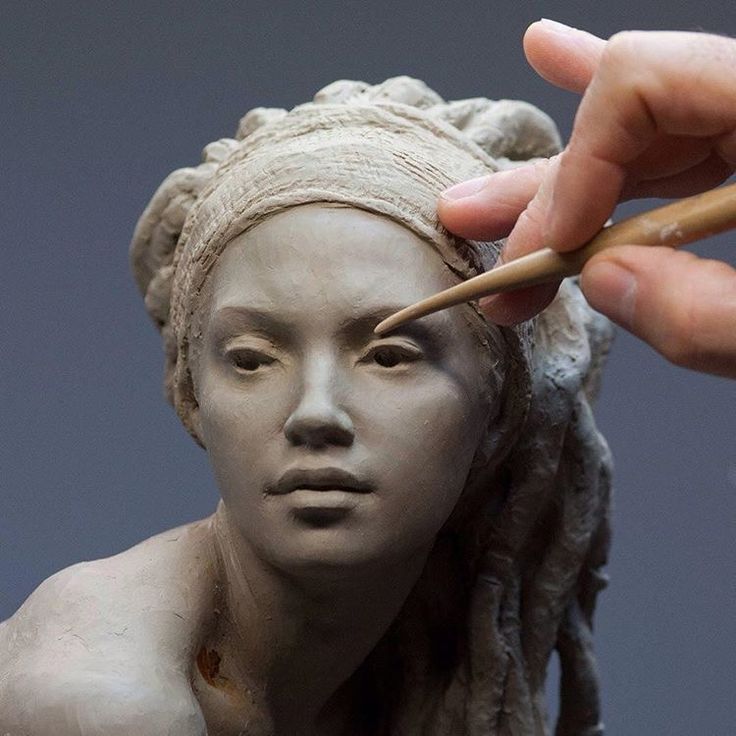
Texturing Tips for Skin
To create realistic skin textures, start with light touches using your wire end tools. These tools help mimic natural skin patterns. Use rubber shapers for subtle wrinkles and fine lines around eyes and mouth areas. Incorporate a stippling technique by gently pressing a textured object into the clay to create pores. Constantly turn and observe your piece from different angles for even application of texture.
Techniques for Lifelike Hair
For hair that looks almost real, plan the hair flow direction first. Add thin strands of clay using a needle tool to create depth and movement. Pay attention to the hairline and how it frames the face. For curly or wavy textures, twist small pieces of clay before applying. Smooth out transitions where hair meets scalp to ensure a natural look. With practice, your techniques for hair detailing will improve, bringing your clay face sculptures to life.
Common Mistakes to Avoid
When creating a clay face sculpture, certain common errors can set you back. Avoiding these pitfalls ensures a smoother sculpting process and a more polished final piece. Awareness is key, and you can steer clear of these mistakes with care and precision.
Addressing Proportional Issues
Proportion is crucial in facial sculptures. A common mistake is misjudging the size and placement of facial features. Check proportions continually as you sculpt. Compare eyes, nose, and mouth to each other. Use a reference image to guide you. If features look off, don’t hesitate to rework them until they feel right.
Fixing Cracks and Smoothing Surfaces
Cracks may form as the clay dries. To fix them, apply water and smooth over with a tool or finger. For surfaces, always aim for evenness; irregularities can distract from your sculpture’s realism. Smooth clay with a rubber shaper and remove excess with a loop tool. Periodically step back and inspect the work from all angles. This practice helps to spot and resolve texture issues early on.
Finishing Your Clay Face Sculpture
When your clay face sculpture starts to take shape, finishing it correctly is critical. This stage involves careful drying and baking of your piece, followed by painting, if desired, and sealing to ensure longevity.
Drying and Baking Practices
Proper drying and baking are key to the success of your clay face sculpture. Follow these steps:
- Let it air dry: If using air-dry clay, leave your sculpture to dry slowly. Avoid rapid drying, which can cause cracks.
- Use an oven for polymer clay: Follow the manufacturer’s instructions for baking polymer clay. Keep temperatures even.
- Preheat and bake stoneware or earthenware clay: Kiln-firing is necessary for these types. Preheat the kiln to avoid thermal shock.
Ensure your sculpture is completely dry before baking, as moisture can lead to cracks or explosions in the kiln. Always monitor the temperature and be patient — rushing this process can ruin your artwork.
Painting and Sealing for Longevity
After your sculpture is dry or baked, you may choose to paint and seal it:
- Choose compatible paints: Use paints that adhere well to your type of clay. Acrylics work well for many clays.
- Apply a primer: This helps the paint adhere better and provides a consistent base.
- Seal it: Apply a clear sealer to protect your sculpture from moisture and wear.
Take your time with each brush stroke and let layers dry thoroughly. Lastly, apply the sealer evenly, and your clay face sculpture will stay beautiful for years to come.
Sculpting Faces with Character
Crafting a clay face sculpture endowed with character involves more than precise technique. It’s about conveying feelings too. Here’s how to infuse personality into your clay creations.
Capturing Expressions and Emotions
Giving life to emotions through clay is an art. Start with the eyebrows and mouth, as these can show a wide range of feelings. Furrow or raise the brows for concern or surprise. Shape the mouth into a smile or frown to depict happiness or sadness. Add depth by carving fine lines that show age or worry. As you work, keep glancing at a mirror or photos to understand how expressions change a face.
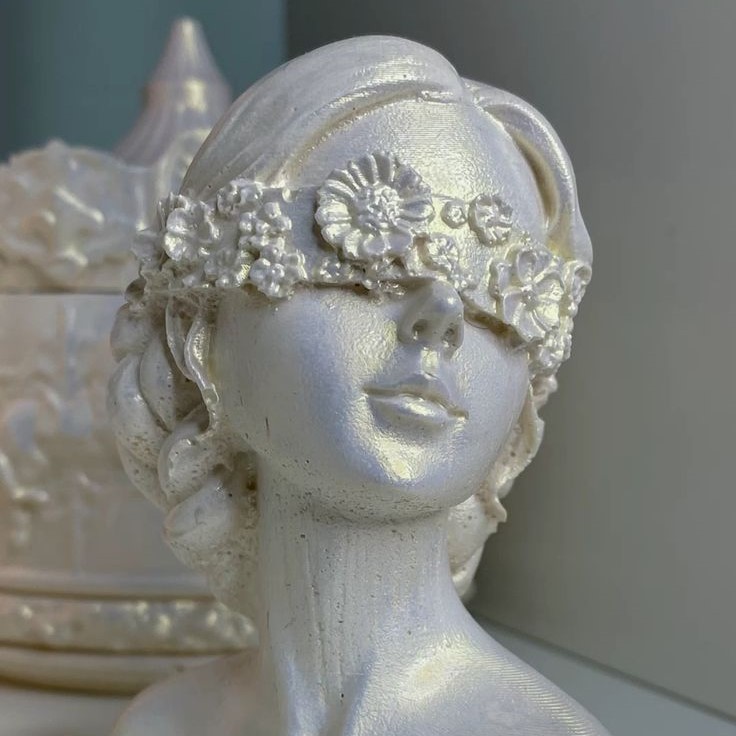
Creative Variations for Abstract Faces
Abstract faces let you bend the rules. Go bold with proportions or mix features in unexpected ways. Enlarge the eyes for a whimsical effect or elongate the nose for style. There are no limits to how you manipulate the clay. Play with textures and asymmetry to create a face that is unique and thought-provoking.
When you sculpt with expressiveness and embrace creative freedom, your clay face sculpture will resonate with viewers. Each piece tells a story, lets the imagination run wild, and becomes a window into an unspoken narrative.
Learning Resources and Practice Workshops
Improving your clay face sculpture skills needs more than just practice. Utilize the right learning resources and attend workshops to boost your expertise.
Recommended Books and Online Tutorials
For sculptors looking to deepen their knowledge, books and online tutorials offer a wealth of information. Look for books that cover anatomy and sculpting techniques. Authors like Philippe Faraut and Bridgette Mongeon have written detailed guides that are great for learners at all levels. Online platforms provide video tutorials. These can help you see techniques in action. Websites like YouTube have experienced sculptors sharing their skills. Find channels dedicated to sculpting and subscribe for regular updates.
Workshops and Classes for Aspiring Sculptors
Join workshops and classes for hands-on learning. Local art centers often run short courses on clay face sculpture. Colleges may offer more extensive programs. Both can sharpen your sculpting abilities. Workshops are also perfect for meeting fellow sculptors. You can share tips and inspire each other. Remember to find classes that match your skill level. As you progress, look for more advanced workshops to challenge yourself and grow your talent.