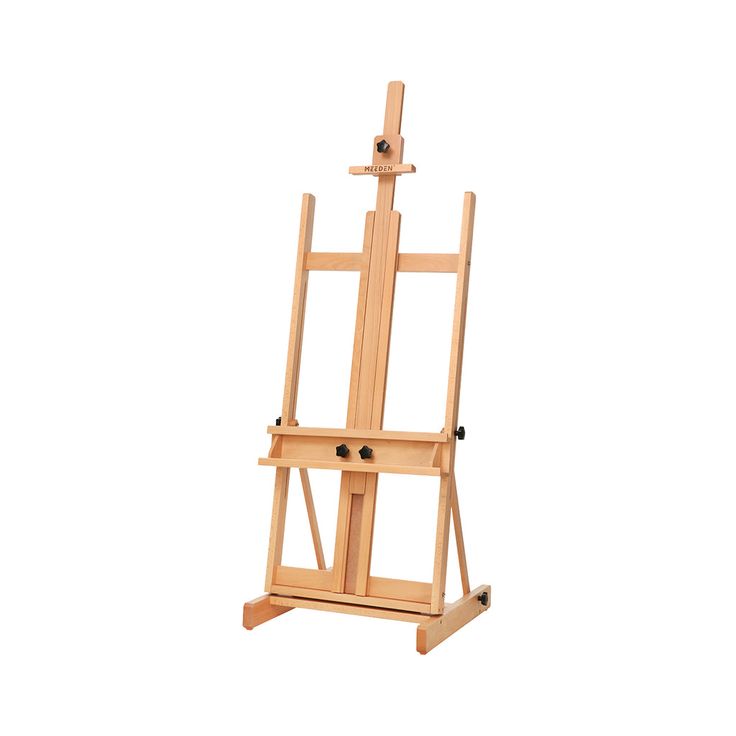
Essential Materials and Tools for Building an Art Easel
Before you start your DIY art easel project, gather the essential materials and tools. With the right supplies, you’ll make the building process smoother and more efficient. Here’s a checklist for what you’ll need:
- Sturdy Wood: Choose a type of wood that’s solid and durable, like pine or oak.
- Screws and Bolts: These will hold the easel structure together. Ensure you have the right sizes.
- Drill: You’ll need this to make precise holes for the screws and bolts.
- Saw: For cutting the wood to your desired dimensions.
- Measuring Tape: Accuracy is key, so measure twice before cutting once.
- Sandpaper: To smooth out any rough edges and improve the easel’s finish.
- Hinges: Essential for creating adjustable parts of your easel, like the legs or canvas holder.
- Screwdriver: For assembling the parts tightly.
- Level: To ensure your easel stands straight and balanced.
- Pencil and Paper: For sketching your design and marking measurements on the wood.
- Wood Glue: For additional bonding strength where needed.
Remember to use these tools carefully and follow safety guidelines. Each tool plays a critical role in building a sturdy and reliable DIY art easel. By properly utilizing them, you’ll create a functional piece that meets your artistic needs.
Step-by-Step Guide to Constructing Your Own Easel
Ready to build your own DIY art easel? Follow this simple guide for an easy construction process. Short, clear steps will help you craft a sturdy easel in no time.
- Design Your Easel: Start with a sketch of your easel design on paper. Include dimensions and angles.
- Cut the Wood: Use your saw to cut the wood according to your measurements. Always prioritize precision.
- Sand the Edges: Smooth all cut edges with sandpaper to avoid splinters and achieve a professional look.
- Drill Holes: Mark where screws and bolts will go. Carefully drill holes at these spots.
- Assemble the Frame: Connect the wooden pieces using screws and bolts. Check that each joint is tight.
- Attach the Hinges: Fix hinges to the parts of the easel that need to adjust, like the back leg.
- Ensure Stability: Use the level to check if the easel stands straight. Adjust as necessary.
- Test the Adjustability: Place a canvas on the easel and adjust the holder and legs. Make sure it holds firmly.
- Glue for Extra Strength: Apply wood glue at critical junctions for added durability.
- Final Touches: Give your easel a clean finish. Consider painting or varnishing if desired.
By following these steps, you’ll create a personalized DIY art easel perfect for your creative space. Use your new easel to explore various art projects with ease.
Customizing Your Easel for Versatility and Functionality
After building your basic DIY art easel, consider customizing it to fit your unique artistic needs. Adding versatile features enhances functionality and can improve your art-making experience. Here’s how you can customize your easel:
- Adjustable Canvas Holders: Install holders with adjustable angles. This allows for working on different sizes and shapes of canvases or panels.
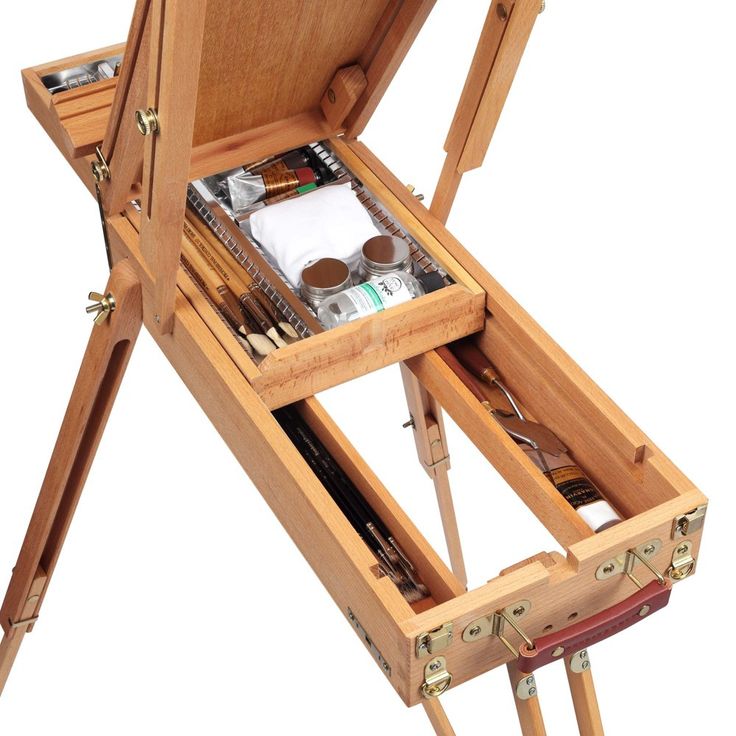
- Tool Trays and Storage: Attach trays or shelves to hold your art supplies. Keep everything within reach while you work.
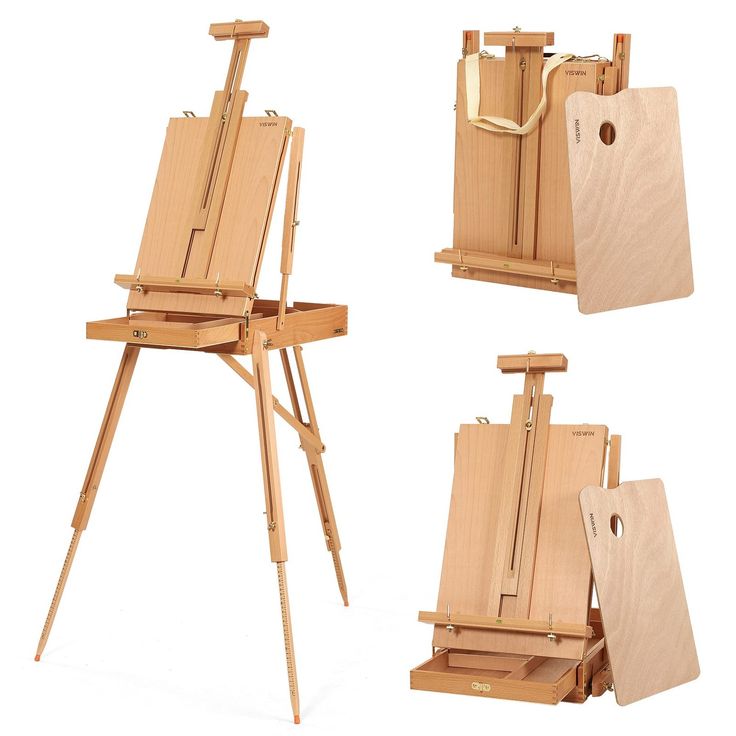
- Portable Design: Add a folding mechanism or wheels. It makes your easel easy to move and store, especially in small spaces.
- Height Adjustment: Include a feature that allows you to change the easel height. It will enable you to work sitting or standing.
- Magnetic Canvas Rest: This can help hold your work in place without clamps, ideal for delicate paper or thin canvases.
Personalize your DIY art easel to make it more than just a stand—it can be a complete work station. Use it to express yourself in the most comfortable and convenient ways possible.
Space-Saving Easel Solutions for Small Studios
As an artist with limited space, finding the right easel to fit your studio is crucial. Here are some space-saving DIY art easel ideas:
- Wall-Mounted Easels: A simple, sturdy bracket can turn any wall into an easel. This uses vertical space and keeps the floor clear.
- Collapsible Designs: Create an easel that folds flat when not in use. This makes it easy to slip behind a door or under a bed.
- Tripod Easels: With a single back leg, tripod easels take up less floor space. They still provide ample support for your work.
- Vertical Sliders: A rail system mounted on a wall allows your easel to move up or down. It’s great for different-sized canvases and for saving space.
- Tabletop Easels: Smaller easels that sit on a table or desk can be great for tiny rooms. They are also easy to put away.
When designing your space-saving easel, bear in mind the ease of storage and mobility. Use lightweight materials and consider wheels or handles for moving around. Lastly, don’t forget to keep the easel adjustable; it should cater to various art forms and positions, whether you prefer standing or sitting while working. With a bit of creativity and the DIY spirit, your small studio can become a highly efficient creative space, with an easel that complements it perfectly.
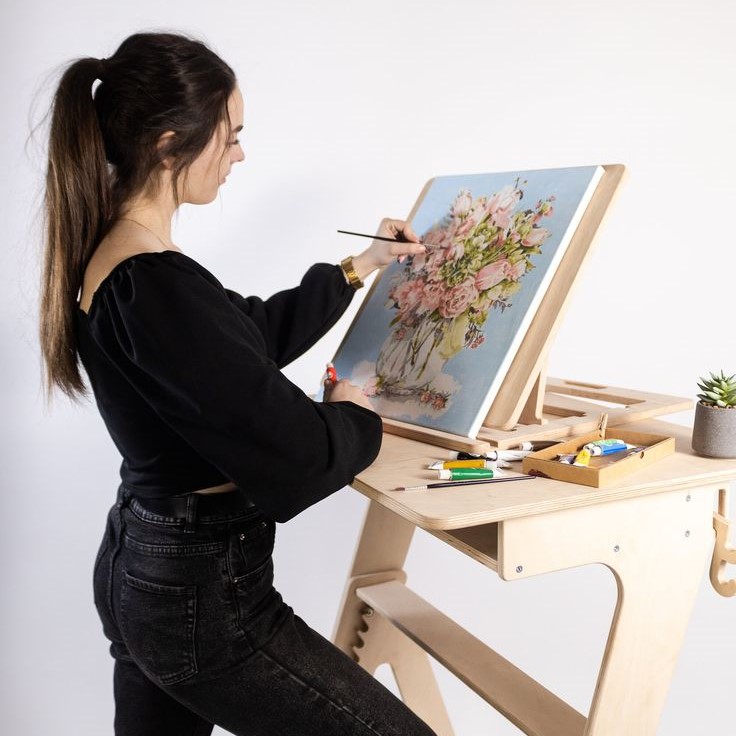
Incorporating Adjustable Features for Different Art Projects
In the realm of art, adaptability is key. To accommodate varied projects, your DIY art easel must offer flexibility. Here’s how to enhance your easel with adjustable features:
- Adjustable Angle: Implement a mechanism that allows the canvas holder to tilt. This aids in shading and perspective work.
- Extendable Legs: Design legs that can telescope or have adjustable notches. This caters to artists who switch between sitting and standing.
- Sliding Canvas Clamps: Fit your easel with clamps that can slide up or down. This feature supports canvas of different heights.
- Rotatable Canvas Holder: A rotating holder allows for easy shifts between landscape and portrait orientations.
- Flexible Tray Position: Add a tray that moves up and down. This keeps tools handy, regardless of the canvas size.
By integrating these features, you ensure your DIY art easel can handle an array of art projects. Such adaptability not only improves your artistic flexibility but also enhances comfort and efficiency. Remember, in the world of art, your easel is your ally; customize it to be as dynamic as your creativity demands.

Tips for Maintaining and Storing Your DIY Art Easel
To ensure your DIY art easel lasts long, proper maintenance and storage are key. Here’s how to care for it:
Regular Cleaning
- Dust Removal: Make it a habit to regularly wipe down your easel using a damp cloth. This simple task helps eliminate dust and debris that can accumulate over time and affect its appearance.
- Gentle Cleaning Solutions: Avoid using harsh chemicals or abrasive materials that could damage the finish of your easel. Mild soap and warm water are usually sufficient for keeping it clean.
- Frequency: Establish a cleaning schedule, such as once a week or after each use, to ensure your easel remains in pristine condition and ready for your next artistic endeavor.
Tighten Screws
- Stability Check: Periodically inspect your easel for any loose screws, bolts, or connections. Tightening these components ensures that the easel remains stable during use.
- Tools Required: Use appropriate tools, such as a screwdriver or wrench, to efficiently tighten the screws or bolts without risking damage to the easel.
- Safety First: Regular maintenance in this area not only prolongs the life of your easel but also enhances your safety while working on your art.
Check for Wear
- Visual Inspection: Regularly inspect your easel for any signs of wear and tear, such as cracks in the wood, frayed hinges, or rust on metal components. Early detection can prevent more significant issues down the line.
- Timely Repairs: If you notice any damage or potential points of failure, make necessary repairs promptly. This might involve sanding down rough edges, replacing screws, or applying protective coatings.
- Maintenance Routine: Incorporate a thorough inspection into your routine, perhaps during cleaning days, to ensure that the easel is always in optimal working condition.
Avoid Moisture
- Proper Storage: Ensure that you store your easel in a dry and well-ventilated area. Excess moisture can lead to wood warping or metal corrosion, both of which can severely impact the integrity of your easel.
- Humidity Control: If you live in a particularly humid climate, consider using a dehumidifier in your studio or storage area to maintain a stable environment for your easel.
- Protective Measures: If necessary, apply a moisture-resistant finish to wooden parts of the easel to help protect it from environmental damage.
Store Flat
- Space-Saving Organization: If your easel is collapsible, take advantage of this feature by folding it down when not in use. Storing it flat will free up space and prevent accidental damage.
- Safe Storage Location: Choose a safe and stable location for your easel, ensuring it is away from high-traffic areas where it might be knocked over or bumped.
- Accessibility Consideration: Store your easel in a manner that makes it easy to access when needed, while also ensuring it is securely packed to avoid any potential mishaps.
Follow these steps to maintain your diy art easel. Good care will extend its life and usefulness.
Gallery of Inspirational DIY Easel Designs
Inspiration is the spark that ignites creativity. To fuel your DIY spirit, explore this gallery of unique and functional DIY art easel designs. Notice how each creation caters to specific artistic needs and spaces. From sleek, minimalist frames to intricate, feature-rich structures, there’s a wealth of ideas to draw from.
- Convertible Easel: This design effortlessly transforms from a standing easel to a tabletop model. It’s perfect for artists who enjoy versatility.
- Plein Air Easel: Built for the outdoors, this easel is lightweight and comes with a built-in carry handle. Take your studio into nature.
- Children’s Easel: Colorful and just the right height, it often includes a chalkboard or whiteboard on the reverse side.
- Corner Easel: Making the most of unused space, a corner easel fits snugly and can hold multiple canvases.
- Vertical Drawer Easel: This easel comes with vertical storage drawers, ideal for keeping supplies neatly organized.
Each design is a testament to the power of customization. They show that with a bit of ingenuity, you can create an easel that not only holds your canvas but also stirs your artistic sensibilities. Whether you’re a professional artist or a hobbyist, let these examples guide your next project. Craft an easel that is a work of art in itself.
The Benefits of Creating Your Own Art Easel
Creating your own DIY art easel brings many rewards. Aside from the pride in building something with your hands, there are tangible benefits.
Customization
- Tailored Design: Creating your own easel allows you to craft a design that is specifically tailored to your artistic requirements.
- Adjustable Features: You can select the size, adjust the height, and modify the angles based on your unique art style, whether you work standing up or sitting down.
- Aesthetic Choices: Choose colors, finishes, and additional features that complement your artistic environment and personal taste, ensuring the easel matches the overall decor of your studio or workspace.
Cost Savings
- Economic Advantage: Ready-made easels can often come with a hefty price tag, particularly for high-quality models.
- Material Control: By building your own easel, you have the freedom to select materials that are within your budget, allowing you to avoid markups from manufacturers.
- Significant Savings: Engaging in a DIY project frequently leads to lower costs, enabling you to allocate your savings towards other essential art supplies or personal projects.
Learning Experience
- Skill Development: Building an easel is not just about having a functional tool; it’s also an educational journey where you can acquire new skills in woodworking and crafting.
- Hands-on Experience: You get the opportunity to learn how to handle various tools and work with different materials, enhancing your overall craftsmanship.
- Rewarding Process: The satisfaction that comes from successfully completing a project fosters a sense of achievement and can add to your creative repertoire.
Quality Control
- Personal Standards: As the creator of your easel, you have the ability to dictate the construction quality. You can choose materials that meet your standards for durability and performance.
- Long-lasting Construction: By carefully selecting robust components and employing thoughtful design, you can ensure that your easel is built to withstand the rigors of regular use.
- Final Product Assurance: Knowing that you crafted the easel provides peace of mind regarding its reliability and functionality, as you were involved at every step of the process.
Personal Connection
- Emotional Investment: Your easel becomes a personal artifact that reflects your creativity and effort; it is imbued with your artistic spirit.
- Inspiration Booster: Having a custom-made easel can enhance your artistic environment, serving as a source of motivation and inspiration as you work on your pieces.
- Unique Identity: Each easel has its personality, and this uniqueness can foster a deeper connection to your artwork, making the creative process even more meaningful.
Satisfaction
- Sense of Accomplishment: Completing your DIY easel instills a profound sense of pride and achievement, as you witness the transformation of raw materials into a functional piece of art.
- Confidence Building: Successfully navigating the challenges of building your easel boosts your self-esteem and reassures you of your abilities to create and innovate.
- Problem-solving Skills: Engaging in the DIY process not only enhances your skill set but also sharpens your problem-solving capabilities, which are invaluable in all areas of life and art.
These benefits make the effort of building your art easel worthwhile. Plus, it also allows you to create a personalized piece that’s tailored to your artistic journey.