Introduction to Ceramics and Pottery
Ceramics are a part of human history. Our ancestors molded clay into pots and figures. Animals, gods, and household items came to life under their hands. Today, we too can craft with this ancient medium. Pottery is the process we use to craft ceramics. It’s an art form that lets us turn clay into useful and decorative items.
Starting with ceramics is a journey. You need no prior skills, just a willingness to learn. The joy of pottery is in shaping something with your own hands. It’s a tactile craft that engages your senses and creativity.
As beginners, easy ceramics projects simplify the learning process. They allow you to grasp the basics before moving to complex ones. In this blog, we’ll explore starter projects that build your skills step by step. We aim to give you enough confidence to craft your own works.
Remember, ceramics can be fragile. Patience and delicate handling are key. You’ll learn both as you progress through various techniques. These include hand-building, coiling, and using slabs. We’ll guide you through these methods, offering tips and tricks along the way.
Let’s embark on this creative journey together. With each piece you make, you’ll grow more adept. And before you know it, you’ll be creating with clay as effortlessly as our ancestors did.

Essential Tools and Materials for Getting Started
Starting your journey into easy ceramics projects requires the right tools and materials. As a beginner, it’s important to gather the essentials without becoming overwhelmed with too many options. Here is what you’ll need to embark on your first project:
- Clay: This is the foundational material for all your creations. There are various types of clay, but as a beginner, start with a low-fire earthenware or stoneware.
- Work Surface: You’ll need a sturdy, flat table or countertop. Cover it with canvas or a non-stick mat to prevent sticking.
- Rolling Pin: A simple kitchen rolling pin will do, essential for flattening clay when you progress to slab projects.
- Wire Cutter: This helps in cutting large pieces of clay and in removing finished pieces from the work surface.
- Basic Pottery Tools: Purchase a beginner’s tool kit which should include a sponge, a couple of wooden modeling tools, a ribbon tool, a loop tool, and a needle tool.
- Scratch Tool or Toothbrush: You will use this to score the clay when joining two pieces together.
- Water Bucket: Keep one nearby to maintain clay’s moisture and clean your hands/tools.
- Metal Ribs: These are used for shaping and smoothing your work.
- Kiln: While it’s an investment, a small kiln will allow you to fire your projects. Some beginners opt to use their community’s kiln resources.
Remember that ceramics require both patience and persistence. With these essential tools and materials at your fingertips, you’re ready to tackle your first easy ceramics projects. Stay tuned, as the next steps will guide you through the hand-building techniques any beginner can master.
Hand-Building Techniques for Beginners
For those new to crafting with clay, hand-building is a great starting point. This technique involves shaping clay with your hands and simple tools, and it provides a fundamental understanding of the material. Here are the three basic hand-building techniques:
Pinching
Begin by rolling clay into a ball. Press your thumb into the center to create a hollow. Gently squeeze and turn the clay, thinning the walls to form a bowl or pot.
Coiling
Roll long, snake-like strands of clay. Spiral these coils to create a base. Add coils layer by layer, joining with scoring and slip to build up the sides. Smooth out the joins for a uniform look.
Slab Building
Flatten clay into sheets using a rolling pin. Cut out shapes and join the edges to form cubes, cylinders, or other geometric forms. Use scoring and slip to ensure a firm bond.
Mastering these techniques takes practice but is very rewarding. Start with simple shapes and gradually move to more intricate designs. Remember, every expert was once a beginner, so embrace the learning process with each easy ceramics project you undertake.

Simple Pinch Pot Projects
Moving forward from the hand-building techniques, let’s focus on some simple pinch pot projects. Pinch pots are a perfect start for new potters. They involve a hands-on approach and teach you how to control the clay’s shape and thickness. Here are a few easy projects to try:
Basic Pinch Pot
Begin with a softball-size piece of clay. Firmly press your thumb into the center. Slowly pinch the sides with your fingers. Turn the ball as you pinch to keep the shape even. Aim for an even wall thickness throughout. Once you’re happy with the form, smooth the surface with a sponge.
Pinch Pot Cups and Bowls
Once you’ve mastered the basic pinch pot, try making small cups or bowls. Start as you would with a basic pinch pot. Work on getting the walls a bit thinner for a delicate look. Add a foot or a handle after they’ve slightly dried using scoring and slip. Personalize the creations with patterns or stamps.
Pinch Pot Animals
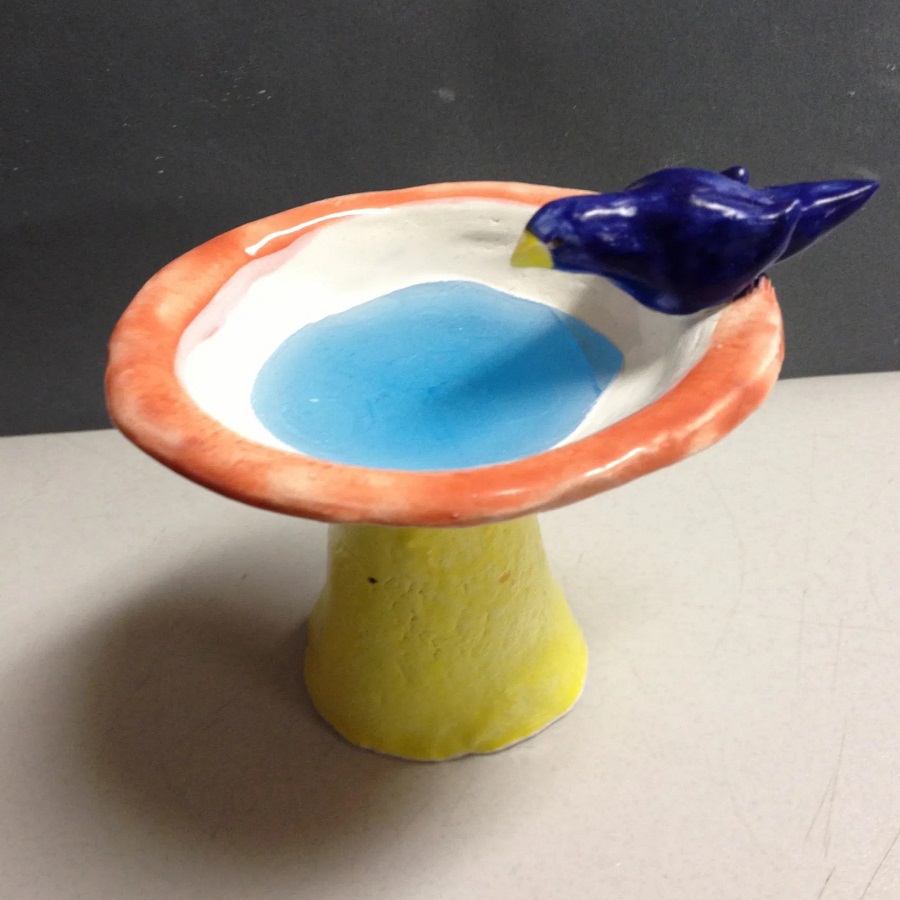
For a fun twist, craft pinch pots into animal shapes. Begin with the pinch pot base. Push, pull, and mold the clay into forms like turtles, birds, or fish. Add details like eyes or fins with small bits of clay. These projects can double as quirky home decor or gifts.
Remember, proper moisture is key to working with pinch pots. Keep a small bowl of water handy to smooth cracks or rough edges. Patience goes a long way in achieving the best results. These easy ceramics projects will build your confidence in handling and molding clay.
Creating Coiled Ceramics
Building on the hand-building techniques, let’s delve into creating coiled ceramics. This method involves rolling clay into long, rope-like strips and layering them to form shapes. Coiling can produce a variety of objects, from simple cups to intricate vases. Here’s how to start your journey in coiled ceramics.
Start with the Right Clay
Choose a soft, pliable clay for easier rolling. Your clay should not crack while coiling. Keep it moist but not too wet.
Roll Even Coils
Take a piece of clay and roll it with both hands. Move outwards from the center to create uniform coils. Aim for even thickness to ensure strength and stability in your final piece.
Create a Base
Begin with a circular base from a flat piece of clay or by coiling. This is your foundation. Make sure it’s strong and even.
Build Up the Walls
Place coils on the base one at a time. Press gently to bond each coil to the one below. Smooth the inside and outside with your fingers or a tool to connect the coils well.
Smooth the Surface
After completing the walls, smooth out any bumps or lines with a rib or sponge. This will give your piece a cleaner look and feel.
Let Dry and Clean Up
Once your form is complete, let it dry to a leather-hard state. Trim any uneven edges with a loop tool. Clean up the surface for a polished final product.
Through coiling, you can explore different textures and designs. Patience and practice are important, as coiled ceramics offer a range of possibilities. With each project, your skill in shaping and joining coils will improve, leading to more complex and satisfying creations.

Slab Construction Methods
Slab construction for easy ceramics projects opens up a world of possibilities. With this technique, you can create sleek, modern pieces with crisp edges and flat surfaces. Here’s a straightforward guide to begin your slab-built ceramics:
Starting with a Good Clay Slab
A successful slab project begins with an even, flat slab of clay. First, roll out your clay using a rolling pin until it’s about a quarter-inch thick. Make sure to flip and rotate the clay to ensure uniform thickness.
Cutting and Assembling
Once your slab is ready, use a knife or a clay cutting tool to cut shapes. Think about the design of your piece and cut the corresponding sides. When assembling, score the edges of each slab piece. Then, use slip to join them together. Press the edges firmly to secure the bond.
Drying and Smoothing
After assembly, leave your piece to dry gradually to prevent warping. During the drying process, inspect for any cracks or seams. Use a wooden rib or a sponge to smooth out any imperfections. For edges, use a damp sponge to soften and smooth.
Creative Designs with Slabs
Don’t limit yourself to boxes and cylinders. Try wrapping slabs into curves or layering to create texture. Experiment with cutting patterns or adding appliques. The slab method allows for endless creativity in shapes and designs.
Utilizing slab construction methods offers a foundation to create functional and decorative items. Keep practicing to refine your skills and bring complex ideas to life. As with all easy ceramics projects, remember: patience is key.
Painting and Glazing Your Ceramic Pieces
After molding and shaping your ceramics comes the exciting part: painting and glazing. These steps add life and durability to your projects. Glazing not only decorates but also waterproofs your creations. Here’s how you can paint and glaze your easy ceramics projects.
Choosing Your Colors
Pick colors that suit your style. Go for bright colors to make a statement, or choose muted tones for a classic look.
Applying Underglaze
Start with underglaze for a base of color. Use a brush to apply it evenly. Let it dry before you apply glaze.
Dipping or Brushing On Glaze
Once your underglaze is set, dip your piece into clear glaze or brush it on. Ensure full coverage to prevent leaks.
Firing Again
After glazing, your piece needs to be fired again. This makes the glaze meld with the clay.
Remember, take your time with each step. Applying underglaze and glaze neatly ensures the best outcome. Your effort will reflect in the finished pieces, shining with vibrant colors and textures.
Tips for Firing Your Projects at Home or in a Kiln
Firing your ceramic projects is a crucial step. It turns your clay from a soft piece to a solid, permanent form. If you’re using a kiln at home or in a community studio, here are tips to ensure your pieces come out as you intend.
Understand Kiln Types
Know what kind of kiln you’re using. Electric, gas, and wood-fired kilns all have their own firing processes. Each type affects the final look of your pieces.
Follow the Firing Schedule
Don’t rush the firing process. Kilns take hours to reach the right temperatures. Increase the heat slowly. This prevents cracking.
Load the Kiln Carefully
Place your items on the kiln shelves with space between them. This allows heat to circulate. The heat needs to reach all parts of your piece.
Monitor Temperature
Use pyrometric cones or a digital kiln controller to track temperature changes. Make sure the temperature rises as per the firing schedule.
Glaze Firing
After bisque firing, apply glaze to your bisqueware. You’ll fire it again to a higher temperature. This second firing melts the glaze to a glassy coating.
Cooling Down
Let the kiln cool slowly after the firing cycle. Rushing the cooling can cause cracks. Wait until the kiln is at room temperature before you open it.
Safety First
Always wear protective gear when firing. Heat-resistant gloves and eye protection are must-haves. Make sure your workspace is well-ventilated, too.
Firing at home gives you control over your projects. A community kiln can also be a great resource. You’ll meet other potters and learn from them. Whether at home or in a kiln, take your time. It’s the path to beautiful, lasting ceramics.