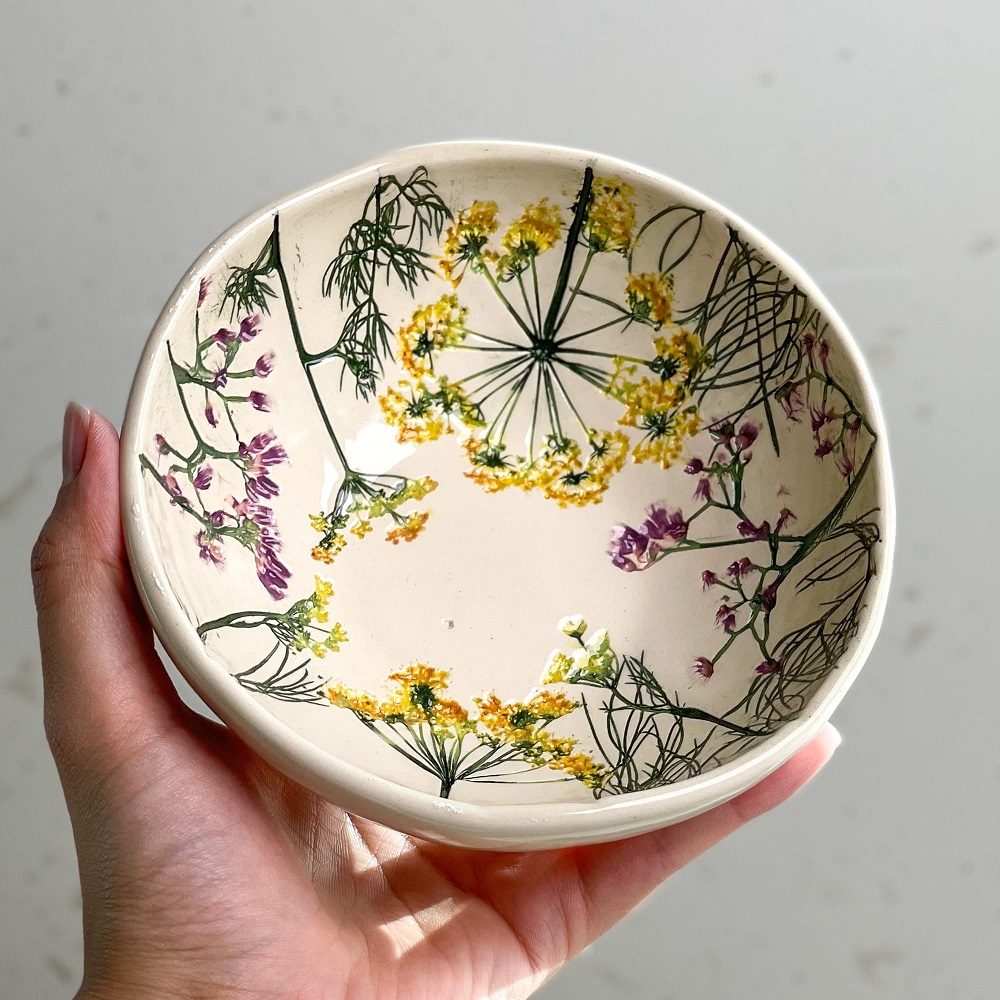
Choosing Your Ceramics
Before you begin to paint ceramics, the first step is choosing the right piece. Look for a ceramic base that inspires you and fits the purpose of your project. Whether it’s a mug, plate, or figurine, select a shape and size that you are comfortable working with. Here are some tips to help you choose:
- Consider the Texture: Smooth surfaces are easier to paint for beginners, while textured ceramics can offer a unique challenge and effect.
- Inspect for Defects: Check your ceramic piece for any cracks, chips, or uneven areas. These can affect the painting process and the final outcome.
- Size Matters: If it’s your first time, start with a smaller piece to practice your skill.
- Think About Usage: If the ceramic is going to be used for food or drink, ensure it’s safe for such purposes. Some ceramics are only decorative.
Once you’ve chosen your ceramics, you’re ready to move on to selecting the right type of paints and exploring painting techniques.

Selecting the Right Paints for Ceramics
Choosing the right paints is crucial to the success and longevity of your ceramic painting project. Not all paints are suitable for ceramics, and using the incorrect type can lead to fading, chipping, or peeling. Here’s a guide to help you select the appropriate paints for your ceramic pieces:
- Use Underglazes: Underglazes are ideal for ceramics, they go on before glazing and firing. They come in a variety of colors and can be applied to bisqueware.
- Opt for Acrylic Paints: If you don’t plan to fire your ceramic piece, you can use acrylic paints. They are easy to handle and great for decorative items.
- Consider Ceramic Paints: Ceramic paints, specifically formulated for pottery, offer a durable finish. They need to be fired for permanence.
- Explore Glazes: Glazes not only add color but also a glass-like finish that seals your work. They require firing at high temperatures.
Remember to check the manufacturer’s recommendations for application and firing temperatures. Correct use ensures a quality finish and longevity for your painted ceramics. When you’re set with the right type of paint, gather all your materials and prepare to express your creativity!
Essential Tools and Materials
When you’re ready to paint ceramics, having the right tools and materials is key. Here’s what you’ll need:
- Brushes: Use a variety of sizes and shapes for different strokes and details.
- Sponge: A sponge helps to evenly distribute glazes and can create interesting textures.
- Water Basin: Keep a water basin nearby to rinse brushes between colors.
- Palette: Use a palette for mixing and holding your paints and underglazes.
- Towels or Rags: Have towels on hand to wipe and dry your brushes.
- Paper Towels: Useful for cleaning up spills and blotting brushes.
- Clean Workspace: Ensure your workspace is clean to prevent dust from sticking to wet paint.
- Apron or Smock: Wear protection to keep your clothes free of paint stains.
Gather these tools before you start to make the painting process smooth and enjoyable. With these essentials, you’re all set to begin creating your painted ceramics masterpiece.
Preparing Your Ceramic Piece for Painting
Before you dip your brush into paint, preparing your ceramic piece is a critical step. Cleanliness is key to ensuring that the paint adheres well and looks its best. Here’s how to prepare your ceramic piece for a successful painting session:
- Wash the Ceramics: Begin by gently washing your piece with soap and water. This removes any dust or grease. Make sure to rinse it well.
- Dry the Piece: After washing, dry your ceramic thoroughly. Use a clean, lint-free towel to avoid leaving residue.
- Sand Any Imperfections: If you find rough spots or bumps, lightly sand these areas. Choose a fine-grit sandpaper for this task.
- Wipe Down After Sanding: Dust off any particles left from sanding with a damp cloth or sponge, and then dry it again.
- Apply a Base Coat: If desired, apply a base coat of underglaze or paint, especially if you want uniform color.
- Let the Base Coat Dry: Before you start with your design, make sure the base coat is completely dry to touch.
Preparation sets the stage for your paint to go on smoothly and stick properly. Now that your piece is ready, you can embrace the art of painting ceramics with confidence and creativity.

Step-by-Step Painting Techniques
Now that you’ve chosen your ceramics, selected the right paints, and prepared your materials, it’s time to dive into the painting process. Here are some simple step-by-step painting techniques to help you get started on your ceramic artwork:
- Plan Your Design: Think about what you want to create. Sketch your design on paper first to serve as a guide.
- Apply a Base Coat: If you use underglazes or ceramic paints, start with a base coat. It helps colors pop.
- Paint in Layers: Begin with the largest areas and then add details. Allow each layer to dry before adding the next.
- Use the Right Brushes: Choose a larger brush for broad sections and a smaller one for fine details.
- Experiment with Techniques: Try different brush strokes, sponging, or stenciling to add texture and patterns.
- Keep Colors Clean: Rinse your brushes well when switching colors. This prevents unwanted mixing.
- Correct Mistakes Quickly: Use a damp cloth to wipe away errors before the paint dries.
- Protect Areas: Use masking tape or wax resist to keep certain areas free of paint.
- Add Highlights and Shadows: Once the base layers are dry, enhance your design with highlights and shadows.
- Finish with Details: Use a fine brush to add final touches to your piece.
Remember, practice makes perfect. Don’t worry if it’s not flawless on your first try. Every piece you paint will improve your skills. Enjoy the process, and watch your ceramic painting come to life!
Drying and Firing Your Painted Ceramics
Once you’ve painted your ceramics, drying and firing are the next crucial steps. They ensure your artwork is durable. Here’s what to do:
- Let the Paint Dry: After finishing your painting, let the piece dry completely. This can take several hours. Touch the paint gently to see if it’s dry.
- Prep for Firing: Check your ceramic paints’ labels for firing instructions. Not all paints need firing.
- Use a Kiln: For those paints that require it, you will need access to a kiln. Kilns heat the ceramics to set the paint.
- Set the Right Temperature: Use the temperature guide from the paint’s label when setting the kiln. The right temperature is key for a good finish.
- Firing Process: Place your piece inside the kiln. Then, follow the paint manufacturer’s time and temperature guide. Take care when handling.
- Cool Down: After firing, let your piece cool in the kiln. Avoid rushing this step. Rushing can lead to cracks.
- Safety First: Always use protective gloves and follow safety measures when firing ceramics.
Drying and firing are essential for the paint to become permanent. With patience and care, your painted ceramics will be ready for sealing and display.
Sealing and Protecting Your Artwork
After you’ve painted and fired your ceramics, it’s time to seal and protect them. This step is vital for ensuring that your artwork remains vibrant and withstands the test of time. Here’s how to add a protective layer to your ceramics:
- Choose a Sealant: Select a clear sealant suited for ceramics. Sealants come in gloss or matte finishes.
- Follow Instructions: Read the sealant’s instructions carefully. Apply as directed by the product manufacturer.
- Use Thin Coats: Apply thin, even coats of the sealant. Thick coats may drip or take too long to dry.
- Allow Drying Time: Let each coat dry fully before applying the next one. The drying time varies between products.
- Check for Even Coverage: Make sure to cover every painted surface. Missed spots can lead to chipping or peeling.
- Curing: Some sealants need to cure. This means they must sit undisturbed for a certain period.
By sealing your ceramics properly, you give your art a layer of defense against scratches, moisture, and everyday wear. With the sealing complete, your ceramic masterpiece is ready for display and use. Remember, if the piece will come into contact with food or drink, ensure the sealant is non-toxic and food-safe.
Tips for First-Time Ceramic Painters
Setting out on your first ceramic painting adventure can be thrilling, yet it may also come with a fair share of questions and uncertainties. To help first-time ceramic painters, here are some useful tips to get you started on the right foot:
- Start Simple: Begin with an easy project. Small items like coasters or tiles are great for practicing.
- Take Your Time: Don’t rush the painting process. Enjoy each step, from design to drying.
- Practice Techniques: Try different painting techniques on paper before applying them to ceramics.
- Be Patient: Glazes and paints may look different when they dry. Wait to see the final colors.
- Learn from Mistakes: If something doesn’t go as planned, use it as a learning experience.
- Stay Safe: Always handle ceramics carefully to avoid cuts. When firing, follow all safety guidelines.
- Ask for Help: Don’t hesitate to seek advice from more experienced painters or take a class.
- Keep a Journal: Document your progress and ideas. It can be gratifying to see your growth.
- Stay Inspired: Look at different ceramic art for inspiration but develop your own style.
- Have Fun: Remember, the goal is to enjoy creating something unique, not to achieve perfection.
As you paint ceramics, remember each piece is a step on your creative journey. Embrace the process, and don’t shy away from challenges—they are often the best teachers. Armed with these tips, you’re well on your way to producing beautiful, hand-painted ceramics that reflect your personal touch and newfound skill.