The Basics of Kiln Ceramics
Kiln ceramics is a transformative process. It turns clay into durable, finished pottery. The kiln, a type of oven, heats the clay to high temperatures. This process is known as firing. The result is ceramics with permanent solid forms.
To begin, one must choose the right clay body. Different clays have distinct properties and firing temperatures. Porcelain and stoneware are popular choices. Then, the shape is formed. Potters use techniques like throwing on a wheel or hand-building.
Once shaped, the piece must dry. It should reach a bone dry state before firing. Any moisture can cause cracks or explosions in the kiln. Once dry, the kiln awaits. The specifics of the kiln will vary. Electric, gas, and wood-fired kilns are common types. Each gives a unique finish to the ceramics.
Timing is crucial in firing. The kiln’s temperature rises slowly. This steady increase prevents breakage. The final temperature can reach up to 2,400 degrees Fahrenheit. Kiln ceramics requires patience and precision. It turns soft clay into works of art that last for generations.
They signify both the process and the finished product. In the following sections, we will delve deeper into the different types and uses of kilns, and the various stages of the ceramic process. Stay tuned to learn more about kiln ceramics, from clay preparation to the finishing touches of glazing and cooling.
Types of Kilns Used in Ceramic Crafting
Choosing the right type of kiln is vital for any ceramicist. Kilns are classified by how they are heated and by their design features. Here, we’ll explore the most common types of kilns used in crafting ceramics.
Electric Kilns
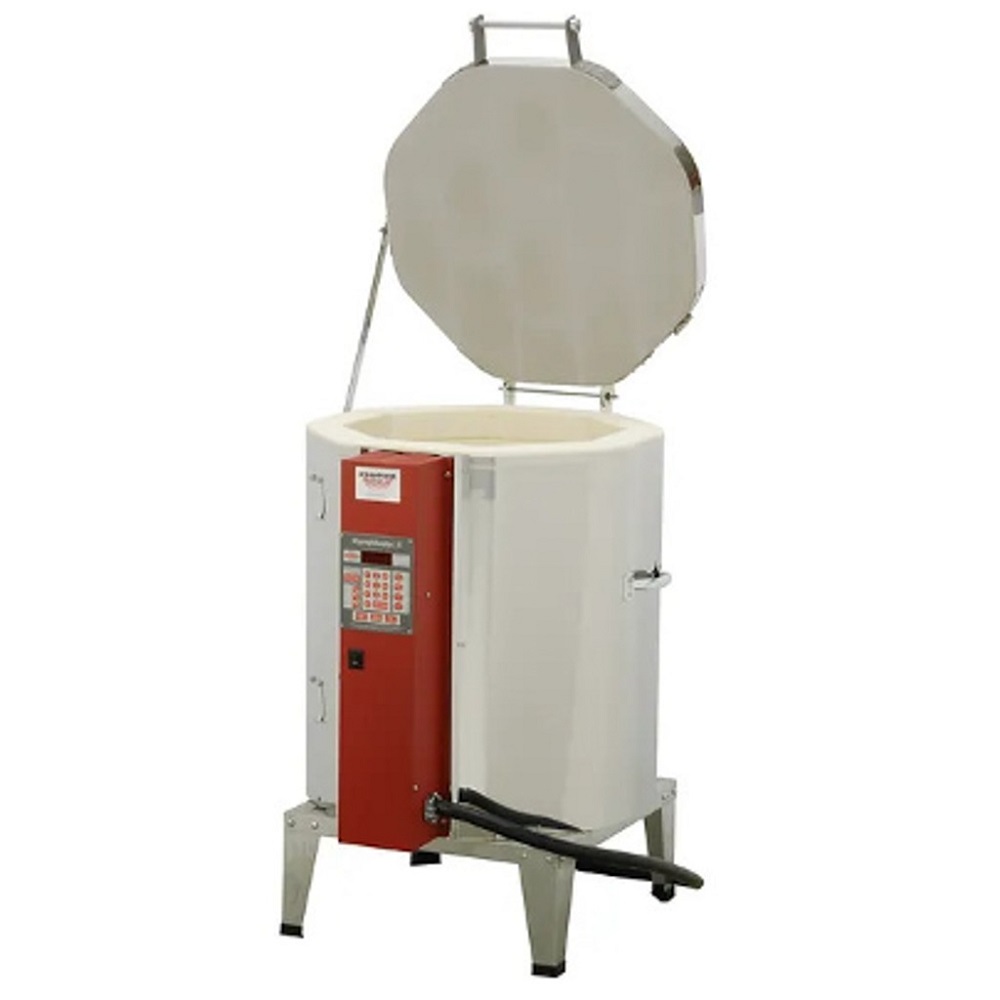
Electric kilns are a popular choice for ceramicists. They are known for their ease of use and precise temperature control. With electric kilns, the heat is generated by coils or elements inside the kiln’s walls. They are suited for both beginners and advanced potters due to their consistent results.
Gas Kilns
Gas kilns are fueled by natural gas or propane. These kilns offer a traditional approach to ceramics and provide a certain level of warmth and organic quality to the pieces. Temperature control is more challenging, but gas kilns can reach high temperatures and are often preferred for effects like reduction firing.
Wood-fired Kilns
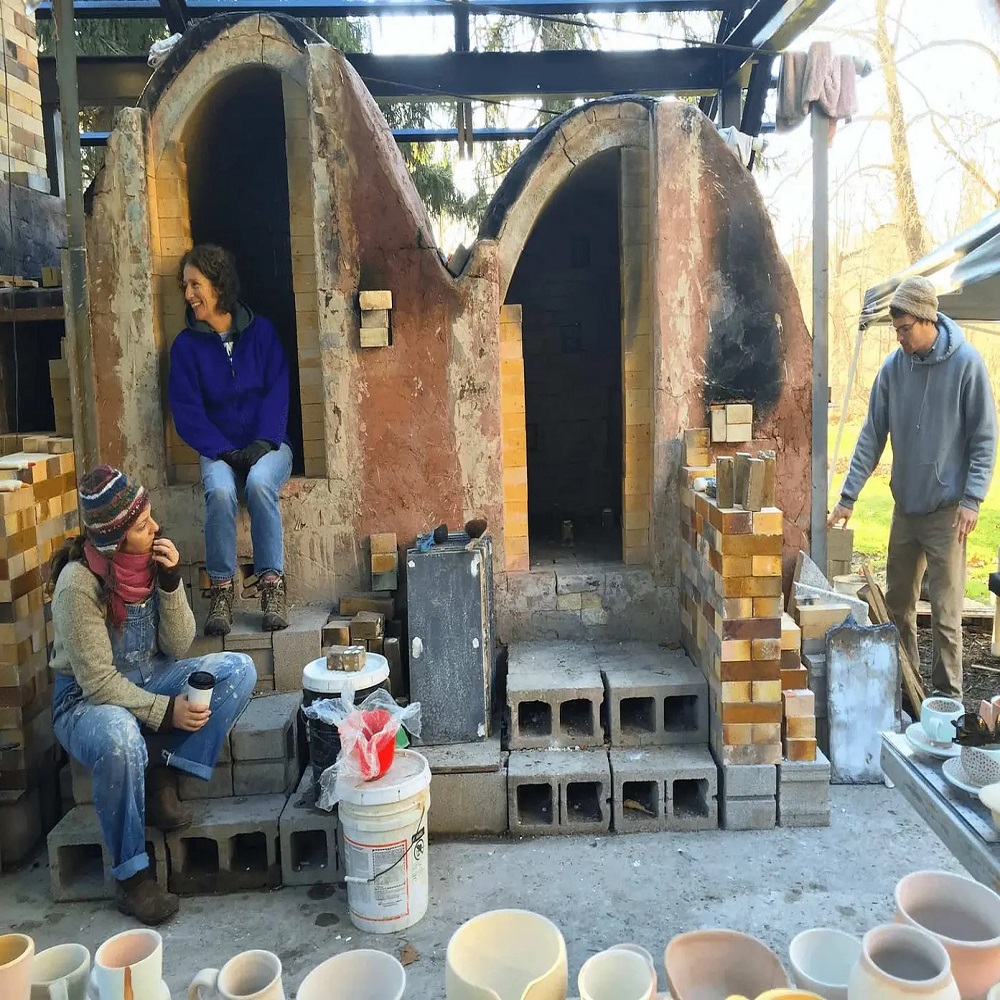
Wood-fired kilns are the oldest form of kiln ceramics. They use wood as the fuel, which creates unique patterns and hues due to the ash and flame paths. Although they can be labor-intensive, the results often have a desirable rustic character.
Selecting the appropriate kiln for your project depends on the desired outcome. Kiln ceramics artists may choose their kiln based on the finish they want, the materials they work with, or the techniques they plan to use.
Preparing Clay for the Kiln
Preparing clay for the kiln is a crucial step in the ceramic process. Begin by ensuring the clay is free of impurities. Small rocks and debris can cause defects in the final piece. Knead the clay thoroughly. This process, called wedging, aligns the clay particles and removes air pockets. Air pockets cause explosions in high kiln temperatures.
Once wedged, form the clay into the desired shape. Use precise tools for consistent thickness. An even thickness prevents cracking during firing. After shaping, let the clay piece dry. It must reach a bone-dry state. Check for any remaining moisture. This step is vital. Any residual moisture can spell disaster in the kiln.
Drying can take several days, depending on the piece’s size and thickness. Speed should not be your priority. Patience is key in this stage of kiln ceramics. Once dry, a final inspection is necessary. Look for any imperfections and smooth them out. Your piece is now ready for the kiln, where it will transform into ceramic art.
The Firing Process: An Overview
The firing process is a key stage in kiln ceramics. This is where the real magic happens, transforming softened clay into a tough and durable piece of art. As you might expect, this process is delicate and requires close attention to the details. Let’s look at the main steps involved in firing a piece of clay in a kiln.
First, the artist must load the kiln. They’ll place the bone-dry clay pieces inside carefully. The loading must ensure that air can flow around each piece. This is to avoid mishaps like uneven heating or breakage. Once loaded, the kiln is sealed for the firing.
Next is the heating phase. The kiln slowly increases in temperature at a controlled rate. This gradual rise is crucial, as it prevents stress on the ceramics. Different clays and designs need different temperature curves.
Then there’s the holding or ‘soaking’ period. At this point, the kiln maintains its peak temperature. It allows every part of the piece to reach the same temperature. This uniformity is important for the final strength and look of the piece.
Finally, the cooling stage completes the firing process. Just like the heating, cooling must be gradual. If it’s too quick, the rapid change can cause the pieces to crack. Only after the kiln has fully cooled can the artist open it and remove the pieces.
In summary, firing is a complex process that requires patience and care. ‘Kiln ceramics’ artists constantly refine their firing techniques to get the perfect finish on their work. This step is where clay truly becomes ceramic, and its success is vital to the art form.
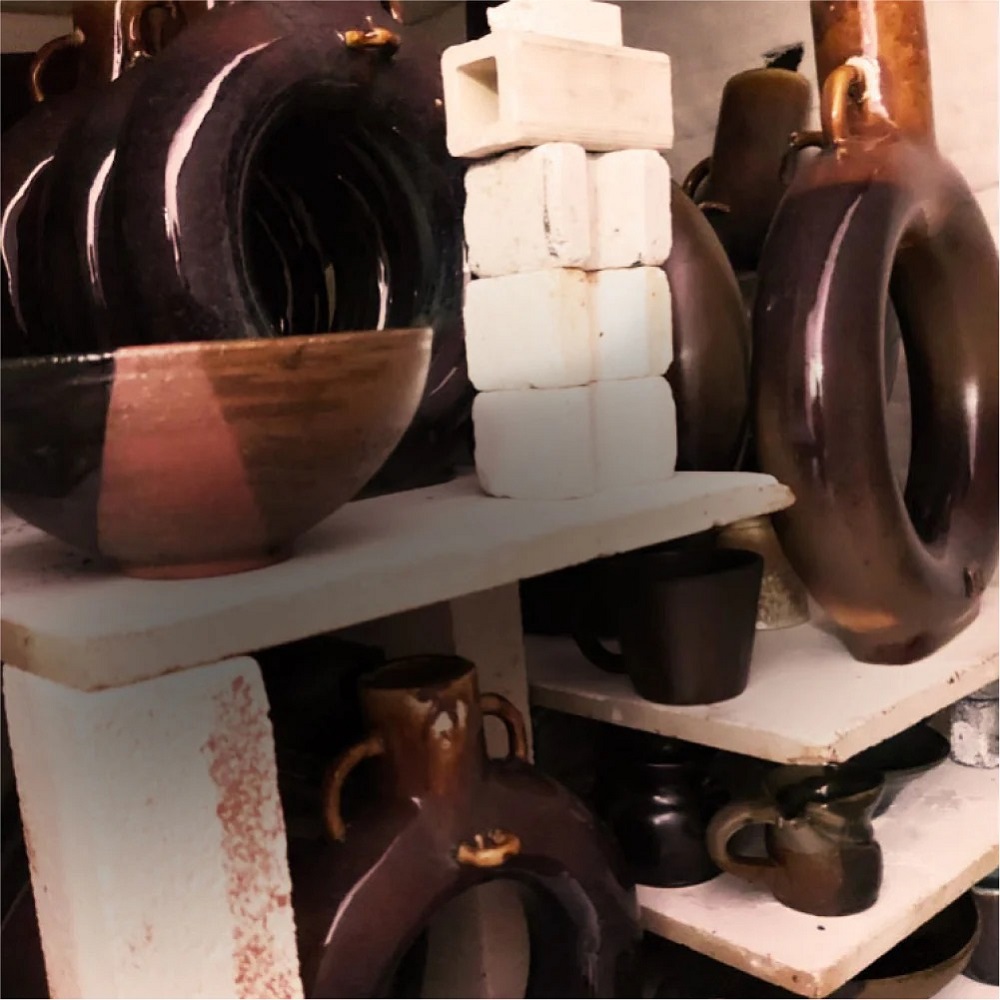
Glazing Techniques for Kiln-fired Ceramics
Glazing is a crucial step in kiln ceramics. It involves coating the surface of bisque-fired pottery with a thin layer of glassy substance. This process not only beautifies the ceramic piece but also makes it more functional by creating a non-porous layer. Here are some common glazing techniques used by pottery artists:
- Dipping: Submerge the pottery into a bath of glaze. It’s quick and ideal for covering large areas.
- Pouring: Pour the glaze over the ceramic piece, handy for creating an even coat.
- Brushing: Apply glaze with a brush, allowing for detailed work and design.
- Spraying: Use a spray gun to coat complex forms evenly.
- Layering: Apply multiple glaze coats, each fired separately, to achieve depth and textures.
After applying the glaze, the piece goes back into the kiln for a second firing, known as the ‘glaze firing’. This firing melts the glaze onto the ceramic. The kiln temperature is usually lower than the first firing. This ensures the glaze bonds well to the piece.
Choosing the right glaze is key. It should match the clay body and firing temperature. Test glazes before applying them to important work. This helps avoid unwanted results and ensures the piece meets your vision. Remember, kiln ceramics is as much art as it is science.
Cooling and Unloading: Completing the Ceramic Process
Once the glaze firing is done, the kiln ceramics pieces need to cool. This stage is just as important as the others in the crafting process. The kiln must cool down slowly for the best results. Rapid cooling can crack or damage your ceramics. You must wait until the kiln and pieces are completely cool before unloading. This could take many hours or even days, depending on the kiln size and contents.
After cooling, it’s time to unload the kiln. Handle your ceramics with care. The pieces are often still fragile while they adjust to room temperature. If you rush to move them, they may crack or chip. Once you remove the items, inspect them closely. Look for any signs of issues that could affect their durability or look.
The cooling and unloading process finalizes the transformation of clay into durable kiln ceramics. Each piece now showcases the skill of the artist and the many steps that went before. You’ll see the colors and textures brought out by your chosen glazes. And you can be proud of the hard work and patience it took to complete the process.
As a recap, remember these key points:
- Let the kiln cool down slowly.
- Don’t open the kiln while it’s hot.
- Handle your ceramics gently.
- Look for any flaws after unloading.
Take your time during this final stage to ensure you preserve the quality of your kiln ceramics work.
Advanced Kiln Techniques for Professional Crafters
Moving beyond the basics of kiln ceramics, professionals employ advanced techniques to refine their art. Precision in controlling kiln atmosphere can drastically alter a piece’s final appearance. Crafters experiment with alternative firings, like raku or salt firing, to create distinct textures and colors. Overlaying different glazes before a single firing can result in intricate surface designs.
Professionals also use advanced materials. Porcelain, known for its purity and difficulty, demands exact firing conditions. Understanding the chemistry of glazes also allows crafters to custom-blend their own, adding to the uniqueness of their work. Custom kiln furniture, designed for specific art pieces, can improve airflow and heating uniformity.
Timing is key in advanced kiln techniques. Professionals will often soak their pieces at certain temperatures or apply flash cooling at strategic points. This controls the crystallization within glazes, creating visual depth. They monitor the kiln’s atmosphere, adding oxygen or reducing it to influence glaze characteristics.
Mastering such advanced kiln techniques sets professional crafters apart. Their ability to manipulate the kiln environment results in stunning and durable kiln ceramics.
Safety Tips and Best Practices for Kiln Usage
Ensuring safety is critical when working with kiln ceramics. Adhering to safety tips and best practices can prevent accidents. Below are essential guidelines for safe kiln usage.
- Proper Ventilation: Always operate kilns in well-ventilated areas. Fumes and gases can be harmful. Ensure adequate airflow to reduce risks.
- Use Protective Gear: Wear heat-resistant gloves, safety glasses, and aprons. Protect your skin and eyes from heat and glaze particles.
- Regular Maintenance: Check your kiln regularly for any wear or damage. Repair issues promptly to prevent malfunctions during firings.
- Keep a Safe Distance: Maintain a safe distance from the kiln when it’s hot. This prevents burns and overheating exposure.
- Follow Manufacturer Instructions: Read the kiln manual carefully. Use the kiln as specified by the manufacturer for the best results and safety.
- Emergency Procedures: Know how to shut off the kiln quickly. Always have a fire extinguisher close by and practice evacuation routes.
- Training and Education: If you’re new to using kilns, seek proper training. Learn from experienced ceramicists or take a class on kiln ceramics.
Remember, safety in your ceramic workspace is not just about preventing accidents. It also ensures the longevity of your kiln and the quality of your ceramic pieces. By following these safety tips and best practices, you create a safe environment for crafting beautiful kiln ceramics.