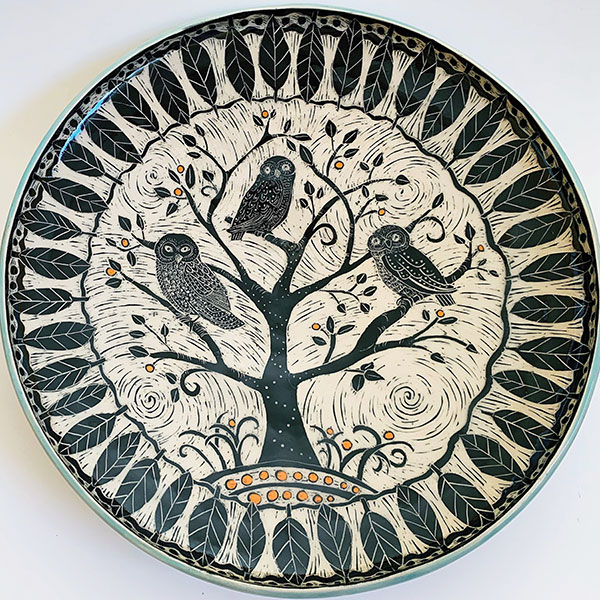
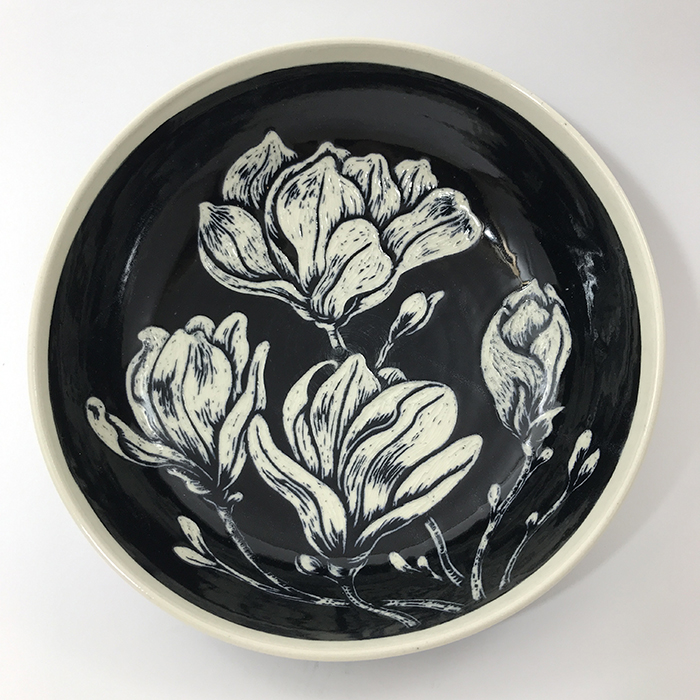
Sgraffito is a fascinating pottery technique that allows artists to create intricate designs and textures on ceramic surfaces. By scratching through a layer of colored slip to reveal the clay body underneath, artists can achieve striking visual effects. This time-honored craft brings together artistry and technical skill, making it a favorite among ceramicists of all skill levels. In this comprehensive guide, we will explore the fundamentals of sgraffito ceramics, essential tools and materials, step-by-step techniques, and tips for achieving stunning results. Whether you are a beginner or an experienced potter, this guide will help you elevate your sgraffito skills to new heights.
Understanding the Basics of Sgraffito
The Art of Sgraffito
Sgraffito as a technique dates back to ancient times, with origins in both Eastern and Western pottery traditions. Deriving from the Italian word “sgraffire,” which means “to scratch,” this technique involves applying slips—liquid clay tinted with color—onto a clay surface. The artist then scratches or carves into the slip to create detailed designs and patterns.
The contrast between the colored slip and the clay body provides a visually striking effect. This method not only adds depth and dimension to the piece but also emphasizes the artist’s creativity. Sgraffito techniques can be used on various ceramic projects, from plates and bowls to sculptures and tiles, showcasing the versatility of this art form.
Types of Sgraffito
There are two primary types of sgraffito: incised and applied. Incised sgraffito entails scratching directly into the slip to create a design. The artist usually uses a sharp tool to carve intricate patterns. Applied sgraffito, on the other hand, involves layering colorful slips on a constructed form before scratching through to create contrast and texture.
Each method allows for creative expression, and choosing one over the other depends on the desired aesthetic. Experimenting with both techniques can help you discover your preferred style, whether it is finely detailed incisions or bold, sweeping designs.

Essential Tools and Materials
Core Supplies for Sgraffito
To get started with sgraffito ceramics, you will need several essential supplies. First, you need clay that is suitable for your project. Stoneware, earthenware, or porcelain can all work well depending on the final look you wish to achieve. Choose a clay body that responds well to scratching and can hold its form through the process.
Next, you will require colored slips. These slips can be purchased pre-made or created at home by mixing clay with water and pigment. Ensure the slip is adequately fluid for application but not too watery, which could wash out details during the scratching process. Having a variety of colors available will give you more freedom in your designs.
Tools for Application and Carving
In addition to clay and slip, gathering the right tools will make the sgraffito process easier and more enjoyable. Key tools include a variety of brushes for applying slip, which let you create different effects depending on the brush size and type. The use of a sponge can also help with smoothing the surface if needed.
Carving tools are crucial for creating designs. Look for a range of tools with different tips, such as loop tools, knives, and needle tools. Each provides a unique experience in scratching the surface. Experimenting with various tools will help you find which ones fit your style best.
Preparing Your Clay and Slip
Working with Clay
Before diving into sgraffito techniques, start by preparing your clay. If using clay that has been previously wedged or thrown, ensure it is evenly moistened so that it is pliable yet firm. Proper preparation is essential for successful sgraffito work, as it will help maintain even thickness across the piece.
Begin shaping your pottery by hand or by using a potter’s wheel. Creating bowls, plates, or tiles offers a solid foundation for your sgraffito work. If you are new to pottery, it may be helpful to practice basic shapes before moving on to more intricate sgraffito designs.
Mixing and Applying Slip
Once your clay is prepared, it’s time to mix your colored slip. For homemade slip, combine clay, water, and underglaze pigments. Ensure the mixture is well-blended, with a consistency similar to yogurt. Testing the slip on a clay scrap piece will allow you to check its thickness and color vibrancy.
After achieving the desired consistency, apply the slip to your clay surface using a soft brush. Aim for an even coat, ensuring there are no clumps or thick spots that could interfere with your designs. Once the slip is applied, let it dry slightly until it reaches a leather-hard state. You want it to be firm enough to scratch but still soft enough to allow for detailed work.

The Sgraffito Technique: Step-by-Step
Creating Your Design
The key to successful sgraffito work is having a solid design in mind before you begin scratching. Start by sketching your ideas on paper. Simple shapes and patterns often yield beautiful results. Once you are satisfied with your sketches, transfer them to your clay piece using a pencil or a pointed tool.
After transferring your design, examine how the composition interacts with the shape of the piece. Consider the balance and flow of the design. Adjust as needed before beginning to carve. Remember that you can create overlapping designs to add complexity to your piece.
Carving and Scratching
With your design mapped out, take your carving tools and begin the sgraffito process. Start by scratching lightly along the lines of your design. Work with steady pressure, as excessive force could damage the surface. It is essential to maintain control during this process, as it will define the depth of the cuts.
You can create various textures by adjusting the angle and pressure of your tools. Wider cuts may yield bolder lines, while delicate scratches can create fine details. Continuously assess your progress and refine your designs as you carve. Keep in mind that patience is crucial, and taking your time will lead to stunning results.
Glazing and Firing Your Work
Preparing for Glazing
Once you have completed your sgraffito work, it’s time to prepare for glazing. Allow your piece to dry completely, ensuring that all moisture has evaporated. Clay that is not fully dried may cause issues during the firing process. Consider bisque firing your piece before glazing, as this can enhance the strength and longevity of the final product.
After bisque firing, examine the surface of your piece. Ensure that all scratched areas are free from dust or debris, which can interfere with the adhesion of the glaze. If needed, clean the surface gently with a damp sponge.
Applying and Firing Glaze
When applying glaze, choose one that complements your sgraffito design. Applying a transparent or semi-transparent glaze allows the colors and textures beneath the surface to shine through. Using a brush, sponge, or dipping method, apply the glaze evenly across the entire piece.
Once the glaze is applied, fire your piece according to the glaze manufacturer’s instructions. The firing process will integrate the glaze and enhance the sgraffito pattern. Once complete, you will have a beautiful, finished piece that showcases your unique sgraffito design.

Troubleshooting Common Issues
Avoiding Pitfalls During Creation
Throughout the sgraffito process, many hobbyists encounter common challenges. One frequent issue is the slip cracking or peeling during the scratching process. This can happen if the slip is too dry or thick. To avoid this, monitor the consistency of your slip, ensuring it remains workable throughout the carving process.
Another common problem is uneven glazing, which can lead to unsatisfactory final results. Ensure the glaze is applied evenly, and be cautious of drips or pools that can affect the overall appearance. Testing your glazes on scrap pieces can help you understand how different applications affect the outcome.
Adjusting Techniques for Better Results
If you find that your designs are not coming out as envisioned, take a moment to reassess your technique. Ensure that your tools are sharp and suited to the level of detail required. Experimenting with various tools can lead to newfound creativity in your designs.
Continuously practicing and refining your skills is essential for improvement. Make notes of what works and what doesn’t, allowing you to learn from each experience. Over time, the issues you encounter will become stepping stones toward greater mastery of sgraffito ceramics.
Embrace Your Creativity
Mastering sgraffito ceramics requires patience, practice, and experimentation. With the right techniques and tools, you can create stunning, one-of-a-kind pieces that showcase your artistic vision. Remember that this art form is not just about technical skill; it’s also a means of self-expression.
As you delve deeper into the world of sgraffito ceramics, embrace your creativity. Don’t be afraid to experiment with different designs, colors, and textures. Each piece you create will enhance your understanding of the technique. Over time, you will develop a unique style that sets your work apart.
Engaging in sgraffito ceramics can be a rewarding experience, allowing you to connect with an age-old tradition. Whether you are a beginner or a seasoned ceramicist, this technique offers endless possibilities. So gather your tools, unleash your imagination, and start creating stunning sgraffito pieces that reflect your individuality. Enjoy the journey as you make your mark in the world of ceramics!