Oil pastel drawings offer vibrant colors and rich textures, making them an ideal medium for capturing the beauty of flowers. Whether you’re an experienced artist or just starting out, this easy step-by-step guide will help you create stunning flower drawings using oil pastels. By following these instructions, you’ll learn essential techniques and tips to bring your floral artwork to life.
Gather Your Materials
Essential Supplies
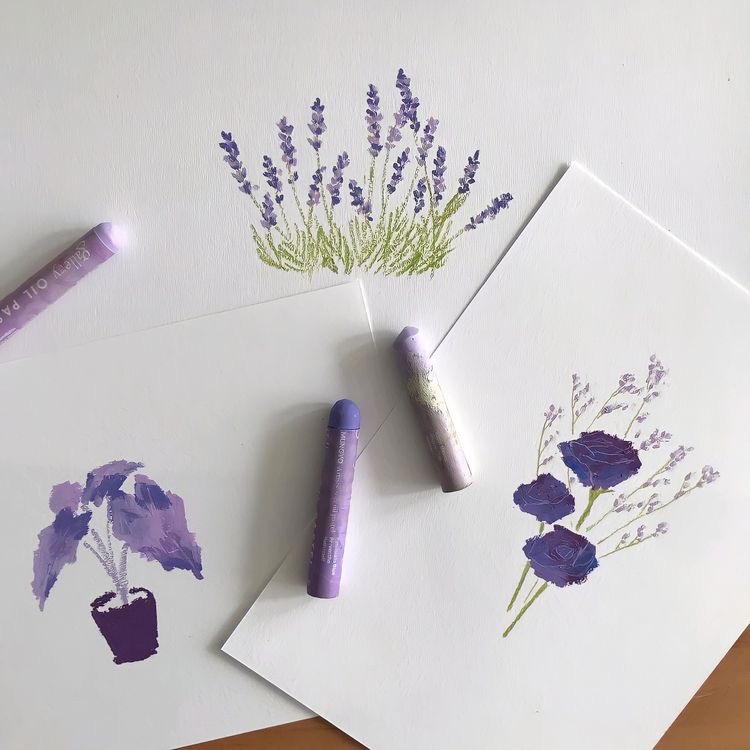
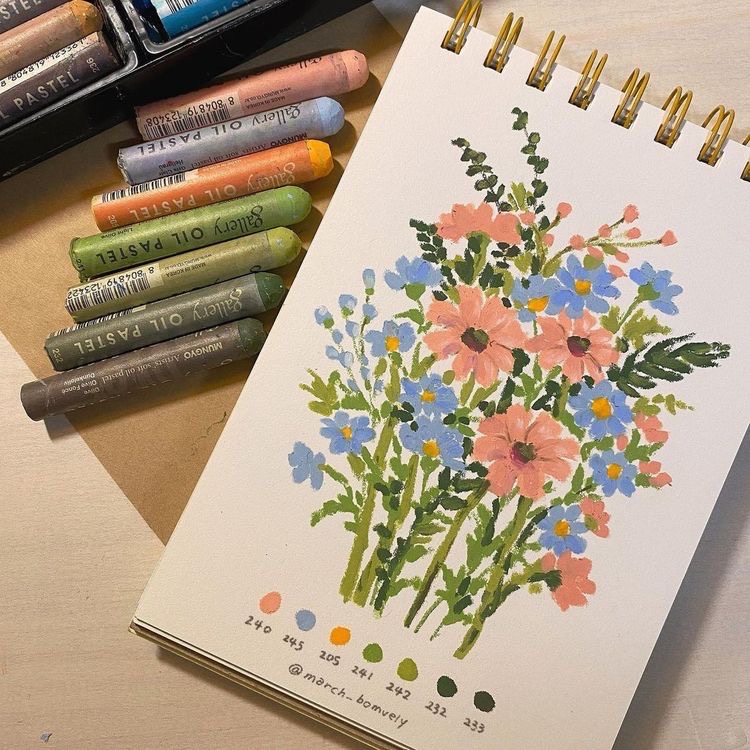
Before diving into your oil pastel flower drawing, it’s crucial to gather all necessary materials. You’ll need a set of oil pastels, which come in various qualities and color ranges. For beginners, a basic set is sufficient, but more advanced artists might prefer professional-grade pastels for better pigmentation and blendability.
In addition to oil pastels, you’ll require paper designed specifically for pastel work or heavyweight drawing paper to support the blending techniques. A blending tool or tissue paper can enhance your drawings, while a pencil and eraser will help you sketch initial outlines. Don’t forget to include a fixative spray to preserve your artwork.
Work Environment
Set up a comfortable workspace with good lighting and a flat surface. Having all your materials within reach will make the drawing process smoother and more enjoyable. Consider listening to some music or podcasts to create a more relaxed atmosphere while you work on your masterpiece.
Choose Your Flower
Selecting a Reference
Choosing the right flower can make a significant difference in your drawing experience. Popular options include roses, sunflowers, or daisies because of their distinct shapes and colors. You can take inspiration from real flowers or use reference images from books and the internet.
Spend a few moments studying your chosen flower. Notice its unique structures, colors, and shading. Understanding the flower’s details will make it easier for you to replicate its beauty on paper. You may also compile a few reference photos for different angles or lighting conditions to give you more options as you draw.
Simple vs. Complex Flowers
Beginners might find it easier to start with simple blossoms like daisies or tulips. These flowers have straightforward shapes and require less intricate detailing compared to more complex flowers like orchids or peonies. As you grow more comfortable with your technique, you can gradually challenge yourself with more intricate floral designs.
Sketch the Basic Outline
Starting with Light Pencil Lines
Begin your drawing by lightly sketching the basic outline of the flower on your paper using a pencil. Focus on simple shapes to capture the flower’s core structure, such as circles and ovals for the petals, stem, and leaves. Remember, this initial drawing serves as a guideline, so there’s no need for perfection at this stage.
Proportions and Symmetry
Pay attention to the proportions and symmetry of your flower during the sketching process. Try to maintain balance, especially for symmetrical flowers like daisies and roses. If you are drawing a single flower, think about how it sits in relation to its stem. If you are creating a bouquet, consider how the different shapes will interact with one another.
Don’t hesitate to erase and adjust as you go. The beauty of art lies in flexibility, allowing you to refine the outline until you’re satisfied with the composition.
Add Base Colors
Building Layers
Once you’re content with your outline, it’s time to add the base colors. Start with the petals, applying a light, even layer of oil pastel using gentle strokes. Choose the main color of your flower; for example, a soft pink for a rose or sunny yellow for a sunflower. Work from the center of the petals outward to create a sense of depth.
Blending Techniques
Oil pastels blend beautifully, so don’t hesitate to mix colors to achieve a more natural look. Layer different shades, working in light pressure first to avoid overwhelming the paper. For instance, you can combine a light yellow with a deeper gold for sunflowers, which will add dimension and vibrancy to your drawing.
For areas where colors meet, use a finger or blending tool to smooth the transition. This technique will help you create subtle gradients and soft edges, allowing the viewer’s eye to flow across your artwork naturally.
Add Details and Texture
Enhancing Petals
After establishing the base colors, you can begin adding details to your flower’s petals. Use a slightly darker shade of your primary color to outline the edges of the petals, creating depth and shadow. Employ a lighter color to highlight the areas where light hits the petals, giving them a more three-dimensional appearance.
Leaf and Stem Details
Don’t forget to add details to the leaves and stem as well. For leaves, use varying shades of green and apply similar blending techniques to create texture. Emphasize the veins by using a lighter color to trace them, ensuring they stand out against the base color. For the stem, use a darker green or brown to add dimension and shadow.
This stage allows you to express creativity and experiment with textures. Adding fine lines and patterns can help enhance the overall look of your flower, contributing to its realism.
Refining Your Composition
Final Touches
Once your oil pastel flower drawing is complete, take a moment to step back and evaluate your work. Notice any areas that may require additional blending, shadows, or highlights. Feel free to revisit your flowers and refine any details that may read as too flat or lifeless.
You may also want to soften any harsh lines by blending them out or adding more layers of color where necessary. Refining your composition at this stage will lead to a polished final product, bringing your blossom to life.
Adding a Background
Consider adding a background to enhance your oil pastel flower drawing. A simple gradient can provide depth, or even a light wash of color can lift the overall composition. If you choose to add a background, make sure it complements your flower without overshadowing it. A complementary color can highlight your flower, making it the star of the piece.
Preserving and Displaying Your Artwork
Final Protection
Once you’ve completed your drawing, preserve it by applying a fixative spray. This step helps secure the oil pastels in place, ensuring your artwork remains vibrant and intact over time. Apply the spray in a well-ventilated area, holding it several inches away from the paper.
Display Options
Think about how you want to display your artwork. Framing it can provide an elegant touch to your home decor. You can also create a gallery wall featuring multiple floral drawings or even gift your art to friends and family. Sharing your art can bring joy to others while also boosting your confidence as an artist.
Continuous Learning
Creating art is an ongoing journey. Don’t hesitate to experiment with different flowers, colors, and styles in your future drawings. Each attempt will refine your skills and help you discover your unique artistic voice. Consider joining art groups or taking classes to continue learning and growing as an artist.
Conclusion
Oil pastel flower drawing can be a rewarding and enjoyable experience. By following this easy step-by-step guide, you’ve learned to gather necessary materials, sketch your design, apply color, and finish your artwork beautifully. Remember to keep practicing and exploring different styles to further enhance your skills. By dedicating time and creative energy to this art form, you’ll not only produce stunning floral pieces but also deepen your appreciation for art and nature. So grab your oil pastels and start creating your floral masterpiece today!