The Exciting World of DIY Drones in 2026
The hobby of flying drones has evolved significantly over the last decade. In 2026, technology is more accessible than ever before. Many enthusiasts are now turning to the diy drone market to find a more rewarding experience. Building a drone from scratch offers a unique sense of accomplishment. You learn about aerodynamics, electronics, and software configuration. Consequently, you gain a deeper understanding of how these complex machines stay airborne. Retail drones are certainly convenient, but they often lack customization options. When you build your own, you choose every single component.
This ensures the aircraft meets your specific needs and preferences. Furthermore, repairing a self-built diy drone is much easier. You know exactly how it fits together. Therefore, you save time and money on maintenance. This guide explores the best kits available this year. We will also cover the essential skills you need. The journey might seem daunting at first. However, with the right kit, any beginner can succeed.
The community has grown rapidly, offering support and advice. Forums and video tutorials make the learning curve much smoother. In addition, manufacturers now design kits specifically for learners. These kits include clear instructions and compatible parts. This reduces frustration and increases the chances of a successful first flight. There is no better time to start than now. The technology is stable, prices are reasonable, and resources are plentiful. We will help you navigate the options. You will soon be ready to take to the skies with your own creation.
Why Building Your Own Drone is Better Than Buying One
There are many compelling reasons to build a drone instead of buying a pre-assembled model. First, the educational value is immense. You will learn about soldering, flight controllers, and electronic speed controllers. This knowledge is invaluable for troubleshooting later. For instance, if a motor fails mid-flight, you will know exactly how to fix it. Pre-built drones often require expensive professional repairs. In contrast, a homemade drone can be fixed in your garage. Second, customization is a huge advantage. Manufacturers design retail drones for a general audience. They usually include average cameras and standard batteries.
When you build your own, you can prioritize what matters to you. If you want longer flight times, you can buy a high-capacity battery. If you want to carry a heavy camera, you can choose powerful motors. This flexibility allows you to create a machine that is truly unique. Third, building a drone is a fantastic bonding activity. It is a great project to do with children or friends. You work together to solve problems and celebrate success.
Moreover, the cost can be significantly lower. While high-end parts are expensive, basic kits are very affordable. You get exactly what you pay for. There are no markup costs for assembly labor. Additionally, the used market for parts is thriving. You can often find great deals on gently used components. This makes the hobby accessible to people with smaller budgets. Finally, the satisfaction of seeing your creation fly is unmatched. It is a feeling of pride that you simply cannot get from opening a box. Therefore, the effort is well worth the reward.
Understanding the Core Components of a Drone Kit
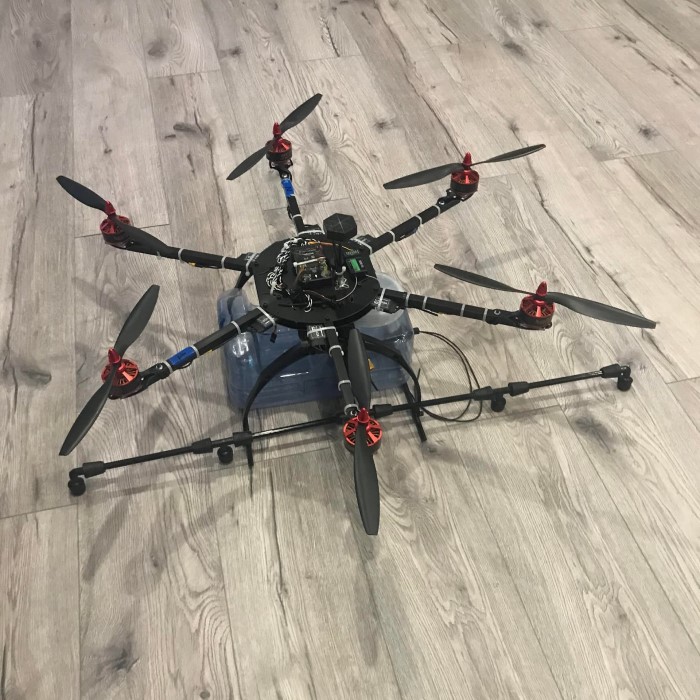
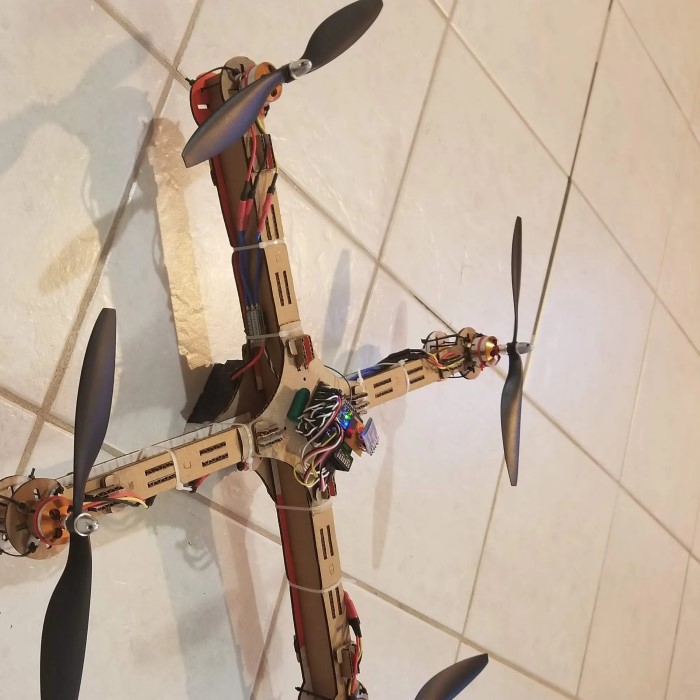
Before you purchase a kit, you must understand the key parts. A diy drone might look complex, but it consists of several distinct systems working together. The frame is the body of the aircraft. It holds all the other components in place. Frames are usually made of carbon fiber or plastic. Carbon fiber is lighter and stronger but more expensive. Therefore, it is the preferred choice for racing drones. The motors are the muscles of the drone. They spin the propellers to generate lift. Most drones use brushless motors. These are more efficient and durable than older brushed motors. You will typically need four motors for a quadcopter.
Next, the Electronic Speed Controllers (ESCs) act as the nervous system. They tell the motors how fast to spin. The flight controller is the brain. It processes information from sensors to keep the drone stable. It adjusts motor speeds hundreds of times per second. Without it, the diy drone would flip over immediately. The propellers are crucial for generating thrust. They come in various sizes and pitches. The right propeller affects efficiency and flight characteristics. Furthermore, the battery is the fuel tank. Most modern drones use Lithium Polymer (LiPo) batteries. These offer high power density. However, they require careful handling to prevent fire hazards. Lastly, the radio receiver communicates with your remote controller. It translates your stick inputs into movement. Understanding these parts is essential for a successful build. You do not need to be an engineer, but basic knowledge helps.
How to Choose the Right DIY Drone Kit in 2026
Choosing a kit can be overwhelming due to the sheer variety available. You should start by defining your goals. Do you want to fly indoors or outdoors? Are you interested in racing or aerial photography? These questions determine the type of kit you need. For beginners, a “Ready-to-Fly” (RTF) kit is often the easiest entry point. However, this guide focuses on the DIY aspect. An “Almost-Ready-to-Fly” (ARF) kit is a great middle ground. These kits usually include the frame, motors, and ESCs. You just need to add a radio and battery. Another option is the “Bind-and-Fly” (BNF) model. This requires you to bind the drone to your own controller.
However, a true DIY kit often includes loose parts. This requires soldering and assembly. It is the most educational route. Consequently, we recommend it for those who want to learn. You must also check for compatibility. Ensure the motors match the ESCs and the frame. Most kits handle this for you. But double-checking prevents disappointment. Furthermore, consider the availability of spare parts. Crashes are inevitable for beginners. If a propeller breaks, you want to replace it easily. Brands with good local support are preferable. Read reviews from other users. They often highlight hidden issues. For example, a kit might have poor instructions. Or, the soldering might be too difficult for a novice. Take your time with this decision. A good kit makes the hobby enjoyable. A bad kit can lead to frustration and quitting.
Top Recommended DIY Drone Kits for Beginners
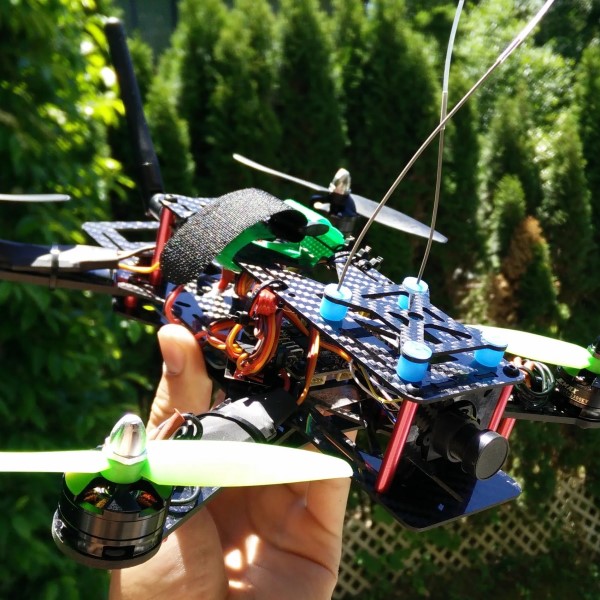
In 2026, several kits stand out for their quality and user-friendliness. The market has matured, offering excellent options for every budget. The first recommendation is the standard learner quadcopter kit. This typically includes a robust plastic frame and basic brushless motors. It is perfect for learning to hover and fly line-of-sight. It is durable enough to survive crashes. Another popular category is the micro drone kit. These are small, often under 250 grams. They are safe to fly indoors. In addition, many countries have fewer regulations for lightweight drones. For those interested in First-Person View (FPV) flying, an FPV starter kit is ideal. These usually come with a camera and video transmitter. They allow you to see what the drone sees through goggles. This is an immersive experience. However, it requires more practice.
We also see the rise of modular kits. These feature snap-together parts. You do not need to solder anything. Consequently, they are great for younger builders. They still teach the logic of assembly. When selecting a specific product, look for updated versions. Technology moves fast. A kit from two years ago might have outdated firmware. Check the specifications for modern connectors like USB-C. This makes connecting to a computer for setup much easier. Also, look for kits that include simulation software. This lets you practice flying on a computer before risking the real drone. It saves you money on repairs.
Essential Tools and Skills for Assembly
Building a drone requires some basic tools. You cannot assemble a precision machine with just your hands. The most important tool is a good soldering iron. You will need it to connect the ESCs and motors to the flight controller. A soldering station with adjustable temperature is best. You also need solder and flux. Flux helps the solder flow and creates a strong connection. Do not forget wire cutters and strippers. These help you prepare the wires for soldering. Furthermore, a set of small screwdrivers is essential. Hex drivers are common in drone assembly. Cheap screwdrivers can strip the heads of screws. Therefore, invest in a decent tool set.
A multimeter is also useful. It helps you check for short circuits before plugging in the battery. This prevents expensive damage to your components. Regarding skills, patience is the most important one. Do not rush the assembly process. Read the manual thoroughly before you start. If you are unsure about a step, look for a video tutorial. Visual guides are often clearer than text. You should also learn about battery safety. LiPo batteries can be dangerous if mishandled. Learn how to charge them and store them safely. Additionally, familiarize yourself with software. You will need a computer to configure the flight controller software. Betaflight is the standard for racing drones. It has a clean interface. However, it still requires some reading to understand. Take your time to learn these skills. They are the foundation of the hobby.
Step-by-Step Guide to Assembling Your First Drone
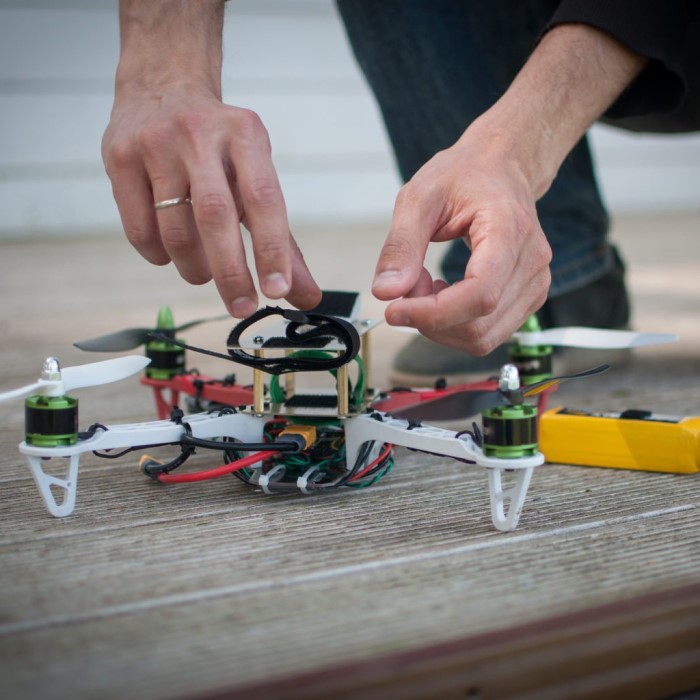
The assembly process is the heart of the DIY experience. You should follow a logical order to avoid mistakes. First, inspect your frame. Check for any cracks or defects. Then, install the motors. Usually, you screw them onto the arms of the frame. Make sure the wires are long enough to reach the center. Next, mount the Electronic Speed Controllers (ESCs). Some frames have specific slots for them. Secure them with double-sided tape or zip ties. After that, you can start soldering. This is often the scariest part for beginners.
However, it is simply a matter of connecting the right wires. Follow the wiring diagram provided with your kit. Typically, you solder the motor wires to the ESCs. Then, you solder the ESC signal wires to the flight controller. Double-check your connections. A mistake here can fry your board. Once the soldering is done, mount the flight controller. Use vibration-dampening foam to protect it. Vibration can affect the sensors. Then, install the radio receiver. Bind it to your controller according to the instructions. Finally, connect the battery lead. Use a battery strap to secure the battery to the frame. Do not attach the propellers yet. You must test the motors without propellers first. This prevents injury if something is wired backwards. If the motors spin correctly, you can mount the propellers. Now, your diy drone is ready for its maiden voyage.
Safety Precautions and Legal Regulations
Safety is paramount when operating flying machines. A drone can cause serious injury if not handled correctly. Therefore, you must follow strict safety protocols. Never fly near people or animals. The spinning propellers act like knives. They can cut skin easily. Always inspect your drone before flight. Check for loose screws or damaged propellers. A broken propeller can shatter in mid-air. This causes the drone to crash unpredictably. Furthermore, be aware of battery safety. Never leave a charging battery unattended. Store batteries in a fireproof bag. If a battery looks puffy or damaged, dispose of it properly.
Do not use it. In addition to physical safety, you must follow the law. Regulations vary by country. In the United States, the FAA requires registration for drones over 250 grams. You also need to pass a knowledge test. This ensures you understand airspace rules. You cannot fly near airports or military bases. Furthermore, you must respect privacy laws. Do not fly over private property without permission. Many countries have “No Drone” zones. Use apps to check for airspace restrictions before you fly. Ignorance of the law is not an excuse. Fines can be heavy. By flying responsibly, you protect the hobby for everyone. Reckless behavior leads to stricter regulations. Therefore, be a responsible pilot.
Troubleshooting Common Issues and Maintenance
Even the best-built drones encounter problems. Knowing how to troubleshoot is part of the fun. One common issue is the drone drifting. This usually means the sensors need calibration. Most flight controller software has a calibration button. Perform this on a flat surface. Another issue is motor stuttering. This often indicates a bad solder joint or a burnt ESC. Inspect your connections closely. Sometimes, a wire might look connected but is actually loose. Re-soldering the joint often fixes the problem. If a motor does not spin at all, check the motor wires. They might be cut or disconnected. Maintenance is also crucial for longevity.
After every few flights, check the screws. Vibration causes them to loosen over time. Use thread-locking fluid to keep them secure. Also, clean your diy drone regularly. Dust and grass can get into the motors. Use a small brush or compressed air to clean them. This prevents wear and tear. Monitor your battery health. If you notice flight times decreasing, the battery might be degrading. Replace it before it fails in the air. Keep a log of your flights. Note any strange behavior. This makes diagnosing future problems easier. The community is a great resource for troubleshooting. Online forums have thousands of members who have solved similar issues. Do not be afraid to ask for help. Most pilots are happy to assist a fellow enthusiast.
FAQ: Common Questions for Beginners
Is it cheaper to build or buy a drone?
Generally, building a drone can be cheaper if you are looking for specific performance characteristics. You avoid the labor costs associated with pre-assembled models. However, for very basic toy-grade drones, buying is often cheaper due to mass production. But for high-quality racing or photography drones, building your own usually saves money. Furthermore, you get better value because you choose every component. You do not pay for parts you do not need. In the long run, a self-built drone is cheaper to repair. You can replace individual parts rather than sending the whole unit to a service center.
Can you build a homemade drone?
Yes, absolutely. Anyone with basic motor skills can build a homemade drone. You do not need an engineering degree. Modern kits are designed for beginners. They come with detailed instructions. Moreover, the online community provides immense support. You can find video tutorials for almost every kit available. The process requires patience and careful soldering. But the result is a machine you truly understand. It is a highly accessible hobby. Many people start with no prior experience and become experts quickly.
Is it illegal to fly drones around houses?
Yes, in many jurisdictions, flying low over private property without permission can be illegal or subject to civil penalties. Privacy laws protect homeowners. You should never fly close to windows or hover in backyards. This is considered an invasion of privacy. Additionally, aviation authorities often have rules about minimum distances from people and buildings. For instance, you might need to stay at least 50 meters away from structures. Always check your local laws before launch. Respecting privacy is essential for the reputation of the hobby.
How high can a homemade drone fly?
Technically, a DIY drone can fly very high. Some can reach altitudes of over 10,000 feet. However, legally, you are restricted. In the United States, the FAA limits recreational drone flights to 400 feet above ground level. This rule exists to prevent collisions with manned aircraft. Most other countries have similar altitude restrictions. It is very dangerous to fly higher than this. You could encounter a small plane or helicopter. Your diy drone might also fly out of range and crash. Always keep your drone within visual line of sight.
Conclusion: Taking Flight with Your New Skills
The journey to building a diy drone is filled with learning and excitement. You start with a box of parts and end with a flying machine. This process teaches you valuable skills. You learn about electronics, mechanics, and flight physics. Moreover, you gain the confidence to maintain and repair your device. The sky in 2026 is friendly to hobbyists. Technology has made parts cheaper and easier to use. Consequently, there is no barrier to entry.
You just need patience and a willingness to learn. The satisfaction of a successful first flight is incomparable. You will see your hard work pay off instantly. As you gain experience, you can upgrade your diy drone. You might add a better camera or faster motors. The hobby grows with you. It opens doors to photography, racing, and engineering. Remember to always fly safely and follow the rules. Respect the airspace and the people around you. This ensures a positive experience for everyone. Building a drone is not just a project; it is an entry into a passionate community. We hope this guide has inspired you to start your build. Grab a kit, pick up your screwdriver, and prepare for takeoff. The view from above is waiting for you. Enjoy every moment of your flight.