The Significance of the Tradition
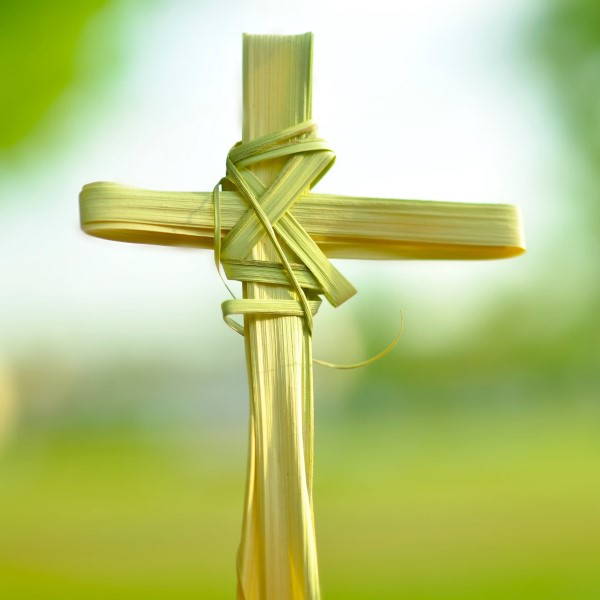
The Palm Sunday tradition is a profound event. It marks the beginning of Holy Week for Christians worldwide. Believers carry palm branches to church. They reenact Jesus Christ’s triumphant entry into Jerusalem. The crowds waved branches and laid them on the road. Therefore, the branch is a symbol of victory and peace. After the service, many people take the palms home. They often fold them into specific shapes. The most popular shape is the cross. This act serves as a physical reminder of the holy day. It connects the user to the faith. Furthermore, it creates a tangible object for prayer. Making a palm leaf cross is a meaningful practice. It is passed down through generations.
Families gather to fold the green fronds together. This shared activity strengthens bonds. It also teaches younger members about the faith. The cross represents the crucifixion. Combining the palm with the cross shape links the two events. It connects the celebration of the entry with the sacrifice. Consequently, this craft is more than just a hobby. It is a spiritual discipline. It focuses the mind during the Easter season.
Preparing Your Materials
Before you start folding, you must prepare. The quality of your materials matters. You need fresh palm fronds for the best results. Fresh palms are green and flexible. They contain moisture, which prevents cracking. If the palms are too dry, they will snap. Therefore, try to get them from your church or a florist. Look for long, flat leaves. They should be free from blemishes or tears. If you cannot find fresh palms, you have options. Some stores sell artificial palm strips. These are often made from paper or plastic.
They are easier to handle but lack the natural scent. Alternatively, you can use ribbon or paper strips. However, real palms provide the authentic experience. Once you have your materials, inspect them. Wipe them clean with a damp cloth. This removes any dirt or dust. Then, cut the leaves into strips. Most crosses require two strips. One strip should be longer than the other. The length determines the size of the cross. For a standard size, cut strips about 12 inches long. Keep them wrapped in a damp paper towel. This keeps them pliable while you work.
Basic Folding Techniques
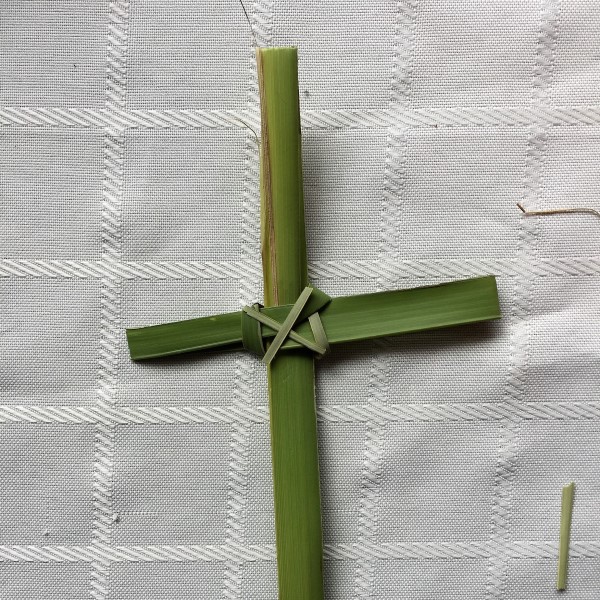
Folding a palm cross requires patience. It is similar to origami. You must follow the steps precisely. First, take the long strip of palm. Make a loop at the top. This loop forms the top arm of the cross. Hold the loop firmly between your fingers. Next, take the bottom part of the strip. Fold it up and over the loop. This creates a knot in the center. Pull it tight, but not too tight. The center knot should be square. This is the heart of the design.
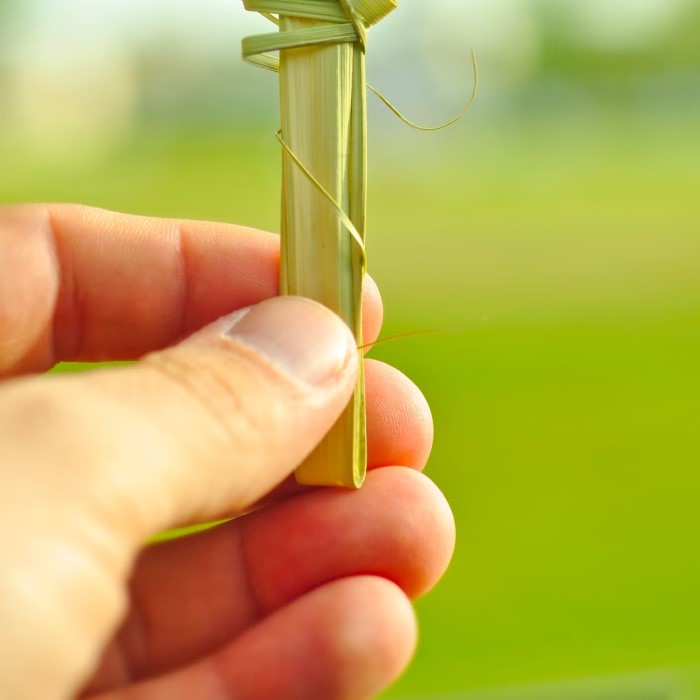
Then, you will create the side arms. Take the same strip and make two loops on the sides. One loop goes to the right, and one to the left. These are the arms of the cross. Finally, take the remaining tail. Fold it down to create the bottom section. Secure the center by wrapping the tail around. You might need a small staple or glue. However, traditional methods use a tight knot. The second strip is for reinforcement. It is often threaded through the back. This makes the cross thicker. It also helps it keep its shape.
Creating a Simple Palm Leaf Cross
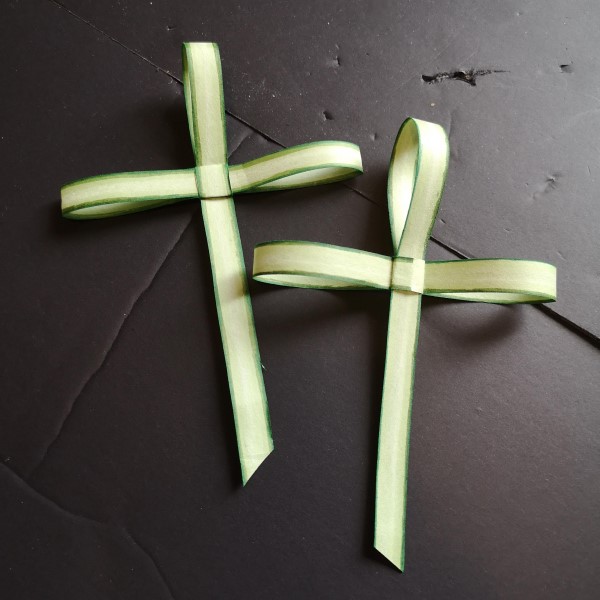
Let us look at a simple method. This design is perfect for beginners. Start with one long palm strip. Hold it vertically in your hand. Make a loop near the top. This is the first section of the top arm. Now, fold the long end behind the loop. Bring it down to create a 90-degree angle. Then, bring it forward to make a second loop.
This forms the other side of the top arm. The key is to keep the center tight. Your fingers act as a clamp. Next, focus on the side arms. Fold the remaining strip to the right. Make a loop and bring it back to the center. Repeat this on the left side. Now you have the three arms of the cross. The remaining strip hangs down. This will become the longest arm. Fold it behind the center knot. Pull it through to secure everything. If there is excess, trim it with scissors. You can tuck the end into the knot. This palm leaf cross is simple yet elegant. It takes practice to get the sizing right. Do not be discouraged if the first one is crooked. Try again with a fresh strip.
Advanced Design Variations
Once you master the basic cross, try variations. There are many ways to fold a palm leaf cross. Some designs are intricate and beautiful. For instance, the “Rose” design is popular. You fold the palm into a spiral pattern. It looks like a flower rather than a cross. This symbolizes the new life of Easter. Another variation is the “Crown of Thorns.” This design features a circular weave in the center. It represents the suffering of Christ.
Furthermore, you can try a double cross. This uses two strips interwoven together. It creates a thicker, more textured look. To do this, start with two strips side by side. Fold them as if they were one piece. The weaving creates a checkerboard effect in the center. This technique requires more dexterity. It is best for those with some experience. Additionally, you can combine different materials. Weave a thin ribbon into the palm leaf cross. This adds color and sparkle. Gold or purple ribbon matches the liturgical colors of Easter. These advanced designs make wonderful gifts. They show extra effort and care.
Tips for Preserving Your Cross
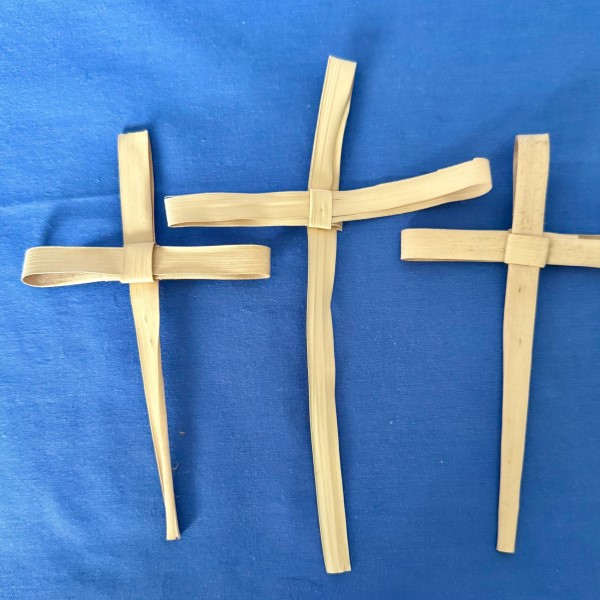
A fresh palm cross is green and soft. Over time, it will dry out. The green color fades to a golden brown. This is a natural process. It does not ruin the cross. In fact, many people prefer the dried look. However, the palm leaf cross can become brittle. If it dries too fast, it might crack. Therefore, preservation is important. To keep the cross intact, let it dry slowly. Do not place it in direct sunlight. Sunlight bleaches the color and dries it out too quickly. Instead, place it on a shelf or table. You can also hang it on a wall.
Some people coat the cross with a sealant. A clear craft spray or varnish works well. This locks in the moisture slightly. It also gives the palm a slight sheen. Be careful when applying spray. Test it on a scrap piece first. Too much spray can make the palm soggy. Once dry, the cross will last for years. Many families keep them for decades. They become family heirlooms. It is important to handle them gently. The dried leaves snap easily if bent.
Creative Display Ideas
You have made your cross; now display it. There are many creative ways to showcase it. The most common place is on a wall. You can hang it near a doorway. This is a traditional practice. It serves as a blessing for the home. Some people hang a cross in every room. Another idea is to frame the cross. Place it inside a shadow box frame. This protects it from dust and damage. You can add a small plaque with the year. It becomes a keepsake for that specific Easter. Furthermore, you can incorporate it into a wreath.
Glue the cross to a grapevine wreath. Add some dried flowers or ribbons. This creates a beautiful Easter decoration for your door. You can also use smaller crosses as bookmarks. They are perfect for marking your place in a prayer book. Laminate a flat cross to make it durable. This makes a thoughtful gift for a church group. Finally, place the cross on your prayer table. Light a candle beside it. This creates a peaceful focal point for meditation.
Sharing the Skill with Others
Making palm crosses is a social activity. It is a wonderful skill to share. Teaching others creates community. You can organize a workshop at your church. Invite children and adults to learn together. Prepare extra palm fronds in advance. You might need to cut them into strips. Show the group step-by-step. Use large demonstrations so everyone can see. Go slow and help those who struggle. It is a great way to bond with neighbors. Additionally, you can teach your own children. This passes on the tradition.
Explain the meaning behind the craft. Tell them the story of Palm Sunday. This gives context to the activity. It transforms a craft into a lesson. Furthermore, you can share your designs online. Take photos of your unique crosses. Post them on social media with relevant hashtags. This connects you with other crafters. You might pick up new tips from them. Sharing keeps the tradition alive. It ensures that the art of palm weaving does not disappear. It spreads joy and faith during the Easter season.
Common Mistakes to Avoid
Beginners often make similar mistakes. One common error is using dry palms. As mentioned, dry palms break easily. Always check the flexibility before starting. Another mistake is folding too tightly. You need tension to hold the shape. However, pulling too hard tears the leaf. The leaf is a natural material. It has limits to its stretch. Be gentle but firm. Additionally, people often lose track of the layers. The design requires a specific order. If you miss a loop, the cross looks uneven. Therefore, count your steps.
Make sure the arms are symmetrical. If one side is longer, undo it and try again. There is no shame in starting over. It is better to restart than to force a mistake. Another issue is the finishing knot. Sometimes the knot slips. This causes the whole cross to unravel. If the knot is loose, use a tiny drop of glue. This secures the final tail. Finally, avoid cutting the ends too short. Leave a little excess. You can trim it later after the cross settles.
FAQ: Common Questions About Palm Weaving
Q1: What do I do with my old palm crosses?
The church considers palm crosses to be blessed objects. Therefore, you should not throw them in the trash. The proper way to dispose of them is by burning. Many churches collect old palms in the spring. They burn them to create ashes for Ash Wednesday. You can bring your old crosses to the church. Alternatively, you can burn them yourself at home. Bury the ashes in your garden.
Q2: Can I use other types of leaves?
Palm leaves are the traditional material. However, you can practice with other materials. Ribbons or strips of paper work well for practice. They are easier to find than fresh palms. Some people use tall grasses or reeds. Just ensure the material is flexible enough. It needs to bend without snapping. Real palms have a specific texture. They hold the knot better than paper.
Q3: How long does a palm cross last?
If kept dry, a palm cross can last indefinitely. It will turn brown and brittle over time. However, the shape will remain. I have seen crosses that are decades old. The key is to keep them away from moisture. Humidity can cause mold to grow on the leaves. Direct sunlight will fade the color rapidly. Handle them with care as they age.
Q4: Is there a meaning to the knots?
The knots do not have a specific dogmatic meaning. However, many interpret them symbolically. Some say the square knot represents the four Gospels. The central knot represents Jesus as the center of the church. Others see the binding as a symbol of our faith securing us to God. The cross shape itself is the primary symbol. It reminds us of the sacrifice made for humanity.
Conclusion: A Labor of Faith
Creating a palm leaf cross is a rewarding experience. It blends art with spirituality. Whether you are a beginner or an expert, the process is fulfilling. You create a physical symbol of your faith. The cross serves as a reminder of the Holy Week. It sits in your home as a blessing. This tradition has lasted for centuries. By learning it, you keep it alive. You join a long line of believers. You connect the past with the present. So, grab some palms and start folding. Enjoy the quiet moments of creation. Let the repetitive motion calm your mind. It is a simple act with deep meaning. May your crosses bring you peace and joy.