The Timeless Appeal of Paper Crafting
Paper crafting is a beloved hobby for many people around the world. It is accessible, inexpensive, and wonderfully versatile. Among the various paper projects, creating headwear stands out as a classic activity. It brings joy to children and adults alike. Whether for a school play, a birthday party, or a rainy afternoon, this craft is a perfect solution. It sparks creativity and imagination. Many people search for how to make a paper hat to solve a last-minute costume issue. Others simply want to enjoy a relaxing artistic session. The beauty of this craft lies in its simplicity. You do not need expensive tools or rare materials. All you really need is a sheet of paper and a little bit of patience.

Furthermore, making paper hats is an eco-friendly choice. In a world full of plastic and disposable items, paper is biodegradable. You can easily recycle your creation once the celebration is over. This aspect makes it a responsible choice for environmentally conscious crafters. Additionally, it serves as an excellent educational tool for children. It helps them develop fine motor skills. They learn about geometry, folding, and following instructions. Consequently, the process is just as valuable as the final product. It encourages focus and attention to detail.
Moreover, this activity fosters a sense of connection. Parents and grandparents often share this craft with younger generations. It is a nostalgic experience that bridges the age gap. The tradition of folding paper into wearable art has existed for generations. From the classic sailor hat to the intricate Samurai helmet, the possibilities are vast.
Essential Materials for Your Project
Before diving into the folding process, you must gather the necessary materials. Fortunately, the supply list is short and adaptable. The most important item is, of course, the paper itself. You can use almost any type of paper available to you. Standard printer paper (A4 or Letter size) works well for smaller hats. For larger, adult-sized hats, newspaper is a fantastic choice. It is large, pliable, and readily available. Additionally, newspaper holds folds very securely. Construction paper is another excellent option. It comes in a variety of colors. Therefore, it adds a vibrant touch to your creations instantly.
In addition to paper, you will need a flat, clean surface. A dining table or a hard floor works perfectly. This ensures crisp and accurate folds. While not strictly necessary, a ruler or a bone folder can be helpful. These tools help you make sharp creases. Sharp creases are the secret to a professional-looking hat. If you do not have these tools, your fingernail works just as well. Simply run it along the fold to press it down firmly.
Furthermore, consider having decorating supplies on hand. Markers, crayons, and colored pencils allow for customization. You can add patterns, logos, or drawings to your hat. Glitter and stickers are also popular choices for children’s hats. If you plan to make a more durable hat, you might need tape or glue. Tape can reinforce the structure. Glue allows you to attach additional elements like feathers or pom-poms. Scissors are necessary if you need to trim the paper or cut out shapes. However, many basic hat designs require no cutting at all. This makes the craft safe for even very young children. Once you have these items ready, you are prepared to begin the creative process.
Step-by-Step Guide to the Classic Sailor Hat
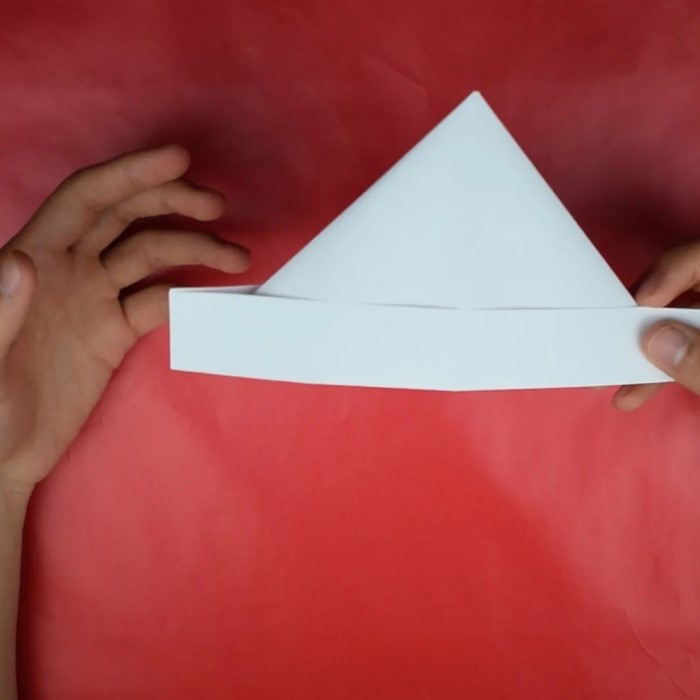
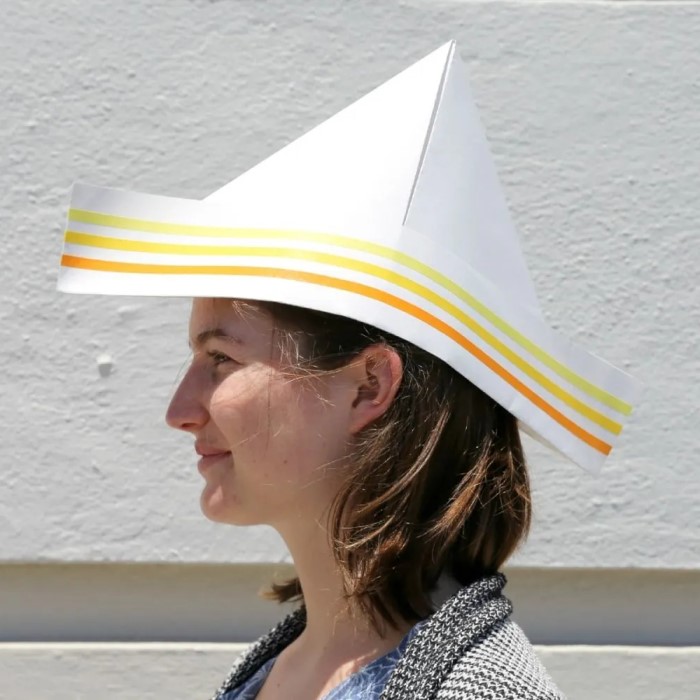
How to make a paper hat? The classic sailor hat is the most recognized paper hat design. It is simple, iconic, and quick to make. This section provides a detailed guide on how to make a paper hat in this traditional style. First, select your piece of paper. A standard sheet of newspaper is ideal for an adult size. For a child, a square piece of wrapping paper or construction paper works well. Start by folding the paper in half widthwise. You want to create a long rectangle. Make sure the edges align perfectly. Then, create a sharp crease along the fold. Unfold the paper and lay it flat.
Next, fold the paper in half lengthwise. This creates a shorter, wider rectangle. Keep the folded edge at the bottom. Now, take the top left and right corners. Fold them down towards the center to form a triangle. The top layer should now look like a triangle on top of a rectangular strip. This creates the main shape of the hat. There will be a rectangular strip at the bottom. Take the top layer of this bottom strip and fold it upward. Fold it over the base of the triangle. Flip the paper over and do the same on the other side. This secures the triangle shape.
Finally, you need to open the hat. Place your hands inside the opening at the bottom. Gently pull the sides apart. The flat shape will transform into a three-dimensional hat. You may need to adjust the folds slightly to make it sit correctly on the head. If the hat is too small, you can tear or cut a small slit in the center of the top fold before opening it.
Creating a Newspaper Hat for Sun Protection
Newspaper hats are not just for play. They offer practical protection from the sun. This style is slightly different from the sailor hat. It resembles a wide-brimmed sun hat. This makes it perfect for gardening or outdoor events. To begin, take a full sheet of newspaper. Fold it in half to make a large square. Then, fold it in half again to make a smaller square. Unfold the second fold so you have a rectangle with a crease down the center. Now, take the two top corners and fold them down to the center crease. This is similar to the first steps of the sailor hat.
However, the next steps differ. You will see two layers of paper at the bottom. Take the top layer of the bottom flap and fold it up. Fold it over the triangle edges. Turn the hat over. Take the bottom corners of the triangle and fold them inward. This creates a more fitted shape. Then, take the remaining bottom flap and fold it up. This secures the folds. You will now have a shape that looks somewhat like a boat. To turn this into a hat, you need to open it up. Pull the sides apart gently.
Additionally, you can adjust the brim for better shade. The brim can be rolled or shaped to suit your style. Because newspaper is thin, you might want to double up the layers. Use two sheets of newspaper stacked together.
Decorating Your Creation for Parties
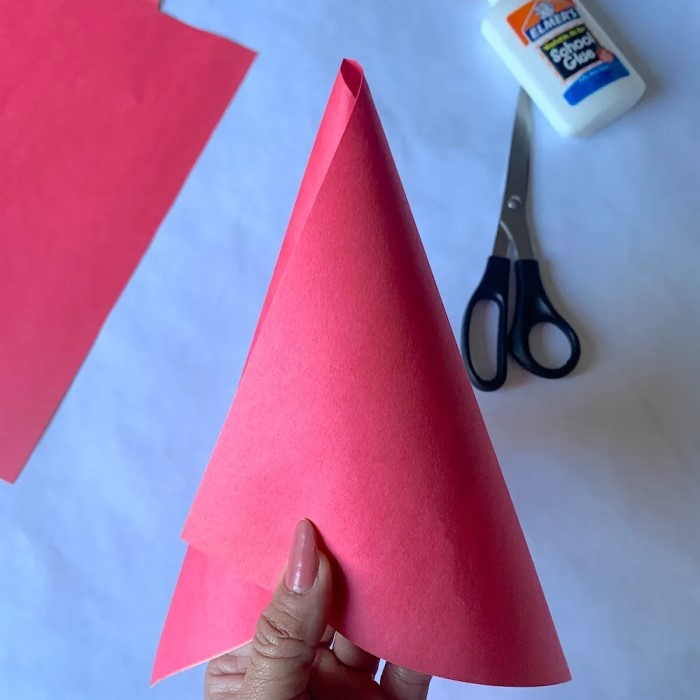
How to make a paper hat? A plain paper hat is a blank canvas. Decorating it transforms it from a simple craft into a fashion statement. This is where you can really let your personality shine. For a birthday party, you can match the hat to the theme. Use markers to draw polka dots, stripes, or stars. If the party has a specific theme, like pirates or princesses, add relevant symbols. For a pirate hat, you can draw a skull and crossbones. Use black marker to color the whole hat. For a princess crown, you might use gold or silver paper. Add sequins and glitter glue for sparkle.
Furthermore, you can add three-dimensional elements. Feathers are a classic addition to any hat. You can glue or tape them to the side or back. Artificial flowers are also lovely for a garden party hat. Pom-poms can be glued around the brim for a whimsical look. If you are making hats for a sports event, use team colors. You can even write slogans or cheer words on the hat. This makes the hat a part of the fan gear. It is a great way to show team spirit.
Moreover, do not forget the chin strap. Sometimes paper hats can fly off in the wind. To prevent this, punch a hole on each side of the hat. Thread a piece of string or elastic through the holes. Tie a knot on the inside to secure it. This creates a functional strap. It ensures the hat stays securely on the head. This is especially useful for active children. Decorating is also a fantastic group activity. Set up a crafting station with various supplies. Let the guests create their own hats. This keeps them entertained and provides a party favor to take home. It doubles as an activity and a souvenir.
Exploring Different Paper Types and Textures
How to make a paper hat? The type of paper you choose dramatically affects the final result. Different papers offer different looks and levels of durability. Standard printer paper is the most common choice. It is easy to fold and holds creases well. It is also very affordable. However, it can be a bit flimsy. If you want a sturdier hat, consider using cardstock. Cardstock is thicker and heavier. It creates a very durable hat that can withstand more wear and tear. Keep in mind that cardstock can be harder to fold. You will need to score the fold lines first. Use a ruler and a blunt object to make a groove before folding.
On the other hand, tissue paper is a delicate option. It is not suitable for structured hats like the sailor style. However, it works well for decorative toppers. You can scrunch it up to create fluffy accents. Wrapping paper is another excellent alternative. It comes in countless colors and patterns. This saves you the step of decorating. The only downside is that some wrapping paper is very thin. It might tear if you fold it too many times. To fix this, you can fold the paper while it is still on the roll. Or, simply handle it gently.
Additionally, consider using recycled materials. Old magazines or comic books make colorful and unique hats. The glossy pages create a fun, textured look. Brown kraft paper or grocery bags offer a rustic, vintage style. These are perfect for historical costumes or pioneer themes. They are also very durable. The texture of the paper adds a tactile element to the craft. Children enjoy the different feel of various papers. Exploring these options expands the possibilities of the project. It teaches resourcefulness and creativity. You learn to see potential in everyday materials.
Troubleshooting Common Folding Issues
Even with clear instructions, folding paper can sometimes be tricky. You might encounter a few common issues. One frequent problem is uneven folds. This usually happens if the corners are not aligned properly. To fix this, unfold the paper and start again. Take your time to line up the edges exactly. Precision is key to a symmetrical hat. If the paper is wrinkled, try smoothing it out with your hand. Or, use a ruler to press it flat. A clean, flat surface makes a big difference.
Another common issue is the hat being too small. This happens often when using standard printer paper. Adults often find that A4 paper does not fit their heads. The solution is simple. You need to start with larger paper. Tape two pieces of paper together side by side. This creates a larger square or rectangle. Then, proceed with the folding instructions as normal. This will result in a larger hat that fits comfortably. If you do not have tape, you can use a newspaper page instead. It is naturally larger.
Furthermore, sometimes the paper rips during the folding process. This can be frustrating. If the rip is small, you can tape it from the inside. The tape will be hidden, and the structure will hold. If the rip is large, you may need to start over with a new sheet. To prevent ripping, be gentle when making sharp creases. Do not use too much force. It is better to make multiple gentle passes with your fingernail than one hard press. Finally, if the hat keeps falling off, try adjusting the shape. Squeeze the sides slightly to narrow the fit. Or, expand the opening gently to widen it. With a little practice, you will master the technique.
Fun Variations: The Samurai and the Crown
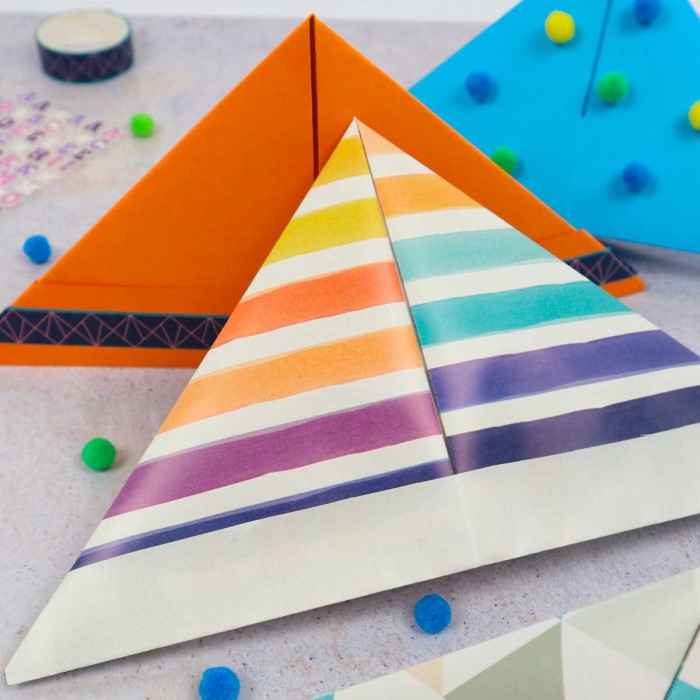
Once you have mastered the basic sailor hat, you can try more advanced designs. The Samurai helmet is a popular origami project. It looks impressive but is actually quite accessible. It starts with a square piece of paper. You fold it in half to make a rectangle. Then, you fold the top corners down to form a triangle. The tricky part is the bottom flaps. You fold one layer of the bottom strip upward on both sides. Then, you fold the tips of these flaps outward. This creates the “horns” of the helmet. The remaining bottom strip is folded up and tucked in. This creates a detailed, sculptural hat perfect for costumes.
Another fun variation is the paper crown. This design is perfect for birthdays and royalty-themed parties. Start with a long strip of paper. It should be long enough to wrap around the head. You may need to tape two strips together. Fold the strip in half lengthwise. This makes it stronger. Then, cut triangles out of the top edge to create the points of the crown. You can make them jagged or smooth. Unfold the strip and decorate it with jewels or markers. Finally, tape the two ends together to fit the head.
Additionally, you can create a pirate tricorn hat. Start with the sailor hat base. Instead of leaving it open, push the top point down. This creates a flat top. Then, fold the three corners up to meet the center. This pinches the hat into a three-cornered shape. These variations allow you to expand your crafting repertoire. They show you how to make a paper hat that suits any character or story. Trying these different styles keeps the activity fresh and exciting. It challenges your folding skills and encourages imagination.
Conclusion
Learning how to make a paper hat is a rewarding and practical skill. It is a craft that combines simplicity with endless creativity. From the classic sailor hat to practical sun hats, the possibilities are vast. You only need a few simple materials to get started. Whether you are a parent looking for a rainy day activity or an adult needing a quick costume accessory, this guide provides the answers. The process is straightforward, and the result is always useful.
Moreover, this activity offers benefits beyond just the final product. It is a wonderful way to bond with family and friends. It encourages imagination and develops fine motor skills. We hope this guide has inspired you to pick up some paper and start folding. The joy of wearing something you made yourself is unmatched. So, the next time you need a hat for a party or play, remember this simple solution. It is cost-effective, fun, and limited only by your imagination.