The Science Behind Touchscreen Technology
Modern touchscreen devices have revolutionized the way we interact with technology. Consequently, the need for precise input tools has grown significantly. Many users find themselves searching for a homemade stylus when they misplace their official digital pen. To build an effective tool, one must first understand the underlying science. Most modern smartphones and tablets utilize capacitive touchscreen technology. These screens function by detecting the electrical properties of the human body. When your finger touches the glass, it distorts the screen’s electrostatic field. Therefore, a stylus must mimic this electrical conductivity to work effectively. It is not merely about applying pressure. A plastic stick will not register a touch because it is an insulator. You need a material that can transfer the body’s natural electricity to the screen.
Furthermore, this scientific principle dictates the materials required for a successful project. Conductive materials like copper, aluminum, and even the human body act as conduits for electricity. Therefore, any successful DIY project must incorporate a conductive path. This path connects your hand to the tip of the stylus. Without this connection, the screen will not recognize the input. Many people try to use random objects and fail because they ignore this fundamental rule. Understanding the “capacitive” nature of your device is the first step. It transforms a random arts and crafts project into a functional piece of technology. Additionally, knowing this allows for better customization. You can experiment with different conductive materials once you grasp the core concept. This knowledge empowers you to fix or improve your tool whenever necessary.
Essential Materials for Your Project
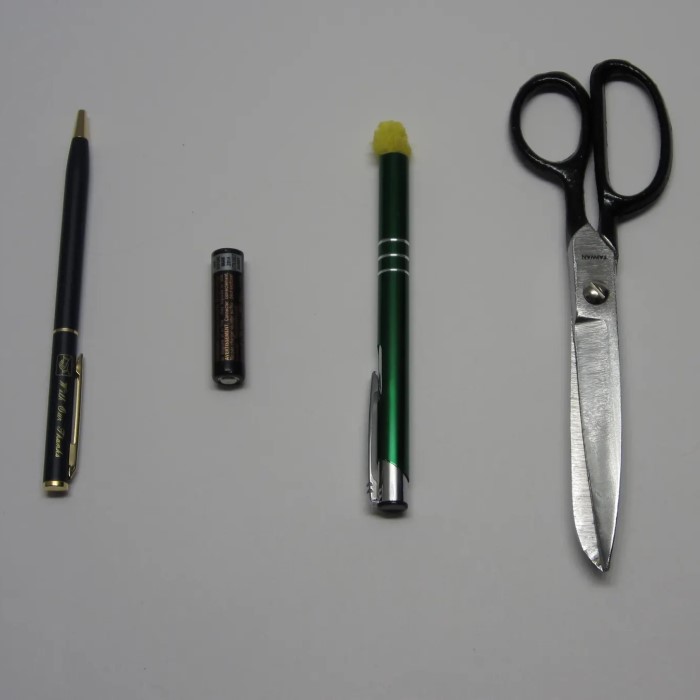
Creating a homemade stylus requires gathering specific household items. You likely have most of these materials in your kitchen or desk drawer. The most critical component is a conductive element. Aluminum foil is the most popular choice due to its availability and high conductivity. It is flexible and easy to shape around various handles. Another excellent material is a anti-static sponge. This is often found in packaging for electronics. It works wonderfully because it is soft and conductive. Additionally, you will need a handle or a body for your stylus. A standard wooden pencil or a ballpoint pen casing works perfectly. Wood and plastic make good handles because they are lightweight and easy to hold.
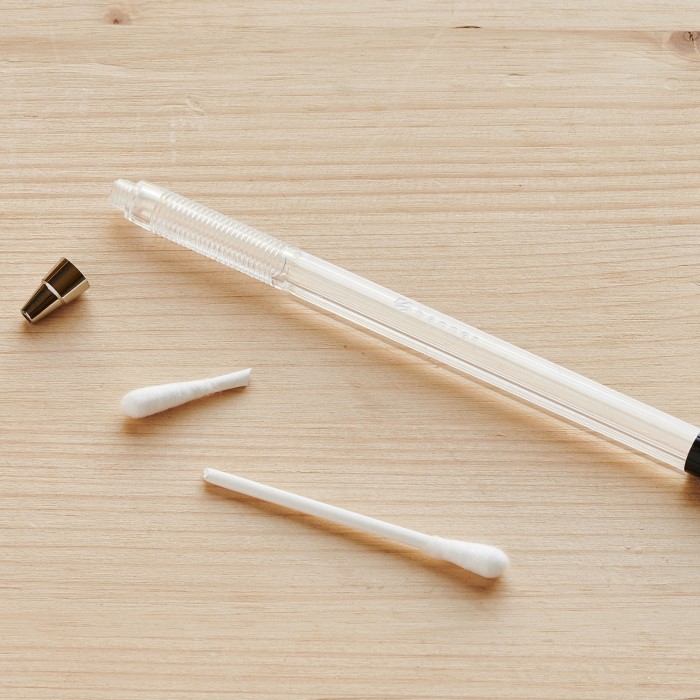
Moreover, you will need something to secure the conductive material. Scissors are necessary for cutting the foil or sponge to the right size. Tape, preferably electrical tape or clear scotch tape, is essential for holding everything together. Some DIY enthusiasts also use cotton swabs. These can be used to create a softer tip. However, they must be moistened with water to become conductive. While this works, it is less permanent than using metal or conductive foam. Therefore, dry conductive materials are generally preferred for a long-lasting tool. You might also consider a wire if you are dismantling an old cable. The copper strands inside are perfect for ensuring a strong connection. Gathering these items beforehand makes the construction process smooth and enjoyable. It prevents interruptions once you start building your custom tool.

Constructing a Basic Foil Stylus
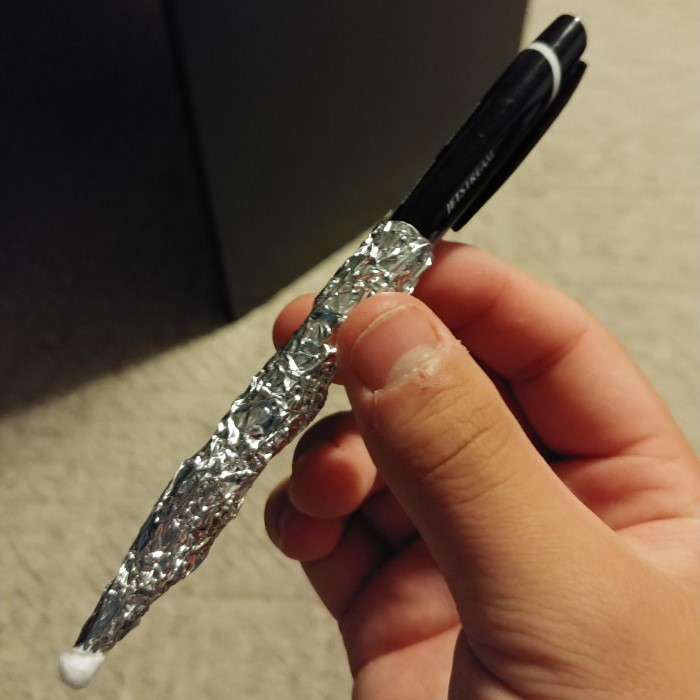
The aluminum foil method is the simplest way to create a functional tool. First, take a standard wooden pencil or an old pen barrel. If you are using a pencil, ensure the graphite tip is not exposed. The graphite could scratch your screen. Next, tear off a piece of aluminum foil. It should be roughly the size of a standard sheet of paper. Fold the foil a few times to increase its thickness and durability. Then, wrap the foil tightly around the pencil tip. You want to cover the end completely. It is crucial that the foil wraps far enough back so your fingers can touch it while you write. This maintains the conductive path.
After wrapping the pencil, secure the foil with tape. Wrap the tape around the foil near the middle of the pencil. This prevents the foil from unraveling during use. However, do not cover the very tip with tape. The tip must remain exposed to make contact with the screen. You can gently round the foil at the tip to create a smoother writing surface. A sharp point might tear or scratch, although foil is generally soft. Finally, test your new tool on your smartphone. Hold the stylus so your hand touches the foil. If it works, you have successfully built a basic input device. This method is incredibly cost-effective. It allows you to replace a lost stylus in under five minutes. Consequently, it is the go-to solution for students and professionals in a pinch.
Advanced Methods Using Conductive Foam
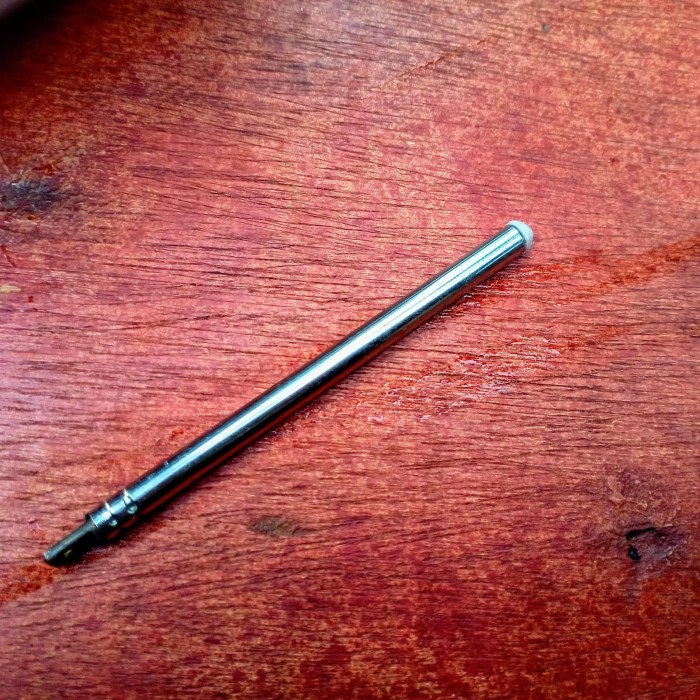
For those seeking a more refined experience, conductive foam offers a superior texture. This material is often found in the packaging of circuit boards. It has a soft, spongy texture that glides easily across glass. To start, find a ballpoint pen that has run out of ink. Disassemble the pen to remove the empty ink cartridge. You will now have a hollow tube. Next, cut a small cube of conductive foam. The cube should be slightly larger than the opening of the pen tube. You want a snug fit. Push the foam into the tip of the pen. It should stick out slightly to form a soft “nib.”
The advantage of this design is the feel. The foam mimics the rubber tips found on commercial styluses. It provides a bit of friction, which helps with control. Furthermore, you must ensure the foam connects to your hand. The best way to do this is with a small wire. Take a thin piece of copper wire. Wrap one end around the foam inside the pen. Let the other end extend out of the back of the pen. You can tape this wire along the outside of the barrel. Ensure your fingers touch the wire while holding the pen. This completes the electrical circuit. Consequently, this method results in a professional-feeling tool. It is durable enough to last for weeks of regular use. This is an excellent project for those who enjoy DIY electronics.
Customizing Your Tool for Comfort and Style
Functionality is important, but comfort is equally vital for prolonged use. A homemade stylus can be customized to fit your hand perfectly. The handle is the primary area for customization. If you are using a bare pen barrel, it might be too thin and slippery. You can improve the grip by adding materials. For instance, you can wrap the barrel in duct tape or sports grip tape. This adds thickness and texture. It reduces hand strain during long writing sessions. Additionally, you can mold a custom grip using Sugru or air-dry clay. These materials allow you to shape a handle that fits your specific finger placement.
Moreover, aesthetics can be improved to suit your personal style. Aluminum foil can look messy. You can cover the foil with colored tape or decorative paper. Just remember to leave the contact point exposed. Some creators paint their stylus barrels. A coat of spray paint can give a plastic pen a sleek, metallic finish. This makes the tool feel less like a temporary fix and more like a permanent accessory. Furthermore, you can add a pocket clip.
Salvage a clip from an old pen and glue it to your new stylus. This adds practicality. You can also experiment with the tip shape. A rounded tip is better for general navigation. A finer point might be preferred for drawing. However, the screen still requires a certain surface area to register the touch. You can create a finer tip by wrapping the foil very tightly over a smaller base. These customizations turn a simple DIY project into a personalized tool that you will be proud to use.
Troubleshooting Common Issues
Sometimes, your DIY project might not work as expected. Do not be discouraged. Troubleshooting is part of the learning process. The most common issue is a lack of responsiveness. If the screen does not react, check the conductive path. Ensure your fingers are touching the conductive material. If you are holding the plastic handle without touching the metal, the stylus will fail. This is the most frequent mistake beginners make. Therefore, adjust your grip so your skin makes contact with the foil or wire. Another common problem is a jagged or scratching motion. This usually happens if the foil has wrinkled or torn. Simply smooth out the foil or add a fresh layer.
Additionally, water-based styluses can dry out quickly. If your cotton swab stylus stops working, it probably needs more moisture. However, be careful not to drip water onto your device. Too much liquid can damage the internal components. It is better to switch to a dry conductive material like foam or foil. Another issue is the size of the tip. If the tip is too sharp, the screen might not recognize it. Capacitive screens require a certain surface area to register a touch. If your stylus acts like a fingernail, it won’t work well. Try flattening the tip slightly. This increases the contact area. Finally, check your screen protector. Some thick or matte screen protectors reduce sensitivity. You might need to press harder or remove the protector temporarily to test. By systematically checking these factors, you can refine your tool until it works flawlessly.
Maintenance and Longevity Tips
A homemade stylus is not as durable as a factory-made one. Therefore, it requires some maintenance. Regularly inspect the tip of your stylus. Aluminum foil can wear out and develop holes. If this happens, simply replace the foil. It is a quick and inexpensive fix. If you are using conductive foam, it might lose its shape over time. You can reshape it with your fingers or cut a fresh end. Keeping the tool clean is also important. Dirt and oil can accumulate on the tip. This can transfer to your screen and cause streaks. Wipe the tip with a damp cloth occasionally.
Furthermore, proper storage extends the life of your tool. Do not throw your stylus into a bag loosely. The delicate tip might get crushed or bent. Store it in a pen case or a dedicated slot in your backpack. If you used a wire connection, check it periodically. Wires can break if bent too many times. If the connection is loose, your stylus will become unreliable. Reinforce any weak spots with tape. Additionally, avoid using your stylus on screens with cracks. The rough edges can tear the foil or foam. Treat your DIY tool with care. It is a functional object, but it is also a delicate one. With proper care, a simple homemade tool can last for months. This ensures you always have a precise way to interact with your devices without spending money on replacements.
Frequently Asked Questions
How do I make a homemade stylus?
You can easily make a stylus using a pen and aluminum foil. Wrap the foil tightly around the tip of the pen. Ensure your fingers touch the foil when holding it. This allows the electric current to flow from your hand to the screen. Alternatively, use a cotton swab slightly damp with water.
Can a pencil eraser be used as a stylus?
A standard pencil eraser does not conduct electricity. Therefore, it will not work on a capacitive touchscreen on its own. However, you can wrap the eraser in aluminum foil. This creates a conductive surface. The foil allows the screen to register the touch effectively.
What can I use instead of my finger on a touch screen?
You can use any conductive material. Aluminum foil, anti-static foam, or a moist cotton swab are common substitutes. These materials mimic the electrical conductivity of the human finger. Consequently, they allow the screen to detect the input without direct skin contact.
Can you use tin foil as a stylus?
Yes, tin foil or aluminum foil is the most popular material for DIY styluses. It is highly conductive and easy to shape. Wrap it around a pen or a stick to create a stylus. It works perfectly on all capacitive touchscreens found on modern phones and tablets.
Conclusion
In conclusion, creating a homemade stylus is a practical and educational project. It solves the immediate problem of a lost or broken tool. Furthermore, it teaches valuable lessons about how our everyday technology functions. From simple foil wraps to advanced conductive foam designs, the options are versatile. You do not need to spend a fortune to have a functional touch tool. With a little creativity and an understanding of conductivity, you can build a homemade stylus that rivals store-bought versions. Whether you are an artist, a student, or simply someone who prefers a stylus, the DIY approach offers a rewarding solution. Grab some foil, find an old pen, and start customizing your perfect touchscreen companion today.