Introduction: The Appeal of Shiny Air Dry Clay
Air dry clay is a versatile medium that has captured the interest of crafters, artists, and DIY enthusiasts alike. Its ease of use and no-kiln requirement allow for creative freedom in making a variety of projects, from decorative items to functional pottery. However, many people wonder how to achieve a shiny finish on their air dry clay creations. A glossy surface not only enhances the appearance but also provides durability against wear and tear.
In this article, we will discuss various techniques on how to make air dry clay shiny. We will explore the necessary materials, effective application methods, and answers to common questions to help you achieve stunning results. Whether you are making jewelry, decorative bowls, or artistic sculptures, learn how to elevate your air dry clay projects with a beautiful glossy finish.
Understanding Air Dry Clay
Before diving into the specifics of achieving a shiny finish, let’s take a moment to understand what air dry clay is and its characteristics.
- Composition and Properties:
Air dry clay is made from organic and inorganic materials that create a malleable medium. As it dries, it solidifies without requiring firing in a kiln. This practicality makes it an excellent option for beginners and experienced artists alike. - Usage:
This type of clay is perfect for various projects, including jewelry, home decor, plant pots, and artistic sculptures. Its versatility allows for both intricate and straightforward designs. - Types of Air Dry Clay:
Various brands exist in the market, each offering distinct characteristics. Popular options include:- Sculpey: Well-known for its vibrant colors and smooth texture, offering multitude crafting possibilities.
- DAS: This clay yields a consistent finish and is particularly suitable for casting and sculpting.
- Crayola Air-Dry Clay: A non-toxic option that is excellent for kids and beginners, making it accessible for various ages.
Understanding these aspects will help you select the right materials and guide your process toward achieving a shiny finish.
Essential Materials for Making Air Dry Clay Shiny
To successfully create a glossy finish on air dry clay, you’ll need the following materials:
- High-Quality Air Dry Clay:
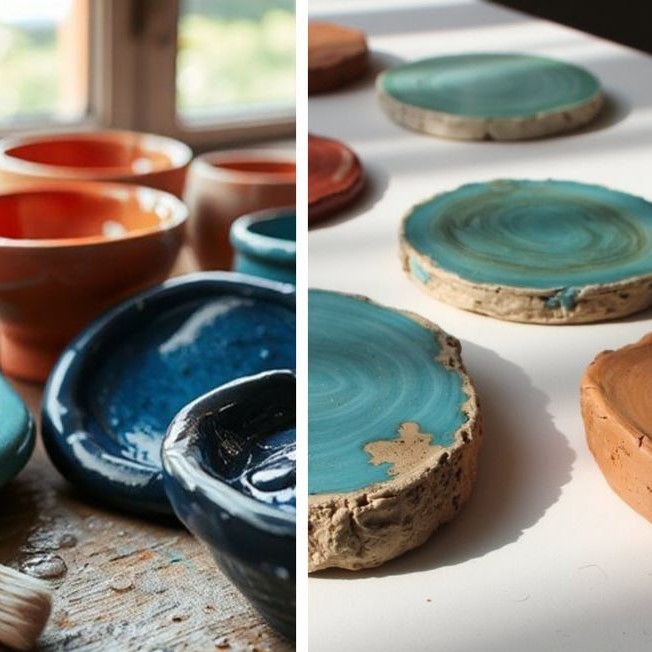
Choose a reputable brand to ensure a great end product. High-quality clay is easier to work with and achieves better results. - Glazing Medium:
This is essential for achieving a glossy look. You have a few options:- Acrylic Sealants: Clear acrylic sprays or brush-on sealants that create a protective, glossy layer.
- Water-Based Glazes: Specifically formulated for clay to add shine and enhance colors.
- Varnishes: Ideal for providing different finishes like matte or gloss.
- Application Tools:
You will require specific tools to apply the glaze effectively. Essential tools include:- Brushes: Utilize various sizes of brushes to reach all areas of your clay piece.
- Sponge: Helpful for smoothing the glaze and ensuring an even coat.
- Spray Bottles: For achieving a spray-on glaze effect, providing a fine mist over your project.
- Sealers:
Use sealers to protect your finished clay pieces. Options might include:- Matte or Glossy Spray Sealants: These can enhance the final appearance and durability of your items.
- Protective Work Surface:
Set up a clean work area to prevent any mess. Employ craft mats, newspapers, or plastic sheets to cover your workspace adequately.
Step-by-Step Guide: How to Make Air Dry Clay Shiny
With the right materials at hand, let’s go through the detailed steps on how to make air dry clay shiny:
Prepare the Clay
- Knead the Clay:
Begin by kneading the air dry clay until it becomes soft and pliable. This eliminates air bubbles and ensures an even texture. - Shape Your Piece:
Create your desired item using molding techniques or a potter’s wheel. Whether it’s beads, pots, or sculptures, ensure that the piece is symmetrical and has smooth surfaces. - Let it Dry:
Allow your clay creation to dry completely. This could take anywhere from several hours to a few days, depending on the size and thickness of your piece.
Sanding for Smoothness
- Sanding Technique:
Once your piece is completely dry, lightly sand any rough areas using fine-grit sandpaper. This will help achieve a smooth surface, which is crucial for a glossy finish. - Wipe Down the Surface:
After sanding, use a damp cloth to remove any dust created by the sanding process. Ensuring a clean surface before glazing is vital.
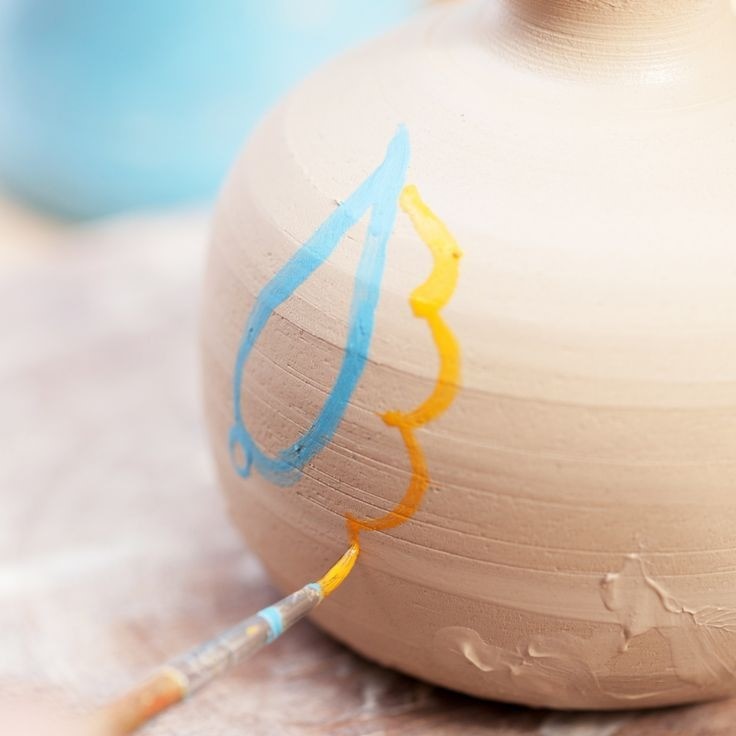
Applying the Glazing Medium
- Select Your Glaze:
Choose whether you want to use a brush-on, spray-on, or dipping glaze based on your comfort level and the type of item you’ve created. - Application:
- Brush-On Method: Use a clean brush to apply a thin, even coat of glaze over your clay piece. Start from one side and work your way to the other to avoid drips.
- Spray-On Method: Hold the spray can 6-12 inches away and apply an even coat, rotating the piece to cover all angles.
- Dipping Method: Dip small pieces directly into the glaze for a quick and even coating. Make sure excess glaze drains back into the container.
- Layering Glaze:
Depending on the look you want, consider applying multiple thin layers of glaze. Allow each layer to dry thoroughly before adding another.
Final Drying and Curing
- Drying Time:
After glazing, leave your pieces to dry according to the manufacturer’s instructions. This step may take a few hours to a full day. - Curing Process:
Some glazes may require curing, either by air drying or sometimes by gentle heating (if indicated). Follow specific instructions for each product used.
Polishing and Finishing Touches
Inspect Your Work
- Check for Drying Completeness:
Once your clay pieces have dried thoroughly, take a moment to inspect them closely. Ensure that the glaze has set properly and that there are no soft or sticky areas. - Look for Missed Spots:
Examine the entire surface of your pieces for any areas that may have been missed during the glazing process. Pay attention to corners, edges, and areas where you might have applied less than enough glaze. - Touch-Up Application:
If you find any spots that require more glaze, carefully use your brush to touch up those areas. Apply a thin layer of glaze and avoid overloading the brush to prevent drips. - Final Inspection:
Give your pieces one last look after the touch-ups. Ensure that the glaze is evenly distributed and that the finish meets your expectations before moving on to the polishing stage.
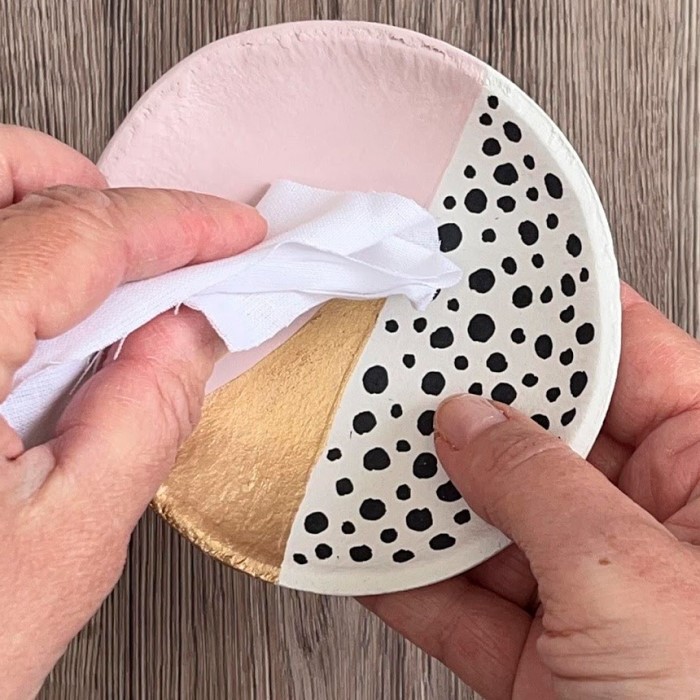
Polishing
- Choosing the Right Cloth:
Select a soft, lint-free cloth for polishing your pieces. Microfiber or soft cotton fabrics work well to avoid scratching the surface. - Buffing Technique:
Using gentle pressure, lightly buff the surface of your glazed items with the cloth. Use circular motions to enhance the shine without damaging the glaze. -
Focusing on Details:
Pay special attention to grooves, crevices, or textured areas that may need more attention to bring out their luster. Buffing these areas can help ensure an even shine across the entire piece. - Evaluate the Shine:
After polishing, visually evaluate the glossiness of your clay pieces. Check if they reflect light evenly and if any additional polishing is required to achieve your desired shine.

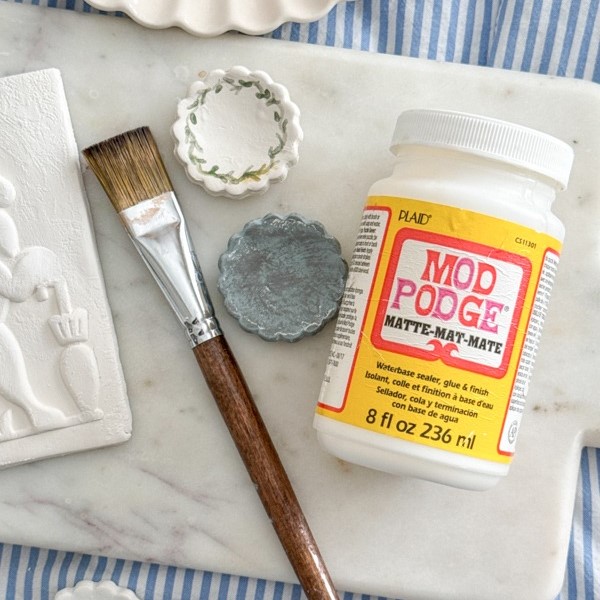
Final Sealant
- Purpose of Applying Sealant:
A sealant acts as a protective layer over the glazed surface. It helps guard against scratches, moisture, and UV rays, extending the lifespan of your pieces. -
Selecting the Right Sealant:
Choose a sealant that is compatible with air dry clay and the glaze you’ve used. Options include spray sealants or brush-on varieties that can provide varying finishes (matte or glossy). - Application Process:
- Preparation: Ensure your pieces are clean and dry before applying the sealant. Any dust or residue can interfere with adhesion.
- Application: Follow the manufacturer’s instructions carefully for the best results. Apply the sealant in thin, even layers, either by spraying from a distance or using a brush for more control.
- Drying Time:
Allow the sealant to dry completely per the product instructions. This step is crucial for the sealant to perform effectively and protect your glazed surface. - Final Check and Care:
After the sealant has dried, inspect your pieces for any inconsistencies or areas that may need additional sealant. Ensure you know the best care procedures for maintaining your sealed items, which may include avoiding prolonged exposure to moisture or direct sunlight.
Creative Ideas for Using Shiny Air Dry Clay
Once you’ve mastered how to achieve a shiny finish on your clay pieces, consider applying your new skills in various creative projects:
- Jewelry Making:
Use your shiny clay beads to create necklaces, bracelets, and earrings. The glossy finish will add elegance to your jewelry. - Home Decor:
Create functional items like bowls, plant pots, or decorative figurines. The shine will enhance their beauty and make them eye-catching decor pieces. - Gift Items:
Handcrafted items make thoughtful gifts. Add personal touches and shiny finishes to create unique pieces for friends and family. - Artistic Sculpture:
Experiment with freeform sculpture using shiny air dry clay. The glossiness can add depth and visual interest to your artistic pieces.
Frequently Asked Questions
To address common queries about making air dry clay shiny, here are some helpful answers:
How to paint air dry clay to make it glossy?
To achieve a glossy look when painting air dry clay, use acrylic paints followed by a clear acrylic sealant or varnish to protect and enhance the shine.
How to make pottery look glossy?
You can make pottery look glossy by applying a clear glaze or sealant that is suitable for the type of clay and intended use.
What gloss do you use on air dry clay?
Choose a clear gloss sealer specifically made for air dry clay or water-based acrylic varnish that offers a shiny finish.
Is there a way to glaze clay without a kiln?
Yes, you can glaze air dry clay using water-based glazes and sealers, which do not require a kiln to cure.
Conclusion: Transform Your Creations with a Glossy Finish
In conclusion, mastering how to make air dry clay shiny is an enriching experience that can significantly enhance your projects. With the right materials, techniques, and a touch of creativity, your air dry clay items can be transformed into stunning, glossy pieces that shine.
This guide has detailed every step of the process, ensuring that you feel confident and prepared to create beautiful clay jewelry and decorative items. Enjoy every moment of the crafting process, embrace your creativity, and unleash your artistic potential. Get started today and watch your air dry clay creations come to life with a beautiful shine! Happy crafting!