Introduction
If you’re looking for a fun and creative activity to engage in, learning how to make chalk is an exciting option. Whether you’re a parent seeking a crafty weekend project with your children or an art enthusiast wanting to explore new mediums, creating your own chalk can be both educational and enjoyable. Not only do you get to unleash your creativity, but you also have the satisfaction of making something with your own hands. In this guide, we will walk you through several methods of making chalk at home using simple materials and ingredients.
Understanding Chalk
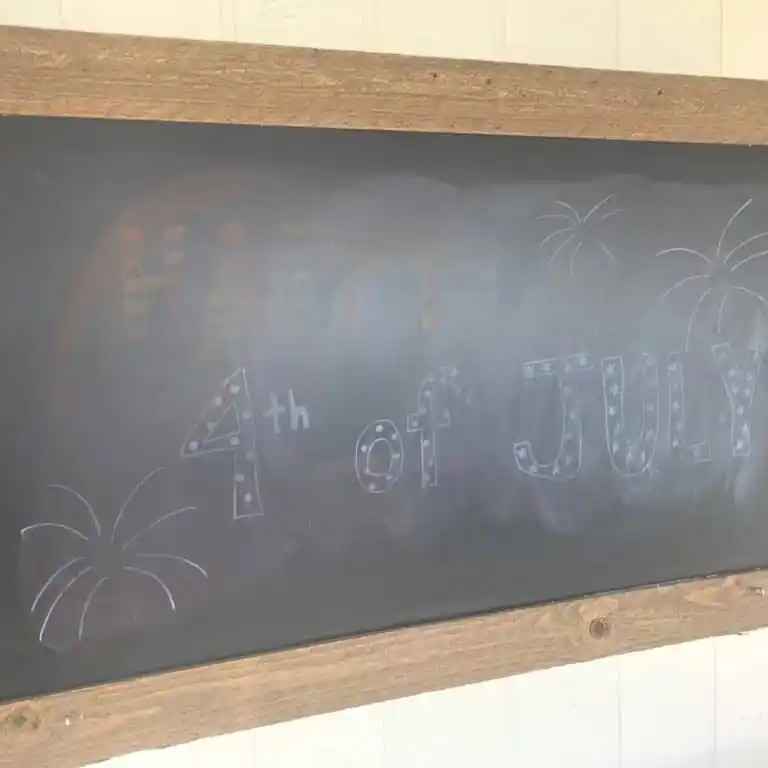
Before diving into the recipes, it is essential to understand what chalk is and its basic components. Chalk is primarily made from calcium carbonate, a natural mineral. It is commonly used in classrooms, art supplies, and even in sports applications. When making chalk, you’ll find that the process is relatively straightforward, allowing for numerous variations based on personal preferences. The primary ingredients for homemade chalk typically include:
- Calcium Carbonate (for traditional chalk)
- Water (to mix the ingredients)
- Additives such as flour or cornstarch for variations
- Coloring Agents (optional)—these can come from food coloring, natural dyes, or pigments.
How to Make Chalk: Simple Recipes
How to make chalk? Now that we understand the basics, let’s explore some easy ways to make chalk at home. Here are several recipes that will help you create your own chalk, from traditional white chalk to colorful drawing materials.
Recipe 1: Traditional Chalk
Ingredients:
- 1 cup of calcium carbonate
- 1/2 cup water
- 1/2 cup flour (optional for improved texture)
- Optional: Food coloring for hues
Instructions:
Mix Dry Ingredients:
- Gather Ingredients: Start by collecting your dry ingredients, which include calcium carbonate and flour. Also, prepare any colorants you wish to incorporate, such as food coloring or safe powdered pigments.
- Combine in a Bowl: In a mixing bowl, add the calcium carbonate and flour together.
- Ensure Thorough Mixing: Use a whisk or spoon to mix the dry ingredients thoroughly. This step is crucial to avoid lumps in your final product, ensuring a smooth consistency that will enhance the quality of your chalk.
Add Water:
- Gradual Addition: Carefully pour water into the dry mixture a little at a time. This gradual process helps maintain control over the consistency.
- Stir While Mixing: Continuously stir the mixture with a spoon or spatula while adding water. This will ensure an even blend and prevent clumping.
- Achieve Desired Consistency: Keep mixing until the mixture reaches a thick batter-like consistency. It should be pourable but not too runny, similar to pancake batter. Adjust the amount of water as necessary.
Mold the Mixture:
- Choose Your Molds: Decide on the molds you want to use for shaping the chalk. Silicone molds are especially popular due to their flexibility and the fun shapes they can create.
- Alternate Molding Options: If you don’t have silicone molds, consider alternatives like cardboard tubes or muffin tins. These can also create interesting shapes and are often readily available.
- Pouring the Mixture: Carefully pour the prepared mixture into your chosen molds, filling them to the desired level. Be cautious to avoid overflow.
Let it Dry:
- Drying Time: Allow your chalk to dry for 24 to 48 hours. The exact drying time can vary based on environmental factors such as humidity and temperature.
- Optimal Drying Conditions: Place the molds in a well-ventilated area to promote faster drying. Avoid direct sunlight, as too much heat may crack the chalk.
- Check for Hardness: After the drying period, check to ensure the chalk is fully hardened by gently pressing on it. It should feel firm and not soft to the touch.
Remove from Molds:
- Careful Removal: Once the chalk has dried completely, it’s time to remove it from the molds. Gently flex the silicone molds or tap the cardboard tubes or muffin tins to release the chalk.
- Inspect the Finished Product: After removing the chalk, inspect it for any irregularities or imperfections. Most homemade chalk turns out great, but it’s good to check.
- Ready for Use: Your homemade chalk is now ready for use! Enjoy creating colorful art and engaging in various projects with your new chalk creations.
Recipe 2: Easy Two-Ingredient Chalk
For a quick and simple version, here’s a two-ingredient recipe.
Ingredients:
- 1 cup of plaster of Paris
- 1/2 cup of water
- Optional: Food coloring
Instructions:
Combine Ingredients
- Gather Your Materials: To start, ensure you have everything ready. You will need plaster of Paris, water, a mixing bowl, and a stirring utensil. Having all your materials organized will streamline the process and make it easier to follow.
- Measure Accurately: Accurate measurements are crucial when working with plaster of Paris. Typically, the ratio is about one part plaster to one half part water. Measure these ingredients carefully to ensure that your chalk will have the right consistency.
- Mix Thoroughly: Pour the measured plaster of Paris into the bowl. Then, gradually add the water while stirring consistently. Stir with a spoon or spatula until the mixture is smooth and free of lumps. This ensures that the plaster and water are evenly combined, resulting in a consistent texture for your chalk.
Add Color
- Choose Your Colors: If you want your chalk to be colorful, select food coloring in your preferred shades. You can opt for a few colors or multiple colors to create unique combinations.
- Add Food Coloring: After the plaster and water are combined, take your food coloring and add a few drops to the mixture. It’s best to start with a small amount to gauge the intensity of the color. If you want brighter shades, you can always add more.
- Mix for Even Distribution: Stir the mixture thoroughly after adding the food coloring to ensure the color is evenly distributed. Continue mixing until the desired shade is achieved, keeping in mind that the color may appear slightly different once the chalk dries.
Pour into Molds
- Select Your Molds: Choose molds that suit your creative vision. Silicone molds are excellent for achieving fun shapes, while cardboard tubes or muffin tins can create traditional chalk sticks. Ensure the molds are clean and dry before use.
- Transfer the Mixture: Carefully pour the colored mixture into the selected molds, filling them to about three-quarters full. This allows enough space for the chalk to expand slightly as it sets.
- Smooth the Surface: If necessary, use a spatula or the back of a spoon to smooth the mixture’s surface in the molds. This step ensures that your final chalk product has a neat appearance and is easy to remove once cured.
Cure
- Setting Time: Once your molds are filled, let the chalk mixture set in a safe location where it won’t be disturbed. Allow it to cure for about 30 minutes, but the time may vary depending on the environment’s temperature and humidity.
- Check for Solidification: After the initial setting period, gently press the surface of the mixture to check if it has solidified. It should feel firm to the touch. If it still feels wet or soft, give it additional time to set.
Dry Completely
- Extended Curing Time: After the initial set, the chalk needs to cure fully. Allow it to remain in the molds for several hours—ideally, let it cure overnight. This extended drying time ensures that the moisture evaporates completely, resulting in durable chalk.
- Remove from Molds: After the chalk has cured completely, gently flex or twist the molds to release the chalk. If using cardboard molds, you may need to tear away the cardboard carefully.
- Store Properly: Once removed, place the chalk in a dry area to prevent moisture absorption. Proper storage will help prolong its lifespan and ensure it remains usable for a more extended period.
Creative Uses for Homemade Chalk
Once you’ve mastered how to make chalk, the possibilities for creative projects can be endless! Here are some exciting ways to use your homemade chalk:
Art Projects:
- Chalk Drawing: Use chalk to create colorful drawings on various surfaces such as sidewalks, chalkboards, or other areas that allow for creative expression.
- Community Engagement: Consider organizing a neighborhood chalk art competition. This event can bring community members together, encourage artistic expression, and foster a sense of camaraderie. Participants can showcase their skills, and there could even be small prizes for the most creative or unique artworks.
Teaching Aids:
- Educational Activities: Parents and teachers can utilize homemade chalk as a versatile teaching tool.
- Outdoor Learning: Encourage children to engage in educational activities outside—using chalk to practice writing letters, solving math problems, or even creating illustrations that reinforce learning.
- Interactive Learning: This hands-on approach allows kids to learn in a fun and dynamic environment, making the educational experience more enjoyable and memorable.
Crafting:
- Custom Chalk Labels: Create personalized chalk labels for jars, containers, or any other storage items around your home.
- Creative Repurposing: Reuse old containers by adding your unique chalk designs, enhancing both functionality and aesthetics.
- Home Decor Touch: These custom labels not only organize your space but also contribute a unique and personal touch to your home decor.
Games and Activities:
- Outdoor Games: Use chalk to set up fun outdoor games such as hopscotch, mazes, or other creative markings.
- Easy Setup: These games can be easily drawn in your yard or at a local park, providing hours of entertainment for children and adults alike.
- Social Interaction: Engaging in chalk-drawn games promotes physical activity and social interaction among children, enhancing their playtime experience.
Seasonal Designs:
- Thematic Creativity: Embrace the changing seasons by getting creative with seasonal themes using chalk.
- Festive Decorations: Design and draw festive decorations for various holidays like Halloween, Christmas, or Easter.
- Community Spirit: Encourage others to join in on the fun by sharing your seasonal chalk art, which can brighten up your neighborhood and spread holiday cheer.
FAQs About Making Chalk
How do I make my own chalk?
Making your own chalk involves combining ingredients like calcium carbonate or plaster of Paris with water. Pour the mixture into molds and let it dry for a couple of days.
What are the ingredients of chalk?
Traditional chalk is mainly composed of calcium carbonate. For homemade chalk, additional ingredients like water, flour, and optional food coloring can be used.
How to make chalk with two ingredients?
To make chalk with just two ingredients, mix plaster of Paris with water, pour it into molds, and allow it to set until hard.
How to make school chalk?
School chalk is often made using calcium carbonate or gypsum. You can follow a basic recipe similar to the traditional chalk recipe listed above but ensure to use appropriate molds.
Conclusion
In conclusion, learning how to make chalk at home is an enriching experience that can spark creativity and fun. By using simple ingredients and following easy recipes, you can create unique pieces of chalk for various projects or educational purposes. Whether it’s drawing on sidewalks or crafting with friends, homemade chalk is not only practical; it also brings joy and imagination into your activities. So gather your materials, get creative, and start making your own chalk today! There’s nothing quite like the satisfaction of creating something with your own hands, and the sky is the limit with what you can do with your homemade chalk.
