Modeling clay is a versatile material widely used in various crafting and art projects. Whether you are a hobbyist, an artist, or simply crafting with kids, knowing how to harden modeling clay effectively is crucial for maintaining the durability and integrity of your creations. This comprehensive guide will walk you through the essential techniques, tips, and methods on how to harden modeling clay properly, ensuring perfect results every time.
Understanding Modeling Clay: A Quick Overview
Before diving into the specifics of hardening modeling clay, it’s essential to understand the different types of modeling clay available. The two primary forms of modeling clay are air-dry clay and polymer clay. Each type has unique properties and requires different techniques for hardening.
- Air-Dry Clay: This type of clay hardens naturally when exposed to air, making it convenient for projects that do not require baking. The drying time depends on the thickness of the clay and environmental conditions such as humidity and temperature.
- Polymer Clay: Polymer clay is a synthetic material that remains soft and pliable until it is baked in an oven. This clay allows for greater detail and intricate designs but requires precise baking to achieve optimal results.
Why Hardening Your Modeling Clay Is Important
Hardening modeling clay serves several purposes, particularly related to long-term durability and functionality of your creations:
- Durability: Hardening prevents your clay projects from breaking or deforming during handling or use. Properly hardened clay can withstand regular wear and tear.
- Finish Quality: When clay is correctly hardened, it maintains its shape and surface texture, allowing for better finishing options such as painting or sealing.
- Longevity: Hardening extends the lifespan of your artworks or crafts, preventing them from deteriorating over time.
By understanding the importance of hardening, you can appreciate the necessity of mastering this technique.
How to Harden Modeling Clay: Techniques to Consider
How to harden modeling clay? Now that you know the basics let’s explore effective methods to harden modeling clay, ensuring that you achieve great results each time.
Air-Dry Clay: Steps for Hardening
Hardening air-dry clay is a straightforward process:
- Shape Your Project: Begin by molding and shaping your clay into the desired form. Focus on details, as this will enhance the final appearance of your piece.
- Select the Right Environment: For the best results, select an area that is well-ventilated. Avoid direct sunlight, as this can cause cracking. Place your clay on a non-stick surface to prevent it from sticking during drying.
- Allow to Air Dry: Let your clay piece sit undisturbed in the open air. The drying time will vary based on thickness; most pieces will take between 24 hours to several days to fully harden.
- Check for Hardness: After the appropriate drying time, gently press the surface of your creation. It should feel solid and should not indent easily. If it remains soft, allow more drying time.
- Finishing Touches: Once the clay is completely dry, you can paint or seal it as desired. Sealers can protect the surface and enhance the longevity of your piece.
Polymer Clay: Baking for Hardening
Baking polymer clay is crucial to achieving the right hardness and durability:
- Create Your Design: Shape your polymer clay into the desired form. Polymer clay provides ample flexibility to mold intricate designs, so take your time during this step.
- Choose the Right Temperature: Preheat your oven to the temperature recommended on the packaging, typically between 265°F to 275°F (130°C to 135°C). Never use a microwave to harden polymer clay.
- Prepare for Baking: Place your creations on a ceramic tile or a baking sheet lined with parchment paper. This choice of surface helps prevent sticking while allowing for even heat distribution.
- Bake Your Clay: Insert the baking sheet into the preheated oven. Follow the recommended baking time, which is usually around 15 minutes for every quarter inch of thickness. Keep a close watch to avoid overheating, as this can cause discoloration or burning.
- Cooling Down: Remove the baking sheet from the oven and allow it to cool completely. Polymer clay becomes more durable as it cools, creating a solid finish for your projects.
Troubleshooting Common Hardening Issues
While the above methods work effectively, you may encounter challenges when hardening your modeling clay. Here are some common issues and solutions:
- Cracking During Drying: If your air-dry clay cracks, it may have dried too quickly due to heat or low humidity. To prevent this, ensure adequate ventilation and try covering your piece loosely with a damp cloth as it dries.
- Bending or Softness After Baking: If your polymer clay feels soft or bends after baking, it may not have been baked long enough, or the temperature might have been too low. Check the oven calibration, and consider extending the baking time.
- Inconsistent Hardness: If some parts of your project feel harder than others, it may be due to uneven thickness. Make sure your mold is uniform in thickness, and rotate the item while baking for an even finish.
- Sticking to Surfaces: If your air-dry clay sticks to surfaces, consider using a release agent, such as cornstarch or cooking oil, to prevent adhesion during the drying process.
Techniques to Firm Up Modeling Clay
Sometimes, you may need to firm up modeling clay before or during the crafting process. Here are effective techniques to achieve the desired firmness:
Kneading
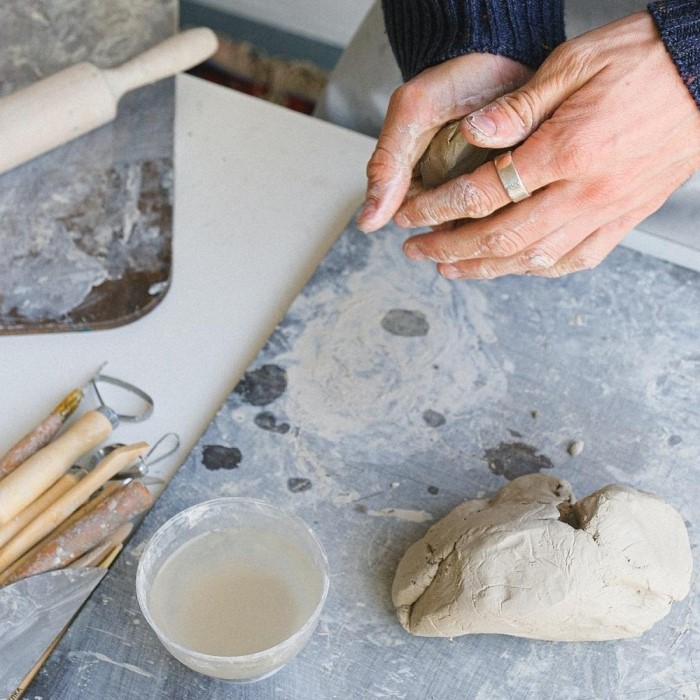
- Purpose of Kneading: Kneading your modeling clay is an essential step in the preparation process. This action is designed to incorporate air into the clay, which helps to enhance its texture and pliability.
- How to Knead: To knead the clay, use the palms of your hands to press and fold the clay repeatedly. You can also roll it into a ball and then flatten it before folding it again. This motion encourages even distribution of moisture and helps to break up any clumps that may have formed.
- Achieving the Right Texture: Continue kneading until the clay feels less sticky and more manageable. As you work, you should notice that it becomes smoother and easier to shape. This not only improves the handling of the clay but also enhances the final outcome of your project.
Adding Cornstarch
- Identifying the Issue: If you find that your modeling clay is overly soft or sticky, it may require firming up. This often happens if the clay has absorbed too much moisture or if it has been handled excessively.
- Introducing Cornstarch: To rectify the consistency, gradually introduce small amounts of cornstarch into the clay. Start with about a teaspoon and mix it in thoroughly, ensuring that it distributes evenly throughout the material.
- Monitoring Consistency: After mixing in the cornstarch, assess the consistency of the clay. Your goal is to reach a workable firmness that allows for shaping without stickiness. However, be cautious about adding too much cornstarch, as excess can lead to a dry or crumbly texture which may not hold together well.
Drying Environment
- Preparing for Drying: When working with air-dry clay, the drying environment can significantly affect the final result. To ensure your creations dry properly and uniformly, consider the conditions in which you place them.
- Optimal Conditions: Aim to place your clay creations in a slightly drier environment. This will help increase the rate of evaporation, resulting in faster drying times. A well-ventilated area is preferable.
- Using a Fan: Utilize a fan to enhance air circulation around your clay pieces. This can help distribute air more evenly and speed up the drying process without the risk of overheating or uneven drying.
- Avoiding Direct Heat: While you want good airflow, it’s essential to avoid placing your creations near direct heat sources, such as radiators or heaters. High temperatures can cause the clay to dry too quickly, leading to cracks and unsightly defects.
Controlled Temperature
- Understanding Softening in Polymer Clay: If you are working with polymer clay and it begins to feel too soft or pliable during handling, it can become challenging to shape. To address this issue, consider temperature control as a remedial measure.
- Refrigeration Method: Place the soft polymer clay in the refrigerator for a short period. Cooling the clay will help firm it up temporarily, making it easier to work with before you proceed to the baking stage.
- Adjusting Handling: Once the clay has been sufficiently cooled, remove it from the refrigerator and handle it gently. This will prevent it from becoming overly soft again, allowing you to complete your project successfully and prepare the clay for baking.
- Timing the Chill: It is important not to leave the polymer clay in the refrigerator for too long. A short 10 to 15-minute cooling period is often enough to achieve the desired firmness without losing workability.
FAQ: Answers to Common Questions
To further assist you, here are answers to frequently asked questions about hardening modeling clay:
How do you harden modeling clay?
Modeling clay can be hardened through air drying or baking, depending on the type used. Air-dry clay hardens naturally in the air, while polymer clay hardens when baked in an oven.
How to firm up modeling clay?
To firm up modeling clay, knead it well, add cornstarch, and ensure it’s stored in a controlled environment with adequate humidity.
Does modeling clay harden when heated?
Yes, polymer clay hardens when heated in an oven. Following the correct temperature and baking times is essential for achieving the desired results.
How can you harden modeling clay without an oven?
You can harden polymer clay without an oven by using alternative methods such as a slow cooker, hot water bath, or heating gun. For air-dry clay, it naturally hardens over time when exposed to air.
Conclusion: Perfect Your Craft with Hardened Modeling Clay
In conclusion, learning how to harden modeling clay is an essential skill for crafters and artists alike. Whether utilizing air-dry clay for quick projects or polymer clay for more detailed works, each technique can lead to impressive and durable results.
By following the steps outlined in this guide, you’ll be equipped to create, harden, and finish your creations effectively. Take your time during the shaping and hardening stages. Rushing these processes can lead to unsatisfactory results.
As you continue your journey in crafting with modeling clay, don’t hesitate to experiment and refine your techniques. Embrace creativity and enjoy the satisfying process of working with this versatile medium. Happy crafting and may your future projects turn out perfectly every time!
