Introduction to the Bunsen Burner
The Bunsen burner is a crucial tool in scientific laboratories. It provides a safe and controllable flame for heating, sterilization, and combustion. Understanding its history, invention, and components helps maximize its utility and ensures safe operation of bunsen burner flame.
Overview of Its History and Inventors
The Bunsen burner was invented by Robert Bunsen in 1855. He worked with Peter Desaga, a skilled laboratory technician, at the University of Heidelberg. They aimed to create a better heat source for laboratory work. Their design improved combustion efficiency and reduced emissions. The Bunsen burner became an essential tool in laboratories worldwide. Its simple and efficient design remains largely unchanged.
Key Components and Design Features
The Bunsen burner consists of several vital components:
- Base: Ensures stability and supports the burner.
- Gas Inlet: Connects the burner to the gas supply for fuel.
- Barrel: A vertical tube where gas and air mix.
- Air Hole: Allows adjustment of air supply for precise combustion.
- Collar: Rotatable part controlling the size of the air hole.
- Nozzle: Regulates the flow of gas into the burner.
These components work together to produce a steady and adjustable flame. Proper understanding of these parts ensures safe and efficient use of the Bunsen burner.
Setting Up the Bunsen Burner
Setting up a Bunsen burner correctly is essential for safe and effective operation. Follow these steps to ensure proper placement and connection.
Proper Placement and Safety Precautions
Choose a Stable Surface:
Select a sturdy, flat surface that can withstand high temperatures to place the Bunsen burner.
Ensure that the setup is away from the edge of the table or counter to minimize the risk of accidental tipping or falling.
It may be beneficial to use a heat-resistant mat beneath the burner for additional protection.
Keep Flammable Items Away:
Conduct a thorough inspection of the surrounding area to remove any flammable materials, such as paper, cloth, or chemicals.
Store chemicals in their designated, secure locations to avoid accidental spills or contact with the flame.
Inform everyone in the vicinity about the importance of maintaining a clear area around the burner.
Inspect the Burner:
Before use, carefully examine the Bunsen burner for any signs of wear and tear, such as cracks or leaks in the gas line.
Check the air holes and other components to ensure they are clean and free from blockages that could affect performance.
Always perform a test igniting the burner in a safe manner to confirm that it is functioning properly.
Ventilation:
Set up the Bunsen burner in a location that has adequate airflow to diminish any risk of hazardous gas accumulation.
Open windows or use a fume hood if available to promote better air circulation during the experiment.
Regularly monitor the area for any unusual smells or signs of gas buildup, and be prepared to extinguish the burner if necessary.
Wear Protective Gear:
Don appropriate personal protective equipment (PPE), including safety goggles to shield your eyes from flames and splashes.
Use heat-resistant gloves to protect your hands while handling hot equipment or substances around the burner.
Consider wearing a lab coat or apron to shield your clothing and skin from heat and chemical exposure.
Positioning:
Ensure that the gas hose connecting the burner to the gas source is properly secured and positioned to avoid kinks or twists that can cause gas leaks.
Keep the gas hose away from the flame to prevent it from melting or catching fire, and check for any signs of damage before beginning your work.
Position the burner to face away from yourself and others to minimize risks and improve safety during operation.
Following these precautions reduces risks and ensures safe operation.
Connecting to Gas Supply Systems
- Check the Gas Source: Verify that the gas supply is functioning and compatible with the burner.
- Attach the Hose Securely: Connect the gas inlet to the gas supply using a secure and undamaged rubber hose.
- Test for Leaks: Before igniting the burner, confirm there are no leaks by applying soapy water to the connections.
- Adjust the Air Hole: Set the air hole to a partially closed position for a controlled start.
- Turn on the Gas Valve: Slowly turn on the gas valve on the supply system while keeping the burner off.
- Ignite the Burner: Use a spark lighter held at arm’s length to safely ignite the gas.
Proper connection ensures consistent gas flow and reduces the risk of accidents. Double-check each step for safety.
Types of Flames in a Bunsen Burner
The Bunsen burner produces different flames depending on the air supply and gas mix. Proper adjustment is important to achieve the desired flame for specific tasks.
Differences Between Luminous and Non-Luminous Flames
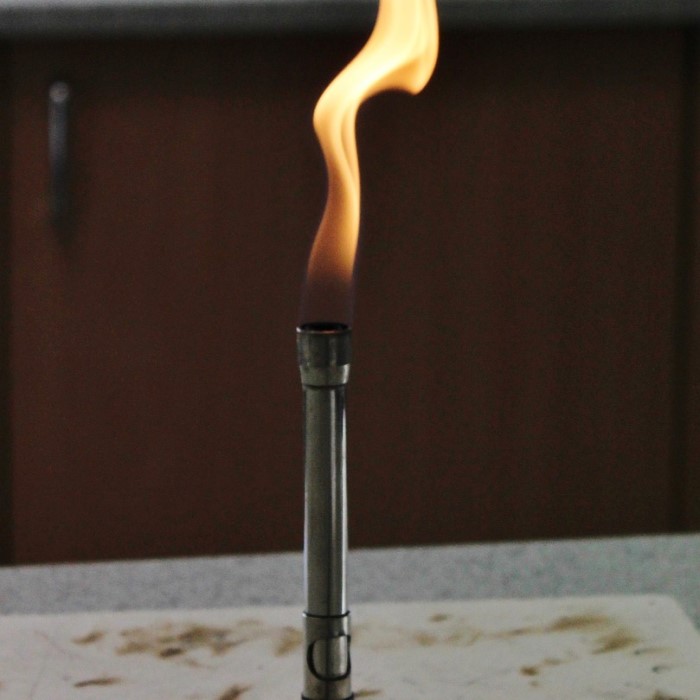
- Luminous Flame:
- Yellow and bright.
- Produced when the air hole is mostly closed.
- Indicates incomplete combustion of gas.
- Emits less heat and often results in soot.
- Suitable for simple heating tasks that don’t need high temperatures.
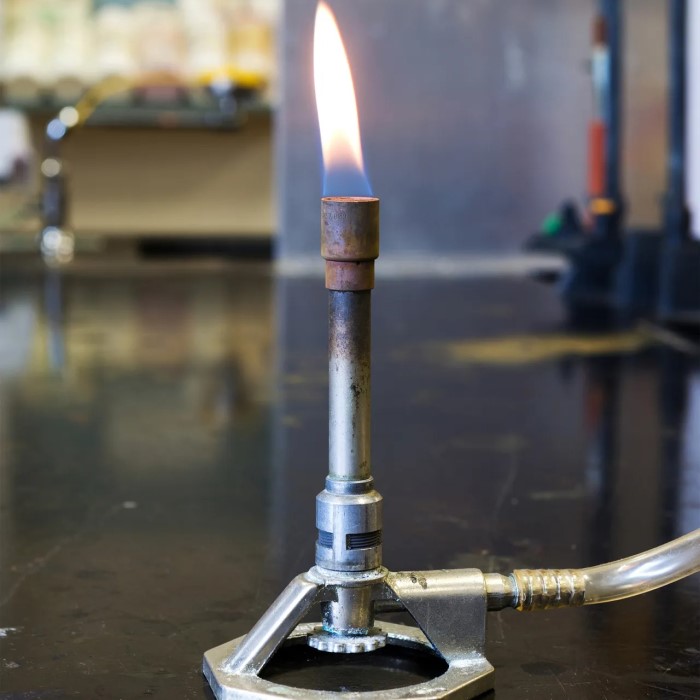
- Non-Luminous Flame:
- Blue and steady.
- Formed when the air hole is open to allow more air.
- Represents complete combustion of gas, making it more efficient.
- Produces intense heat and no soot.
- Ideal for laboratory experiments and tasks requiring precision.
Understanding the differences ensures proper application of each flame type based on needs.
Achieving Optimal Flame Colors and Temperatures
- Open the Air Hole Gradually: Adjust the collar to regulate air supply.
- Observe the Flame: A blue cone signifies complete combustion and optimal heat.
- Maintain Stable Gas Flow: Avoid sudden changes in gas pressure while adjusting.
- Avoid Yellow Flame for Precision Tasks: The yellow flame is unstable and cooler.
- Check Safety Before Adjustment: Ensure surroundings are safe and flame is stable.
The right adjustment leads to optimal temperature and color for effective use. Mastering this allows safe and efficient operation of the Bunsen burner flame.
Adjusting the Bunsen Burner Flame
Proper flame adjustment ensures safe operation and achieves the desired temperature for tasks. The Bunsen burner allows easy manipulation of the flame using its air hole and other features.
Using the Air Hole for Controlled Combustion
- Understanding Air Flow: The air hole controls how much air mixes with the gas.
- Open or Close Gradually: Turn the collar to adjust the size of the air hole.
- Determine Combustion Type:
- Closed Air Hole: Produces a luminous, yellow, cooler flame (incomplete combustion).
- Open Air Hole: Produces a non-luminous, blue, hotter flame (complete combustion).
- Monitor Flame Stability: Observe flame size and color while adjusting to maintain control.
- Optimize for Task Needs: Use the blue flame for precision; use yellow for simpler heating.
Proper air hole adjustment balances safety and performance for different applications.
Practical Techniques for Flame Adjustment
- Start With a Partially Closed Air Hole: This ensures a safe ignition.
- Use a Spark Lighter for Ignition: Light the burner quickly and safely.
- Adjust After Ignition: Gradually open the air hole to increase flame heat.
- Check for Blue Inner Cone: A small blue cone signifies an ideal flame.
- Avoid Sudden Changes: Make small, steady adjustments to prevent unstable flames.
- Recheck Flame Position: Ensure it doesn’t flicker or spread erratically.
- Adapt as Needed for Specific Experiments: Tailor flame characteristics based on the requirements of your task.
Mastering these techniques ensures precise and efficient flame control. It also maximizes safety in laboratory environments.
Applications of the Bunsen Burner
The Bunsen burner is a versatile tool with wide-ranging applications in science and industry. Its controlled flame and efficiency make it indispensable in many settings.
Laboratory Experiments and Analytical Uses
Chemical Reactions:
The Bunsen burner plays a vital role in various chemical experiments by providing a reliable and adjustable heat source. It enables researchers and students to heat a wide range of substances, facilitating reactions that require specific temperature conditions. Its ability to produce a consistent flame makes it an indispensable tool in the laboratory.
Sterilization:
The intense non-luminous flame produced by the Bunsen burner is effective in sterilizing laboratory tools and glassware. By exposing instruments such as scalpels, forceps, and petri dishes to the flame, any potential contaminants, including microorganisms, can be eradicated. This sterilization process is crucial for ensuring the accuracy and reliability of experimental results, especially in microbiology and medical research.
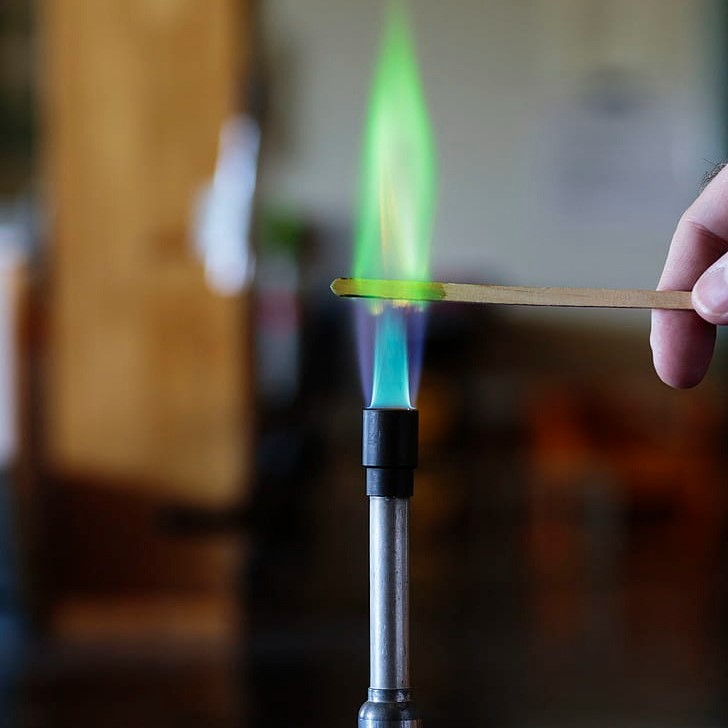
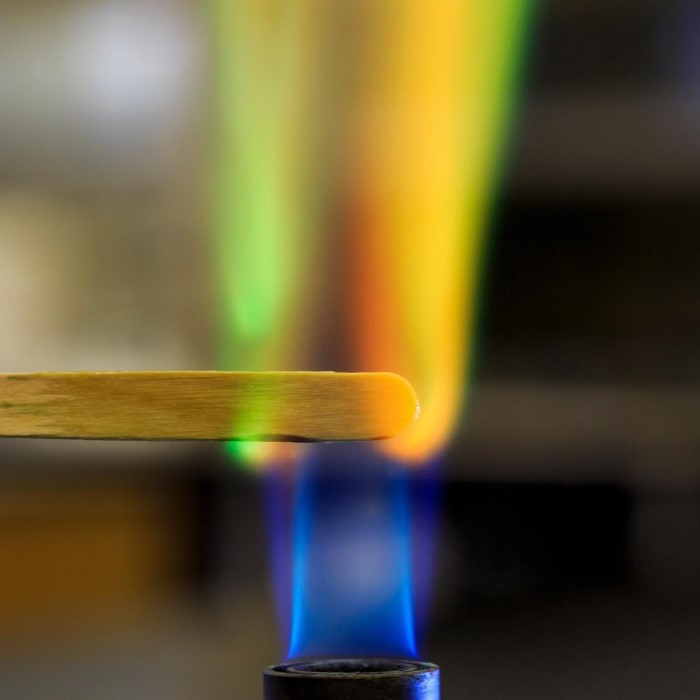
Flame Tests:
Bunsen burners are essential for performing flame tests, a simple and effective method for identifying the presence of certain metal ions in a sample. By heating the substance in the flame, the characteristic color emitted—such as sodium producing a bright yellow or copper producing a green—allows chemists to deduce which elements are present based on their unique flame coloration.
Distillation Processes:
The steady and controllable heat provided by a Bunsen burner makes it an ideal choice for distillation procedures. In distillation, mixtures are separated based on their different boiling points, allowing for the purification of liquids. The Bunsen burner can be used to gradually heat the mixture, ensuring that components can vaporize and condense at precise temperatures, which is crucial for the successful separation of complex mixtures.
Crystallization and Evaporation:
In addition to heating for chemical reactions, the Bunsen burner is valuable in the processes of crystallization and evaporation. By applying controlled heat, it aids in gradually evaporating solvents from solutions, promoting the formation of crystals. This careful management of temperature helps ensure that the crystals grow properly and that the final product maintains high purity, making it an important tool in both educational and research settings.
These uses highlight how essential the Bunsen burner is in research and analysis.
Industrial and Educational Applications
- Industrial Uses: Many factories utilize Bunsen burners for processes requiring controlled heat, like soldering.
- Educational Labs: Schools use them to teach students basic experimental skills.
- Field Studies: Portable versions assist researchers in outdoor chemical analyses and sterilization tasks.
- Small-Scale Manufacturing: It supports processes like glassblowing and prototype material testing.
- Demonstrational Purposes: Bunsen burners are central to explaining combustion and heat transfer in science classes.
Their adaptability to meet different heating needs ensures their continued relevance in various fields.
Common Problems and Troubleshooting
Understanding common issues is key to the safe use of a Bunsen burner. Troubleshooting ensures efficient operation and prevents accidents.
Irregular Flame Patterns and Possible Causes
- Yellow Flame Despite Open Air Hole:
- Cause: Blocked air hole.
- Solution: Inspect and clean the air hole for debris or dirt.
- Flickering Flame:
- Cause: Unstable gas flow or drafty environment.
- Solution: Check gas leakages and move burner away from strong airflow.
- Weak Flame:
- Cause: Low gas pressure or restricted fuel supply.
- Solution: Confirm proper connection and increase gas supply.
- Flame Extinguishing Suddenly:
- Cause: Excessive air or insufficient gas.
- Solution: Adjust air hole and gas valve slowly.
- Noise During Operation:
- Cause: Incorrect gas-to-air ratio.
- Solution: Rebalance the air flow and reduce gas pressure.
Addressing these problems prevents interrupted experiments and ensures consistent flame quality.
Safety Measures for Malfunctions and Emergencies
- Turn Off Gas Immediately:
- In case of flame irregularities or sudden extinguishing.
- Use Protective Gear:
- Wear goggles and gloves to handle sudden issues.
- Have Fire Extinguishing Equipment Nearby:
- Keep fire extinguishers easily accessible in case of emergencies.
- Inspect Prior to Use:
- Always check hoses, valves, and the burner for damage.
- Ventilate the Area:
- Ensure proper airflow to avoid gas buildup.
- Report Unsafe Conditions:
- Inform authorities if you identify persistent issues or gas supply problems.
By actively applying these measures, labs can minimize risks and ensure safer operations.
Tips for Efficient and Safe Usage
Proper usage of a Bunsen burner ensures safety and maximizes efficiency. Regular maintenance and adherence to best practices are essential for avoiding accidents during operation.
Maintenance and Cleaning Guidelines
- Inspect Before Use: Check the burner, hoses, and connections for wear, damage, or debris.
- Clean the Air Hole and Barrel: Remove dust or blockages to maintain proper airflow and combustion.
- Maintain Gas Hose Integrity: Replace worn or cracked hoses immediately to prevent leaks.
- Lubricate Moving Parts: Ensure the collar and other adjustable components move smoothly.
- Store Safely: Keep the burner in a dry, clean area away from flammable materials.
- Schedule Regular Checks: Perform thorough inspections at regular intervals to ensure reliable operation.
Proper maintenance keeps the burner functional and reduces the risk of issues during use.
Best Practices to Avoid Accidents
- Wear Protective Gear: Always use safety goggles and gloves while working with the burner.
- Work in Ventilated Areas: Ensure proper airflow to prevent gas buildup and toxic gases.
- Follow Setup Instructions: Place the burner on a stable, heat-resistant surface away from flammable items.
- Check for Leaks: Use soapy water to test for gas leaks before igniting the burner.
- Ignite Safely: Use a spark lighter at arm’s length to reduce risk of injury.
- Control the Air Hole Gradually: Avoid sudden adjustments to maintain a stable flame.
- Gas Valve Management: Turn off the gas supply immediately after use to prevent accidents.
- Keep Extinguishing Equipment Nearby: Always have a fire extinguisher in the workspace for emergencies.
By following these best practices, labs can minimize hazards and ensure safe operation of the Bunsen burner.
Conclusion: Enhancing Your Chemistry Skills
Mastering the Bunsen burner flame is an essential skill for all chemistry students. With the right techniques and safety precautions, students can make the most of their lab experience. Effective flame control and proper equipment handling enhance both safety and experimental results. Always prioritize safety when working with Bunsen burners. By applying these lessons, you will develop a strong foundation in laboratory skills that will benefit you throughout your chemistry education. Embrace the Bunsen burner flame and let it guide you in your scientific journey!