The Spiritual Significance of a Handmade Rosary
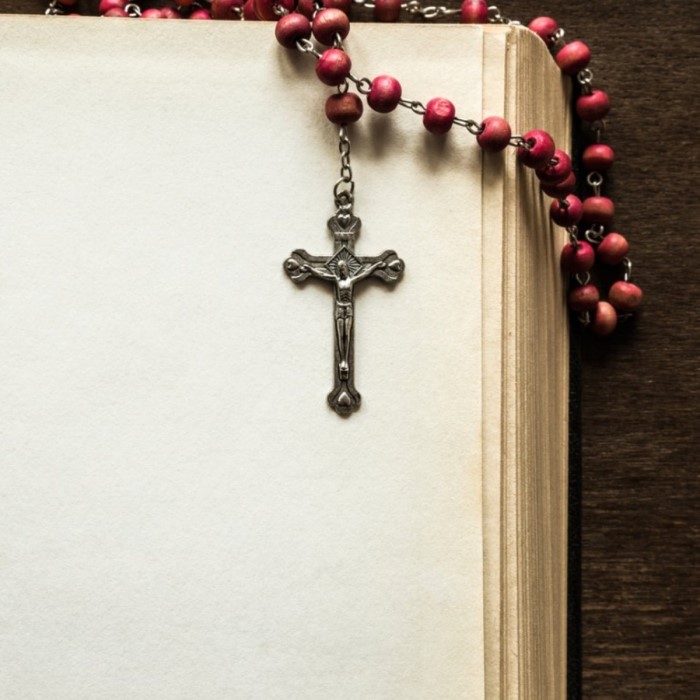
A rosary is much more than a collection of beads and a chain. It serves as a powerful weapon against evil and a path to peace. When you decide to make one, you engage in a form of prayer itself. Consequently, the act of creation becomes a meditation. Many people find peace in the repetitive motions of looping wire. It allows the mind to settle. Furthermore, a handmade rosary carries the love of the maker. This is especially true when crafted as a gift. You impart your blessings into every loop.
The recipient often feels this spiritual connection. Historically, rosaries were made from various materials. Early Christians used stones or knotted ropes. Today, we have a variety of options. However, the core purpose remains unchanged. It aids in counting prayers. Specifically, it helps meditate on the life of Christ and Mary. Therefore, understanding this purpose is crucial before starting. You are not just assembling parts. You are building a tool for salvation. This mindset elevates the work. It turns a simple craft project into a ministry. Many saints have promoted the rosary. They understood its power. How to make a rosary? By making one, you join a long line of faithful artisans. Thus, approach this task with reverence. Your intention matters as much as your technique. Keep your heart open to the graces that flow through this work.
Essential Materials and Tools Needed
How to make a rosary? To begin your project, you must gather the correct supplies. Quality materials ensure your rosary lasts for years. First, you need rosary beads. These come in various materials like glass, wood, or stone. Beginners often prefer glass or plastic beads for affordability. However, semi-precious stones offer a weightier, premium feel. Next, you need rosary wire. This wire is usually silver-plated or gold-plated. It must be strong enough to hold its shape. Additionally, you need a crucifix. This is the centerpiece of the prayer tool. It comes in many styles, from simple to ornate. You also need a centerpiece medal. This typically features an image of Mary or a saint.
It connects the loop of beads to the crucifix. Beyond the main components, you require specific tools. Chain-nose pliers are essential. They help you bend and close the wire. Round-nose pliers are necessary for creating loops. Furthermore, you need wire cutters. These snip the excess wire cleanly. Some people use a rosary-making jig. This tool helps make uniform loops easily. While not strictly necessary, it speeds up the process. Finally, have a ruler or measuring tape on hand. Precision matters in this craft. You want your rosary to hang correctly. Therefore, prepare your workspace with these items. Good lighting is also important. It reduces eye strain. Consequently, you can focus better on the details.
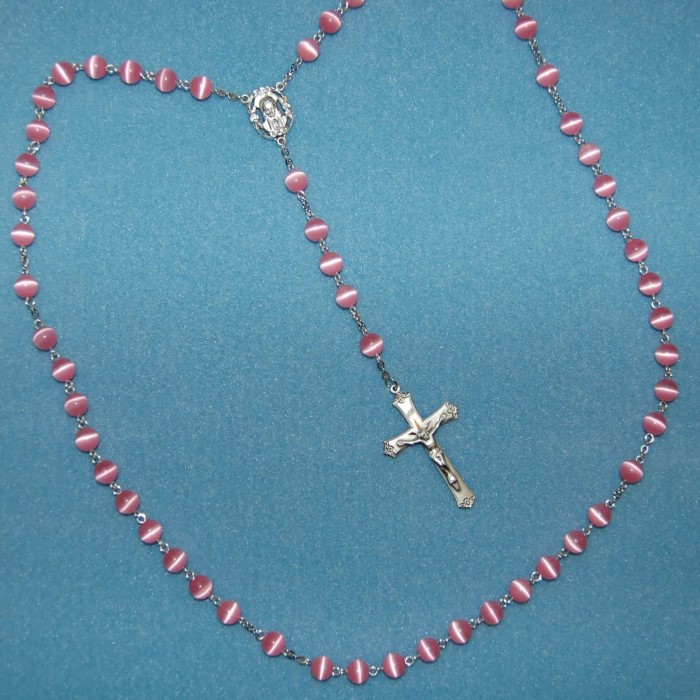
Understanding the Anatomy of a Traditional Rosary
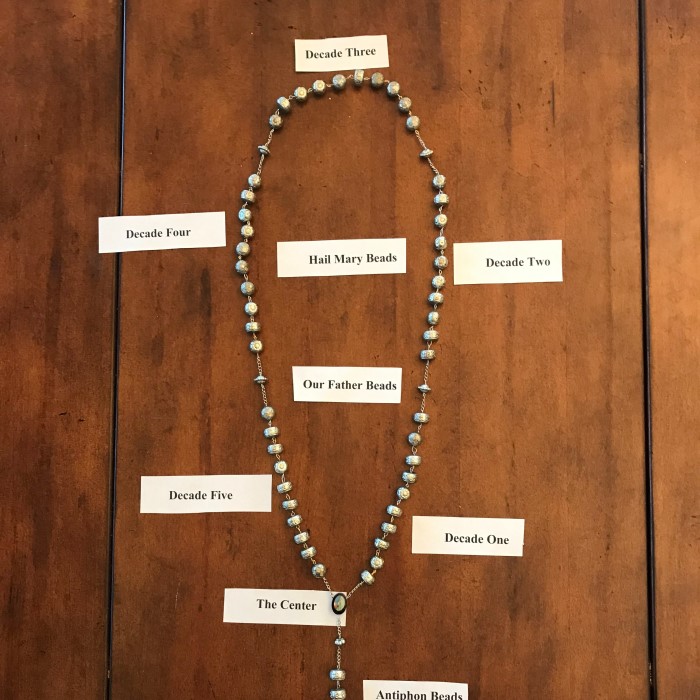
Before construction, you must understand the structure. A traditional Dominican rosary has a specific design. It consists of five decades. Each decade is a group of ten beads. These beads are called “Hail Mary” beads. Separating each decade is a single bead. This is the “Our Father” bead. In total, there are fifty Hail Mary beads. There are also four Our Father beads in the loop. Additionally, the rosary has a pendant or “tail.” This section hangs down from the centerpiece. It leads to the crucifix.
On this tail, you usually find one Our Father bead and three Hail Mary beads. Sometimes, there are additional medals. However, the standard structure remains consistent. The loop represents the continuous cycle of prayer. The pendant guides the user into the prayer. Furthermore, the beads vary in size. Our Father beads are often larger. This distinction helps the user feel the transition during prayer. They do not need to look at the rosary. Consequently, they can close their eyes and focus on God. You must follow this pattern accurately. If you miss a bead, the rhythm of the prayer is broken. Therefore, counting your beads before starting is wise. This knowledge guides your assembly process. It ensures the final product functions correctly for its intended purpose.
Step-by-Step Wire-Wrapping Technique
How to make a rosary? The most common method for making rosaries is wire wrapping. This technique creates a secure and durable connection. First, take a piece of wire. It should be about two inches long. Place a bead onto the wire. Slide it down to the center. Then, take your chain-nose pliers. Grip the wire just above the bead. Bend the wire at a 90-degree angle. Next, switch to your round-nose pliers. Place them in the bend. Wrap the wire over the top jaw of the pliers. This creates a loop. You must make the loop large enough to connect to other parts. After forming the loop, wrap the excess wire around the stem. This is the “wrapped” part of the technique.
It locks the bead in place. Use your pliers to tuck the end of the wire in. This prevents sharp edges. Consequently, the rosary feels smooth to the touch. Repeat this process for every bead. It takes time to master. Do not get discouraged if your first loops are imperfect. Consistency comes with practice. However, ensure each wrap is tight. A loose wrap causes the rosary to rattle. A tight wrap ensures stability. This technique creates the links between beads. Thus, you build a chain of prayer, one bead at a time.
Assembling the Main Loop and Decades
How to make a rosary? Once your beads are wrapped, you begin the assembly. You will create the main loop of five decades. Start with the first Our Father bead. Connect one loop of the Our Father bead to the next. Then, attach the first Hail Mary bead. Continue connecting ten Hail Mary beads in a row. This forms your first decade. After the tenth bead, you must connect another Our Father bead. This pattern repeats five times. You must ensure the flow is correct. The beads should hang neatly without twisting. Consequently, check your connections frequently.
Sometimes, beads flip over. If this happens, simply open the loop slightly and adjust. To open a loop, use your chain-nose pliers. Twist it open sideways, like a jump ring. Do not pull it apart outwards. This weakens the wire. After adjusting, twist it closed again. As you link the beads, the rosary starts to take shape. It becomes a flexible chain. You will notice the weight growing in your hands. This is a satisfying feeling. It signifies progress. Furthermore, pay attention to the spacing. The wraps should be snug against the beads. However, they should not be so tight that they crack the bead. Finding this balance is key. Continue this process until all five decades are linked. Then, you are ready for the centerpiece.
Connecting the Centerpiece and Crucifix
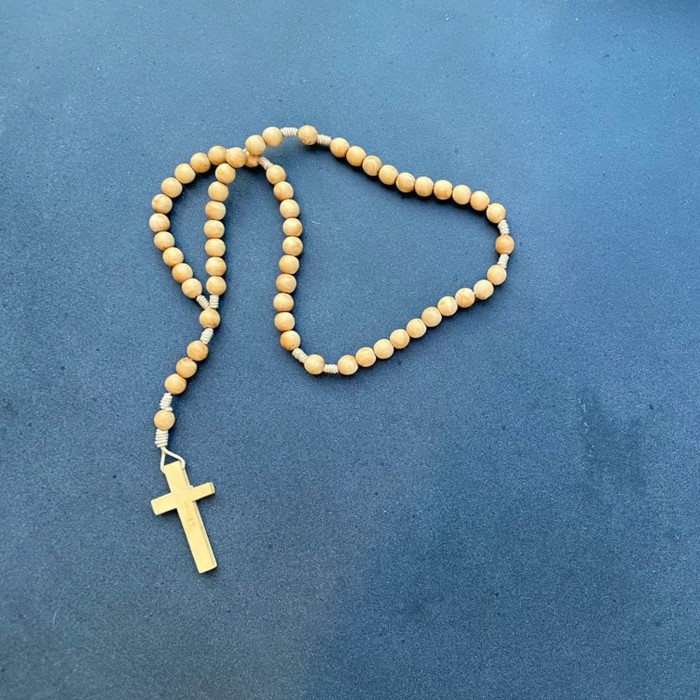
The final structural step involves the centerpiece and crucifix. First, take your centerpiece medal. It usually has three loops. One loop is at the top, and two are at the bottom. Open the loop of the last Our Father bead of the fifth decade. Attach it to one of the bottom loops of the centerpiece. Next, open the loop of the first Our Father bead. Attach it to the other bottom loop. Now, your loop is complete. The rosary forms a circle. Next, you work on the pendant or tail. Take three wrapped Hail Mary beads. Connect them in a chain.
Attach one end to the top loop of the centerpiece. Then, take one wrapped Our Father bead. Connect it to the end of the three Hail Mary beads. Finally, attach the crucifix. The crucifix usually has a loop at the top. Connect the Our Father bead to the crucifix. Your rosary is now structurally complete. However, you are not done yet. Inspect every connection. Look for gaps or sharp wires. Use your pliers to squeeze any loose wraps shut. This ensures safety and durability. The rosary should drape naturally in your hands. It should not feel stiff. Consequently, the user can move easily from bead to bead during prayer. This completes the physical construction of your sacred tool.
Finishing Touches and Quality Inspection
After assembly, you must perform a quality check. This step is vital for safety and longevity. Run your fingers along the entire length of the rosary. Feel for any sharp points. If you find one, use your pliers to press it down. A sharp wire can scratch the user. Therefore, ensure every wire end is tucked away. Next, check the strength of the loops. Give the rosary a gentle tug. The connections should hold firm. If a loop looks weak, redo it. It is better to fix it now than have it break later. Additionally, inspect the aesthetic appeal. Wipe the beads with a soft cloth. This removes fingerprints and dust. Sometimes, you might want to add a “Miraculous Medal.”
This is a common addition. It typically attaches to the connector between the Our Father bead and the crucifix. You can also apply a small amount of clear nail polish to the wire wraps. This adds an extra layer of security. However, this is optional. If you used plated wire, be gentle when polishing. Harsh chemicals can strip the plating. Finally, pray over your creation. This is the most important finishing touch. Dedicate the rosary to its future owner or purpose. This act sanctifies the object. It prepares the rosary for its holy use. Thus, your labor of love is complete.
Maintaining and Caring for Your Rosary
A handmade rosary is an heirloom piece. With proper care, it can last generations. Proper maintenance preserves its beauty and function. First, store the rosary in a safe place. A pouch or a small box works well. This prevents the wire from tarnishing quickly. It also protects the beads from scratches. Furthermore, avoid pulling the rosary too hard. Wire is strong, but it can bend. If a loop opens slightly, use pliers to close it gently. Regular inspection prevents major repairs. If the rosary gets dirty, clean it carefully. Use a soft, dry cloth for metal parts.
For glass or stone beads, a slightly damp cloth is fine. However, avoid water for wood or pearl beads. Water can damage these materials. Silver-plated wire may tarnish over time. This is a natural process. You can use a silver polishing cloth to restore the shine. Be careful not to polish the beads themselves. Additionally, rosaries are for prayer, not for teething. Keep them away from small children and pets. They contain small parts that pose a choking hazard. Therefore, supervision is necessary. Treat your rosary with respect. It is a sacred object. By caring for it, you honor the time you spent making it. You also respect the prayers said with it.
FAQ: Answering Your Top Questions
Can you make your own rosary?
Yes, absolutely. Anyone can make a rosary. It requires basic tools like pliers and wire. It also requires patience and practice. Many people find the process spiritually rewarding. There are many kits and tutorials available to help beginners.
Am I allowed to make a rosary?
Yes, you are allowed. You do not need special permission to craft a rosary for personal use. However, if you plan to sell them, you should ensure they are durable. Some people get their rosaries blessed by a priest after making them.
Why do rosaries have 59 beads?
A traditional rosary has 59 beads. This includes 53 Hail Mary beads and 6 Our Father beads. This structure corresponds to the prayers of the Rosary. The 53 Hail Marys represent the three sets of Mysteries. The Our Fathers separate the decades.
What are the 4 types of rosaries?
The term “rosary” often refers to the Dominican Rosary. However, other types exist. The Servite Rosary has seven sorrows. The Franciscan Rosary has seven decades. The Irish Rosary uses penal beads. These variations focus on different aspects of faith.
Conclusion
Crafting a rosary is a journey of faith and skill. We have explored the materials, the techniques, and the structure. You now understand the anatomy of this sacred tool. You have learned the wire-wrapping method. Furthermore, you know how to assemble the decades and attach the centerpiece. This process requires patience. However, the result is deeply satisfying. You hold in your hands a tool for grace. It is a bridge between the physical and the spiritual. Whether for yourself or a loved one, the value is immense. The time invested in learning how to make a rosary yields spiritual fruit. It connects you more deeply to your faith. Now, you possess the knowledge to begin. Go forth and create with love. Let your hands do the work of your heart. Your finished rosary will be a testament to your devotion.