Wood staining is a transformative process. It enhances the natural beauty of the grain. Furthermore, it provides essential protection against damage. Many DIY enthusiasts find the process intimidating. However, with the right knowledge, anyone can succeed. How to stain wood?This guide breaks down the steps. We cover everything from preparation to the final finish. You will learn about different wood types. Additionally, we discuss tool selection.
Proper technique is crucial for a smooth result. Therefore, we focus on application methods. We also highlight common mistakes to avoid. This ensures your project runs smoothly. Whether you are refinishing an old chair or building a new table, this article helps. We aim to build your confidence. You will achieve a professional-grade finish at home. The process involves several distinct stages. First, you must prepare the surface. Then, you select the appropriate product. Finally, you apply the finish with care. Each step builds upon the last. Consequently, attention to detail is vital. This resource is designed for learners of all levels. It simplifies complex concepts. Moreover, it provides actionable advice. By following these instructions, you will revitalize your wooden items. Your home will benefit from your new skills.
Understanding the Basics of Wood Staining
Wood staining is an essential skill for any DIY enthusiast. It changes the color of the wood. Additionally, it highlights the unique grain patterns. Many people mistakenly believe it is a simple painting process. However, the wood absorption rate varies significantly. Therefore, understanding the material is the first step. Softwoods like pine absorb stain quickly. Conversely, hardwoods like oak absorb it more slowly. This difference affects the final appearance. Consequently, you must adjust your technique accordingly. The primary goal is to enhance beauty.
You want the wood to look natural. Furthermore, you want to protect it from moisture and wear. Stain penetrates the wood fibers. It does not just sit on top like paint. This penetration ensures durability. It also prevents peeling over time. Learning how to stain wood correctly saves time and money. You avoid costly mistakes. You also create long-lasting pieces. The process requires patience. Rushing leads to uneven results. Therefore, approach the task with care. Consider the environment where the wood will reside. Outdoor projects require different stains than indoor ones. UV protection is vital for exterior items. Water resistance is also crucial. For interior items, focus on aesthetics. Low-odor options are preferable for indoor use. Always read the manufacturer’s label. It provides specific instructions for that product. This information is invaluable for success.
Essential Tools and Safety Gear
Preparation is the key to success. You need the right tools before you begin. First, gather your sanding supplies. You will need sandpaper in various grits. Start with a medium grit. Then, progress to a fine grit for smoothing. A sanding block or an orbital sander makes the job easier. Additionally, you need a tack cloth. This sticky cloth removes fine dust particles. Dust can ruin a smooth finish. Therefore, cleaning is non-negotiable. Next, consider your application tools. High-quality brushes are a good investment. Look for natural bristles for oil-based stains. Synthetic brushes work well for water-based products. Foam brushes are another option.
They provide a smooth application. However, they may not last as long. Rags are also necessary for wiping off excess stain. Use lint-free cloths to avoid residue. Safety is equally important. Stains contain chemicals that can be harmful. Consequently, you must protect yourself. Wear safety goggles to shield your eyes. Gloves protect your hands from irritation. A respirator mask is also advisable. It prevents the inhalation of fumes. Furthermore, ensure your workspace has good ventilation. Open windows and doors. This circulates fresh air. Knowing how to stain wood involves knowing how to stay safe. Never skip safety precautions. Accidents happen quickly. Preparation prevents them. Organize your tools before starting. This streamlines the workflow. You will not have to search for items later.
Surface Preparation and Sanding Techniques
The wood surface must be perfect before applying any product. Imperfections will show through the stain. Therefore, sanding is the most critical step. Start with coarse grit sandpaper. This removes old finishes and deep scratches. Move the sander in the direction of the grain. Never sand across the grain. This creates unsightly scratches. Subsequently, move to a medium grit. This smooths the surface further. Finally, use a fine grit sandpaper. This prepares the wood for staining. It creates a silky smooth texture. Wipe the wood with a tack cloth between sanding steps. This removes dust. Dust creates bumps in the finish.
Consequently, the surface must be spotless. Repair any dents or holes with wood filler. Apply the filler and let it dry. Then, sand the area flush with the surface. This ensures a seamless repair. Note that filled areas may absorb stain differently. They might appear lighter or darker. Therefore, test the stain on a hidden area first. Preparation also includes cleaning the wood. Use a wood cleaner if the wood is dirty. Let it dry completely. Moisture interferes with stain absorption. The wood must be bone dry. This is a fundamental rule in how to stain wood. Proper preparation guarantees an even tone. It opens the wood pores. The stain can then penetrate deeply. This results in a rich, vibrant color. Do not rush this stage. It dictates the quality of the final result.
Choosing the Right Stain for Your Project
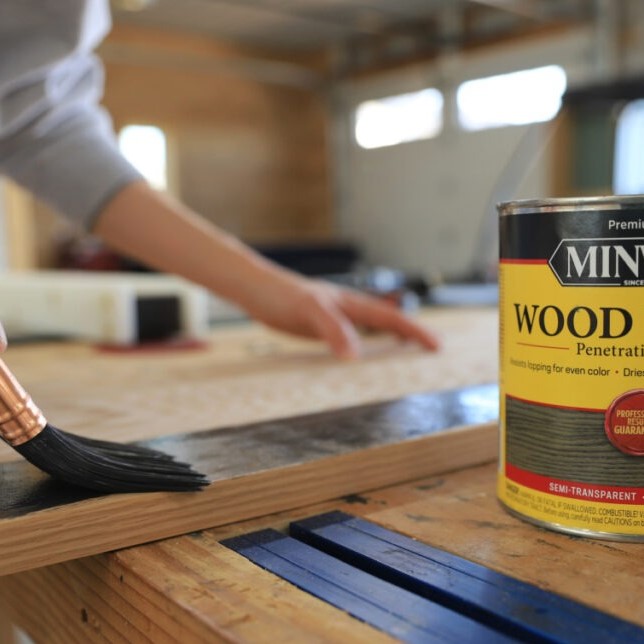
There are many types of stain available. Choosing the correct one is essential. Oil-based stains are very popular. They penetrate deeply and provide a rich color. Furthermore, they take longer to dry. This gives you more working time. It is ideal for large projects. However, they have a strong odor. They also require mineral spirits for cleanup. Water-based stains are another option. They dry very quickly. Additionally, they have a low odor.
Cleanup is easy with soap and water. However, the fast drying time can be a challenge. You must work quickly to avoid lap marks. Water-based stains can also raise the wood grain. You may need to sand lightly between coats. Gel stains are thicker. They sit on the surface more. This makes them good for vertical surfaces. They do not drip as easily. Gel stains are also great for non-porous woods. They provide a uniform color.
Consider the color intensity as well. Some stains are transparent. They allow the grain to show through. Others are semi-transparent. They offer more color while showing some grain. Solid stains are like paint. They hide the grain completely. Use solid stains for weathered wood. They mask imperfections well. Your choice depends on the project’s needs. Understanding how to stain wood includes understanding these products. Read the labels carefully. Compare samples on scrap wood. This visual test helps you decide. The right choice ensures satisfaction with the final look.
The Importance of Wood Conditioner
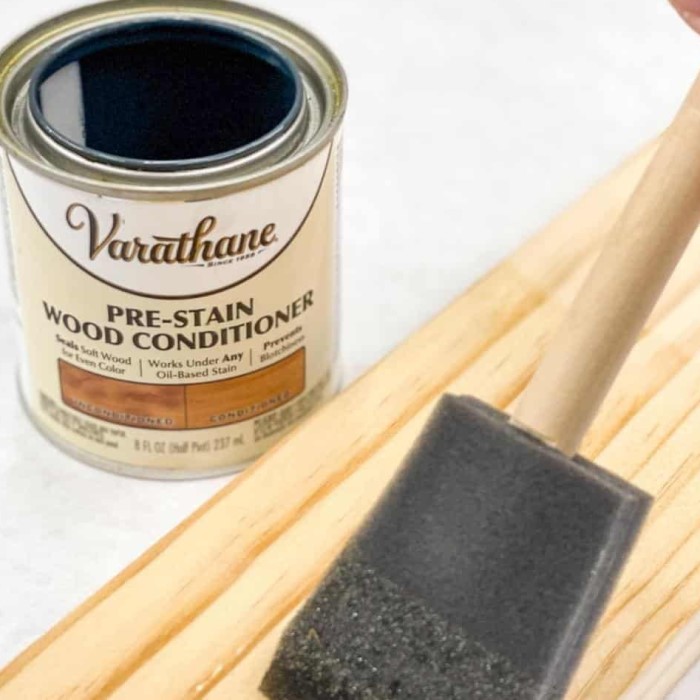
Softwoods present a unique challenge. They absorb liquid unevenly. This leads to a blotchy appearance. Areas of denser grain absorb more stain. Consequently, they look darker. Softer areas look lighter. This mottled effect is often undesirable. To prevent this, use a pre-stain wood conditioner. This product seals the wood pores. It creates a uniform surface. Therefore, the stain absorbs evenly. The result is a consistent color. Conditioner is especially vital for woods like pine, fir, or maple. These woods are prone to blotching. Apply the conditioner with a brush or rag. Let it penetrate for the recommended time.
Usually, this is about 5 to 15 minutes. Then, wipe off any excess. You must apply the stain shortly after. Most manufacturers recommend staining within two hours. If you wait too long, the sealer may block absorption. This step is a secret to professional results. Many beginners skip it. Then, they are disappointed with the outcome. Learning how to stain wood means learning to control absorption. Conditioner acts as a primer. It regulates the flow of stain. It is a simple step. Yet, it makes a massive difference. It ensures the final color is true to your vision. Always test the conditioner on a scrap piece first. This confirms its effect on your specific wood.
Application Methods for a Flawless Finish
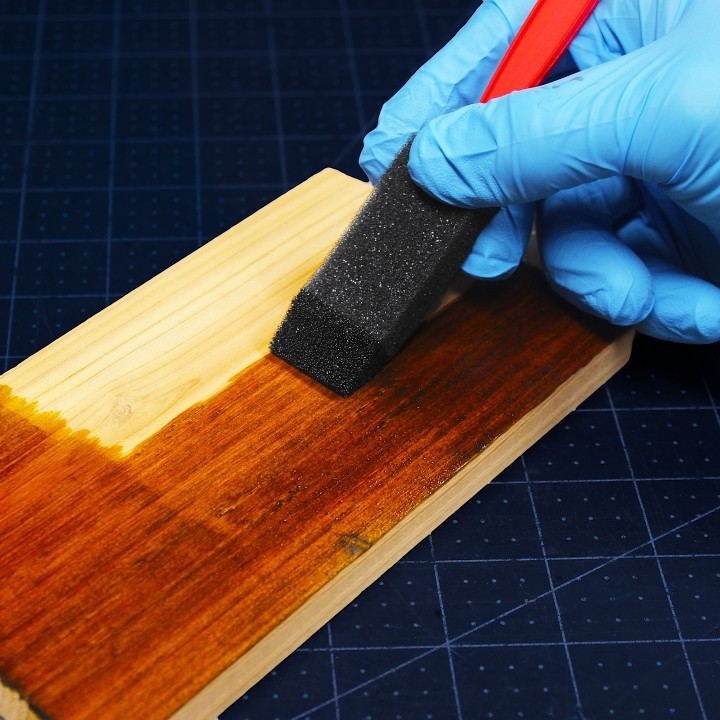
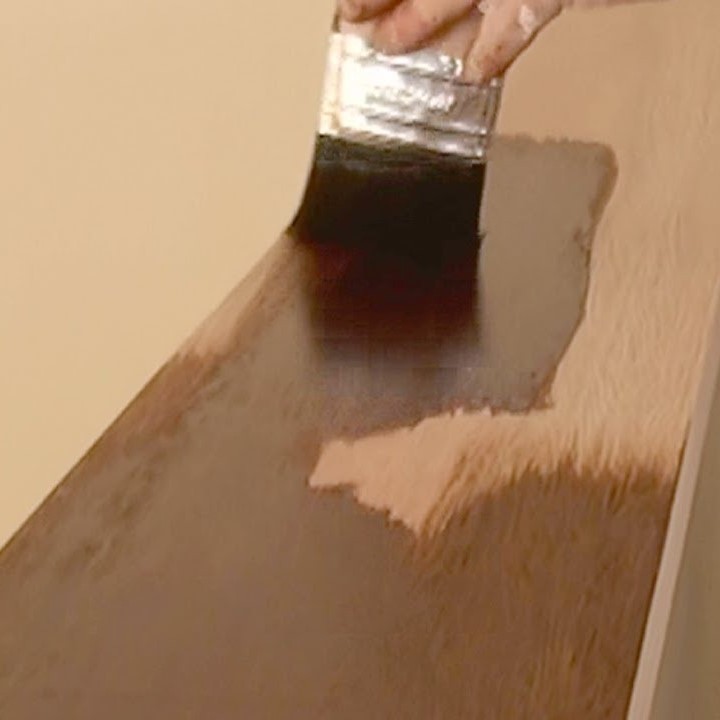
Now you are ready to apply the stain. Stir the stain thoroughly before use. Pigments settle at the bottom of the can. If you do not stir, the color will be uneven. Never shake the can. Shaking introduces bubbles. Bubbles will transfer to the wood. Dip your brush or rag into the stain. Apply a generous amount to the wood. Work in the direction of the grain. Cover the entire surface. Do not worry about overlap marks at this stage. Focus on wetting the surface. Ensure every spot is covered. Work on one section at a time. This prevents the stain from drying too fast. Once the area is wet, let it sit. Check the product label for timing. The longer it sits, the darker the color becomes. Wiping off the excess is the next critical step.
Use a clean, lint-free rag. Wipe in the direction of the grain. Remove all the wet stain that did not soak in. If you leave too much, the surface will remain tacky. It will not dry properly. The wood should look wet but not have puddles. This technique is the core of how to stain wood. It requires a steady hand. It also requires a good eye. Inspect your work as you go. If you miss a spot, apply more stain immediately. Do not wait. Consistency is the goal. Apply thin, even coats. It is better to apply two thin coats than one thick coat. Thin coats dry harder and clearer. They also look more natural.
Drying, Curing, and Cleanup
Patience is required after application. The stain needs time to dry. Drying times vary by product. Water-based stains may dry in an hour. Oil-based stains can take 4 to 8 hours. Check the surface before touching it. Touch a hidden area gently. If it feels tacky, wait longer. Do not rush the process. Moving the piece too soon can leave fingerprints. Furthermore, the stain needs to cure. Curing is different from drying. It is a chemical process.
The stain hardens fully during curing. This can take several days. Wait at least 24 hours before applying a topcoat. A topcoat protects the stained wood. It adds durability and sheen. Options include polyurethane, lacquer, or wax. Apply the topcoat according to its instructions. Cleanup is the final step. For oil-based stains, use mineral spirits. Clean your brushes thoroughly. For water-based stains, use warm water and soap. Proper cleanup extends the life of your tools. Store leftover stain properly. Seal the can tightly. Keep it in a cool, dry place. This prevents the stain from spoiling. Knowing how to stain wood also means knowing how to finish the job. Proper care of your tools saves money. It also ensures they are ready for the next project. Admire your work. You have transformed a piece of wood. It now has depth and character.
Common Mistakes to Avoid
Even experienced woodworkers make errors. Knowing common pitfalls helps you avoid them. One major mistake is poor preparation. Skipping the sanding steps leads to a rough finish. The stain will highlight every scratch. Therefore, sand thoroughly. Another error is ignoring the wood conditioner. This results in a blotchy finish on softwoods. Do not learn this lesson the hard way. Always use conditioner on porous woods. Furthermore, do not over-apply the stain. Puddles of stain will not dry. They create a sticky mess. This attracts dust and dirt. The finish will remain soft indefinitely. Always wipe off the excess. Another issue is lap marks. These occur when the stain dries before you wipe it. Work in manageable sections.
Do not try to stain a large table all at once. Work on one leg, then the next. Or work on half the top at a time. Keep a “wet edge” to avoid lines. Additionally, test the stain before the final application. Wood colors vary. The picture on the can is just a guide. Test on a scrap piece of the same wood. This confirms the color. It allows you to adjust your technique. Finally, avoid working in direct sunlight or high humidity. Sunlight dries the stain too fast. Humidity slows down the drying process. Both conditions create problems. Work in a controlled environment. A garage or workshop is ideal. Understanding how to stain wood involves anticipating these problems. Prevention is easier than correction. Follow these tips for a stress-free project.

FAQ
Q1: Can I stain wood without sanding it first?
It is generally not recommended to skip sanding. Sanding opens the wood pores. This allows the stain to penetrate evenly. Without sanding, the surface may be uneven. The stain might not adhere correctly. However, there are “no-sand” products available. These are typically gel stains or combination products.
Q2: How many coats of stain should I apply?
Usually, one coat of stain is sufficient to achieve the desired color. Wiping off the excess controls the depth. If you want a darker color, you can apply a second coat. Wait for the first coat to dry completely.
Q3: What is the difference between stain and finish?
Stain and finish serve two different purposes. Stain is primarily used to color the wood. It enhances the grain and changes the tone. It penetrates the wood fibers.
Q4: How long should the stain dry before applying a topcoat?
Drying times vary based on the type of stain. Oil-based stains typically require 24 hours to dry. You should wait overnight at a minimum. Water-based stains dry faster, often within 4 hours. However, dry to the touch does not mean ready for a topcoat. The stain needs to cure slightly. If you apply a topcoat too soon, you may smear the stain. The topcoat might also not adhere properly. Always check the manufacturer’s instructions on the can. Ensure the surface feels dry and cool. If it feels tacky, wait longer.
Q5: Can I use a rag instead of a brush to apply stain?
Yes, using a rag is a very effective method. Many professionals prefer it. A rag allows you to control the application. You can work the stain into the grain. It also helps you wipe off the excess immediately.
Conclusion
Mastering the art of staining is a rewarding journey. It unlocks the potential of your wooden furniture. Your DIY projects will look professional and polished. The process requires attention to detail. From sanding to the final wipe, every step matters. We have covered the essential tools. We also discussed the importance of preparation. Furthermore, we explored choosing the right product for your specific wood type. Safety should always be a priority. Protecting yourself ensures the work is enjoyable. Remember that patience is your best tool. Do not rush the drying times. Allow the wood to absorb the stain naturally.
This creates a finish that lasts for years. A beautiful stain enhances the grain. It brings warmth to your home. It also protects your investment. You now have the knowledge to succeed. You can confidently approach your next project. Grab your sander and your brush. Start transforming your space today. With this guide on how to stain wood, you are ready. You will achieve results that you can be proud of. Enjoy the process of creation.