The Timeless Joy of Creating Flight
There is a unique magic in seeing something you built with your own hands take to the sky. For centuries, humans have looked upward with wonder. Kite making connects us to this ancient desire to conquer the air. It is a hobby that bridges the gap between crafting and engineering. Furthermore, it provides an immense sense of satisfaction. You do not just buy a product; you create a memory. In a world dominated by digital screens, this tactile activity offers a refreshing break. It forces you to step outside. You must feel the wind and observe the weather. Consequently, many families are returning to this traditional pastime. It is an excellent way to bond with children. They learn basic physics without realizing they are studying.
Moreover, the process is surprisingly accessible. You might think you need expensive tools. However, the reality is much simpler. The beauty of kite making lies in its simplicity. A few sticks, some paper, and a bit of string are often all you need. This guide will walk you through the essentials. We aim to demystify the process for beginners. We will also provide tips for those looking to advance their skills. From selecting the right materials to understanding aerodynamics, every step matters. Ultimately, the goal is to see your creation soaring high. Therefore, prepare your workspace. Gather your supplies. Let us embark on a journey of creativity and flight. You will soon discover that the sky is not the limit. It is just the beginning of your adventure.
Understanding the Fundamental Materials
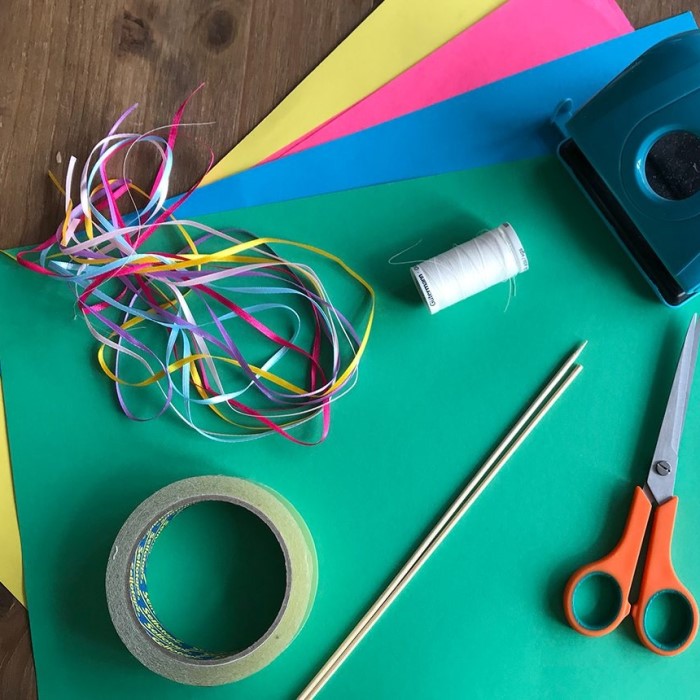
The foundation of any successful project lies in the materials you choose. Selecting the right components ensures your kite flies smoothly. It also determines the durability of your creation. For the frame, you need something lightweight yet sturdy. Traditionally, bamboo strips were the go-to choice. They offer flexibility and strength. However, modern builders often use dowel rods. These wooden rods are easy to find at hardware stores. They come in various diameters. For a standard diamond kite, 1/4 inch dowels work perfectly. Alternatively, you can use fiberglass rods. They are more durable and resistant to warping. Therefore, consider your environment when choosing the frame.
Next, you must consider the sail material. This is the surface that catches the wind. Paper is the classic choice. Tissue paper is light and delicate. It creates beautiful, translucent effects. However, it tears easily. Consequently, it might not be best for beginners. Plastic sheeting is a robust alternative. Heavy-duty garbage bags or Tyvek mailing envelopes work wonders. Tyvek is particularly good because it is tear-resistant and lightweight. It does not absorb water like paper. This is crucial if you fly near the ocean or in humid areas. Furthermore, you need a strong adhesive. Tape is convenient. Duct tape provides extra strength at the joints. For paper sails, glue sticks or wood glue are effective. Finally, the string is critical. Do not use thin sewing thread. It snaps under tension. Instead, look for twine or specialized kite line. These materials form the skeleton and skin of your project.
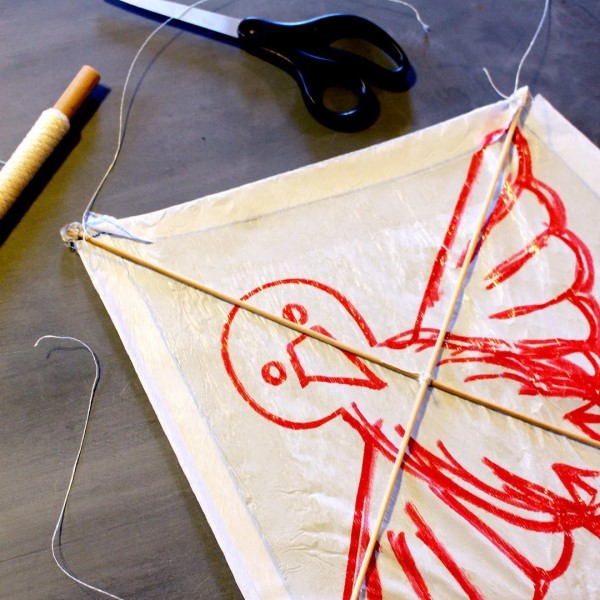
The Classic Diamond Kite Design
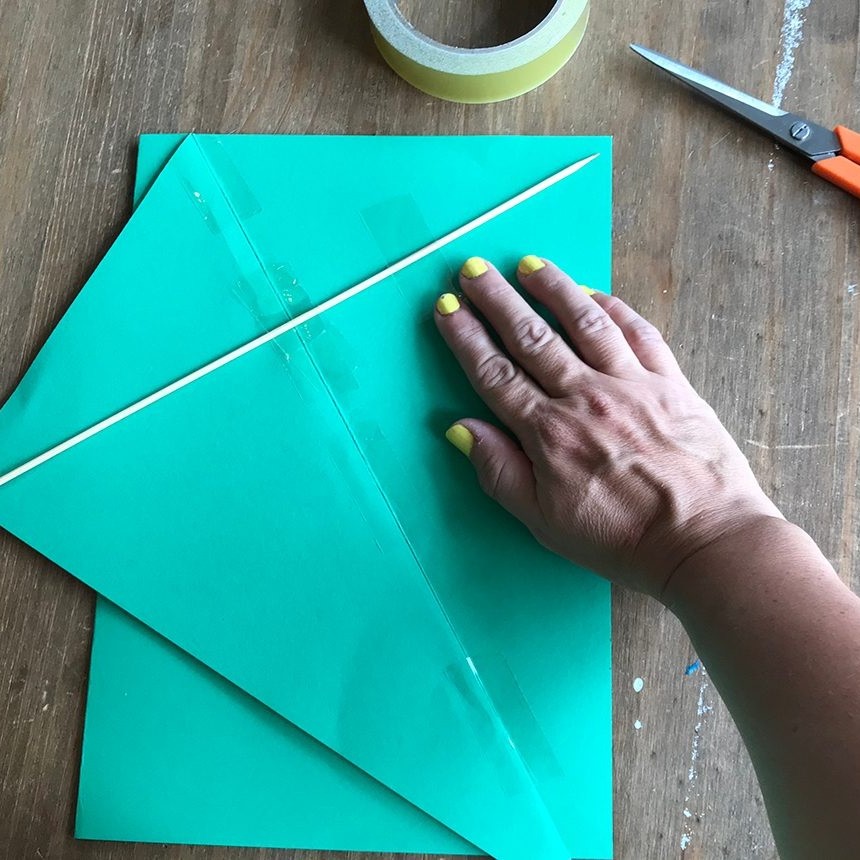
When people imagine a kite, they usually picture the diamond shape. It is the iconic symbol of the hobby. This design is perfect for your first kite making attempt. It teaches you the basics of balance and symmetry. To begin, you need two dowels. One acts as the spine or vertical spar. The other acts as the cross spar or horizontal support. The spine must be longer than the cross spar. A ratio of roughly 3:2 usually works well. For instance, use a 36-inch spine and a 24-inch cross spar. You will join these two pieces. They cross each other to form the diamond frame.
First, lay your dowels on a flat surface. Position them perpendicular to each other. The cross spar should sit about one-third of the way down the spine. Then, secure the intersection. You can use string to lash them together tightly. Add a dab of glue for extra security. Next, create the outline. Cut a notch at the ends of each dowel. Thread your string through these notches. Pull it tight to create a rigid perimeter.
This string outline keeps the frame from collapsing under wind pressure. Now, you are ready for the sail. Lay your plastic or paper flat. Place the frame on top of it. Trace the outline, leaving a margin of about two inches. Cut the shape out. Then, fold the excess margin over the string outline. Secure it with tape or glue. Ensure the sail is tight and smooth. Loose fabric creates drag and instability. With the frame and sail complete, you have a classic kite ready for bridling.
Mastering the Art of Bridling and Balance
A kite without a bridle is like a car without a steering wheel. It will not fly straight. The bridle connects the flying line to the kite frame. It controls the angle of attack. This angle determines how the wind lifts the kite. For a diamond kite, a simple two-point bridle is sufficient. You attach the line at two specific spots. The first point is at the intersection of the dowels. The second point is near the bottom of the spine. Tie small loops at these points. Then, connect them with a longer piece of string. This creates the bridle loop.
Furthermore, you must find the towing point. This is where you attach your main flying line to the bridle. It is not a fixed point. You need to adjust it to find the perfect balance. Slide the knot up or down the bridle loop. Test it in a light breeze. If the kite loops uncontrollably, the tow point might be too high. Shift it slightly lower.
If the kite refuses to lift, it might be too low. Move it up. This trial and error process is vital. It teaches you how wind interacts with your design. Additionally, a tail is essential for stability. The diamond shape naturally wants to spin. A tail adds drag at the back. This drag keeps the nose pointing upward. You can use strips of fabric or plastic. Make them long and colorful. A tail that is about three times the length of the spine usually works well. Through proper bridling and tail attachment, you achieve a stable flight.
Exploring Other Exciting Kite Shapes
Once you master the diamond, you can explore other designs. The world of kite making is vast and diverse. The Delta kite is a popular alternative. It has a triangular shape. It looks like a bird wing. Delta kites are incredibly efficient. They require very little wind to fly. They also do not usually need a tail. This makes them easier to launch. The frame consists of a long spine and two leading edges. The leading edges curve back slightly. This shape creates a natural lift. Consequently, they are great for beginners who want a more modern look.
Another fascinating design is the box kite. The structure is complex. It requires multiple spars and crosspieces. However, the principle remains the same. You create a rigid frame and cover specific panels with sail material. Additionally, there are sled kites. These have no rigid frame. They rely on the wind to inflate their shape. They are the easiest to make. You simply cut a large rectangular shape with vent holes. They fold up small, making them portable. Each design offers unique challenges and rewards. Trying different shapes expands your understanding of aerodynamics. It also keeps the hobby fresh and exciting. You can choose a design based on the typical wind conditions in your area.
Decoration and Personal Expression
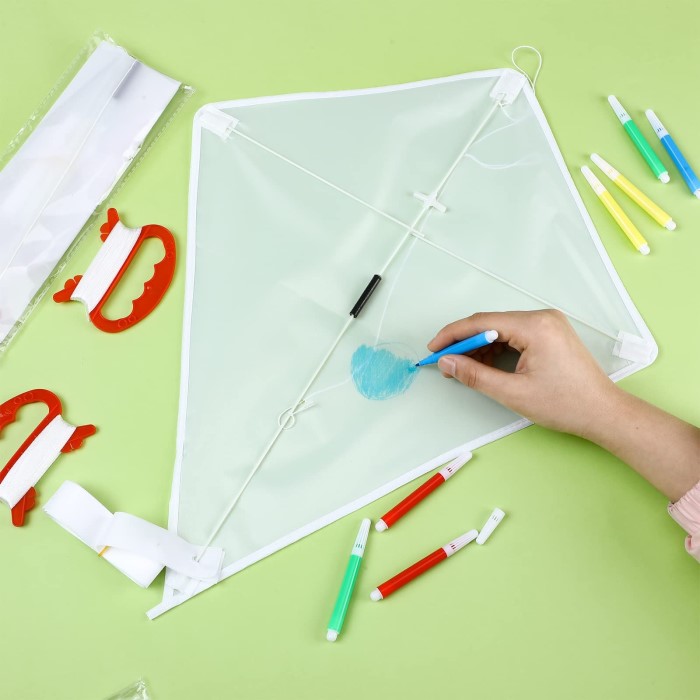
The visual aspect of your project is just as important as the mechanics. Kite making is an art form. It allows you to express your personality. A blank white sail is a canvas waiting for color. You can use markers, paints, or crayons to decorate it. If you use paper, watercolors create a beautiful, soft effect. The sunlight filters through the colors. If you use plastic, permanent markers are best. They do not smudge or fade. You can draw geometric patterns. Or, you can create a realistic animal or scene. Furthermore, you can add accessories. Streamers and ribbons make the kite flashy. They also add weight, so be careful not to overdo it.
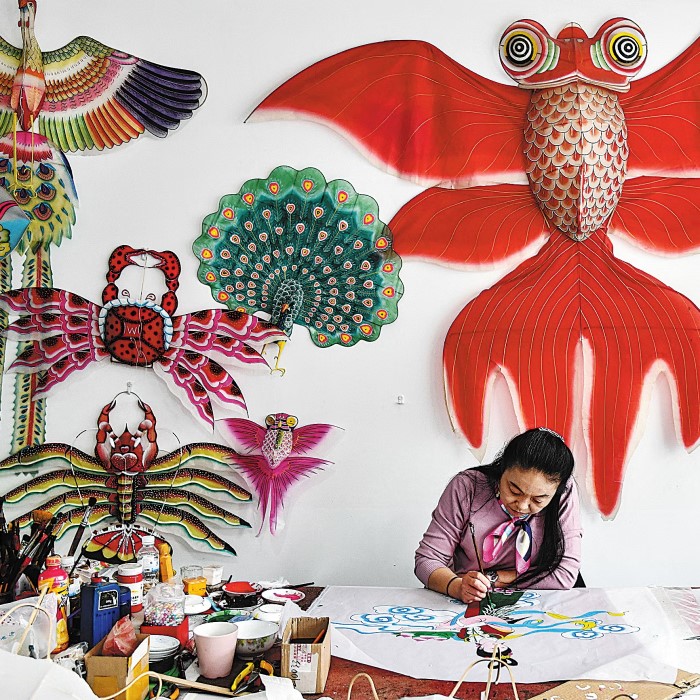
Moreover, cultural designs are popular. Many people draw inspiration from traditional Asian kite art. Dragons, tigers, and mythical creatures are common. These designs tell a story in the sky. You can also use collage techniques. Cut shapes from different colored plastic sheets. Glue them onto the main sail. This creates a layered, textured look. Remember to keep the decoration symmetrical if possible. Asymmetrical designs can affect the balance of the kite. If one side is heavier, the kite will lean. Therefore, try to mirror your artwork on both sides. This ensures that your beautiful creation also flies well. The joy of seeing your unique art floating above you is incomparable. It makes the effort worthwhile.
Maintenance and Repair Tips
Even the best-built kites suffer damage. The wind can be unpredictable. Trees and power lines are constant enemies. Therefore, knowing how to repair your kite is essential. Do not throw it away if it crashes. Most damages are fixable. If the sail tears, you can patch it. Use a piece of clear tape. Place it over the rip on both sides. This creates a strong seal. For larger tears, cut a patch of the same material. Glue or tape it over the damaged area. Ensure the patch is smooth. Wrinkles can disrupt airflow. Consequently, a quick repair saves your project.
Additionally, the frame might snap. Wooden dowels can break under stress. Replacing a broken spar is simple. Keep extra dowels in your crafting kit. Remove the damaged piece. Cut a new one to the exact length. Then, reattach the sail and bridle. If the string breaks, check the rest of the line. It might be frayed. Frayed line is weak. You should replace it entirely to prevent future accidents. Furthermore, proper storage prolongs the life of your kite. Do not just throw it in a garage corner. The moisture and heat can warp the wood. Roll the sail gently. Store the spars flat. If you have a collapsible kite, fold it properly. Regular maintenance ensures your kite is always ready for the next windy day. It saves money and reduces waste.
The Educational Benefits for Children
Kite making is more than a hobby. It is a powerful educational tool. Parents and teachers should embrace this activity. It teaches children fundamental concepts of physics. They adjust the bridle to change the lift. They add a tail to increase drag. This hands-on experience is far more effective than a textbook diagram. Furthermore, it develops fine motor skills. Cutting, tying, and gluing require precision. Children improve their dexterity while having fun.
Moreover, it fosters problem-solving skills. The kite might not fly on the first try. The child must figure out why. Is the tail too heavy? Is the bridle too loose? This troubleshooting process builds resilience. It teaches them to analyze a situation and find a solution. Additionally, it encourages an appreciation for nature. To fly a kite, you must go outside. This connection to the outdoors is vital for mental health. It reduces stress and anxiety. Therefore, encourage your children to build. Help them when they struggle. Let them make mistakes. The lessons they learn will stay with them forever.
Frequently Asked Questions
New enthusiasts often have questions about the process. Here are answers to two common queries.
Are kites hard to make?
No, kites are not hard to make. Simple designs like the diamond or sled kite are perfect for beginners. They require basic materials like paper, sticks, and tape. You can build a functional flyer in less than an hour. Complex designs take more time and skill. However, the learning curve is gentle. Anyone can master the basics quickly with a little patience.
What material can I use to make a kite?
You can use many household items for the sail. Tissue paper, newspapers, and plastic garbage bags are popular choices. Tyvek mailing envelopes are excellent for durability. For the frame, bamboo skewers, wooden dowels, or even straight branches work well. Use strong twine or fishing line for the string. Creativity with materials is part of the fun.
Conclusion: The Sky is Your Canvas
The journey of kite making is one of discovery and delight. We have explored the history and the materials. We discussed the designs and the mechanics of flight. From the classic diamond to the sleek delta, each kite offers a new experience. You now know how to bridle your creation for stability. You also know how to repair it when accidents happen. The process connects us to the elements. It forces us to look up from our screens. It encourages us to breathe the fresh air. Whether you are a parent teaching a child or an adult seeking a creative outlet, this hobby delivers.
So, gather your materials today. Do not wait for the perfect breeze. Start crafting now. When the wind finally picks up, you will be ready. You will feel the thrill of the string pulling against your fingers. You will watch your unique creation climb higher and higher. It is a feeling of pure accomplishment. The sky is waiting for your masterpiece. Embrace the art of kite making. Let your imagination soar.