The Timeless Charm of Handcrafted Melodies
Music boxes have captivated hearts for centuries. They evoke a sense of nostalgia and wonder. The delicate tinkling sound reminds us of simpler times. Many people believe these intricate objects are difficult to create. However, learning how to make a music box is a rewarding and accessible hobby. You do not need to be a master carpenter or an engineer. With the right tools and patience, anyone can build a beautiful musical treasure. This craft combines mechanics with artistry. You get to design the exterior.
You also install the delicate inner workings. Consequently, the final product is a unique expression of your creativity. It makes a perfect gift for loved ones. It also serves as a charming decoration for your home. The process involves selecting a tune. It requires choosing a box material. Furthermore, you must assemble the mechanical movement. This guide will walk you through every step. We will explore the history behind these devices. We will also discuss the essential components you need. By the end of this article, you will have the confidence to start your own project. You will transform raw materials into a vessel of melody. The journey from a silent box to a singing masterpiece is truly magical. So, let us begin this creative adventure together.
Understanding the History and Mechanics
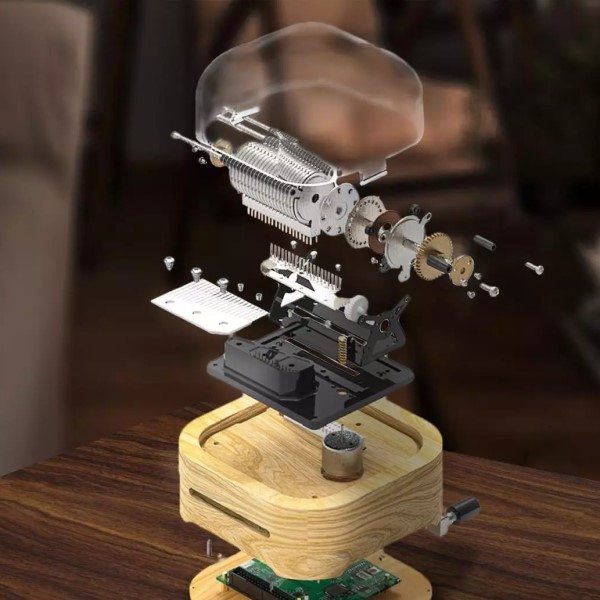
To appreciate the craft, we must first understand the machine. The music box has a rich history. It originated in the 18th century. Swiss watchmakers created the first mechanical movements. They used tiny gears and pins to pluck metal teeth. These teeth are tuned to specific notes. Consequently, a melody is produced when the cylinder rotates. The mechanism is a marvel of precision engineering. The comb is the heart of the system. It consists of a strip of steel with tuned teeth. The cylinder is the brain. It dictates the timing of the notes. Pins are inserted into the cylinder with extreme accuracy.
When the cylinder turns, these pins brush against the comb teeth. This action creates the music we hear. A spring provides the power. It stores energy when you wind the key. This energy drives the gears. The governor regulates the speed. It ensures the song plays at a steady tempo. Modern DIY movements operate on the same principle. However, they are mass-produced for affordability. They are robust and reliable. Understanding this mechanism helps you troubleshoot issues. If the music is too fast, the governor might be loose. If a note is missing, the comb might be damaged. Therefore, a basic knowledge of mechanics is essential. It allows you to respect the delicate nature of the device. It also empowers you to fix minor problems. This knowledge enriches the crafting experience.
Gathering the Essential Materials and Tools
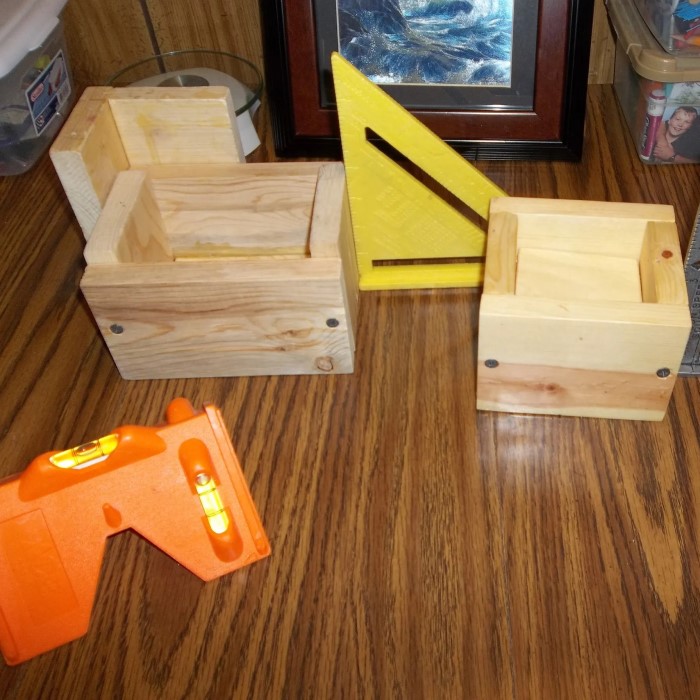
Preparation is the key to success. You cannot build a house without bricks. Similarly, you cannot build a music box without materials. The first item you need is the musical movement. You can buy these online or at craft stores. They come in various sizes and tunes. Choose one that fits your vision. Next, you need a box or container. This will house the mechanism. Wooden boxes are classic. They provide a warm, resonant sound. However, you can use glass, metal, or even paper mache. The choice depends on your aesthetic preference. Furthermore, you need basic tools. A drill is crucial. You must drill a hole for the winding key.
A screwdriver is also necessary. It secures the movement to the base. Additionally, you will need glue. Wood glue works best for wooden boxes. It creates a strong bond. Sandpaper is useful for smoothing edges. It ensures a professional finish. You might also want decorative items. Paint, varnish, or fabric can enhance the look. Gather all these items before you start. It saves time during the process. Consequently, you can focus entirely on the assembly. A well-prepared workspace leads to a better result. Do not rush this stage. Ensure you have everything within reach. This organization minimizes frustration. It maximizes the joy of creation.
Selecting the Perfect Tune for Your Box
The melody is the soul of the music box. Choosing the right song is a critical decision. Standard movements often come with classic tunes. “Für Elise” is a popular option. “Happy Birthday” is also common. However, you might want something unique. Some suppliers offer customizable cylinders. This allows you to choose a specific song. You might select a wedding march for a gift. You might choose a lullaby for a child. Therefore, think about the recipient or the purpose. The length of the tune also matters. Most standard movements play for about 20 to 30 seconds. They loop continuously until the spring runs out.
Longer tunes are available. They might require a larger cylinder. Consequently, the box size might need to increase. Listen to the sound samples before buying. The quality of the tone varies. Some combs have a richer sound. Others might sound tinny. A high-quality mechanism produces a clear, resonant melody. If you learn how to make a music box with a custom tune, you must contact specialized makers. They can program the cylinder pins for you. This process is expensive but rewarding. It creates a one-of-a-kind item. For beginners, a standard tune is recommended. It is cost-effective and easier to install. As your skills improve, you can explore custom options. The melody defines the emotional impact of the piece. Choose it with care.
Designing and Preparing the Housing
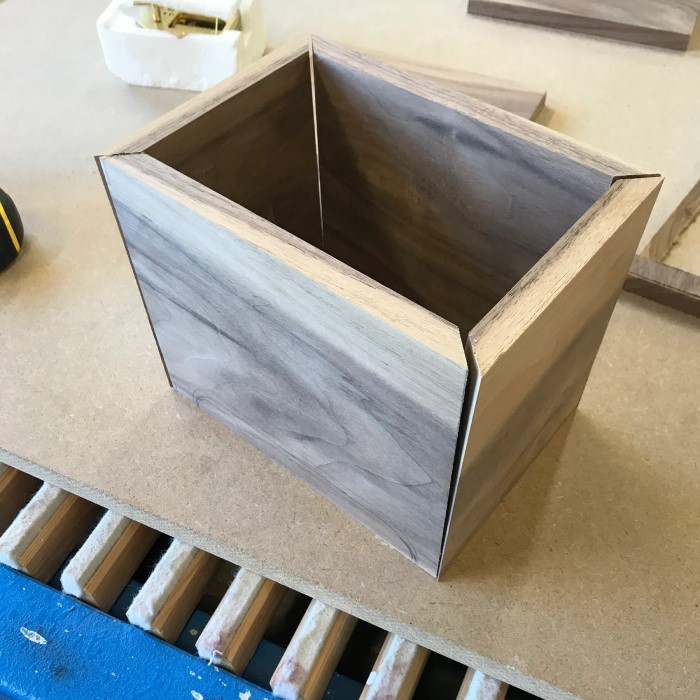
The box serves as the body for the musical soul. Its design is entirely up to you. You can buy a pre-made unfinished box. These are ready for decoration. Alternatively, you can build a box from scratch. This requires advanced woodworking skills. For beginners, a pre-made box is the safer choice. First, you must measure the mechanism. The movement needs space to rotate. The cylinder must not hit the sides of the box. Therefore, internal dimensions are crucial. Measure the length, width, and height of the movement. Add a few millimeters for clearance. This prevents friction. Next, you need to plan the winding key hole.
This hole usually goes through the back or the bottom. Mark the spot accurately. The key shaft has a specific length. The hole must align perfectly with the shaft. If the hole is misplaced, the key will not turn. Consequently, the music will not play. Drill the hole carefully. Start with a small pilot hole. Then, use a larger bit to widen it. Smooth the edges with sandpaper. This prevents splinters. Finally, consider the interior finish. You might want to line the inside with felt. This protects the mechanism. It also dampens mechanical noise. A quiet interior allows the music to shine. These preparatory steps are vital. They ensure the mechanism fits snugly. A well-prepared housing makes the assembly smooth.
The Assembly Process: Step-by-Step Instructions
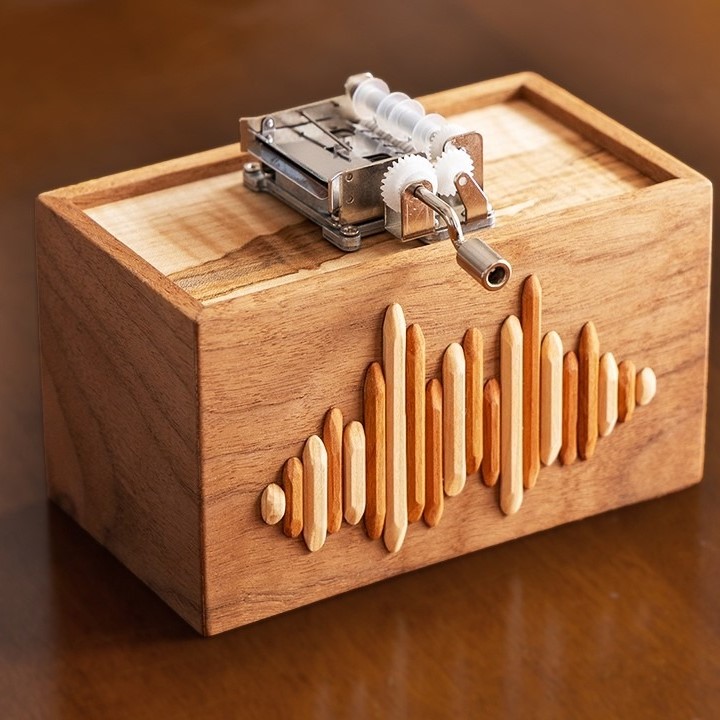
Now, the actual construction begins. This is the most exciting part of learning how to make a music box. First, test the mechanism before installation. Wind the key and listen. Ensure it plays the correct tune. This confirms the unit works. If it is faulty, return it before you glue anything. Next, position the movement inside the box. Place it where you planned. Align the winding shaft with the hole you drilled. The shaft should poke out slightly. Slide the key onto the shaft from the outside. Test the winding action. It should turn freely without resistance. If it scrapes against the box, adjust the position. Once the alignment is perfect, secure the mechanism. Most movements have mounting holes. Use small screws to attach it to the base. Do not overtighten the screws. This could crack the plastic housing of the movement.
Alternatively, you can use strong glue. Apply a adhesive like E6000 to the bottom of the mechanism. Press it firmly into place. Let it dry completely. This takes several hours. Glue is useful if you do not want visible screws. After securing the movement, wind it again. Check for any vibrations or rattling. The box should amplify the sound, not shake. If the box vibrates too much, add weight. A small metal weight glued to the bottom can stabilize it. Finally, attach the lid. Ensure the lid closes easily. It should not touch the mechanism. If the lid has a glass panel, be extra careful. The assembly requires patience and precision. Take your time with each step.
Decorating and Personalizing Your Creation
The mechanical work is done. Now, you can unleash your artistic flair. The exterior design transforms a wooden box into a gift. There are countless ways to decorate. Painting is the most common method. Acrylic paints work well on wood. They offer vibrant colors. You can paint a scene. You might paint flowers or stars. Alternatively, you can use a wood stain. Stain enhances the natural grain. It gives the box a rustic, elegant look. Furthermore, you can add decoupage. This involves gluing paper cutouts to the surface. You can use sheet music as a theme. Glue the notes of the song onto the box. This is a clever visual pun. Additionally, consider adding hardware. Metal hinges and clasps add sophistication.
A decorative lock can make the box look mysterious. You can also add a lining to the lid. A mirror inside the lid is a classic touch. It reflects the moving gears. This allows the user to see the magic inside. For a children’s gift, use stickers or glitter. Make it colorful and fun. The decoration should match the melody. A romantic song deserves a romantic design. A lullaby deserves soft pastels. Consequently, the theme should be cohesive. This personal touch makes the music box special. It shows you put thought into every detail.
Troubleshooting Common Issues
Even careful crafters face challenges. Sometimes, the music box does not work perfectly. Do not panic. Most issues are easy to fix. One common problem is silence. You wind the key, but no sound comes out. First, check the governor. Is it spinning? If the governor spins but the cylinder does not, a gear is stripped. This is a rare manufacturing defect. You need a replacement movement. However, often the issue is simpler. The winding key might be slipping. Ensure the key is seated fully on the shaft. Another issue is a weak sound. The music might sound muffled. This often happens if the box is too small. The sound needs space to resonate. Try moving the mechanism to a larger container. Alternatively, the comb might be dirty.
Dust can clog the teeth. Use a soft brush to clean the comb gently. Be extremely careful. The teeth are delicate. Bending a tooth will change the note. Furthermore, the music might play too fast. This indicates a governor issue. The fan might be unbalanced. You cannot easily fix this. It is better to replace the unit. Finally, the key might be hard to turn. Do not force it. Over-winding can break the spring. If it feels tight, stop winding. Let the music play for a moment. This releases tension. Learning how to make a music box involves learning these repairs. It is part of the hobby. With practice, you will become a master troubleshooter.

Advanced Techniques and Customization
Once you master the basics, you can explore advanced methods. DIY music boxes can become complex projects. One advanced technique involves paper strip movements. These use a paper punch. You punch holes in a strip of paper. The paper feeds through a sensor. The sensor triggers the notes. This system allows for unlimited songs. You can compose your own melodies. You simply punch the holes where you want notes. It is a digital version of the traditional cylinder. This is perfect for musicians. Another advanced option is building a piano style box. You attach a tiny piano mechanism. The keys move as the music plays. This adds a visual element. Furthermore, you can modify traditional movements.
You can change the tempo by adjusting the governor. This requires delicate work. You can also build a music box from recycled items. An old tin can become a housing. A vintage jewelry box can be repurposed. These projects require creativity and skill. They push the boundaries of the craft. You can also join online communities. Forums share tips and tricks. You can learn from experienced builders. They offer advice on rare mechanisms. They also share sources for parts. The world of music box crafting is vast. There is always something new to learn. Keep experimenting. Keep pushing your limits.
Maintenance and Care for Longevity
A music box is a delicate instrument. It requires proper care to last. The metal parts can rust. The gears can wear out. Therefore, maintenance is essential. First, keep the box dry. Humidity is the enemy. Do not store it in a damp basement. Keep it in a dry room. If you live in a humid climate, use silica gel packets. Place one inside the box. It absorbs moisture. Next, lubricate the gears occasionally. Use a light machine oil. Do not use WD-40. It can gum up the mechanism. Apply a tiny drop to the axle points.
Wind the key a few times to distribute the oil. Furthermore, dust the box regularly. Dust can settle on the comb. It affects the sound quality. Use a soft cloth for the exterior. Use a blower for the interior. A can of compressed air works well. It removes dust without touching the teeth. Additionally, be gentle with the winding key. Do not wind it to the very end. Leave a little slack. This prevents the spring from snapping. If you will not use the box for a long time, release the tension. Let the music play until it stops. This relaxes the spring. It prevents metal fatigue. By following these tips, your creation will last for decades. It can become a heirloom for your family. Proper care preserves the magic.
Frequently Asked Questions
Can I put my own song in a music box?
Yes, you can put your own song in a music box. You need a custom cylinder movement or a paper strip mechanism. Custom cylinders are expensive and require professional programming. Paper strip kits are affordable and allow you to punch your own holes for any melody.
Why are music boxes so expensive?
Music boxes are expensive due to the precision engineering required. The cylinders and combs must be made with extreme accuracy. Each pin is placed by hand or by a specialized machine. High-quality materials like brass and steel also add to the cost. Limited production runs increase the price.
How is a music box made?
A music box is made by assembling a comb and a cylinder. The comb is tuned to specific musical notes. The cylinder is studded with pins that pluck the teeth of the comb. A spring motor powers the cylinder’s rotation. A governor regulates the speed to ensure a steady rhythm.
Conclusion: The Joy of Bringing Music to Life
We have journeyed through the world of mechanical melody. Learning how to make a music box is more than a craft project. It is an act of creation. You combine wood, metal, and tune into a single entity. The process teaches patience. It rewards precision. Furthermore, the result is a lasting treasure. A handmade music box carries your spirit.
It plays a song that you chose. It sits in a box that you built. Consequently, it is deeply personal. Whether you make it for yourself or a friend, the value is immense. It is a gift that literally plays a tune. We encourage you to start your project today. Buy a simple kit. Drill that first hole. Experience the thrill of the first wind. As the melody fills the air, you will feel a unique pride. You made that happen. You brought music to life. Keep crafting. Keep listening. The world needs more handmade music.