Introduction to the Timeless Art of Decoupage
Decoupage is a captivating craft that brings new life to ordinary items. It involves decorating surfaces by gluing colored paper cutouts onto them. This technique creates a unique, hand-painted appearance that delights crafters of all skill levels. Many beginners often wonder how to decoupage on wood effectively. It is a popular choice because wood offers a sturdy and versatile base for creativity. Consequently, you can transform plain wooden boxes, furniture, or signs into personalized works of art. The process might seem intimidating at first glance. However, with the right guidance and a little patience, anyone can master it. Therefore, this guide will walk you through every step of the process.
You will discover the joy of turning simple materials into treasured keepsakes. Furthermore, the satisfaction of completing a DIY project is immense. We will explore the essential tools you need to gather before starting. We will also discuss the best preparation methods for your wooden surface. Preparation is key to a smooth and professional finish. In addition, we will cover the application techniques that prevent bubbles and wrinkles.
Common questions often arise during the learning process. For instance, Can decoupage be done on wood? The answer is a resounding yes, and this article will prove it. Others ask, Is decoupage difficult? It is actually quite forgiving and easy to learn. You might also ask, Can you Mod Podge paper onto wood? This is the most common method, and we will explain exactly how to do it. By the end of this guide, you will feel confident in your ability to create beautiful decor.
Gathering the Essential Supplies for Your Project
Success in any craft project begins with gathering the right materials. You cannot build a masterpiece without the proper tools. Therefore, the first step in your decoupage journey is a trip to the craft store or a search through your junk drawer. The most critical component is the wooden object itself. You can use anything from a raw pine plank to an old wooden chair. Furthermore, you need a medium to adhere your paper to the wood. This medium is often referred to as decoupage glue or finish. Mod Podge is the most recognized brand on the market today. It acts as both a glue and a sealer, which simplifies the process significantly.
In addition to the glue, you need your decorative paper. Options include scrapbook paper, napkins, tissue paper, or even old magazine cutouts. Each type of paper behaves differently, so experimenting is part of the fun. You will also need a set of quality brushes. Foam brushes work well for applying the glue smoothly. However, bristle brushes are better for detailed work. Scissors are another non-negotiable tool. A sharp pair allows for precise cuts. You might also consider a craft knife for intricate designs. Sandpaper is essential for preparing the wood surface. A medium-grit sandpaper smooths out rough patches. Finally, a clean, damp cloth is necessary for wiping away excess glue and dust. Having all these supplies ready before you start ensures a smooth workflow. Consequently, you can focus entirely on the creative aspect of the project.
Preparing the Wood Surface for Perfection
The foundation of a successful decoupage project is a well-prepared surface. You cannot simply apply paper to dirty or rough wood. Therefore, preparation is the most important step in learning how to decoupage on wood. First, you must clean the wooden object thoroughly. If it is an old piece of furniture, it might have years of grime or polish buildup. Use a mild detergent and water to wash it. Then, let it dry completely. If the wood has a shiny varnish or lacquer, you need to sand it down. The glue needs a slightly porous surface to adhere correctly. Consequently, sanding helps the medium grip the surface.
Start by sanding the entire surface with medium-grit sandpaper. This removes the old finish and smooths out scratches. Then, switch to fine-grit sandpaper for a polished feel. Always sand in the direction of the wood grain. This prevents unsightly scratches from showing through your paper. After sanding, you will see a lot of dust. You must remove this dust with a tack cloth or a damp rag. Any remaining dust particles will create bumps under your paper. Furthermore, if you plan to paint the wood a base color, do it now. Acrylic paint works wonderfully on wood. Let the paint dry fully before moving to the next step. If you are using raw wood, you might want to apply a wood primer. This seals the wood and prevents the grain from showing through thin paper. Taking the time to prep ensures your final result looks professional.
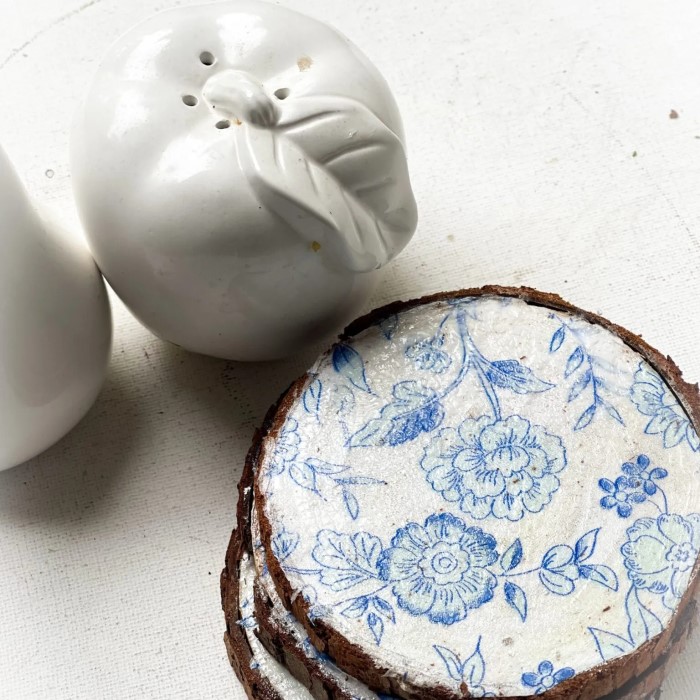
Selecting and Preparing Your Decorative Paper
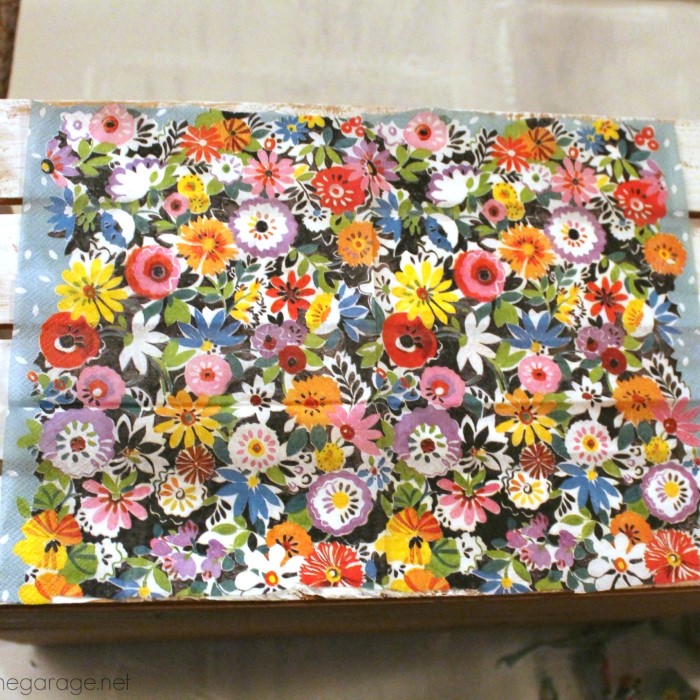
Choosing the right paper is where your creative vision comes to life. The market offers an overwhelming variety of options. However, not all paper is created equal for decoupage. Scrapbook paper is a favorite among crafters. It is thick enough to handle easily but pliable enough to mold to the wood. Napkins are another popular choice. They create a hand-painted effect because the paper is so thin. However, napkins require a gentle touch during application. Tissue paper offers similar benefits but can tear easily. Consequently, beginners might prefer starting with scrapbook paper or printer paper.
Once you have selected your design, you need to cut it out. Precision is key here. You can use sharp scissors for general shapes. For intricate details, a craft knife and a cutting mat are invaluable tools. Take your time during the cutting process. Rushing often leads to jagged edges or accidental cuts. If you are using a napkin, you must separate the layers. Most decorative napkins have two or three plain white layers behind the printed layer.
Gently peel these layers away. You only want to use the thin, printed top layer. This eliminates bulk and helps the design blend seamlessly into the wood. Additionally, consider the layout before you start gluing. Place your cutouts on the wood surface to visualize the final look. Move things around until you are satisfied. This “dry fit” prevents regret later on. Once you are happy with the arrangement, you are ready for the glue.
The Step-by-Step Application Process
Now comes the exciting part where your project starts to take shape. Applying the paper requires a steady hand and patience. First, apply a generous layer of your decoupage medium to the wood surface. Use a foam brush to spread an even coat. Cover the area where your paper will sit. Next, apply a thin layer of glue to the back of your paper cutout. This technique is called “gluing both surfaces.” It ensures a strong bond and helps prevent air bubbles. Alternatively, you can place the paper directly onto the wet glue on the wood. However, gluing both sides offers better control for beginners.
Carefully position your paper onto the wood. Start from one edge and slowly lower it down. This technique helps push air out as you go. Once the paper is in place, do not panic if it wrinkles slightly. Paper naturally expands when wet. The next step is the most critical for a smooth finish. You need to smooth out the paper immediately.
Use your fingers to gently press the paper from the center outwards. Alternatively, use a brayer or a credit card to smooth the surface. This action removes excess glue and air pockets. Be careful not to tear the wet paper. If glue seeps out the sides, wipe it away with a damp cloth. Let this layer dry completely. This usually takes about 15 to 20 minutes. Do not rush the drying process. Once dry, you might notice some edges lifting. Simply apply more glue under the edge and press it down again.
Sealing and Protecting Your Masterpiece
The final step in the decoupage process is sealing. This step protects your hard work and gives the piece a finished look. Without a sealer, the paper could peel or stain easily. Therefore, you must apply a topcoat of your decoupage medium. Dip your brush into the jar and apply a thin, even layer over the entire surface. Ensure you cover the edges of your paper cutouts. This locks them in place. Let this layer dry completely. It will likely feel tacky at first, but it will harden as it cures.

For a durable finish, you should apply multiple coats. It is recommended to apply at least two or three layers. Lightly sand between coats with fine-grit sandpaper. This removes any bumps or brush strokes. It creates an incredibly smooth surface that feels like a painted finish. Wipe away the sanding dust with a dry cloth before the next coat. The number of coats depends on how much use the item will get. If you are decoupaging a tabletop, you might need four or five coats. If it is a decorative wall hanging, two coats are sufficient. Furthermore, consider the finish you desire. Decoupage mediums come in various finishes like matte, glossy, and satin. A matte finish looks natural and rustic. A glossy finish adds shine and makes the colors pop. A satin finish offers a soft sheen somewhere in between. Choose the one that fits your decor style best.
Troubleshooting Common Decoupage Issues
Even experienced crafters encounter challenges. Knowing how to fix mistakes is part of learning how to decoupage on wood. One of the most common problems is air bubbles. These appear as raised bumps under the paper. If you see a bubble while the glue is wet, use your finger to push it to the edge. If the glue has dried, you have a few options. You can use a pin to prick a tiny hole in the bubble. Then, apply a small drop of glue over the hole and press down. This flattens the bubble effectively.
Another frequent issue is wrinkling. This happens if the paper gets too wet or if it is not smoothed out quickly enough. To fix deep wrinkles, you can try to lift the paper carefully before it dries completely. However, this risks tearing the paper. A better approach is to embrace the texture or sand it lightly once dry. Sometimes, a few coats of sealer will level out minor wrinkles. Additionally, you might experience tearing when smoothing thin paper. If this happens, try to piece the torn edges back together while wet. If the tear is visible after drying, you can paint over it or add another design element to cover it. Remember that decoupage is an art form. Imperfections often add to the handmade charm of the piece. Therefore, do not be discouraged by minor setbacks. With practice, you will learn how to handle different papers and glues with ease.
Creative Ideas and Inspiration for Wood Decoupage
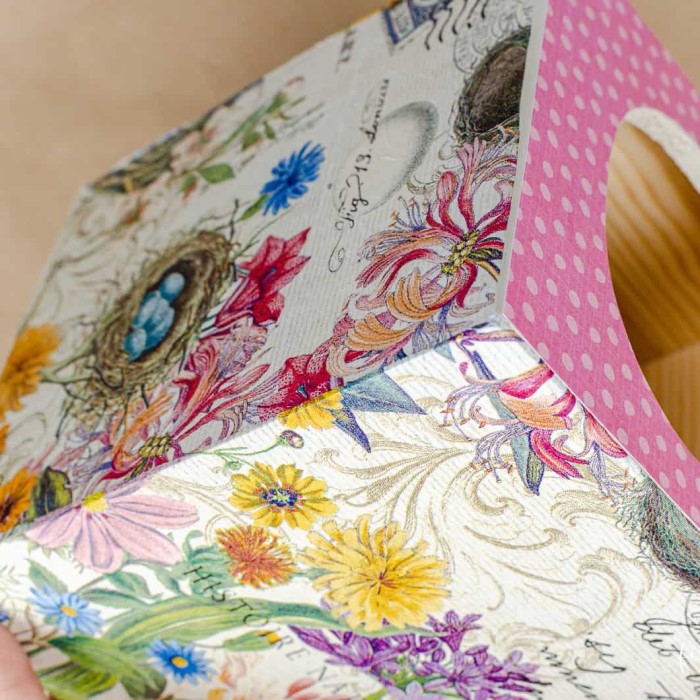
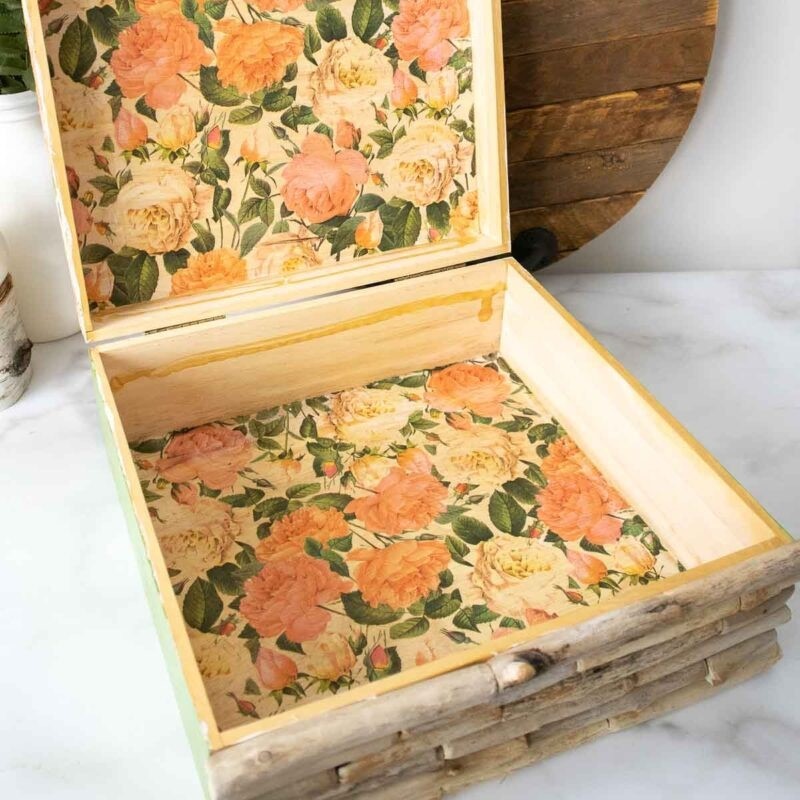
Once you master the basics, the possibilities are endless. You can apply this technique to a wide range of projects. For example, personalized photo gifts are a wonderful idea. You can decoupage family photos onto wooden blocks for a unique display. This makes for a heartfelt present during the holiday season. Furthermore, home decor projects are very popular. You can update old wooden trays, jewelry boxes, or picture frames. These small projects are perfect for using up scrap paper. They also make excellent gifts for friends and family.
Furniture makeover projects are another exciting avenue. An old wooden dresser can become a statement piece with a decoupage front. Use large sheets of floral paper or maps to cover the drawer faces. This technique transforms thrift store finds into custom furniture. Moreover, you can create seasonal decorations. Wooden signs for Christmas, Halloween, or Easter are simple to make. Use themed napkins or scrapbook paper to create festive artwork. You can also involve children in these projects. Kids love cutting and gluing, and it fosters their creativity. Just ensure they use non-toxic, water-based glues. Decoupage is also a great way to preserve memories. You can use ticket stubs, maps from a vacation, or old sheet music. These elements tell a story and make your decor deeply personal. Let your imagination guide you as you explore new ways to decorate.
Frequently Asked Questions
Beginners often have many questions when starting a new craft. Here are answers to some of the most common queries regarding decoupage on wood.
What is the best paper to use for decoupage on wood?
You can use almost any type of paper. However, scrapbook paper is the easiest to handle. It is thick and durable. Napkins and tissue paper create a more painted look but are harder to apply. Printer paper also works well for images you print at home.
How long does it take for decoupage to dry on wood?
The drying time depends on the humidity and the thickness of the glue layers. Generally, thin layers take 15 to 20 minutes to dry to the touch. However, it is best to wait 24 hours before handling the project heavily or adding multiple topcoats.
Can I use regular white glue for decoupage?
Yes, you can dilute regular white craft glue with water. A common ratio is three parts glue to one part water. However, dedicated decoupage mediums like Mod Podge are better. They dry clearer and include sealers for better protection.
How do I prevent bubbles in my decoupage?
Bubbles are caused by air trapped under the paper. To prevent them, apply glue to both the wood and the paper. Smooth the paper from the center outwards immediately. Use a brayer or a credit card to flatten the surface firmly.
Conclusion
Decoupage is a rewarding and accessible craft for everyone. It allows you to express your creativity through simple materials. We have explored the entire process from start to finish. You now know the importance of surface preparation. You understand how to select the right paper and apply the glue smoothly. Furthermore, you have learned how to seal your project for lasting durability. These skills will serve you well for years to come. Remember that practice makes perfect. Your first project might not be flawless, but it will be unique.
The joy of creating something with your own hands is unmatched. Therefore, gather your supplies and start crafting this season. Whether you are making a gift or updating your furniture, the results will be beautiful. Do not hesitate to experiment with different styles and techniques. As you continue to learn how to decoupage on wood, you will develop your own signature style. We hope this guide has answered your main questions. Can decoupage be done on wood? Yes, it is one of the best surfaces for it. Is decoupage difficult? It is an easy and enjoyable hobby for anyone. Can you Mod Podge paper onto wood? Absolutely, and now you know exactly how to do it. Enjoy your crafting journey and the beautiful art you create.