The Rise of Edible Art in Home Baking
Home baking has evolved significantly over the last decade. It is no longer just about taste. Today, visual appeal matters just as much as flavor. Bakers everywhere are looking for new ways to express their creativity. Consequently, the demand for specialized tools has surged. One of the most innovative tools on the market is edible markers for cookies. These handy pens allow even beginners to create intricate designs with ease. You might remember the days of struggling with piping bags. They were messy and difficult to control. However, these markers have changed the game entirely. They function just like regular felt-tip pens. Yet, they are filled with food-safe ink. This means you can draw directly onto your treats.
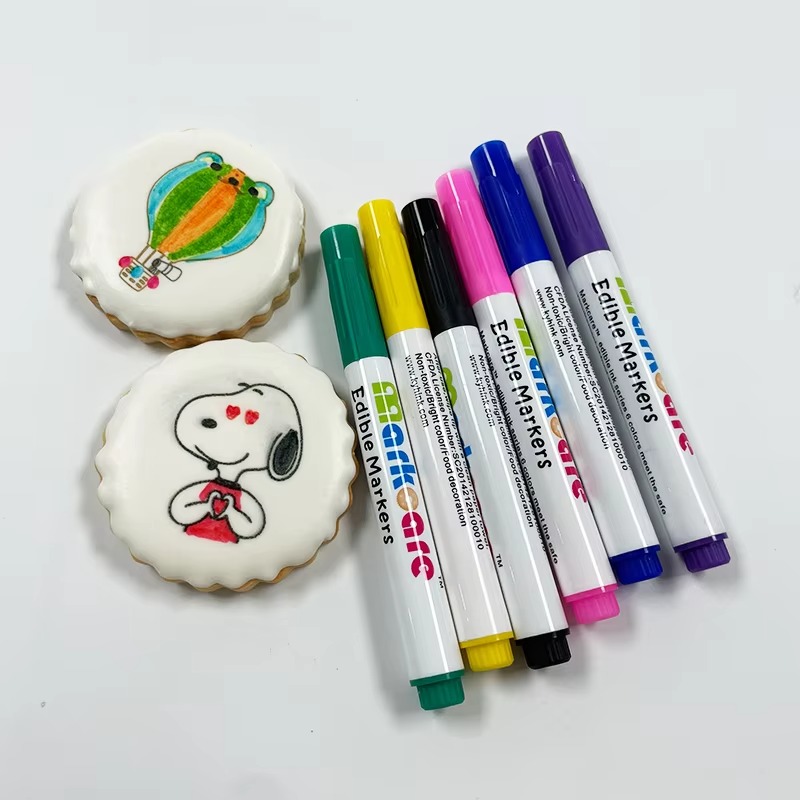
Furthermore, the versatility of these edible markers for cookies is impressive. You can use them on cookies, fondant, and even marshmallows. They open up a world of possibilities for customization. Imagine drawing faces on gingerbread men or writing personal messages on birthday cakes. The precision you get is unmatched by traditional icing methods. Therefore, they have become a staple in many kitchens. Whether you are a professional baker or a parent baking with kids, these markers offer a fun solution. They eliminate the stress of decorating. Instead, they replace it with the joy of drawing. This article will explore the various aspects of this trend. We will look at how they work and what to look for when buying them. By the end, you will be ready to start your own edible art project.
Understanding How Edible Markers Work
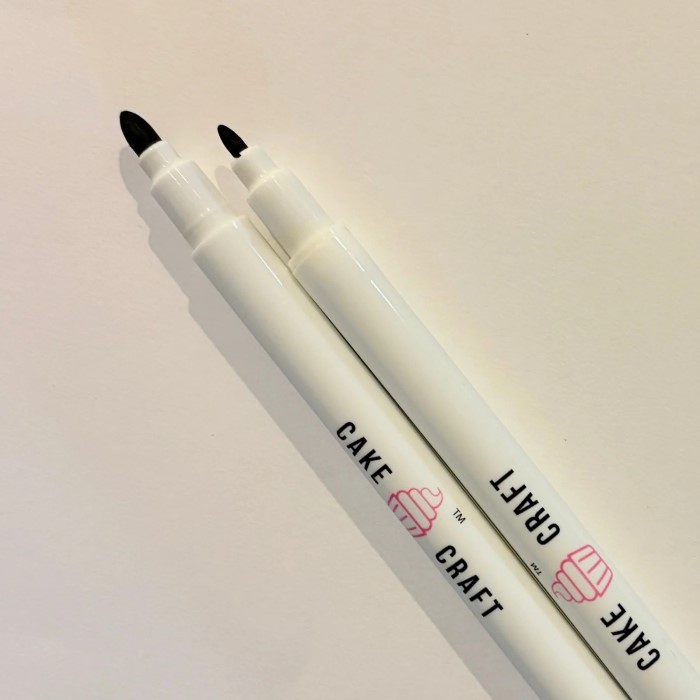
To the naked eye, these markers look identical to standard stationery. However, their internal mechanics are quite different. The ink inside is the key component. It is composed of food-grade ingredients. Manufacturers typically use a mixture of water, glycerin, and food coloring. Consequently, the ink is safe for consumption. The tip of the marker is usually made from felt or nylon. This material allows the ink to flow smoothly onto the surface. You do not need to press hard to get a vibrant color. A gentle touch is often enough.
Moreover, the science behind the adhesion is fascinating. These markers work best on dry, hard surfaces. For example, royal icing that has dried completely is the perfect canvas. The porous surface of the dried icing absorbs the ink. This prevents smudging and ensures a lasting design. On the other hand, wet surfaces can cause the ink to bleed. The water in the icing mixes with the marker ink. This results in a blurry mess. Therefore, patience is a crucial factor when using these tools. You must wait for your base layer to dry completely. This usually takes about an hour or two.
Additionally, the shelf life of these markers varies. Since they contain food ingredients, they do expire. It is important to check the packaging for dates. Most markers last for several months once opened. You should store them horizontally. This prevents the ink from pooling at one end. Proper storage ensures that the tip remains moist. If the tip dries out, you can sometimes revive it. Dipping it in a drop of water might work. However, this will dilute the color intensity. Therefore, keeping them capped tightly is essential.
Choosing the Right Surface for Your Designs
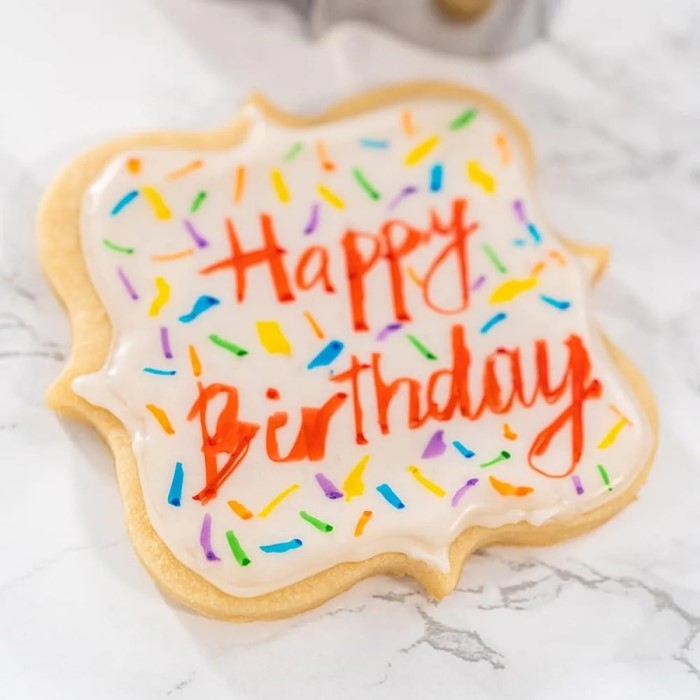
Success with edible markers for cookies depends heavily on the surface. Not all cookies are created equal for this specific task. You need a smooth, flat, and dry canvas. Sugar cookies with royal icing are the gold standard. The icing dries to a hard, matte finish. This provides the perfect texture for drawing. The marker tip glides effortlessly across the surface. Consequently, your lines come out crisp and clean. If you try to draw on a rough or textured cookie, the tip may snag. This can damage the felt and ruin your design.
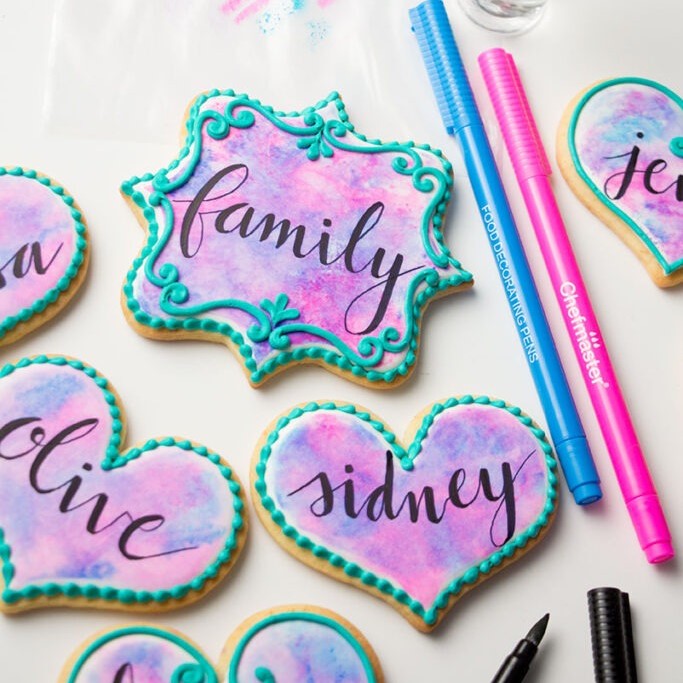
Another excellent surface is rolled fondant. Many cake decorators use fondant to cover cookies or cakes. It is smooth like paper. Therefore, it takes the ink beautifully. You can cut fondant into shapes and let it dry slightly. Then, you can draw intricate patterns or faces. Marshmallows are also a fun option. Their spongy texture creates a unique effect. However, they are soft. You must be very gentle to avoid denting them. Chocolate is another possibility. Yet, it comes with a warning. Chocolate contains oils. The oil can sometimes clog the marker tip. It can also cause the ink to bead up. If you use chocolate, make sure it is fully set and at room temperature.
Furthermore, avoid greasy surfaces. Buttercream frosting, for instance, is not ideal. The grease can break down the ink. It creates a soggy, unappetizing look. If you must use buttercream, let it crust over first. Even then, the results are unpredictable. For best results, stick to dry royal icing or fondant. These surfaces guarantee the best performance from your markers. They allow for the vibrant colors you desire.
Techniques for Mastering Cookie Art
Using these edible markers for cookies is simple, but a few techniques can elevate your art. First, consider the “stippling” method. This involves creating small dots with the marker tip. You can group them together to create shading. It is a great way to add dimension to your designs. For example, you can shade the cheeks of a character. Alternatively, you can create a gradient effect on a balloon. Simply vary the density of the dots. Closer dots create a darker shade. More spaced-out dots appear lighter.
Second, try using stencils. You can place a stencil over your cookie. Then, use the marker to fill in the open areas. This technique ensures perfect shapes every time. It is perfect for those who lack drawing confidence. You can also use paper cutouts. Trace around them to get the outline. Then, fill in the details freehand. Additionally, layering colors is a useful trick. You can layer one color over another. This creates new shades or interesting patterns. For instance, drawing yellow over blue creates a green effect. However, you must let the first layer dry. If it is wet, the colors will mix into mud.
Finally, practice on paper first. While this sounds counterintuitive, it helps. You can plan your design on a piece of paper. This saves your precious cookies from mistakes. Once you are happy with the design, transfer it to the cookie. You can even trace the design. Just place the paper over the cookie. Use a regular pen to trace lightly. This leaves a faint indentation on the icing. Then, use your edible marker to trace the lines. This technique guarantees professional-looking results.
Essential Tips for Storage and Maintenance
Like any art supply, these edible markers for cookies require care. Proper maintenance extends their life significantly. The most common issue is drying out. This happens when the cap is left off. Always cap your markers immediately after use. The air dries the felt tip very quickly. Once dry, the marker is often useless. Therefore, make it a habit to cap them tight. You should hear a “click” sound. This ensures an airtight seal.
Moreover, storage position matters. Store your markers horizontally. Laying them flat keeps the ink distributed evenly. If you store them vertically, the ink will drain. It will flow to one end. The other end will dry out. A pencil case or a flat drawer works best. Keep them away from heat sources. High temperatures can affect the ink consistency. They can cause the ink to expand or leak. Conversely, do not freeze them. Extreme cold can damage the chemical balance of the dye.
Cleaning the tips is also part of maintenance. Sometimes, the tip can pick up crumbs. This happens if the cookie surface is not perfectly smooth. A dirty tip will leave streaky lines. You can gently wipe the tip on a clean paper towel. If the ink seems clogged, you can try a gentle squeeze. Some markers have a pump mechanism. This pushes fresh ink to the tip. However, do this over a sink. You do not want excess ink to drip onto your project. By following these simple steps, your markers will last longer. They will also perform better when you need them.
Safety Standards and Ingredients
Safety is the primary concern when buying food products. You must ensure your tools are safe for consumption. Reputable brands follow strict regulations. In the United States, the FDA regulates food additives. Consequently, you should look for FDA-compliant products. This certification guarantees the ingredients are safe. Common ingredients include water, glycerin, and propylene glycol. They also use certified color additives. These ingredients are generally recognized as safe (GRAS).
However, it is crucial to read the label. Some people have specific allergies. For example, certain red dyes might trigger reactions in sensitive individuals. If you have dietary restrictions, check for allergens. Many markers are gluten-free and nut-free. But, you should verify this if you have celiac disease or nut allergies. Additionally, consider the source. There are many counterfeit products online. These might contain non-toxic ink. “Non-toxic” does not mean “edible.” It simply means it won’t kill you if you ingest a small amount. But it is not food. Therefore, only buy from trusted kitchen supply stores.
Furthermore, look for Kosher or Halal certifications if needed. Many professional brands offer these certifications. This ensures the product meets specific religious dietary standards. It adds another layer of trust. You are putting this ink into your body. Therefore, you should never compromise on quality. Cheap markers from unknown sellers are a risk. They may contain harmful chemicals. Always prioritize safety over price. Your health and the health of your guests are worth the investment.
Creative Project Ideas for All Ages
The possibilities with these markers are endless. They are fantastic for holiday-themed baking. For Halloween, you can draw spooky faces on ghost-shaped cookies. Use black markers for the eyes and mouth. For Christmas, design ugly sweater cookies. Draw intricate patterns with red and green markers. It is a fun activity for the whole family. Kids especially love this. They can express themselves without the mess of icing bags. It keeps the cleanup to a minimum. Consequently, it is a stress-free activity for parents.
Moreover, they are perfect for educational purposes. Teachers can use them in the classroom. Students can draw maps or diagrams on large sugar cookies. It makes learning interactive and delicious. You can also use them for party favors. Personalize each cookie with a guest’s name. It makes them feel special. You can also draw small icons that represent their hobbies. For a sports team, draw basketballs or soccer balls. These personalized touches make events memorable.
Another great idea is “paint-your-own” cookie kits. These are popular gifts. You bake the cookies and provide the markers. The recipient does the decorating. It is a unique and engaging gift idea. You can also use them on other treats. Draw faces on hard-boiled eggs for Easter. Decorate the top of a store-bought cupcake. The only limit is your imagination. Try creating a cookie puzzle. Draw a maze on a large square cookie. It serves as both a game and a snack.
Frequently Asked Questions
Many users have questions when they first start. Here are answers to three common queries.
How to decorate cookies with edible markers?
The process is simple. First, bake your cookies and let them cool completely. Then, cover them with royal icing. Let the icing dry thoroughly. This usually takes at least one to two hours. Once the surface is dry, you can start drawing. Use your markers just like regular pens. Draw your design, add colors, and fill in details. Let the ink dry for a few minutes before packaging.
What kind of markers are food safe?
Only markers specifically labeled as “edible” are safe. They must contain food-grade ink. Look for terms like “FDA approved” or “edible ink.” Do not use craft markers that say “non-toxic.” Non-toxic means they are not poisonous. However, they are not meant to be eaten. True food-safe markers are made with consumable ingredients. They are found in baking aisles, not stationery aisles.
What is a cookie marker?
A cookie marker is another name for an edible pen. It is a writing tool designed for food. It has a felt tip filled with edible ink. Bakers use it to draw designs on dry icing or fondant. It works best on smooth, hard surfaces.
Conclusion: Unleashing Your Inner Artist
The world of baking is full of wonderful innovations. These tools have truly revolutionized cookie decoration. They allow for precision, creativity, and fun. They make the art of decorating accessible to everyone. You do not need years of training to create beautiful treats. With a steady hand and a set of markers, you can achieve professional results. We have explored how they work and how to care for them. We have also discussed safety and creative ideas. Now, it is time for you to try them yourself. Pick up a pack of edible markers for cookies and start experimenting. You will discover a new passion for edible art. It is a delightful way to add a personal touch to your baking. Your friends and family will be amazed by your creations.