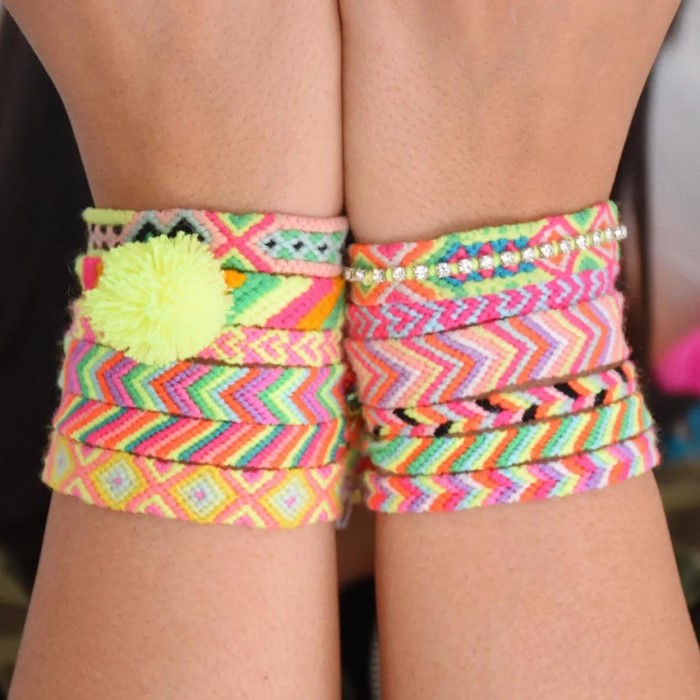
The Art of Creating Handmade Jewelry
Creating jewelry at home is a rewarding hobby. It allows for endless creativity. Furthermore, it is a relaxing activity. Many people search for how to make string bracelets because they want a simple start. This craft does not require expensive tools. Consequently, it is accessible to everyone. You can make gifts for friends. Alternatively, you can sell your creations. The possibilities are truly endless. Moreover, the process is quite meditative. You focus on the knots. As a result, you forget your daily stress. This art form has a rich history.

For instance, friendship bracelets originated in Central America. They symbolized connection and peace. Today, they remain a symbol of bonding. Therefore, learning this skill connects you to a tradition. You use simple materials like thread. However, the results look intricate and professional. This guide will walk you through the basics. We will explore the necessary supplies. Then, we will master the fundamental knots. You will also learn popular patterns. Soon, you will create stunning pieces. You will be proud to wear them.
Gathering Your Essential Materials
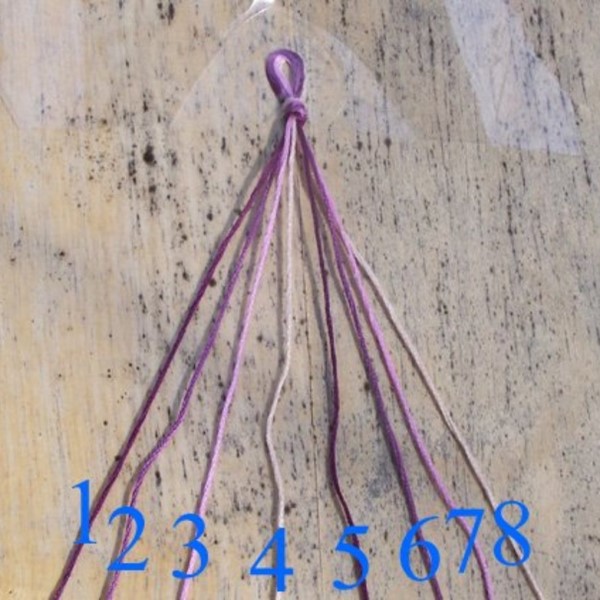
You need specific supplies to begin. Fortunately, the list is short. First, you need string. Embroidery floss is the most popular choice. It comes in many colors. Therefore, you can create vibrant designs. You can also use hemp or yarn. However, embroidery floss is easiest for beginners. Next, you need something to cut the string. A good pair of scissors is vital. You will cut many lengths of thread. Consequently, sharp scissors make clean cuts. You also need a measuring tape. This ensures your bracelet fits. Furthermore, you need a surface to work on.
A clipboard is very helpful. It holds your work tight. Alternatively, you can use a safety pin. You attach the thread to a pillow or your jeans. This keeps the base secure. Finally, you might want beads. Beads add a decorative touch. They make your bracelet unique. You can find these items at any craft store. They are very affordable. Thus, you can start without a large investment. Once you have these items, you are ready.
Understanding the Basic Forward Knot
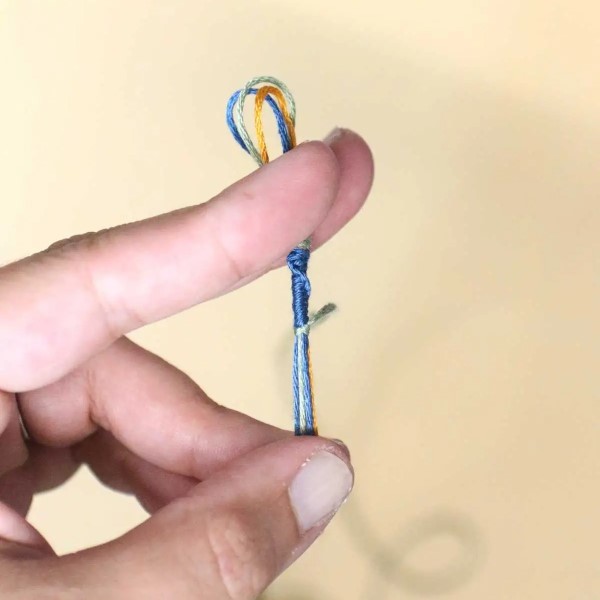
The forward knot is the foundation. You must master this technique. It creates a diagonal pattern. Furthermore, it is the basis for the chevron design. Here is how you do it. First, take two strings. Place them side by side. Then, take the left string. Bend it over the right string. It should look like the number four. Next, pull the end of the left string under the right string. Then, pull it up through the loop. You have made a half knot. However, you are not done. You must repeat this process. Do it again with the same left string. This completes one full forward knot.
Consequently, the knot will be tight. The left string has now moved slightly to the right. This movement creates the pattern. It is important to hold the base string tight. This ensures the knot is secure. If the base is loose, the knot will slip. Therefore, tension is key. Practice this knot repeatedly. You will soon do it without thinking. It is the most common knot in bracelet making.
Mastering the Backward Knot Technique
The backward knot is the reverse. It is just as important as the forward knot. Together, they allow for complex designs. You use this knot to move left. It mirrors the forward knot perfectly. To start, take two strings. This time, focus on the right string. You will move it to the left. First, bend the right string over the left string. It should look like a backward four. Next, tuck the end under the left string. Pull it through the loop. This is a half backward knot.
Like before, you must repeat it. Do the exact same motion again. This secures the knot. Consequently, the right string moves to the left. You use this knot to create lines going the other way. It is essential for zigzag patterns. Furthermore, it helps in creating straight lines. You must maintain even tension here too. Consistent tension makes the bracelet look professional. If your knots are loose, the bracelet falls apart. Therefore, practice is necessary. Switch between forward and backward knots. This helps you understand the direction. Soon, you will control the flow of the design.
Creating the Classic Chevron Pattern
How to make string bracelets? The chevron pattern is iconic. It looks like a series of arrows. Many people recognize this design. It is a great project for beginners. You use both the forward and backward knots. First, you need an even number of strings. Arrange them in a specific order. The colors should mirror each other. For example, place red, blue, green, green, blue, red. This symmetry is crucial. Start with the leftmost string. Make forward knots until you reach the middle. Then, take the rightmost string. Make backward knots until you reach the middle.
The two strings will meet in the center. You then tie them together. You can use a forward knot here. This creates the point of the arrow. Consequently, you have completed one row. You repeat this process for the entire bracelet. The arrows will stack up. As a result, you get a beautiful V-shape. This pattern teaches you rhythm. You learn to switch between techniques. Furthermore, it looks impressive. Your friends will admire your skill. It is a stepping stone to advanced work.
Exploring the Spiral Staircase Design
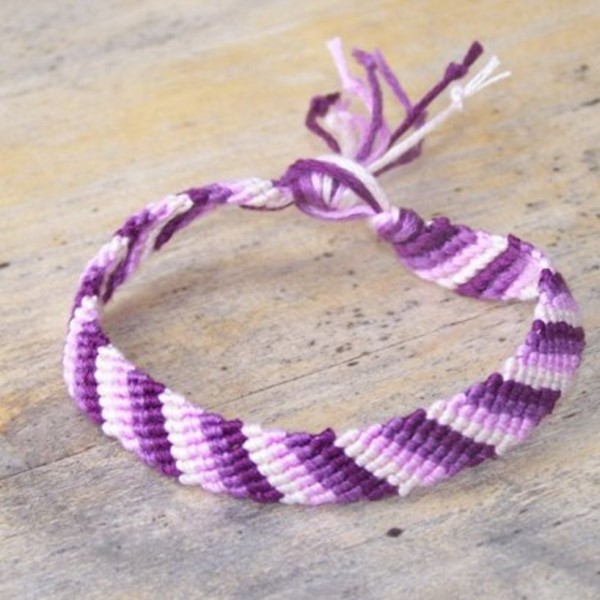
How to make string bracelets? The spiral design is simpler than the chevron. It creates a twisted rope effect. This is perfect for a quick project. Moreover, it uses only one type of knot. You only need the forward knot. Alternatively, you can use only backward knots. The process is very straightforward. First, choose your strings. You can use two colors or more. However, one color acts as the base. The other color does the knotting. You tie forward knots repeatedly. You do not switch directions. Consequently, the knots naturally twist. The thread will start to spiral.
It looks like a DNA helix. This happens because the knots sit at an angle. They push the thread to the side. Therefore, a spiral forms automatically. You can adjust the tightness. A tighter pull makes a stiff bracelet. A looser pull makes it flexible. This design is very durable. It does not unravel easily. Furthermore, it is great for using leftover string. You can make a bracelet in minutes. It is a satisfying and fast project. You can make many in one sitting.
Adding Beads and Charms for Flair
How to make string bracelets? You might want to add variety. String bracelets do not have to be just knots. You can incorporate beads easily. This adds texture and shine. Furthermore, it breaks up the monotony of the pattern. To add a bead, you need a large hole. The embroidery floss must pass through. First, thread your string through a needle. Then, slide the bead onto the string. You can place it in the middle of a knot sequence. Or, you can add it at the ends. Many people add a final bead. It acts as a closure. This is a clever design choice. You make a loop at the other end.
The bead slides through the loop. Consequently, the bracelet stays on your wrist. You can also use alphabet beads. These spell out names or messages. It makes the jewelry personal. Kids love this feature. Additionally, you can add metal charms. They dangle from the bracelet. This gives it a modern look. Just ensure the holes are big enough. Planning your design is helpful. Decide where the beads go first. Then, knot around them.
Finishing Your Bracelet Securely
How to make string bracelets? The ending is just as important as the beginning. A loose end ruins the bracelet. Therefore, you must secure it properly. There are several ways to finish. The braided tail is a popular method. You divide the strings into three groups. Then, you braid them together. This creates a strong tail. You tie a knot at the end. You can then tie the bracelet on your wrist. Another method is the adjustable knot. This involves macrame techniques. You use the ends to tie sliding knots. This allows the bracelet to resize. It fits any wrist size.
Consequently, it is great for gifts. You do not need to measure perfectly. To do this, you overlap the ends. Then, you wrap a new piece of string around them. You tie square knots over the overlap. This binds the ends together. Finally, you trim the excess string. You should also use a lighter carefully. You can melt the tips of synthetic string. This prevents fraying. Be very careful not to burn yourself. A finished bracelet looks polished. It shows attention to detail.
FAQ
What do I need to make string bracelets?
You need embroidery floss or thread, scissors, a measuring tape, and a surface to secure your work, like a clipboard or safety pin. You may also want beads or charms for decoration.
How to make simple thread bracelets?
The simplest bracelet uses the spiral staircase design. You take two or more strings and tie a series of forward knots repeatedly. This creates a twisted, rope-like bracelet that is easy for beginners.
How to make a knotted thread bracelet?
To make a knotted bracelet, you use forward and backward knots. You tie the string around a base strand. By alternating these knots, you create patterns like stripes or chevrons. Consistent tension is key to a neat look.
What kind of string is best for making bracelets?
Embroidery floss is the best choice for beginners. It is widely available, inexpensive, and comes in many colors. It is smooth and easy to knot. For a thicker bracelet, you can use hemp or nylon cord.
Conclusion
Learning how to make string bracelets is a journey. It starts with simple knots. However, it leads to complex art. You have learned the forward and backward knots. You also know the chevron and spiral patterns. Furthermore, you can now finish your pieces professionally. This hobby offers many benefits. It improves your fine motor skills. Additionally, it provides a creative outlet. You can make accessories for any outfit. You can also create heartfelt gifts. The techniques in this guide are just the start. There are hundreds of patterns to explore. Therefore, do not stop here. Keep practicing your tension. Try new color combinations. Experiment with beads and charms. Most importantly, have fun with the process. You have the skills to create beautiful jewelry. Your friends will ask for their own. You can proudly say you made it yourself. So, pick up your string and start knotting today.