The Timeless Appeal of Glass Painting
Glass painting is a captivating and versatile art form. It has attracted artists and hobbyists for centuries. This craft involves transforming a transparent surface into a vibrant masterpiece. The interplay of light and color creates a stunning visual effect. Consequently, it remains a popular choice in the world of decorative arts. Many people assume that this craft is overly complex. However, with the right techniques, anyone can master it. You might want to decorate a simple jar. Or perhaps you wish to create an intricate stained-glass window. Either way, the process is incredibly rewarding. Glass painting dates back to the Middle Ages.
It holds significant religious and historical importance. Originally, it served a narrative purpose in grand cathedrals. Today, it has evolved into a modern and accessible hobby. It offers a refreshing twist on traditional home decor. Furthermore, it does not require expensive equipment to start. You can use simple acrylics or specialized glass paints. The results are often mesmerizing and professional. Friends will admire your creativity and style. Therefore, pick up your brushes and explore this colorful world. This guide will walk you through the essential steps. We will cover materials, methods, and tips. You will create stunning artwork in no time. The joy of creating something unique is unparalleled. Moreover, it serves as a fantastic stress reliever. Engaging in creative activities relaxes the mind. Thus, it is beneficial for your mental well-being too.
Essential Materials for Your Project
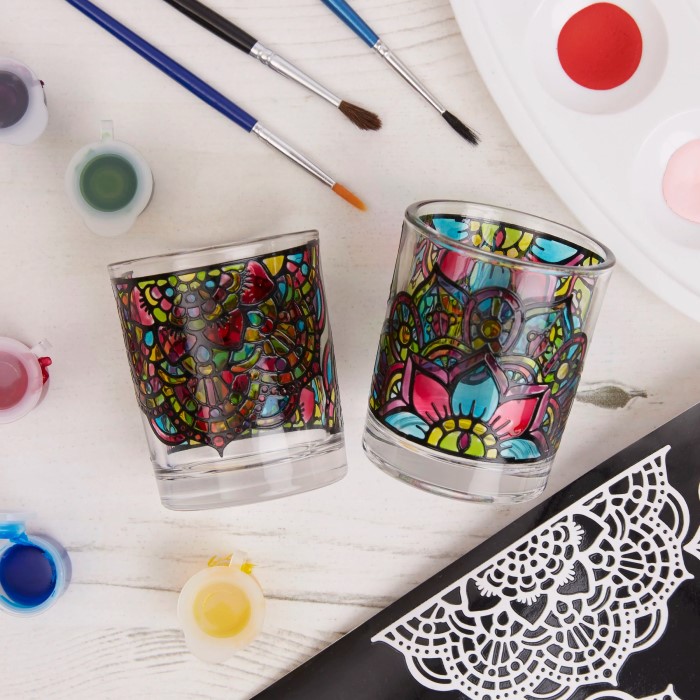
To begin your journey, you need the right tools. High-quality materials make the process smoother. They also ensure a better final result. First, you need a surface to paint on. This can be anything from a wine glass to a flat glass sheet. Many beginners start with recycled glass jars. They are free and easily available. Next, you need the paint itself. There are several types of paint to consider. Acrylic enamel paints are a popular choice. They are durable and water-resistant. Furthermore, they come in a wide range of colors. Transparent glass paints are another option. They mimic the look of stained glass. Consequently, they are perfect for window art.
You will also need a variety of brushes. Fine-tip brushes are essential for outlining. Broader, flat brushes work well for filling areas. Additionally, a palette is necessary for mixing colors. A sponge is also useful for creating texture. Do not forget the cleaning supplies. Rubbing alcohol or white vinegar is crucial. They help prepare the surface. Finally, you might want a pattern or template. This guides your design. Therefore, gather these items before you start. Having everything ready saves time. It also prevents frustration later on. Good preparation is the foundation of success.
Preparing the Surface Correctly
Preparation is arguably the most critical step. Many beginners skip this part. However, it determines the paint’s adherence. Glass surfaces are often coated with oil or dirt. Therefore, the paint will not stick properly without cleaning. First, wash the glass with warm, soapy water. Use a mild detergent for this task. Rinse it thoroughly to remove all soap residue. Then, dry the glass completely with a lint-free cloth. Furthermore, you must degrease the surface. Dip a cotton ball in rubbing alcohol. Wipe it over the entire painting area.
Alternatively, you can use white vinegar. This removes any remaining fingerprints or oils. Consequently, the surface becomes perfectly clean. Avoid touching the glass after this step. Oils from your skin will transfer back. Instead, hold the glass by the edges. Or, wear cotton gloves while you work. This attention to detail is vital. It ensures the longevity of your artwork. If the surface is dirty, the paint will peel. No one wants their hard work to go to waste. Thus, take the time to clean properly. It is a simple step with a huge impact. Proper preparation leads to a professional finish.
Mastering the Outlining Technique
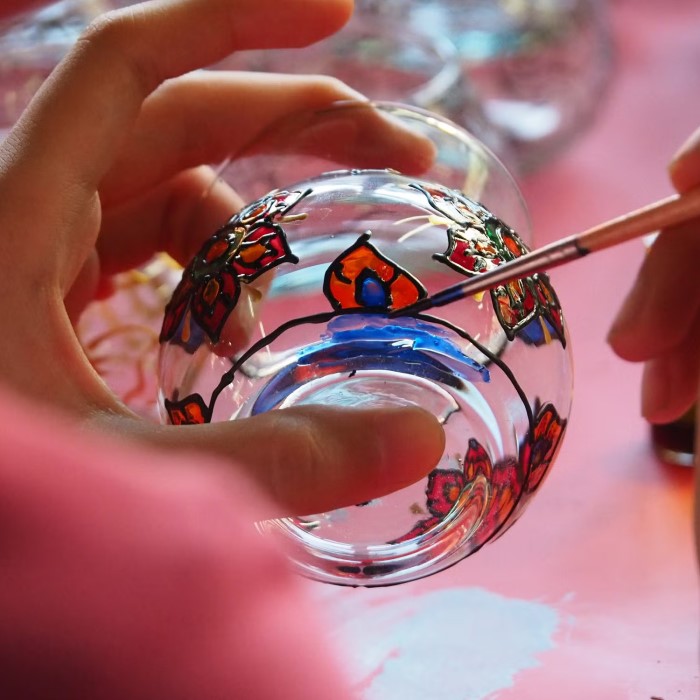
Outlining is a fundamental skill in glass painting. It defines the different areas of your design. It also adds a polished, finished look. Traditionally, stained glass uses lead strips. In glass painting, we use relief paste or outliners. These come in tubes with a fine nozzle. You can draw lines directly onto the glass. However, maintaining a steady hand is key.
Practice on a piece of paper first. Get a feel for the pressure required. Squeeze the tube gently and move your hand slowly. Furthermore, ensure your lines are unbroken. Broken lines allow colors to bleed into each other. Therefore, consistency is important. The outline acts as a barrier. It keeps the wet paint contained. Additionally, you can use this technique to create texture. You can make dots or swirls. Most outliners are available in black or gold. Yet, you can find them in various colors. If you make a mistake, do not panic. Wipe it off quickly with a damp cloth. The outline needs to dry completely before painting. This usually takes about an hour. Patience is your best friend here. Rushing this step can ruin the design. Consequently, let it set firmly. This creates a strong boundary for your colors.
The Art of Applying Color
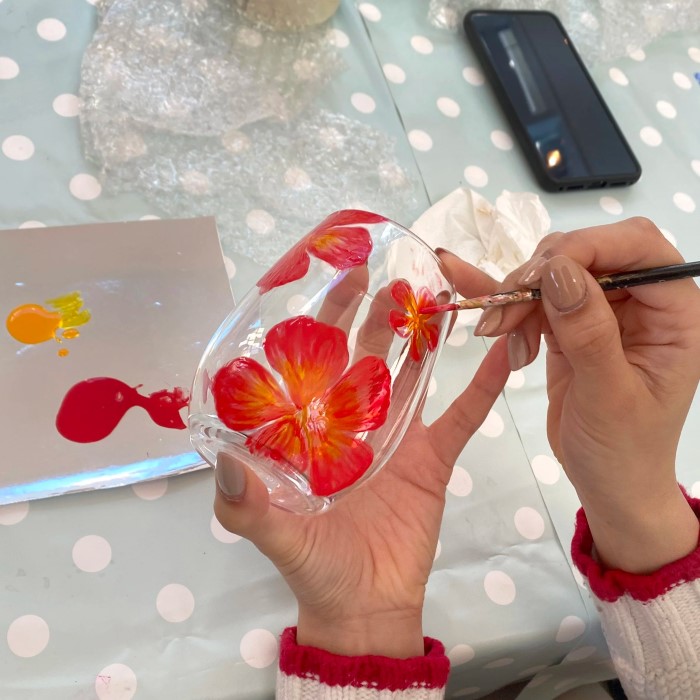
Once the outline is dry, the real fun begins. Filling in the colors brings your art to life. Squeeze a small amount of paint onto your palette. Dip your brush into the color. Carefully apply the paint inside the outlines. Be careful not to overflow the edges. Furthermore, try to apply an even coat. Uneven paint looks patchy when dry. For a stained-glass effect, use transparent paints. Apply a generous amount. Then, gently tap the glass. This helps the paint settle and level out. Consequently, you get a smooth, glossy finish.
You can also mix colors directly on the glass. Drop one color into another while wet. Use a toothpick to swirl them together. This creates beautiful gradients and patterns. Moreover, watch out for air bubbles. Bubbles are common in glass paints. They ruin the smooth texture. Pop them with a pin or needle. Do this while the paint is still wet. If you want a more opaque look, apply a second coat. Wait for the first layer to dry first. Layering adds depth to your artwork. Therefore, experiment with different techniques. Each method offers a unique result. The application of color is where your creativity shines.
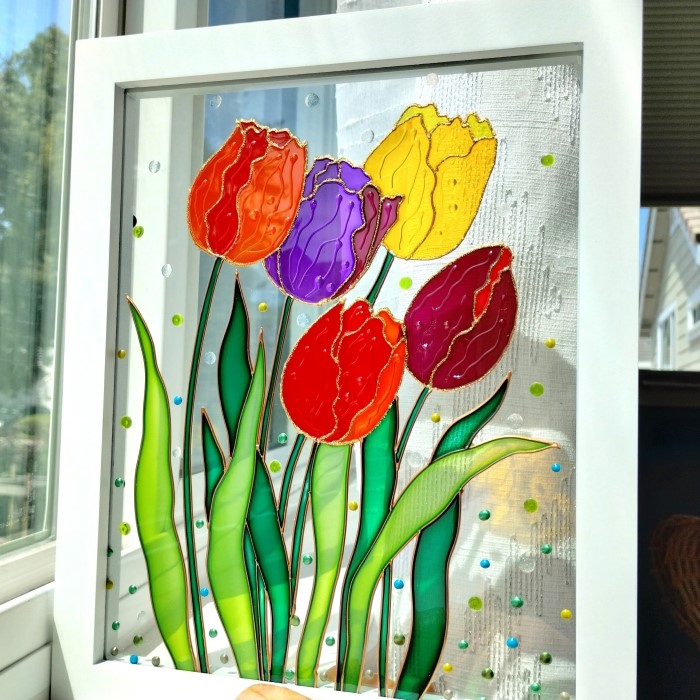
Exploring Reverse Glass Painting
Reverse glass painting is a fascinating technique. It offers a unique perspective on the art form. As the name suggests, you paint on the back of the glass. Therefore, you view the image from the front. This method requires a different way of thinking. You must work in reverse order. Typically, you paint the foreground details first. For instance, you would paint the eyes of a portrait first. Then, you paint the surrounding colors. Finally, you add the background. Consequently, the layers build up behind each other. This creates a wonderful sense of depth.
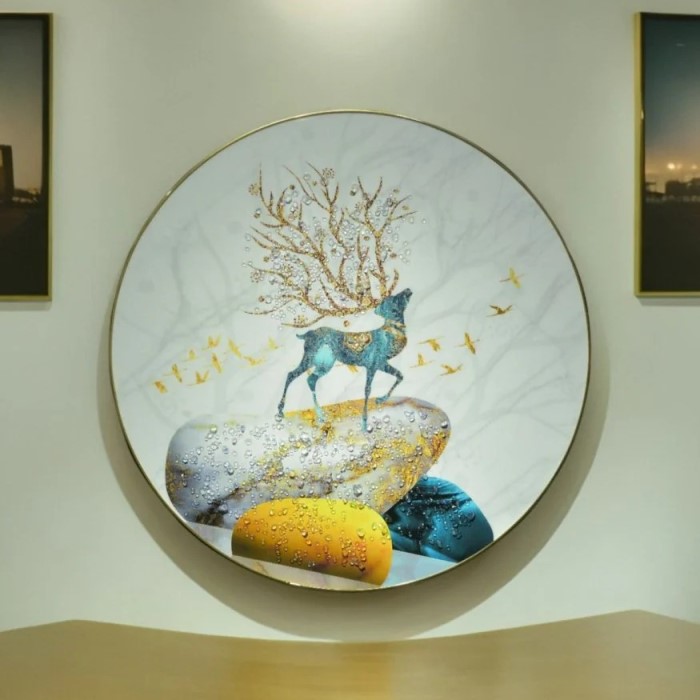
The glass surface protects the paint. It gives the artwork a glossy, smooth finish. Furthermore, brush strokes are hidden from view. This makes it perfect for beginners who struggle with brush control. The result always looks clean and professional. Historically, this technique was used for religious icons. It was also popular in folk art. Today, it is a great way to decorate plates. Just ensure you use non-toxic paints if the plate is for food. Alternatively, paint on the bottom of a clear plate. This keeps the food surface safe. Thus, reverse painting is both versatile and forgiving.
Adding Texture and Special Effects
Texture adds another dimension to your work. While smooth surfaces are classic, texture is eye-catching. There are many ways to create texture. One popular method involves using salt. Sprinkle coarse salt onto wet paint. The salt absorbs the moisture. When the paint dries, brush the salt away. Consequently, a mottled, crystalline pattern remains. This looks like frost or coral. Additionally, you can use sponges. Dip a sponge into the paint. Dab it lightly on the glass. This creates a stippled, grainy effect. It is perfect for creating backgrounds like skies or foliage. Moreover, try using crackle medium.
This special medium causes the paint to crack. It gives the artwork an antique, vintage look. Another fun technique is “sgraffito.” Apply a thick layer of paint. Then, scratch designs into the wet paint. Use a toothpick or a stylus. This reveals the clear glass underneath. Therefore, you can create intricate patterns. You can also use stickers or stencils. Place them on the glass before painting. Paint over them, then remove them while wet. This leaves a clean, negative space design. These special effects elevate your project. They turn a simple craft into a masterpiece.
Curing and Sealing Your Artwork
The final step is curing the paint. This ensures your artwork is durable. It makes the paint resistant to scratches and water. There are two main ways to cure glass paint. The first method is air drying. This is the easiest option. Simply leave the project in a safe place. Check the paint bottle for the recommended time. Usually, it takes about 21 days to fully cure.
However, some paints cure faster. The second method is heat setting. This is faster and often more durable. Place the glass item in a cool oven. Then, set the temperature to around 300°F (150°C). Bake the item for 30 to 40 minutes. Turn the oven off after the time is up. Let the glass cool down inside the oven. Do not remove it while it is hot. Sudden temperature changes can crack the glass. Consequently, the cooling process is just as important. Once cured, the paint is permanent. You can hand wash the item gently. However, avoid putting it in the dishwasher. Harsh detergents can wear down the paint over time. Therefore, treat your artwork with care. Proper curing guarantees your art lasts for years.
FAQ
What kind of paint do you use on glass?
You can use acrylic enamel paints or specialized transparent glass paints. Acrylic enamels are durable and opaque. Transparent paints mimic the look of stained glass. Always check the label to ensure the paint is designed for non-porous surfaces.
What do you call a glass painting?
The term generally refers to “glass painting” or “reverse glass painting” if done on the back. Historically, it is often associated with “stained glass” effects, though true stained glass involves colored glass pieces, not paint on clear glass.
How to permanently paint glass?
To make paint permanent, you must cure it. You can let it air dry for several weeks. Alternatively, you can bake the glass item in an oven. Baking at 300°F for about 30 minutes sets the paint effectively. Always follow the specific paint manufacturer’s instructions.
What is needed for glass painting?
You need a clean glass surface, glass paints, and fine-tip brushes. You also need a surface cleaner like alcohol. Outliners or relief paste are helpful for designs. A palette and a stencil or pattern are also useful for beginners.
Conclusion
In summary, this art form offers endless possibilities. It is a journey of creativity and expression. We have explored various aspects of the craft. From selecting materials to mastering outlining, each step is vital. Furthermore, we discussed advanced techniques like reverse painting. These methods elevate your skills. Remember to be patient with yourself. Skill comes with practice. Glass painting allows you to transform ordinary objects into treasures. It brings color and light into your life. So, gather your supplies and start your project today. The joy of creation is waiting for you.