Introduction
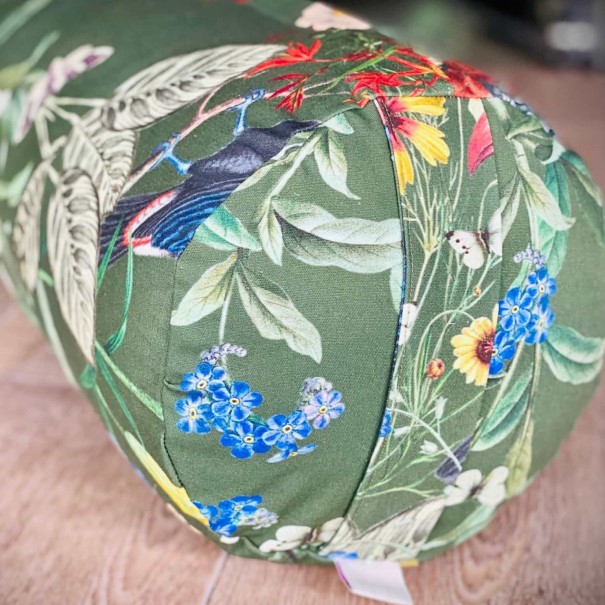
Creating your own diy yoga bolster is a rewarding and practical project that can enhance your yoga practice. A bolster is an invaluable tool for various yoga postures, providing support and comfort, particularly during restorative poses. By making a DIY yoga bolster, you can customize it to your preferences, including size, shape, and filling material. This article will guide you through the essential materials and techniques needed to craft your own yoga bolster, enabling you to enjoy a more fulfilling yoga experience.
Understanding the Benefits of a Yoga Bolster
Support and Comfort
A yoga bolster offers significant support during different yoga poses. It helps the body to relax into postures by alleviating pressure and allowing for better alignment. This support is crucial for restorative and therapeutic practices where deep relaxation is the goal. Using a bolster can enhance your practice, improve breathing, and increase the effectiveness of your sessions.
Versatility in Practice
One of the greatest advantages of a yoga bolster is its versatility. It can be used in various ways, such as under the knees, back, or hips, to modify postures and make them more accessible. Additionally, bolsters can be used for meditation, providing comfort while sitting for extended periods.
Personalized Experience
By crafting your own diy yoga bolster, you can personalize it according to your specific needs. You can adjust its size and filling, ensuring it meets your body’s requirements and enhances your yoga practice. A custom bolster reflects your unique style and preferences, making it a personal and valuable addition to your yoga toolkit.
Essential Materials for Crafting
Outer Fabric
Choosing the right fabric for your bolster’s cover is crucial for both durability and aesthetics. Here are some options:
- Canvas: A sturdy fabric that withstands wear and tear, making it an excellent choice for a long-lasting bolster.
- Cotton: Soft and breathable, cotton offers comfort while providing enough strength for everyday use.
- Linen: Known for its natural texture and durability, linen is an elegant option that adds style to your bolster.
When selecting the outer fabric, consider how easy it is to wash. Many yogis prefer machine-washable fabrics for easy maintenance.

Filling Material
The fill of your bolster greatly affects its firmness and weight. Here are some filling options to consider:
- Cotton Batting: A popular choice among practitioners, it provides a soft yet supportive feel. It is also eco-friendly and can be found at craft stores.
- Buckwheat Hulls: These provide a firm and adjustable support, adapting to the shape of your body. Buckwheat-filled bolsters have excellent weight and stability.
- Polyester Fiberfill: This synthetic option is lightweight and provides good support. However, it may not offer the same firmness as natural fillings.
Selecting the right filling will enhance your comfort and effectiveness during yoga poses.
Step-by-Step Guide
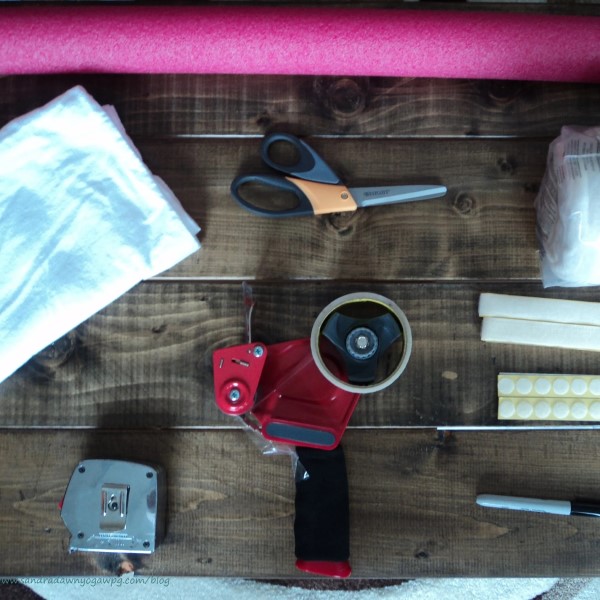
Step 1: Gather Materials
Before starting your project, gather all necessary materials, which typically include:
- Outer fabric (e.g., canvas, cotton, or linen)
- Filling material (e.g., cotton batting or buckwheat hulls)
- Sewing machine or needle and thread
- Measuring tape
- Scissors
- Pins
- Optional: Zipper or Velcro for easy access to the filling
Having everything prepared ensures a smooth crafting process.
Step 2: Measure and Cut the Fabric
Determine the size of your bolster. A standard yoga bolster measures approximately 24 inches long and 8 inches in diameter. Use a measuring tape to mark and cut your fabric accordingly. You should have two identical pieces for the ends and a long rectangle for the body.
- Cut the Rectangles: For the body, cut a rectangle measuring 50 inches in length and 18 inches in height.
- Cut the Ends: For the ends, cut two circles with an 8-inch diameter.
Ensure your cuts are precise for a professional-looking finish.
Step 3: Sew the Bolster
Begin sewing the long rectangle fabric pieces together. Use a straight stitch along the length, leaving one end open to add in the filling:
- Sew the Long Side: Fold the rectangle lengthwise and sew along one long edge, creating a tube.
- Attach the Ends: Once the tube is finished, sew the circular pieces to each end. Pin them securely before sewing to ensure they align correctly.
- Create a Closure: You may opt for a zipper or Velcro closure at one end. This will allow you to adjust the filling as necessary.
Ensure your sewing is sturdy to withstand regular use.
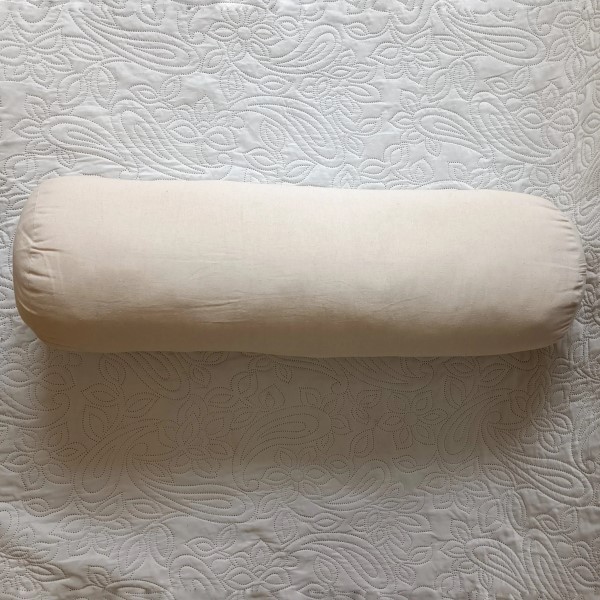
Step 4: Fill Your Bolster
With the bolster sewn, it’s time to add the filling:
Using Cotton Batting
- Selecting the Cotton Batting: When deciding to use cotton batting as your filling material, it’s essential to choose high-quality batting that provides both comfort and support. Look for 100% cotton batting, which is breathable and ideal for yoga bolsters.
- Preparing the Cotton Batting: Before filling the bolster, it’s crucial to fluff the cotton batting. Fluffing helps to loosen the fibers and distributes them evenly, which enhances comfort and ensures a better shape for the bolster.
- Achieving Even Distribution: While fluffing, gently pull apart and separate the batting into smaller sections. This process prevents clumping and allows the fluff to expand. An even distribution of cotton results in a more comfortable bolster, contributing positively to your yoga practice.
Using Buckwheat Hulls
- Choosing Buckwheat Hulls: If you prefer a firmer filling, buckwheat hulls are an excellent option. They are natural, eco-friendly, and provide excellent support while conforming to your body’s shape. Ensure that the hulls are clean and free from debris before use.
- Filling the Bolster: To fill your bolster, carefully pour the buckwheat hulls directly through the opening. You can use a funnel for easier pouring and to minimize spills. Ensure that the hulls fill the bolster evenly to maintain balance.
- Adjusting the Amount: Depending on your personal preference for firmness, you can adjust the amount of buckwheat hulls as you fill the bolster. For a softer feel, use fewer hulls; for a firmer bolster, add more. Testing the fill level during this process is important to achieve the desired comfort.
Final Adjustments
- Testing Firmness and Comfort: After filling the bolster, it’s vital to test its firmness and overall comfort. Gently press down on the bolster and sit on it in various positions that you plan to use it for. This testing will give you a better sense of how well the bolster supports your body.
- Making Adjustments If Necessary: If the bolster feels too firm or soft during your test, you can add or remove some filling as needed. For instance, if it feels too hard, you may want to remove some of the buckwheat hulls or fluff the cotton batting more.
-
Closing the Opening: Once you are satisfied with the firmness and comfort of your bolster, it’s time to secure the final opening. Use your chosen closure method, whether it’s sewing a seam, adding a zipper, or using Velcro, to ensure the filling stays in place. Make sure the closure is secure but also accessible if you wish to adjust the filling in the future.
Maintenance and Care
Regular Cleaning
Maintaining your DIY yoga bolster is crucial to prolong its life. Follow these cleaning tips:
- Covers: If your outer fabric is removable, wash it regularly according to the fabric care instructions.
- Spot Cleaning: For non-removable covers, use a damp cloth to spot clean any stains or dirt.
Proper cleaning ensures your bolster remains hygienic and fresh.
Storage
When your bolster is not in use, store it in a cool, dry place. Avoid exposing it to direct sunlight, which may fade colors or damage materials over time. If using a natural filling, store your bolster upright to prevent compression.
Frequently Asked Questions
What can I use instead of a yoga bolster?
If you don’t have a yoga bolster, you can use pillows, blankets, or larger rolled towels to provide similar support and comfort during yoga practice.
What is the best filling for a yoga bolster?
The best filling depends on personal preference. Cotton batting offers softness, while buckwheat hulls provide firmer support. Test different fillings to see what enhances your practice the most.
What can I use as a bolster?
In addition to traditional bolsters, items like rolled blankets, cushions, or even sturdy yoga mats can substitute for a bolster in various poses.
What to use instead of yoga blocks at home?
If you need a substitute for yoga blocks, try using thick books, sturdy water bottles, or even foam cushions. These items can provide support and elevate your body during practice.
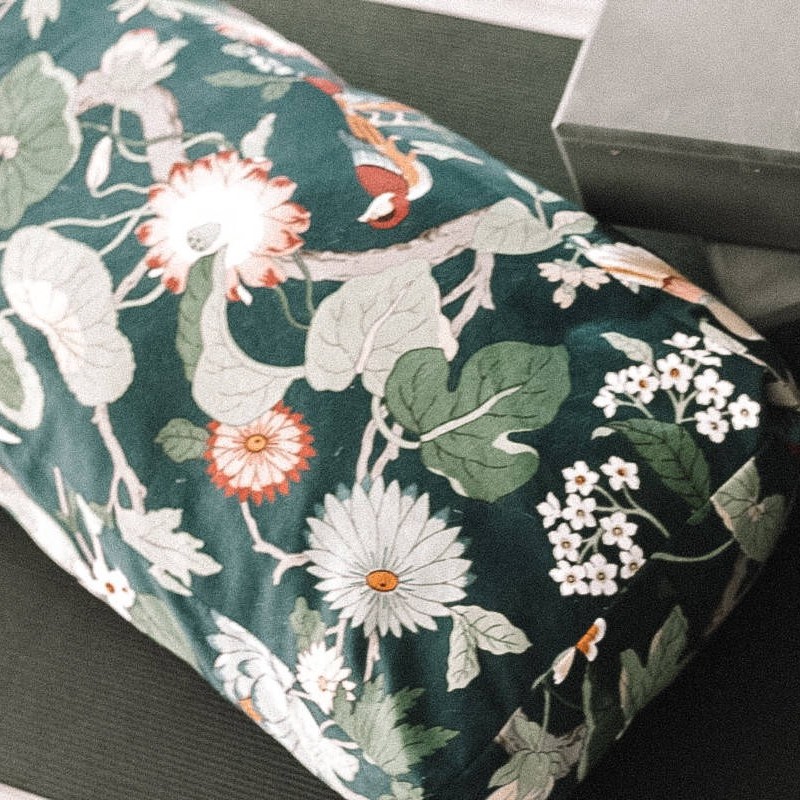
Conclusion
In summary, crafting your own diy yoga bolster is not only a fulfilling project but also enhances your yoga experience significantly. By using the right materials and following the outlined techniques, you can create a personalized bolster that meets your specific needs. This customization allows you to enjoy the numerous benefits a bolster provides during practice, from improved comfort to enhanced support in various poses.
As you implement your DIY bolster, remember to maintain it well to ensure it lasts. By investing time in this project, you give yourself a valuable tool that reflects your personal style and supports your yoga journey. Enjoy crafting your DIY yoga bolster and enhance your practice today!