Introduction: The Allure of DIY Ribbon Garlands
A diy ribbon garland can add a delighful touch to your celebrations, enhancing the atmosphere of any event. Whether you’re decorating for a birthday party, a wedding, or a seasonal gathering, ribbon garlands are versatile and beautiful. They can transform a simple space into a festive environment, reflecting your unique style and theme. Not only are they easy to make, but the range of colors and textures available also allows for endless creativity. In this guide, we will share tips, techniques, and ideas for crafting your own ribbon garland, making it a fun project for all skill levels.
Why Choose Ribbon Garlands?
Creating your own ribbon garland comes with several benefits that make it an attractive option for decorations:
- Customizable Design:
One of the biggest advantages of making a DIY ribbon garland is the ability to customize it according to your theme or color scheme. You can select different types of ribbons—satins, burlaps, and laces— to create the desired impact. - Budget-Friendly:
Purchasing pre-made garlands can be pricey. By crafting your own, you can save money while obtaining a unique decoration that fits your style perfectly. Additionally, using leftover fabric or ribbon scraps reduces waste and benefits the environment. - Creative Outlet:
Working with ribbons allows you to express your creativity. You can experiment with different patterns, textures, and styles to make a garland that is both personal and eye-catching. - Fun for All Ages:
This project is great for individuals of all ages. Involving family or friends can turn the creation process into a delightful group activity, strengthening bonds during the crafting journey.
Materials Needed for Your DIY Ribbon Garland
Before diving into the crafting process, gather the necessary materials. Here’s a list to help you prepare:
Ribbons
- Diverse Color Selection:
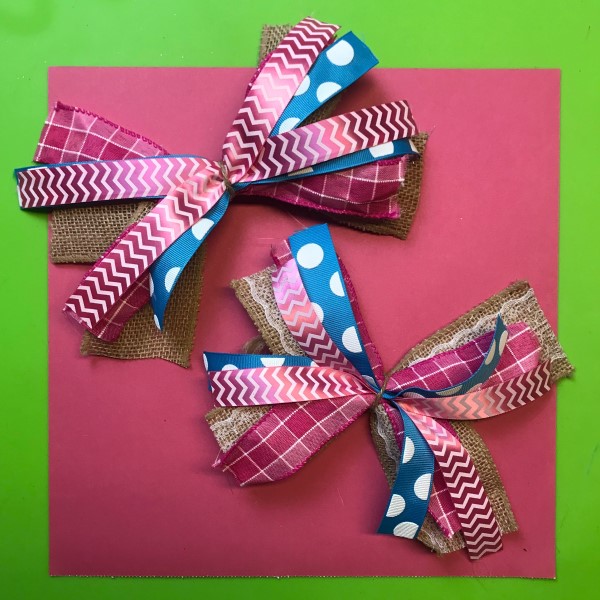
When choosing ribbons for your garland, it’s essential to select a variety of colors that align with your event’s theme or your personal style. Bright, vibrant colors can create a lively atmosphere, while softer shades may evoke a more subdued or elegant feel. - Pattern Variety:
Explore different patterns to add visual interest to your garland. Stripes, polka dots, floral designs, and geometric shapes can create a dynamic look. Mixing patterns can also create a playful and eclectic design, enhancing the overall appeal of your project. - Material Choices:
Ribbons can be made from several materials, and each offers unique properties:- Satin: Known for its glossy finish, satin ribbons add an elegant touch to any decoration. They are smooth to the touch and drape beautifully, making them ideal for sophisticated garlands.
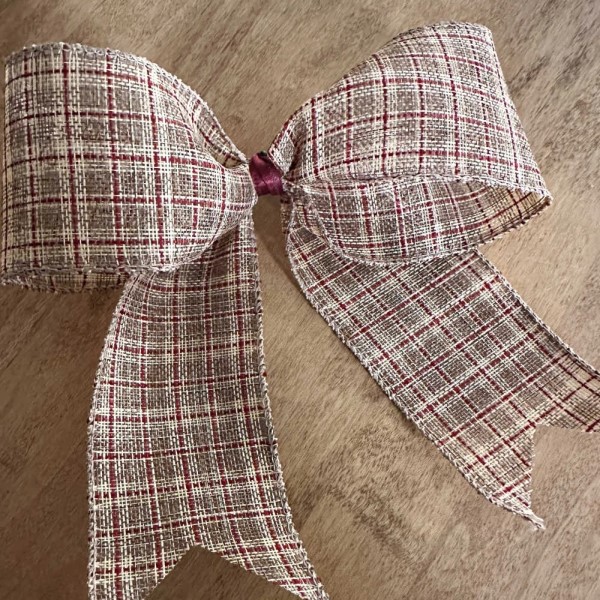
- Burlap: For a rustic, natural look, burlap is an excellent choice. Its textured appearance adds warmth and can complement outdoor settings or country-themed decor.
- Organza: This sheer fabric provides a delicate and ethereal quality to your garland. Organza ribbons can be layered for added dimension and work well for formal occasions, such as weddings or anniversaries.
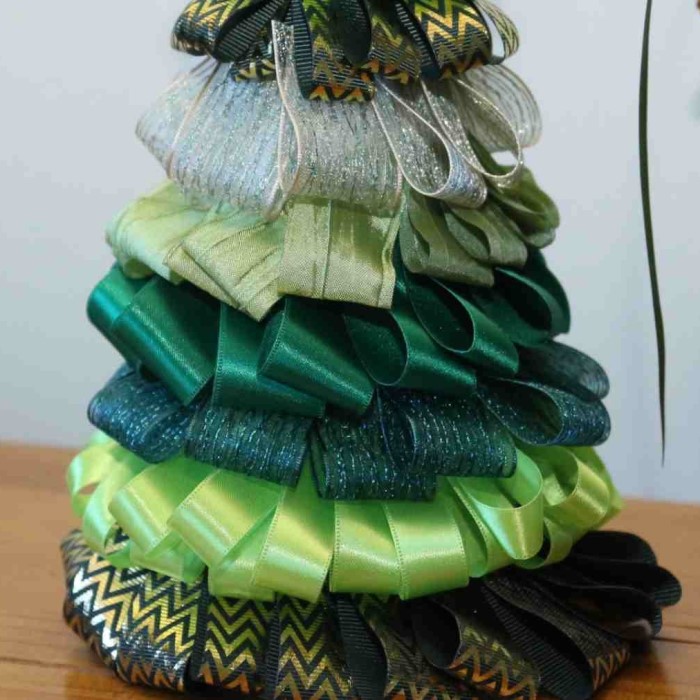
- Textural Mixing:
Mixing different textures in your ribbon choice enhances the visual impact of the garland. For instance, combining shiny satin with textured burlap or sheer organza can create a visually rich and compelling design that captures attention and adds depth.
Scissors
- Importance of Quality:
A good pair of sharp scissors is crucial for accurately cutting the ribbons. High-quality fabric scissors are designed specifically for cutting through various types of ribbon and prevent damage during the cutting process. - Risks of Dull Scissors:
Dull scissors can lead to frayed edges and uneven cuts, which can significantly detract from the final appearance of your garland. Frayed edges can mar the polished look you want to achieve, making a project appear less professional. - Cutting Techniques:
To achieve clean cuts, ensure you hold the scissors properly and use a smooth, straight motion when cutting. For more intricate designs, consider using smaller, precision scissors that allow for better control and detail work.
Twine or String
- Base Structure:
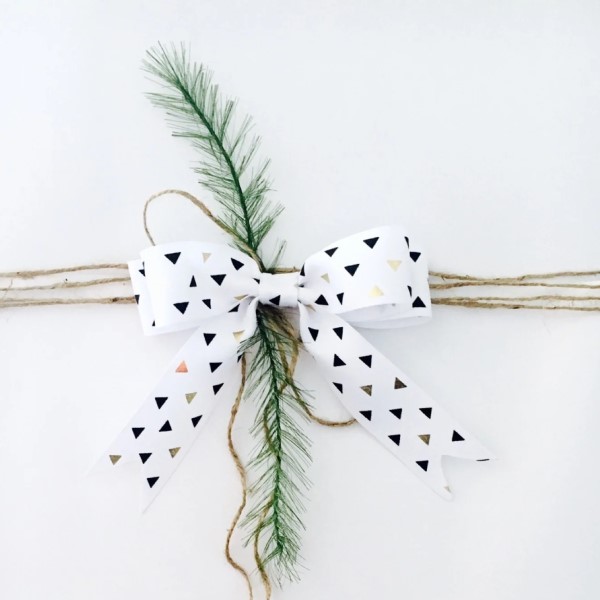
The twine or string you choose will serve as the base for your garland, providing stability and strength to secure the ribbons. This element acts as the backbone of your decoration, anchoring everything in place for a cohesive look. - Choosing the Right Type:
When selecting twine or string, consider factors such as thickness and durability. Thicker twine may hold more weight and withstand tension better, making it ideal for heavier ribbons or additional embellishments. - Color Coordination:
Choose a color that complements your ribbon choices. A neutral-colored twine, such as natural jute or beige, can blend seamlessly with vibrant ribbons, while colored string can enhance the overall look by coordinating with the main colors of your garland.
Hot Glue Gun (Optional)
- Utility of Hot Glue:
While not strictly necessary, a hot glue gun can significantly enhance the construction of your garland. It provides a strong bond, ensuring that ribbons and embellishments remain securely attached. - Attaching Embellishments:
Use the hot glue gun to attach decorative elements such as flowers, beads, or other materials. This method allows for a more polished look, preventing items from slipping or falling away from the main structure of the garland. - Securing Ribbon Ends:
A hot glue gun is also useful for securing the ends of ribbons, preventing unraveling, and adding a neat finish to your design. Be careful to use the glue sparingly; too much can create a gooey appearance rather than a refined look.
Embellishments (Optional)
- Types of Embellishments:
To enhance the visual interest of your garland, consider adding various embellishments. Options include:- Flowers: Artificial or dried flowers can add a natural and vibrant touch to your garland.
- Beads: Incorporating beads can bring sparkle and dimension, enhancing the overall appearance of the garland.
- Lights: If you’re creating a garland for evening events, consider adding fairy lights for a magical effect. These can provide soft illumination and create an inviting atmosphere.
- Creativity in Placement:
Think creatively about where and how you attach embellishments. You can cluster them in certain areas for emphasis or distribute them evenly along the garland for continuity. -
Coordination with Theme:
Ensure that any additional embellishments coordinate with your overall theme and color scheme. For example, use rustic embellishments for a country-themed event or vibrant flowers for a lively celebration.
Step-by-Step Instructions for Creating a Ribbon Garland
Now that you have your materials ready, let’s go through the steps to create a gorgeous DIY ribbon garland.
Cut the Ribbons
- Measure out your ribbon lengths according to your desired garland size. Standard lengths for the pieces can range from 12 to 24 inches. For a fuller look, use longer ribbons.
- Use scissors to cut the ribbons neatly. Keep in mind that you may want to mix different lengths to create a more dynamic and whimsical appearance.
Prepare Your Base
- Take your twine or string and cut it to the desired length of your garland. Ensure that you have enough length that allows for hanging as well as spacing between ribbons.
- If using a thicker string, you may choose to double it for a sturdier base. This can provide extra support for heavier ribbons.
Attach Ribbons
- Begin attaching the ribbons to your base by folding each piece in half. Place the middle of the folded ribbon onto the twine and pull the ends through the loop to secure it. This method is known as a lark’s head knot.
- Continue adding ribbons, spacing them evenly along the twine. Play around with color arrangements or patterns, aiming for a design that visually appeals to you.
- If desired, glue down the knot of each ribbon to secure it further. This is particularly helpful if you plan to hang the garland in a location with lots of movement or activity.
Add Embellishments
- Once all ribbons are securely attached, now is the time to embellish! Attach flowers, beads, or any additional decorations by gluing or tying them to the garland.
- Ensure that any added elements complement the color and style of the ribbons. Mixing textures can create a stunning effect, giving your garland a professional finish.
Display Your Garland
- After completing your garland, hang it in your chosen location. Consider draping it across a mantel, in an entryway, or above a table setting for an added festive touch.
- For outdoor events, ensure the material used can withstand outdoor conditions. A well-constructed garland will stay beautiful even with gentle breezes.
Caring for Your DIY Ribbon Garland
To maintain the beauty of your DIY ribbon garland, consider the following care tips:
- Storage:
When not in use, store your garland in a dry, cool place. Avoid folding it in a way that can cause wrinkles. Instead, lay it flat or hang it to keep its shape. - Cleaning:
If your garland gets dusty, gently shake it or use a soft brush to remove any dirt. For more significant stains, spot clean with a damp cloth and mild detergent, being careful not to wet the ribbon excessively. - Reusability:
One of the best aspects of a ribbon garland is its reusability. You can repurpose it for different events by changing out specific ribbons or embellishments to fit new occasions.
Frequently Asked Questions (FAQs)
How to make ribbon out of fabric?
You can make ribbon from fabric by cutting strips of fabric that are 1-2 inches wide and the desired length. Use a rotary cutter for clean edges or sew the fabric edges to prevent fraying.
Can you make ribbon at home?
Yes, you can easily make ribbon at home using fabric scraps, and by cutting them into strips. Use a straight stitch or fabric glue to secure the edges for durability.
What can I substitute for ribbon?
Alternatives to traditional ribbon include twine, string, fabric strips, or even paper strips. Each option offers a unique texture and look for your projects.
How to make ribbon without ribbon?
You can create ribbon-like effects using fabric strips, folded paper, or other materials such as yarn or twine. Cut and shape these materials to mimic the appearance of ribbon.
Conclusion: Crafting Your Gorgeous Ribbon Garland
Creating a diy ribbon garland is an enjoyable and fulfilling project that can enhance any event or decor. With a variety of materials, creative techniques, and personal touches, your garland will reflect your style and creativity.
As you implement these tips and instructions, remember to enjoy the process and experiment with different colors and embellishments. The effort you put into making your own ribbon garland will shine through, resulting in a beautiful decoration that enhances your space. Gather your materials today, and embark on your crafting adventure!