Introduction
The origami dripper has gained popularity among coffee enthusiasts for its innovative design and ability to enhance the brewing experience. This unique tool allows for precise control over water flow, ensuring a perfectly brewed cup of coffee every time. In this guide, you’ll learn how to create your own DIY origami dripper, allowing you to customize your coffee brewing tool to meet your specific preferences.
Crafting an origami dripper is not only an enjoyable project but also a meaningful way to connect with the coffee brewing process. As you follow the steps outlined in this article, you’ll gain a deeper understanding of how this tool works and the science behind extracting flavor from coffee grounds. Let’s explore how to make the ideal coffee brewing tool that will impress your friends and elevate your barista skills!
Understanding the Origami Dripper
1. What Is an Origami Dripper?
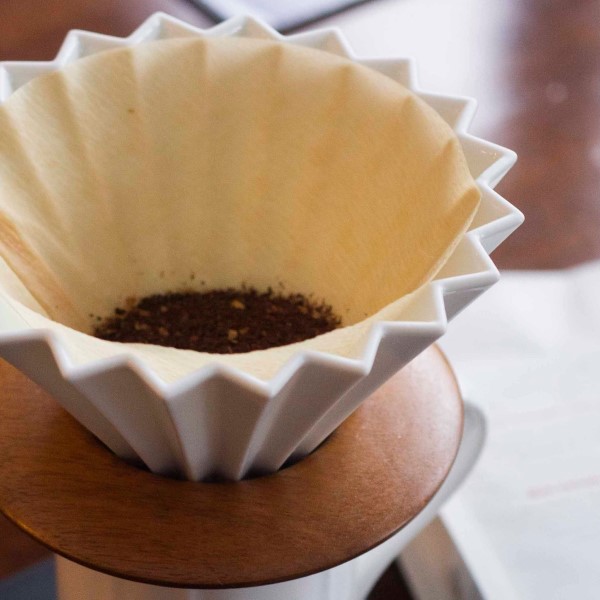
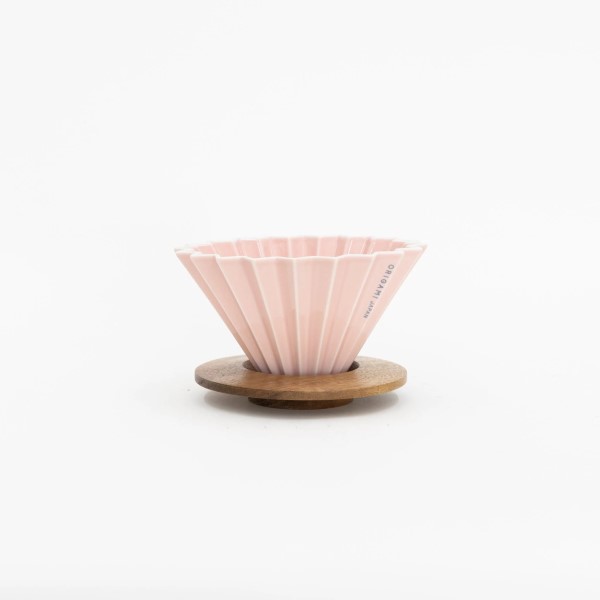
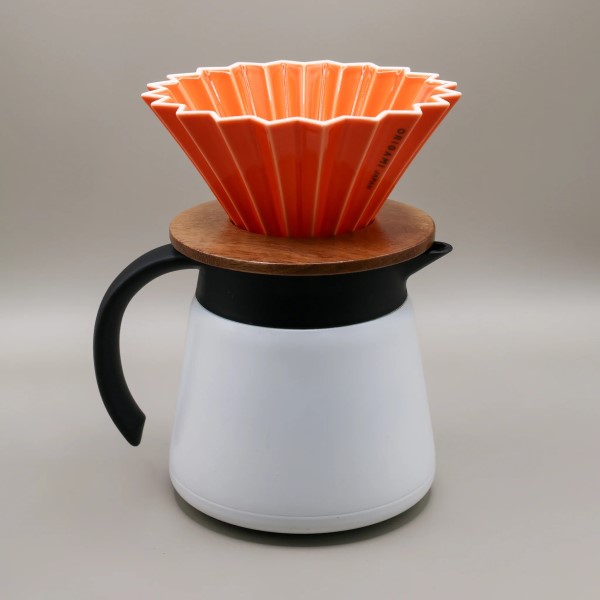
An origami dripper is a pour-over coffee brewing device designed to create an optimal coffee extraction process through its unique folding design. This tool allows you to pour water over coffee grounds, facilitating even saturation and extraction.
- Design Features: The origami dripper features a series of folds that create a drip design. This design enhances airflow, allowing for a more efficient brewing process. Its lightweight and compact nature also makes it convenient for storage and portability.
2. The Benefits of Using an Origami Dripper
Using an origami dripper offers various advantages for coffee lovers. Some of these benefits include:
- Customizable Brewing Experience: The origami dripper lets you control the water flow and brewing time, allowing you to adjust these variables to suit your coffee preferences. This level of control helps you create a personalized brewing experience.
- Enhanced Flavor Extraction: The dripper’s unique design optimizes water distribution over the coffee grounds. This enhances the flavor extraction process, resulting in a richer and more complex cup of coffee.
- Eco-Friendly Option: Many origami drippers are made from sustainable materials, making them an environmentally friendly choice compared to traditional plastic coffee makers.
Materials Needed to Create Your DIY Origami Dripper
1. Essential Materials
Before you start crafting your DIY origami dripper, gather the following materials:
Origami Paper: Selecting the Right Material
- Importance of Sturdy Paper:
- When crafting your origami dripper, selecting the right type of paper is crucial. A sturdy origami or craft paper is ideal because it can retain its shape even when wet. This characteristic helps maintain the structural integrity of your dripper during the brewing process and ensures that it functions effectively.
- Types of Origami Paper:
- Origami paper is typically thinner and more flexible, allowing for intricate folds. However, for the purpose of making a dripper, you may want to choose a paper that is slightly thicker while still being easy to fold. Consider using kraft paper or specialty craft papers that are durable yet manageable for folding.
- Choosing Colors and Patterns:
- While functionality is important, the appearance of your origami dripper can also enhance your brewing experience. Pick color options or patterns that resonate with you. A visually appealing dripper can add aesthetic enjoyment to your coffee-making ritual, making the process more engaging.
- Considerations for Reusable Drippers:
- If you plan on using your origami dripper multiple times, consider using laminated paper or a waterproof coating for added durability. This can extend the life of your dripper and allow for easier cleaning, making it a more practical option for regular use.
Ruler: Ensuring Measurement Accuracy
- Functionality of a Ruler:
- A ruler is an invaluable tool in the origami process. It helps you measure and mark precise folds, which is essential for achieving the correct dimensions for your dripper. Accurate measurements ensure that each fold aligns perfectly, contributing to the overall quality of your final product.
- Measuring and Marking:
- When using a ruler, use it to measure the dimensions of your origami paper accurately. You can mark specific points where folds will occur, helping you visualize the design better. This practice minimizes errors and helps reinforce the geometric principles involved in origami.
- Types of Rulers:
- A flexible, clear plastic ruler is often the best choice because it allows for easier visibility of marks made on the paper beneath. However, any straight ruler will work, provided it has clear demarcation lines for measurement.
- Encouraging Precision:
- By consistently employing a ruler in your origami projects, you develop an understanding of the importance of precision in folding techniques. This focus on accuracy can significantly enhance your skills over time, allowing you to tackle more complex designs with confidence.
Scissors: Essential Cutting Tools
- Role of Scissors in Origami:
- Scissors are essential tools when working with origami paper, especially if you need to trim or modify your origami paper’s size. Precise cuts can lead to cleaner fold lines and contribute to a more visually appealing final product.
- Choosing the Right Scissors:
- Opt for a pair of sharp, high-quality scissors that can make clean cuts without tearing the paper. Dull scissors may cause the paper to rip unevenly, which can ruin your origami project. A smaller pair of scissors is often preferable for detailed work, as it allows for better control.
- Safety Considerations:
- When using scissors, especially if children are involved in the origami project, prioritize safety. Show younger crafters the correct way to handle scissors and always supervise them to ensure they use the tools responsibly.
- Alternative Cutting Methods:
- While scissors are effective for cutting, consider using craft knives or paper cutters for straight lines if you find yourself needing to cut multiple sheets simultaneously. These tools can enhance the efficiency and accuracy of your cutting process.
Bone Folder (Optional): Achieving Professional Quality
- What Is a Bone Folder?:
- A bone folder is a tool used in paper crafts, particularly in origami and bookbinding, to create sharp and precise folds. The flat, smooth edge of the bone folder presses the paper down firmly, resulting in clean creases.
- Benefits of Using a Bone Folder:
- Crafting with a bone folder offers several advantages, including cleaner folds that enhance the overall quality of your origami piece. Sharp, crisp creases not only improve the aesthetic appeal but also assist in maintaining the shape of your origami dripper while brewing.
- Creating Professional Results:
- By incorporating a bone folder into your origami toolkit, you can achieve a more polished final product. The precision that comes with its use is beneficial, especially for intricate designs that require attention to detail.
- Alternatives to a Bone Folder:
- If you do not have a bone folder, you can use alternatives to achieve similar results. For example, the flat edge of a plastic credit card or a smooth handle of a spoon can work in a pinch to create folds, although they may not provide the same level of precision.

2. Selecting Your Paper
Selecting the right paper is crucial for the success of your origami dripper.
- Weight and Durability: Choose paper that is lightweight yet durable. This helps with folding and ensures that your dripper maintains its shape during use.
- Color and Design: While the color of the paper doesn’t affect functionality, selecting visually appealing patterns can add a personal touch to your DIY project.
Step-by-Step Instructions for Creating Your Origami Dripper
1. Step 1: Preparing the Paper
- Cutting the Paper: Start with a square piece of origami paper, ideally around 6 inches by 6 inches. If you’re using larger paper, adjust your measurements accordingly.
- Creating the Initial Folds: Begin by folding the paper in half diagonally. Unfold to reveal a crease line that will guide future folds.
2. Step 2: Folding the Dripper Design
- Folding the Corners: Take each corner of the square and bring them to meet in the center crease. This will create a smaller square shape with a pointed top.
- Reinforcing Folds: Flip the paper over and repeat the previous step on the opposite side. This helps create a sturdy base for your dripper structure.
3. Step 3: Forming the Dripper Shape
- Final Creases: Fold the top two edges of the square down towards the center point, forming a peaked shape on top.
- Creating the Dripper Shape: Fold the bottom portion upwards towards the peak, tucking the points in as necessary to secure the design.
4. Step 4: Final Adjustments
- Inflate the Dripper: To create the final shape of the origami dripper, carefully blow air into the folds or gently adjust the paper to open it up.
- Testing for Stability: Ensure your origami dripper is balanced and holds its shape. Make any necessary adjustments to improve stability.
Using Your Origami Dripper for Coffee Brewing
1. Brewing Process with the Origami Dripper
Now that you’ve crafted your origami dripper, it’s time to put it to use. Follow these steps for a successful brewing experience:
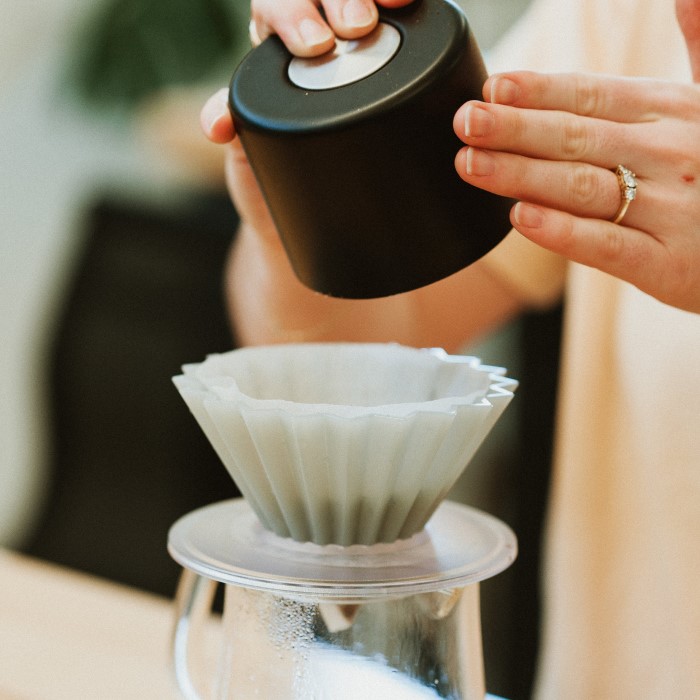
- Gather Your Coffee: Start with freshly ground coffee beans. The grind size should be medium for optimal extraction in a pour-over process.
- Set Up the Dripper: Place your origami dripper over a coffee cup or jug, ensuring it sits securely.
- Add Coffee Grounds: Use a filter if necessary and add your desired amount of coffee grounds to the origami dripper. A common ratio is 1–2 tablespoons of coffee for every 6 ounces of water.
- Water Pouring Technique: Begin pouring hot water (around 200°F or 93°C) over the coffee grounds in a slow, circular motion. This ensures even saturation, prompting optimal extraction. Allow the coffee to drip slowly into the container below.
2. Enjoying Your Brewed Coffee
- Taste Testing: Once brewed, taste your coffee and adjust the water-to-coffee ratio or grind size in future attempts as needed.
- Experimentation: Don’t hesitate to experiment with different coffee beans, brewing times, and water temperatures to find the flavor profile that suits your palate.
FAQs
Is Origami Dripper Better?
The origami dripper is favored for its unique design that allows for better control over water flow and extraction, resulting in a flavorful cup of coffee.
What Is the Difference Between Origami and V60?
While both serve as pour-over coffee makers, the origami dripper has a different design that allows for a more versatile brewing experience compared to the V60.
What Is an Origami Dripper?
An origami dripper is a paper coffee brewing device designed to create an optimal drip method for extracting flavor from coffee grounds.
How Durable Is an Origami Dripper?
Origami drippers can be durable depending on the material used. Many are made from robust, high-quality paper or ceramic that withstands repeated use.
Conclusion
In conclusion, creating a DIY origami dripper is a rewarding project that enhances your coffee brewing experience. Not only does it provide you with a unique tool to craft flavorful pour-over coffee, but it also immerses you in the art of origami.
By utilizing your origami dripper, you can enjoy the benefits of precise brewing methods while exploring the wonderful world of coffee. From crafting to brewing, the journey of making and using an origami dripper is undoubtedly magical, so gather your materials and start your coffee adventure today!