Introduction
Perler bead crafts have emerged as a delightful and creative way to engage both children and adults in art and design activities. These colorful, fuseable beads allow crafters to create a wide variety of projects, from simple shapes to intricate designs. As we look toward 2026, the world of Perler beads continues to inspire enthusiasts to explore new and exciting crafting possibilities. In this article, we will delve into some of the most trending Perler bead ideas, offer tips for crafting, and answer common questions to help you make the most of these enjoyable activities.
Understanding Perler Beads
Before jumping into projects, it’s important to understand the fundamental components of Perler beads and the crafting process.
- What are Perler Beads?: Perler beads are small plastic beads that come in various colors and can be arranged on pegboards to form designs. Once arranged, heat is applied using an iron to fuse the beads together, allowing them to hold their shape.
- Essential Tools and Materials: To get started with Perler bead crafts, you will need a few essential tools:
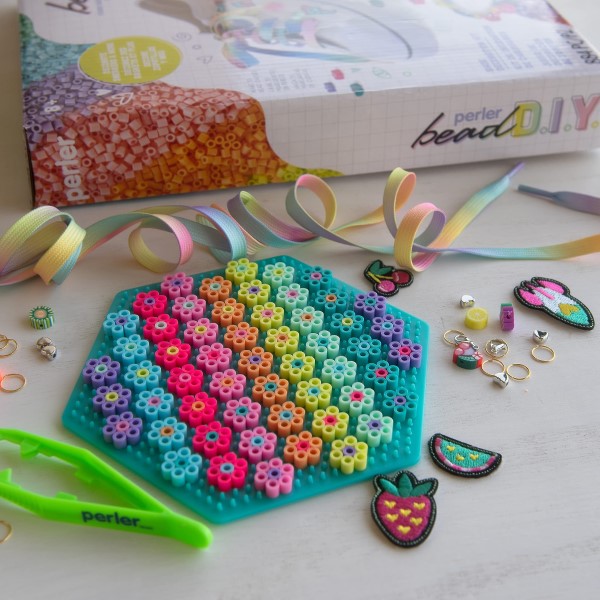
- Perler Beads: Purchase a variety of colors from a craft store or online.
- Pegboards: These come in different shapes including squares, circles, and themed shapes for specific designs.
- Ironing Paper: This protective paper is placed on top of the beads during the ironing process.
- An Iron: A household iron is needed to melt and fuse the beads.
- Tweezers: Helpful for placing beads precisely, especially in detailed designs.
- Safety Considerations: Always supervise younger crafters when using an iron, as it can be dangerous. Additionally, ensure that the area is well-ventilated while ironing to avoid any harmful fumes.
Understanding these basics will lay a strong foundation for creating beautiful Perler bead crafts.
Trending Perler Bead Craft Ideas for 2026
As we step into 2026, several exciting trends in Perler bead crafts are taking the crafting community by storm. Here are some of the most popular ideas to inspire your next project:
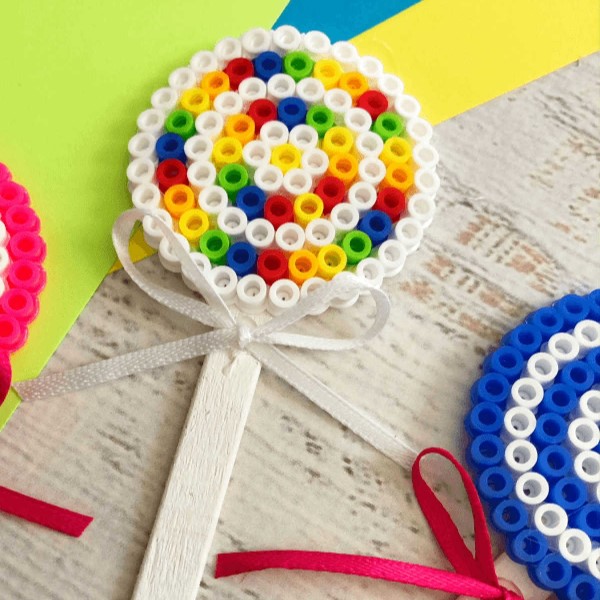
- Keychains and Bag Charms: Personalized keychains or bag charms created with mini Perler beads are trending. You can design cute animals, initials, or shapes that represent your hobbies. These make great gifts or small accessories for your everyday items.
- Fridge Magnets: Fun and colorful fridge magnets are always a hit. Design magnetic characters, food items, or geometric shapes that can brighten up your kitchen. Simply glue a small magnet on the back of your completed design.
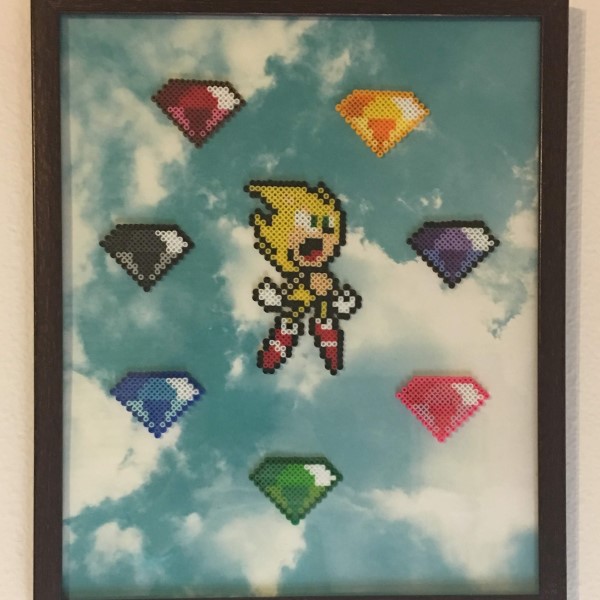
- Miniature Figurines: Crafting small, detailed figures from popular movies, games, or original characters is a fun way to show off your creativity. Mini villians or superheroes can easily be made with Perler beads and can serve as delightful decorations or toys.
- Holiday Decorations: Create themed decorations for various holidays throughout the year. For example, design spooky ghosts and pumpkins for Halloween or snowflakes and Christmas trees for winter holidays. This not only enhances festive cheer but also allows you to change decor seasonally.
- Artistic Wall Hangings: Utilize a large pegboard to create impressive wall art pieces. You can design abstract patterns, landscapes, or portraits to display in your home. These colorful pieces can serve as excellent conversation starters.
- 3D Structures: Experiment with building 3D structures such as small boxes or decorative items that can stand on their own. Stacking beads in layers adds dimension and an interesting tactile aspect to your designs.
Each of these ideas opens doors to exploration and allows for personalization, making them perfect for both individual and group crafting activities.
Techniques for Perfecting Your Perler Bead Crafts
Achieving the best results in your Perler bead crafts requires mastering a few key techniques. Here are some helpful tips:
Planning Your Design
- Sketching Ideas: Begin your crafting process by sketching out your design ideas on paper. This initial step allows you to visualize how the completed project will look. Take your time to refine your sketches, adjusting elements until you feel satisfied with the design.
- Arranging Beads on a Pegboard: Once you have a clear idea of your design, start arranging the beads on a pegboard according to your sketch. This hands-on approach helps you see how colors and shapes work together, making it easier to spot any needed adjustments before finalizing the design.
- Utilizing Online Templates: If you’re unsure where to start or want additional inspiration, consider searching for templates online. Many crafting websites offer free patterns and tutorials, which can guide you in creating various designs. Using templates can simplify the process, especially for beginners who may require visual references.
Heat Application
- Setting the Iron: When you’re ready to fuse the beads, set your iron to a medium heat setting. Ensuring the proper temperature is crucial, as it allows the beads to melt evenly without burning them. Always read the manufacturer’s instructions regarding the ideal heat level for your specific brand of beads.
- Covering with Ironing Paper: Place a piece of ironing paper over the arranged beads before applying the iron. This protective layer not only prevents the beads from sticking to the iron but also helps distribute the heat more evenly, leading to a smoother melting process.
- Monitoring the Melting Process: As you apply the iron to the beads, use even pressure to ensure that all areas receive adequate heat. Keep a close eye on the melting process; check the beads after a few seconds. This ensures you avoid over-melting, which can cause the beads to lose their shape or fuse too closely together.
Layering Beads
- Building 3D Structures: For projects that require depth, consider layering your beads. Start with a solid base layer, carefully placing beads on the pegboard to create the foundation of your design. This method adds dimension and complexity to your crafts.
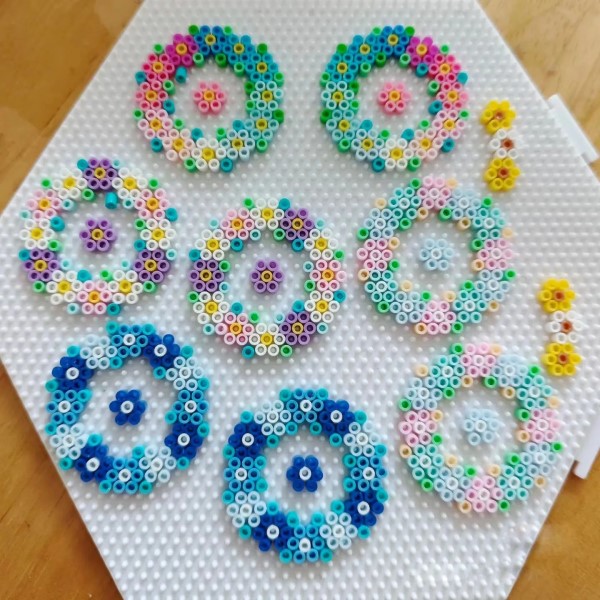
- Adding Details: After establishing your base, continue building upwards with additional layers. Each new layer can introduce different colors, shapes, or textures, which enhances the overall appearance of the piece. Layering also allows you to create more intricate and visually appealing designs, such as flowers or animals.
- Testing Stability: As you layer beads, ensure that the structure remains stable. Adding too much weight or complexity without a solid foundation may lead to a design that cannot stand on its own. Evaluate each layer as you build to maintain overall integrity.
Using Color Gradients
- Creating Depth: One effective way to add visual interest to your designs is by employing color gradients. This technique involves transitioning from one color to another, creating a smooth and aesthetically pleasing effect.
- Implementing Ombre Effects: To achieve a beautiful ombre look, start with the lightest color at one end and gradually transition to a darker shade. For example, using shades of blue, you might start with sky blue and end with navy for a water-themed project. This method introduces a dynamic element to your crafts.
- Experimenting with Color Combinations: Don’t hesitate to experiment with different color combinations. Create sections within your design that incorporate various gradients, or try out unexpected pairings. This experimentation can yield unique and eye-catching results that stand out.
Finishing Touches
- Cooling Down: After ironing and fusing your beads, allow your project to cool completely before handling it. This cooling time ensures that all beads properly bond together and maintain their shape once removed from the pegboard.
- Verifying Fusion Quality: Check that all beads are well-fused together. If you notice any beads that appear loose or detached, consider applying the iron again carefully, ensuring that the heating is applied uniformly to those areas.
- Cleaning the Surface: To enhance the presentation of your finished project, use a soft cloth to gently clean the surface of the beads. This step removes any residue or dust and helps maintain the vibrant colors. A clean finish makes your creation look polished and ready for display or gifting.
- Displaying Your Work: Finally, think about how you want to display your finished Perler bead craft. Consider using frames, shadow boxes, or even just placing them on shelves or kitchen surfaces. A well-displayed piece can add a decorative touch to your home and serve as a testament to your creativity.
Practicing these techniques will significantly improve your Perler bead crafting skills and boost your confidence in attempting more complex designs.
Showcasing and Enjoying Your Perler Bead Projects
After creating your beautiful Perler bead crafts, consider various ways to showcase your work. Here are some suggestions:
- Display Options: Use shadow boxes or frames to display your completed projects as art pieces. This not only protects your designs but also elevates the aesthetic value of your home decor.
- Gift-Giving Ideas: Your Perler bead crafts make thoughtful gifts for birthdays, holidays, or just because. Create a collection of related items, like matching coasters and keychains, to offer as personalized sets.
- Social Media Sharing: Capture and share photos of your creations on social media platforms. Engage with other crafters by using relevant hashtags like #PerlerBeads and #CraftingCommunity. Sharing your work encourages community interaction and can inspire others.
- Crafting Together: Hosting a crafting session with family and friends is a wonderful way to share your passion. Together, you can explore new projects, learn techniques, and strengthen your bonds through creativity.
By exploring these avenues, you’ll be able to celebrate your creativity and share your love for Perler bead crafts with others.
FAQs
- Can I do Perler beads without an iron?
Yes, you can! While traditional Perler bead crafts rely on an iron for fusing the beads, some crafters use alternative methods like heat guns or hairdryers. Additionally, you can create designs without fusing by using glue to hold the beads together. However, keep in mind that the security and durability may vary based on the chosen method. - How do you melt Perler beads perfectly?
To melt Perler beads perfectly, preheat your iron to a medium setting. Place a piece of ironing paper over the beads, and apply the iron gently in a circular motion for about 10-20 seconds. Check the beads frequently; they should fuse together while keeping their shape. It’s important to take your time and find the balance between heating and melting to avoid burning. - What age is good for Perler beads?
Perler bead crafts are suitable for a wide range of ages. Children as young as five can begin crafting, especially with supervision. For younger kids, focusing on larger bead designs can prevent any choking hazards. However, older children and adults can enjoy more complex projects that require precision, making these crafts a delightful activity for families. - Can you use foil on Perler beads?
Yes! Many crafters use aluminum foil while working with Perler beads to create different effects. Some place aluminum foil over the beads instead of ironing paper, allowing for unique textures and finishes. However, ensure that the foil does not touch the iron itself to avoid any damage during the crafting process.
Conclusion
In summary, Perler bead crafts provide an exciting avenue for creative expression and enjoyment in 2026. With trending ideas and helpful techniques, anyone can engage in these delightful projects that are both fun and rewarding. Whether you are making personalized gifts, festive decorations, or unique home decor, Perler beads offer endless possibilities for artistic exploration.
Embrace your creativity, try out the trending ideas shared in this article, and enjoy the delightful process of crafting with Perler beads. With practice and exploration, you will discover the joy of transforming simple beads into beautiful works of art. Join the fun and let your imagination guide you on this colorful crafting journey!