Introduction
If you’re a cat lover and enjoy crafting, Perler bead cat patterns offer a delightful way to combine your passions. Perler beads are a versatile crafting medium that allows you to create vibrant designs and characters with ease. Whether you’re making gifts, decorations, or simply crafting for fun, Perler beads provide endless possibilities. In this article, we will explore various creative Perler bead cat patterns that are perfect for enthusiasts of all ages.
Creating Perler bead cat designs is not only entertaining but also fosters creativity and fine motor skills. From adorable kittens to majestic felines, these patterns can cater to various skill levels and preferences. With simple step-by-step instructions, you can easily bring your favorite cat-themed creations to life.
Understanding Perler Beads: A Brief Overview
1. What Are Perler Beads?
Perler beads, also known as fuse beads, are small, cylindrical plastic beads that can be arranged on pegboards to create designs. Once arranged, you can fuse the beads by applying heat, typically with an iron, which causes the beads to melt slightly and bond together.
- Types of Beads: Perler beads come in various colors and sizes, making them ideal for creating intricate designs. They can be used to make everything from simple shapes to complex characters.
2. The History of Perler Beads
Originally introduced in the 1980s, Perler beads have been a favorite among crafters for decades. In the 90s, they were often referred to as “Hama beads,” named after the Danish brand that popularized them. Since then, they have been embraced by generations of creators who use them for various decorative and functional projects.
Why Choose Perler Beads for Cat Patterns?
1. Endless Creative Possibilities
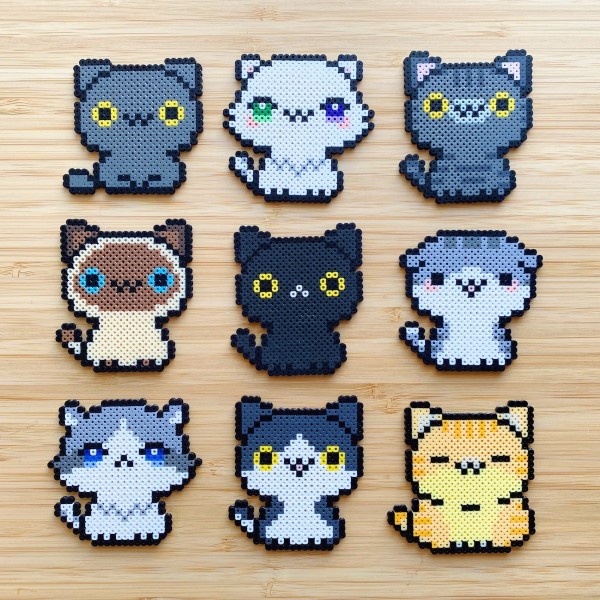
The flexibility of Perler beads makes them a perfect medium for crafting cat-themed designs. You can create various styles, from cartoonish cats to realistic feline portraits.
- Unique Personal Expression: Each craftsperson can personalize their designs with color choices, patterns, and sizes. This allows for unique renditions of beloved cats.
2. Suitable for All Skill Levels
Perler bead patterns can cater to both beginners and advanced crafters.
- For Beginners: Simple patterns with fewer beads and colors can provide an excellent starting point for kids and beginners.
- For Experienced Crafters: More complex patterns challenge experienced crafters to expand their skills and creativity, fostering growth and improvement.
Popular Perler Bead Cat Designs to Try
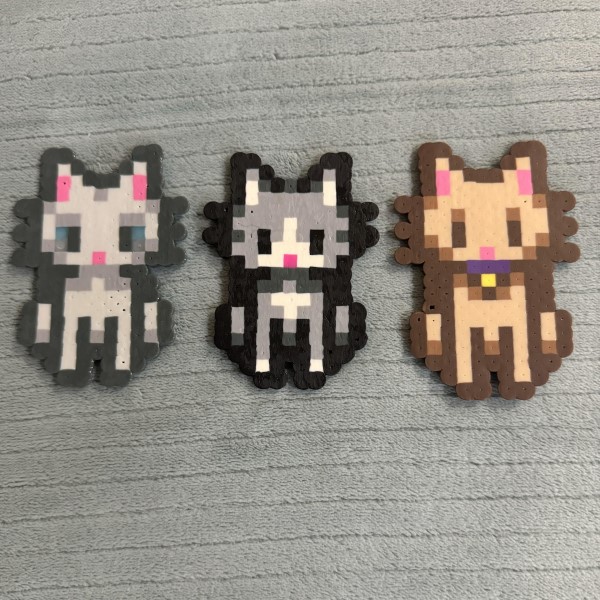
1. Simple Cat Silhouette
Creating a Basic Cat Shape:
- Materials Needed: A pegboard, black and white Perler beads.
- Instructions: Begin by outlining a basic silhouette on the pegboard using black beads. Fill in the shape and then add white beads for features like the eyes or tail. Once complete, follow the ironing technique to melt your design.
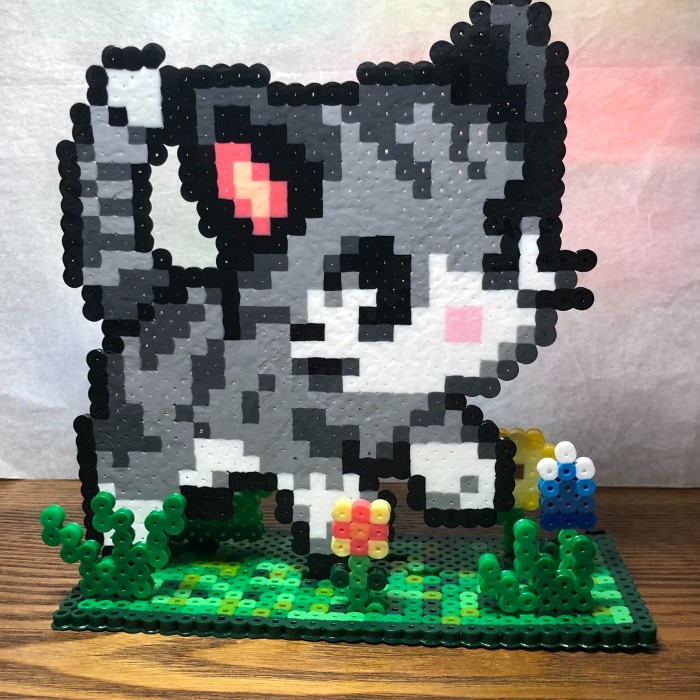
2. Cartoon Cat Face
Crafting a Whimsical Cat Face:
- Materials Needed: Various colored beads (light colors for the face, darker colors for features).
- Instructions: Arrange beads in a circular shape for the head, adding eyes and whiskers. Cartoon cats can allow for fun expressions using vibrant colors. Iron your design to set the beads.
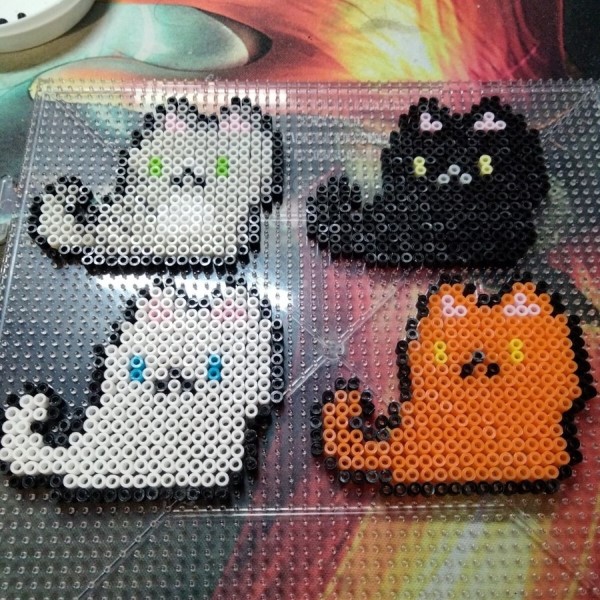
3. Kittens Playing
Designing a Group of Kittens:
- Materials Needed: Multiple colors for different kittens.
- Instructions: Create several individual kitten designs, then arrange them in a playful scene. This can involve different actions or expressions that capture the charm of kittens at play.
Crafting Techniques for Perler Bead Cat Patterns
1. Ironing Technique
The ironing process is critical in fusing Perler beads together.
Preparation
- Gather Your Materials: Before starting the fusing process, ensure you have all necessary supplies on hand. This includes the beads arranged on a pegboard, ironing paper, and an iron set to the appropriate temperature. Having everything ready will streamline the process.
- Understanding Ironing Paper: Take a piece of ironing paper, which is often provided with your Perler bead kit. This paper is specially designed to withstand heat and prevent the beads from sticking to the iron. Place this paper directly over your bead design with care, ensuring that it completely covers the beads to protect them during the fusing process.
- Choosing the Right Heat Setting: Set your iron to medium heat. Avoid using a high setting, as this can lead to over-melting the beads, causing them to lose their shape or burn, which may ruin your design. The medium setting is typically ideal, as it allows for sufficient heat to melt the beads while maintaining control over the process.
Fusing Method
- Pressing Technique: Once the ironing paper is in place, it’s time to fuse the beads together. Begin by gently pressing the iron down onto the paper. Employ a circular motion rather than just pressing straight down. This technique allows for even heat distribution across the beads, promoting uniform melting.
- Melt Without Distortion: As you press, aim to maintain the shape of your design. If you apply too much pressure or hold the iron too long in one spot, the beads can become distorted. Stay gentle and use just enough pressure to ensure the beads come into contact with the hot surface, facilitating the melting process.
- Monitoring the Melting: Keep an eye on the beads as they melt. You should observe them starting to fuse together, altering slightly in appearance as they soften. It’s important to watch closely to prevent potential over-melting.
- Timing for Fusing: Generally, you will need to hold the iron in place for about 10 to 20 seconds. However, the exact time will depend on the specific beads you are using and their melting point. You can periodically lift the iron to check progress without disrupting the beads too much.
- Finalizing the Fusion: Once you notice that the beads are beginning to stick together, carefully remove the iron and allow the design to cool for a few moments while still covered with ironing paper. This cooling phase helps solidify the fusion, ensuring that your design stays intact.
Importance of Proper Fusing
- Creating a Solid Design: The fusing method is essential for ensuring your Perler bead creation is solid. Properly fused beads will hold together securely, allowing you to handle the finished piece without worrying about it falling apart.
- Long-Lasting Results: A well-fused design means that your artwork will be durable and long-lasting. This durability is crucial, especially if you plan to display or use your creation as a functional item, such as a keychain or ornament.
2. Cooling Period
After ironing, allowing your design to cool thoroughly is crucial.
Why It Matters
- Importance of Cooling: Cooling plays a critical role in the bonding process of the beads. When the design has cooled down properly, it ensures that the beads have fully fused together, creating a sturdy and coherent piece.
- Risk of Premature Handling: If the design is handled too soon, there is a significant risk that it may break apart or lose its intended shape. This can lead to frustration and waste of materials, as the carefully crafted design could be ruined.
- Strength and Durability: Proper cooling contributes to the overall strength and durability of the finished product. Designs that are allowed to cool adequately tend to hold up better over time and endure typical handling after completion.
Handling
- Waiting Period: It is advised to let the design sit for approximately 10-15 minutes after completing the bead arrangement. This waiting period is essential for allowing the beads to cool down sufficiently before any removal takes place.
- Gentle Removal: After the waiting period, the next step is to gently remove the design from the pegboard. It’s important to handle the design gently during this process to prevent any accidental damage or misalignment of the beads.
- Checking for Completeness: Before fully lifting the design from the pegboard, it’s a good idea to check for any beads that might not have bonded properly. If any loose beads are noticed, it may be beneficial to reheat the design briefly to ensure everything is securely in place.
Displaying Your Perler Bead Cat Creations
1. Keychains and Accessories
After crafting your cat designs, consider turning them into keychains or bag tags.
- Creating Accessories: Attach a small loop to your finished beads, making them perfect for personal use or gifts.
2. Framed Art
Consider framing your artwork to showcase your creativity.
- Wall Display: Place your finished cat designs in frames and hang them on walls. This adds a unique flair to your home decor.
3. Holiday Ornaments
Use your Perler bead creations for festive decorations.
- Hanging Ornaments: Attach strings or ribbons to your designs for perfect holiday ornaments that can cheer up any Christmas tree.
FAQs
What is a Perler bead?
Perler beads are small plastic beads used for crafting, which can be fused together to create designs and patterns.
How to make Perler beads stay together?
To ensure Perler beads stay together, use an iron to heat them gently enough to fuse but without over-melting, then allow them to cool before handling.
What is the best age for Perler beads?
Perler beads can be enjoyed by individuals of all ages, though younger children are often best suited for guided projects under adult supervision due to the use of an iron.
What were Perler beads called in the 90s?
In the 90s, Perler beads were commonly referred to as “Hama beads,” based on the brand that popularized them worldwide.
Conclusion
In conclusion, creating Perler bead cat patterns offers a wonderful opportunity for artistic expression while celebrating your love for cats. The versatility and accessibility of Perler beads make them an excellent choice for crafters of all skill levels. By exploring various designs—including whimsical cartoon cats, playful kittens, and personalized creations—you can share joy through your art.
Whether you’re crafting for yourself or creating heartfelt gifts, the projects outlined in this guide can help you produce adorable, memorable pieces. So, gather your materials, unleash your creativity, and start crafting enchanting Perler bead cat designs that will capture the hearts of fellow cat lovers! Perfect for decoration, gifts, or simply for fun, these cat patterns are sure to bring joy to your holiday season and beyond.