Introduction
3D chalk art has taken street art to new heights, combining creativity with optical illusions. Artists employ chalk as a medium to create stunning murals that seem to leap off the pavement, captivating passersby. This form of street art not only beautifies urban spaces but also invites interaction and engagement. Whether you are an artist, a hobbyist, or someone looking to explore new creative avenues, understanding the techniques behind 3D chalk art can inspire you to embark on your own artistic journey. In this article, we will delve into various methods and tips for creating eye-catching 3D street designs, breaking down the process step by step.
The Basics
Understanding the Concept
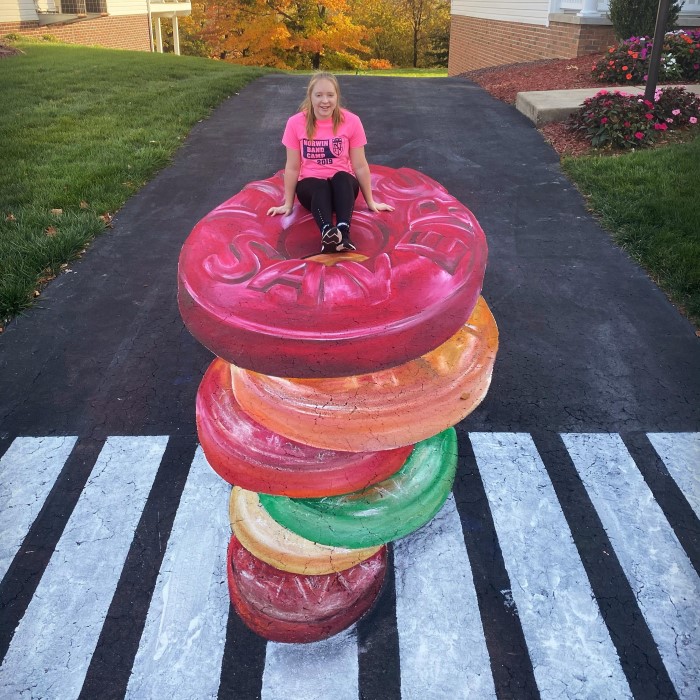
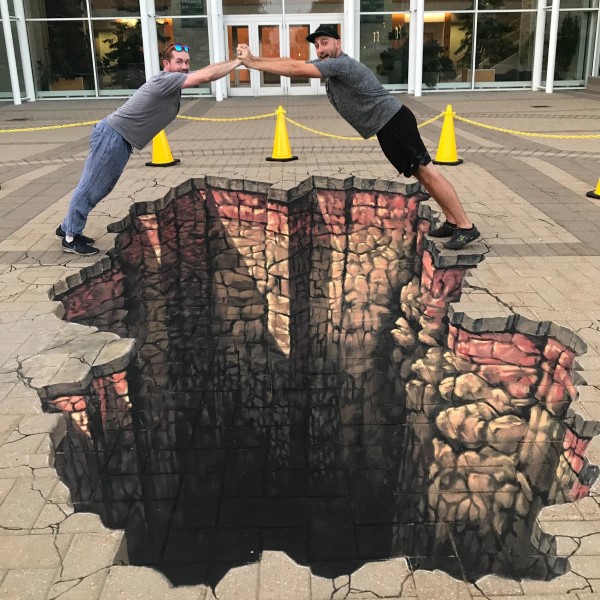
- What Is 3D Chalk Art?: At its core, 3D chalk art refers to large-scale murals created on sidewalks or streets using chalk that employs perspective techniques to create a three-dimensional illusion.
- Visual Illusion: This type of artwork tricks the viewer’s perception, making it appear as if the image is lifting off the ground or extending into the space, thus creating a captivating visual experience.
The Evolution of Chalk Art
- Historical Context: Chalk art has existed for centuries, but the rise of 3D techniques has gained popularity over the past few decades, thanks to advancements in artistic techniques and the rise of social media.
- Modern Applications: Artists now use 3D chalk art in various avenues, from street festivals to promotional events, often leveraging these visuals for marketing and branding purposes.
Essential Tools and Materials
Tools You’ll Need
- Chalk Pastels: High-quality chalk pastels are the foundation of your art. They come in various colors and consistencies. Softer chalks generally yield vibrant colors and smooth blending.
- Chalk Markers: Useful for outlining and adding finer details, chalk markers provide greater precision compared to traditional chalk sticks.
Additional Supplies
Ruler and Measuring Tape
- Importance of Accuracy:
- Using a ruler and measuring tape is essential for achieving accurate scale and proportions in your chalk art designs. Precision plays a crucial role in making your artwork visually appealing and effective.
- Accurate measurements will help maintain consistency across different elements of your design, making it more cohesive and professional in appearance.
- Scaling Up Designs:
- When translating designs from paper to a larger surface, these tools allow you to scale your artwork properly. This ensures that the proportions remain harmonious as you enlarge your image.
- A ruler can also assist in drawing straight lines, which is important for achieving clean edges in your chalk art.
- Creating Grids:
- You can use the ruler to create a grid system on your pavement, marking out sections to help with placing your design accurately.
- A grid can guide you in transferring proportions properly, especially for intricate designs, providing a structured approach to your creation.
Reference Images
- Guidance for Proportions:
- Having a reference image or sketch handy can significantly aid your chalk art process. This image serves as a blueprint to inform your proportions and overall design.
- By visually comparing your work to the reference, you can ensure that aspects such as size and shape align closely with your artistic intent.
- Clarifying Details:
- A reference image can help clarify complex details within your design, assisting you in replicating textures, colors, and lighting effects accurately.
- By studying the reference closely, you will gain a better understanding of how different elements interact within the composition, which can enhance the overall quality of your final artwork.
- Inspiration and Creativity:
- Reference images also serve as a source of inspiration. They can spark new ideas or motifs that you might want to incorporate into your own work.
- Consider using images that align with your theme to deepen the artistic narrative you aim to convey in your chalk art.
Sealer
- Protection for Your Artwork:
- Using a spray sealer helps protect your chalk art from the elements, such as rain, sun, and wind. This is especially important for outdoor artworks that may be exposed to changing weather conditions.
- A sealer can help maintain the vibrancy of the colors and prevent fading or smudging over time.
- Choosing the Right Sealer:
- There are various types of sealers available, including matte and glossy options. Consider selecting a matte sealer to maintain the chalky finish that characterizes chalk art.
- Always read the label to ensure compatibility with chalk materials and check for instructions on application and curing times.
- Application Tips:
- When applying a sealer, do so in a well-ventilated area to avoid inhaling any fumes. Ensure the chalk design is completely dry before sealing to prevent any moisture from being trapped underneath.
- Hold the spray can at an appropriate distance from the artwork to ensure an even coat without saturating the chalk.
- Long-term Exhibition Considerations:
- If you plan to exhibit your chalk art for an extended period, applying a sealer becomes even more crucial. A reliable sealant can extend the life of your artwork and keep it looking fresh for viewers and passersby alike.
- Reassess the need for reapplication periodically, especially if the artwork remains on display for several days or weeks.
Techniques for Creating Stunning 3D Chalk Art
1. Mastering Perspective
- Understanding Vanishing Points: 3D chalk art heavily relies on understanding perspective. By establishing a clear vanishing point, you can create depth and dimension in your designs.
- Line Guide: Draw straight lines extending from the vanishing point. These lines will help you maintain accurate proportions throughout your artwork.
2. Layering Colors
- Color Gradation: To achieve a realistic appearance, experiment with blending different shades of chalk to create gradation. Use darker colors to create shadows and lighter shades for highlights.
- Layered Technique: Apply color in layers, starting with the base color and gradually building up to the final details. This technique enhances craftsmanship and depth.
3. Using Shadows Effectively
- Creating Dimension: Adding shadows is crucial for creating the illusion of depth. Shadows should mimic the light source in your artwork, providing contrast and dimension.
- Shadow Techniques: Use darker shades to represent areas that are concealed from light, thereby reinforcing the 3D effect.
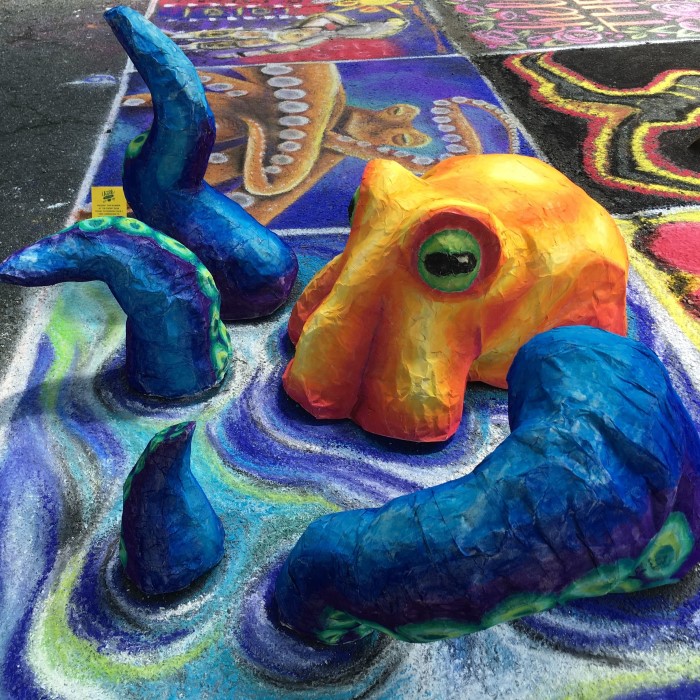
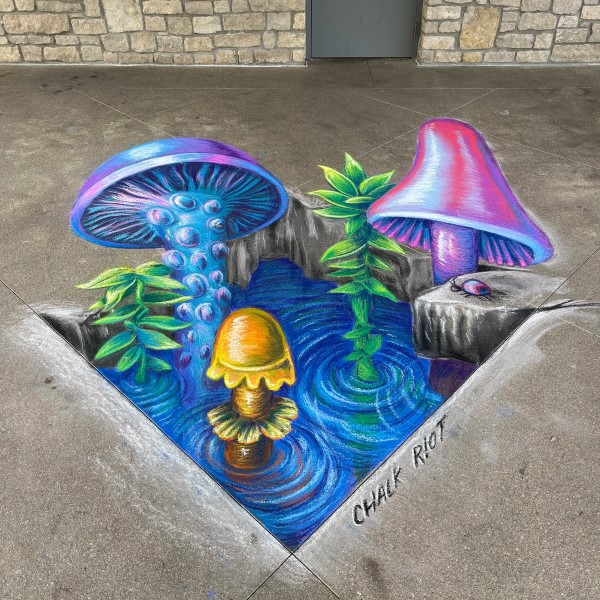
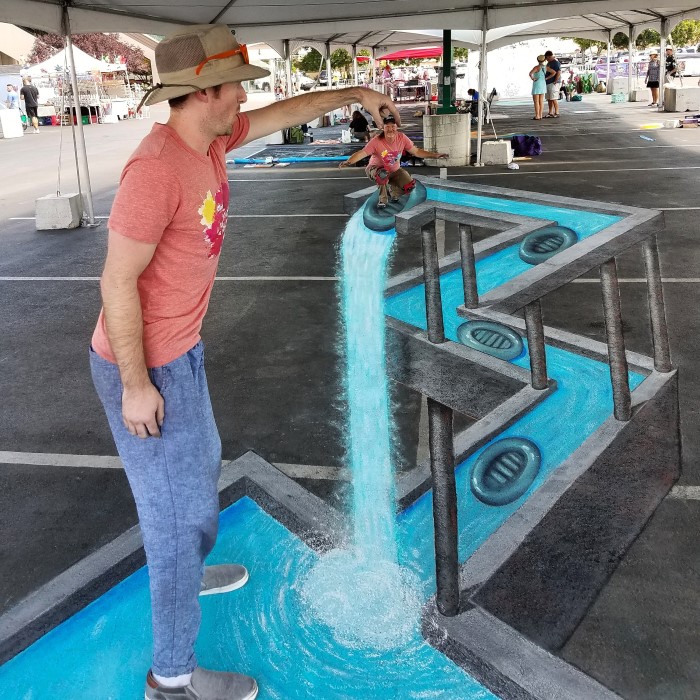
4. Captivating Designs
- Themes and Concepts: The theme of your artwork can dictate the overall feel. Choose concepts that resonate with your audience. Popular themes include nature, fantasy, and whimsical designs.
- Incorporating Interactive Elements: Consider adding elements that encourage viewer interaction, such as 3D objects that people can pose with or interact alongside.
Tips for Successful 3D Chalk Art
Planning Ahead
- Sketching Your Design: Before you start, creating a small-scale sketch of your design can help you visualize the final product. It also serves as a guide during application.
- Location Considerations: Choose a location with enough space for your design and minimal foot traffic. Make sure the surface is clean and even for best results.
Practicing Techniques
- Trial Runs: Before executing your design on the street, practice specific techniques on paper or a test surface. This will help you refine your skills and increase confidence in your abilities.
- Time Management: Chalk art can be time-consuming, especially larger pieces. Be mindful of your timeline to ensure you complete the artwork on schedule.
Caring for Your Artwork
Protecting Your Chalk Art
- Using a Sealer: If your chalk art is intended to be displayed for longer periods or is at risk of rain or wind, consider sealing it with a protective spray.
- Regular Touch-Ups: Be prepared to do touch-ups if you notice areas that have faded or been unintentionally smudged.
Understanding Weather Conditions
Best Weather for Creation
- Ideal Conditions:
- The best weather for creating chalk art is characterized by dry and mild temperatures. Such conditions provide optimal working conditions for artists and allow the chalk to adhere properly.
- Mild temperatures are preferable because extreme heat or cold can affect the application of the chalk.
- Avoiding Windy Conditions:
- Wind can be particularly disruptive when working with chalk art. It can blow away loose particles, cause smudging, or even carry debris onto your surface, ruining your work.
- When planning a chalk art project, always check the local weather forecast for wind speeds, aiming for calm days wherever possible.
- Rainy Weather Risks:
- Rain is detrimental to chalk art because it can wash the chalk away before it has had a chance to dry or adhere properly to the surface.
- Besides washing away existing designs, rain can also make it impossible to work, so it’s best to avoid creating art in such conditions.
- Flexible Scheduling:
- Depending on your local climate, it may be helpful to be flexible with your schedule. If you notice a chance of rain or high winds, consider postponing your project for a more favorable day.
- Keeping a close eye on weather patterns can help you identify optimal days for chalk art creation.
Surface Considerations
- Cleanliness is Key:
- Before applying chalk, ensure that the pavement or surface is clean. Any dirt, dust, or debris can interfere with how well the chalk adheres and can result in uneven application.
- Taking the time to sweep or wash the surface beforehand ensures a smoother finish and better overall quality in your artwork.
- Dry Surface Requirement:
- The surface must be completely dry before applying chalk. Moisture can cause the chalk to clump or slide, resulting in less precise lines and a disappointing finish.
- If there has been rain or dew, allow time for the area to dry thoroughly before beginning your work.
- Texture Consideration:
- The texture of the surface plays an essential role in how well the chalk adheres. Rough surfaces may allow for better grip and more vibrant colors, while smooth surfaces might cause the chalk to slide off easily.
- If working on textured surfaces, consider testing a small area first to assess the chalk’s adherence and overall appearance.
- Assessing the Environment:
- Check the area surrounding your chosen surface for any contaminants like oil stains or grease, as these can hinder adhesion.
- Choosing a location that is clean, dry, and suitable creates the best foundation for your chalk art, allowing for a successful and visually appealing result.
Frequently Asked Questions
What is 3D chalk art called?
3D chalk art is often referred to as “street art” or “chalk pavement art,” emphasizing its dynamic appearance and location on sidewalks or streets.
Can I create 3D art as a beginner?
Absolutely! 3D chalk art can be created by artists of all skill levels. Beginners can start with simpler designs and progressively challenge themselves as they gain experience.
What is chalk art?
Chalk art generally refers to drawings or paintings made using chalk on surfaces such as sidewalks, blackboards, or walls. It is known for its vibrant colors and temporary nature.
Conclusion
In conclusion, 3D chalk art is an inspiring and transformative way to express your creativity while delighting audiences. By understanding the techniques, tools, and practices outlined in this article, you can embark on your journey to create eye-catching street designs that captivate and engage.
Whether you are a beginner or someone with more experience, the world of chalk art invites everyone to explore their imagination. So grab your chalk, plan your next masterpiece, and see how your creative vision can turn a simple pavement into a stunning visual experience! With patience and practice, the results can be nothing short of magical. Get ready to leave your mark on the world of street art!