Introduction
Halloween is a time filled with fun, creativity, and spooky decorations. One of the most vibrant and engaging ways to enhance your Halloween celebrations is through the use of Halloween chalk art. This technique allows you to express your creative side while providing a playful atmosphere that both children and adults can enjoy.
In this article, we will explore various Halloween chalk art ideas, the techniques needed to create captivating designs, and answer some of the most frequently asked questions about chalk art. Whether you’re looking for dramatic street art or simple decorations for your home, you will find inspiration here to transform your space this Halloween season.
Understanding the Basics of Chalk Art
Chalk art isn’t just child’s play; it’s a versatile form of art that has grown in popularity due to its accessibility and ease. To get started with Halloween chalk art, you’ll need a few essential supplies:
Chalk Varieties:
- There is a wide range of chalk available for artistic expression.
- Traditional Sidewalk Chalk: This type is thick and sturdy, ideal for large-scale drawings and outdoor use. It often comes in bright colors and is easy to handle.
- Pastel Chalk: Softer and more pigmented than traditional chalk, pastel chalk allows for smoother blending and a softer finish, making it ideal for detailed and colorful artwork.
- Chalk Pens: These are liquid chalk markers that provide the control of a pen, perfect for fine lines and intricate designs. They are often used on non-porous surfaces and can be easily erased.
Suitable Surfaces:
- When choosing where to create your chalk art, consider the following options:
- Sidewalks: A common choice, providing ample space for large murals and designs.
- Driveways: Similar to sidewalks, but often offer a smoother, uninterrupted canvas.
- Chalkboards: Perfect for indoor projects, allowing for easy application and removal of designs.
- Flat, Non-Porous Surfaces: This includes walls, patios, and any other smooth surfaces that can withstand outdoor conditions without absorbing the chalk.
Creative Tools:
- Although your hands are versatile for chalk art, incorporating additional tools can enhance your designs:
- Brushes: Use brushes for finer applications and different stroke techniques, allowing for various line widths and textures.
- Stencils: These can help create precise shapes and patterns, making it easy to replicate intricate designs.
- Sponges: Great for blending colors and creating soft edges, sponges can add depth and texture to your artwork.
- Experimenting with these tools can produce unique effects and elevate your chalk artwork to the next level.
Once you gather your materials, the fun of creating your Halloween masterpiece begins!
Fun Halloween Chalk Art Ideas
Spooky Designs
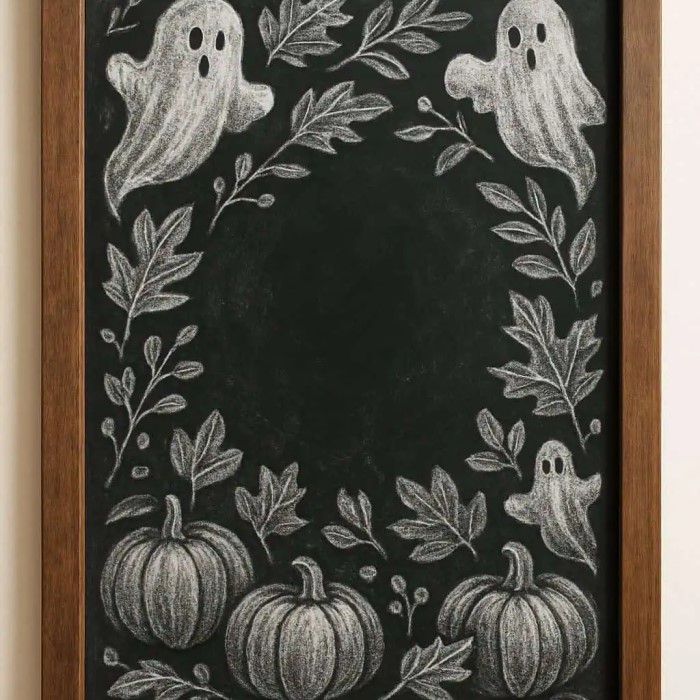
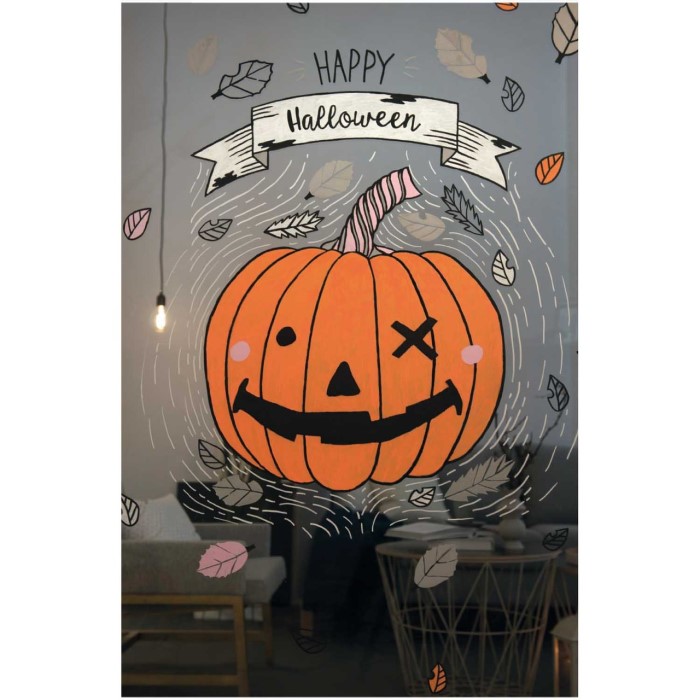
One popular Halloween chalk art theme involves spooky designs featuring ghosts, bats, and jack-o’-lanterns. You can draw a large ghost floating above your front porch or create a detailed jack-o’-lantern with a spooky face. Use white chalk for the ghosts, and orange and black chalk for the pumpkins. These designs are both easy to make and visually appealing.
Creepy Quotes and Messages
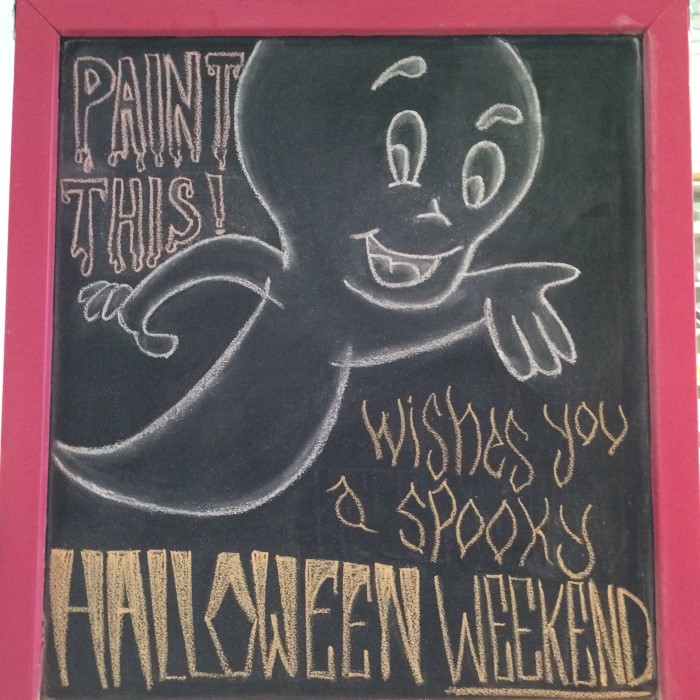
- Creative Medium: One engaging idea is to utilize colorful chalk to craft creepy quotes or phrases. This approach allows for a playful yet spooky atmosphere that can enhance your surroundings.
- Intriguing Phrases: Consider using phrases that evoke a sense of mystery and excitement, such as “Enter if you dare,” or “Beware of the witch.” These statements not only capture attention but also encourage interaction and curiosity.
- Visual Impact: To ensure your message stands out, opt for large lettering. This bold approach makes it easier for onlookers to read from a distance, drawing them in closer.
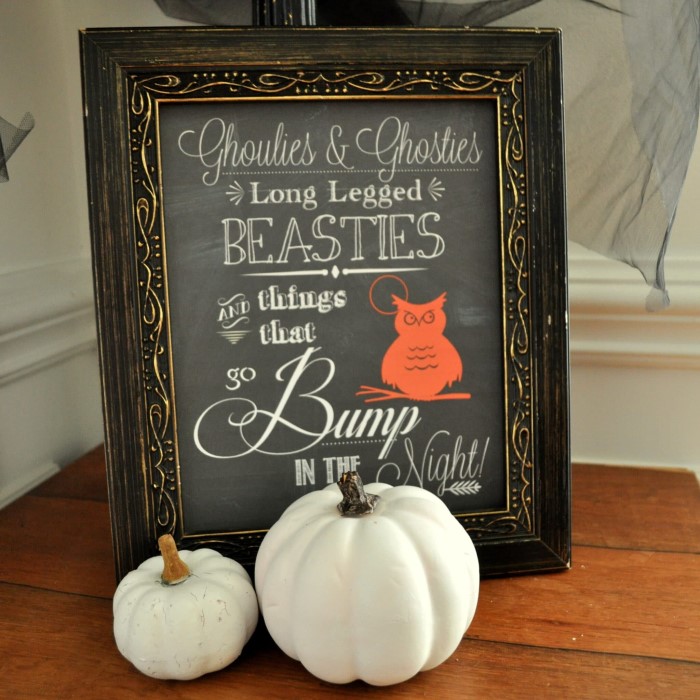
- Decorative Elements: Enhance your quotes by incorporating decorative borders and thematic designs. Adding elements like spider webs, ghosts, or bats can amplify the eerie vibe of your messages.
- Color Experimentation: Don’t hesitate to experiment with different colors and styles. Using a mix of vibrant and dark hues can create a striking contrast, making your quotes more visually captivating. Play around with various fonts and techniques to give each phrase a unique flair.
- Engagement Factor: By setting a fun yet eerie tone with these chalk quotes, you invite others to engage with the space. Whether it’s for a Halloween event or a spooky gathering, these creative messages can become a highlight and a conversation starter.
Interactive Chalk Art
Consider creating interactive chalk art. This can include hopscotch games or mazes that kids can engage with as they trick-or-treat. For example, you could design a spooky maze that leads to your front door, enticing little ghosts and goblins to participate. This kind of artwork not only looks great but also provides entertainment!
Themed Scenes
For those looking for something more elaborate, think about creating a whole themed winter wonderland. For example, create a Halloween graveyard scene with tombstones, skeletons, and stunted trees. This will take more time and patience but will wow family and friends when they see your creativity in action.
Tips for Creating Effective Chalk Art
Creating effective chalk art requires some practice. Here are a few tips to help improve your art skills:
Plan Your Design
- Start with a Sketch: Before diving into the actual artwork, take some time to sketch your ideas on a piece of paper. This will help you visualize the overall layout and composition.
- Consider Dimensions and Placement: Think about the size of your canvas or the surface where you will be working. Make sure your design fits well within these dimensions to avoid any awkward cropping or spacing issues.
- Experiment with Layouts: Don’t be afraid to draw multiple versions of your design to explore different arrangements and structures. This may help you decide which elements to emphasize.
Layering Colors
- Begin with Light Colors: Start your artwork by applying lighter shades first. This foundational layer sets the tone and helps in achieving a vibrant, harmonious color palette.
- Gradually Add Darker Shades: Slowly incorporate darker colors on top of the lighter base. This gradual approach adds dimension and complexity to your artwork, making it more visually appealing.
- Blending Techniques: Experiment with blending your colors as you layer them. This can create smooth transitions and enhance the depth of your artwork.
Use of Shadows
- Understanding Light Sources: Be mindful of where your light source is coming from when applying shadows. This will give your illustrations a realistic appearance.
- Applying Shadows Strategically: Use shadows to highlight certain areas of your artwork and create contrast. This can draw the viewer’s eye to key elements of your design.
- Increasing Depth: Adding shadows effectively can transform flat illustrations into three-dimensional representations, significantly elevating the overall aesthetic of your work.

Protecting Your Artwork
- Consider Longevity: If you want your chalk art to last longer, it’s essential to think about how it will be protected once completed. Exposure to elements can fade and damage your work over time.
- Learn Sealing Techniques: Research different types of sealants designed for chalk art. Experiment with various products to find one that maintains the vibrancy of your colors while providing a protective layer.
- Display Considerations: Decide on a suitable location for your artwork. If you plan to display it outdoors or in a high-traffic area, effective sealing becomes even more crucial to ensure its durability.
Can Chalk Art Be Permanent?
One common question is: Can chalk art be permanent? Chalk is generally not a permanent medium, as it can wash away with rain or wear down over time. However, there are methods to make it last longer. By using specific sealing sprays designed for chalk art, you can protect your designs from weather and ensure they last longer, though they will likely still fade over time.
Is Chalk Art Hard?
Another frequently asked question is: Is chalk art hard? The answer is both yes and no. While anyone can pick up a piece of chalk and start drawing, creating intricate designs requires practice. The best way to improve your chalk art skills is through patience and experimentation. Begin with simple designs and gradually move on to more complex illustrations.
How Do You Seal Chalk Art?
Lastly, many people wonder, How do you seal chalk art? To seal your chalk art, follow these steps:
- Allow your artwork to fully dry.
- Choose a sealing spray designed specifically for chalk art. Make sure it’s suitable for outdoor use if you’re displaying it outside.
- Apply the spray in a well-ventilated area, holding the can 12 inches away from your artwork.
- Allow it to dry completely before exposing it to moisture or heavy foot traffic.
Sealing your artwork can preserve its appearance, especially if you face unpredictable weather.
Conclusion and Final Thoughts
This Halloween season, don’t miss the chance to make your surroundings more festive with innovative Halloween chalk art. Whether through spooky designs, interactive art, or themed scenes, the possibilities are endless. With a few tips, some creativity, and a little practice, anyone can create exciting artworks that bring joy and a festive spirit to their home.
Now that you are familiar with the incredible world of chalk art and how to make it lasting and effective, dive into this colorful celebration. Not only will you enhance your living space, but you’ll also provide joy and entertainment for all who visit. Embrace this art form, and make this Halloween an unforgettable experience!