Embrace Creativity
In a world dominated by digital devices, many people still cherish the artistry of paper and books. One of the best ways to celebrate this is by crafting a paper bag book cover. Not only does this project allow you to customize your books, but it also offers a sustainable approach to protecting your literary treasures. Whether you are a student looking to personalize your textbooks or a book lover wanting a unique design, making a paper bag book cover is both simple and fun.

Why Make a Paper Bag Book Cover?
Paper bag book covers are simple yet practical. They protect your books while being environmentally friendly. This DIY project uses everyday items and takes little time to complete. Let’s explore the many reasons to make one.
Benefits of Using a Paper Bag for Book Covers
Using a paper bag for book covers has many advantages:
- Protects Books from Damage: Paper bags shield your books from dirt, scratches, and spills.
- Customizable Designs: You can decorate the cover to match your personal style.
- Affordable Option: Old grocery bags work well, reducing the need to spend extra money.
- Easy to Replace: If the cover wears out, you can quickly swap it for a new one.
These covers are especially great for school books, as they keep them neat and presentable.
Eco-Friendly and Cost-Effective Solution
Making a paper bag book cover helps reduce waste. Recycling a used paper bag gives it a second life. Instead of buying new plastic covers, you save resources with this eco-friendly alternative.
This approach is also budget-friendly. You don’t need expensive materials. A single paper bag can cover more than one book in some cases. It’s a great way to reduce costs while being kind to the environment.
Supplies Needed
Before making a paper bag book cover, gather the right supplies. Proper preparation ensures your project goes smoothly and delivers great results. Let’s look at what you’ll need and how to choose the best paper bag.
Gathering Materials for Your Paper Bag Book Cover
Gather all the essential materials to simplify the process. Here’s what you’ll need:
- A paper bag: Grocery bags work perfectly for book covers.
- Scissors: Use sharp scissors for precise cutting.
- Tape or glue: Choose sturdy tape or glue for securing edges.
- Markers, stickers, and paints: These are optional, for adding personal touches.
- Ruler: A ruler helps measure your book correctly.
- Pencil: Marks on the paper bag make the cutting easier.
Having these items ready ensures you can finish your book cover without delays.
Choosing the Right Paper Bag for Durability
Not all paper bags provide the same durability. Choosing the right one makes a big difference:
- Thicker paper bags: Stronger paper bags last longer and protect better.
- Clean bags only: Avoid bags with stains or tears.
- Large bags: Bigger bags are easier to size for larger books.
- Plain or branded bags: Plain bags give a clean look, while branded ones offer a fun design.
Select a bag based on your needs, book size, and style preferences. A durable paper bag ensures your DIY book cover lasts and withstands regular use.
Step-by-Step Instructions
Paper bag book covers are easy to make. Follow these steps for a practical and stylish cover.
Measuring Your Book for the Cover
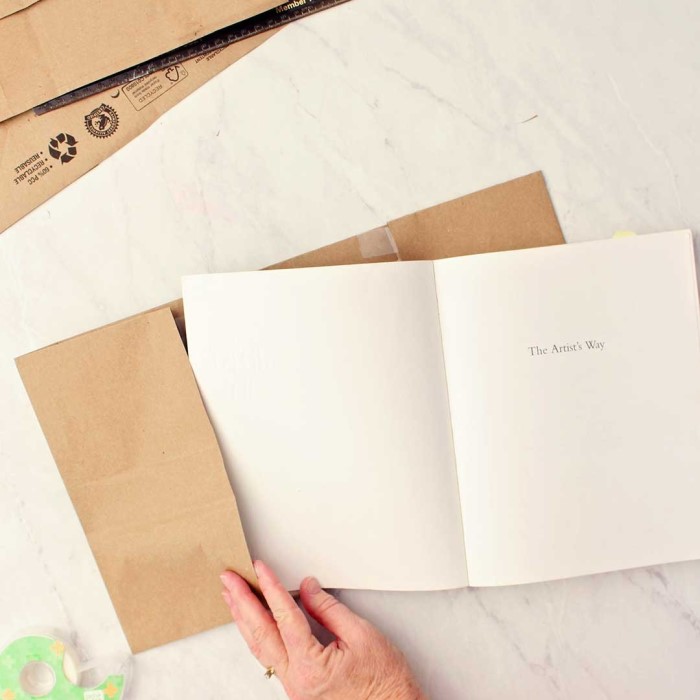
Accurate measurements are essential. Start by closing your book and placing it on the paper bag. Use a ruler to measure the book’s height and width. Mark these dimensions on the paper bag. Leave extra space for folding, about two inches on each side. This ensures the cover fits snugly and doesn’t tear easily.
Cutting the Paper Bag to the Correct Size
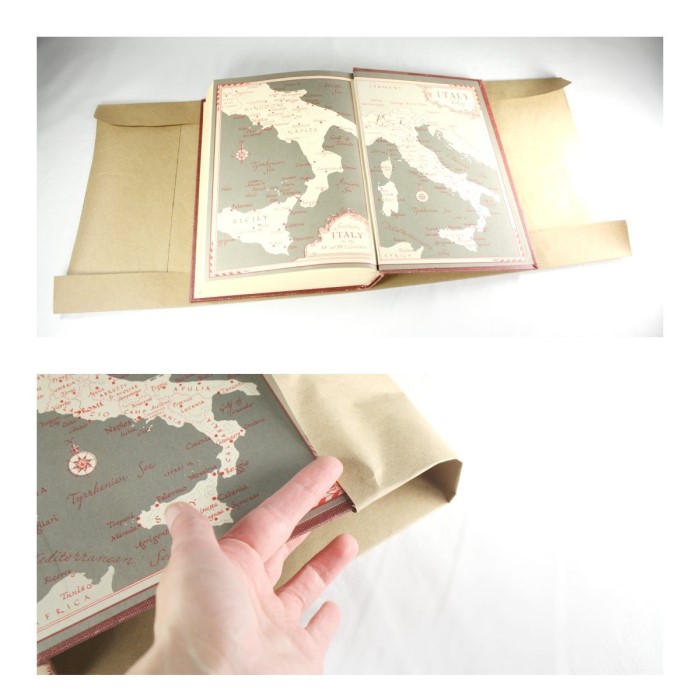
Cutting the paper bag is simple. Use sharp scissors for clean edges. Follow the marked dimensions on the bag. Cut out the bag’s bottom and side seams. You should end up with a large flat sheet. Ensure the piece is big enough to wrap around the book fully.
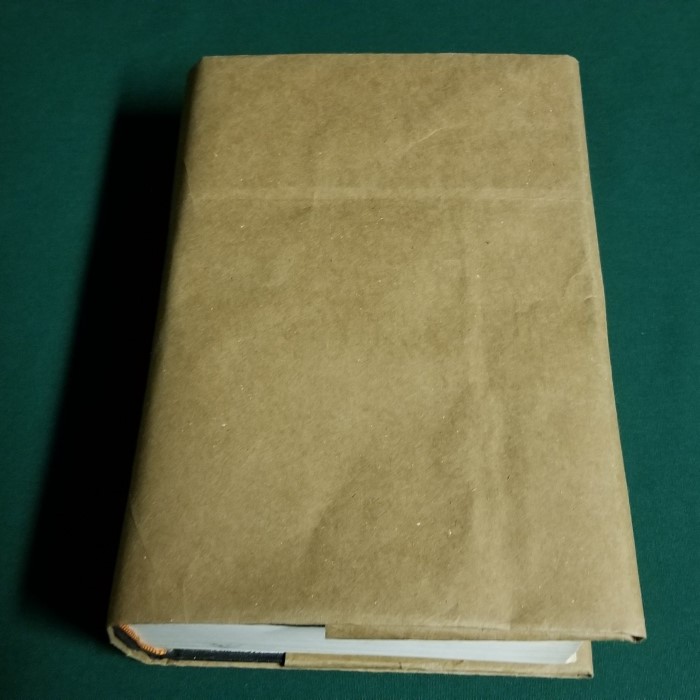
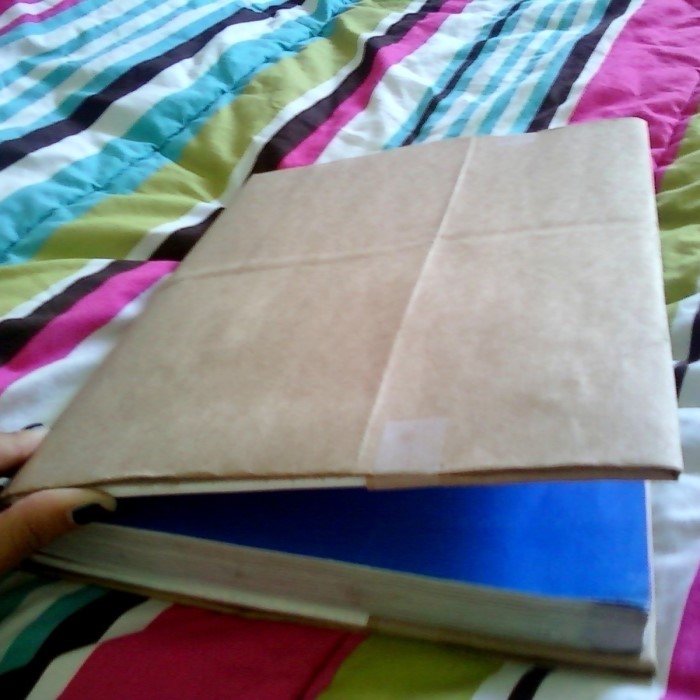
Folding and Wrapping the Bag Around the Book
Folding the paper bag neatly creates a polished look. Lay the book on the paper bag and fold the top and bottom edges inward. These folds should align with the book’s size. Wrap the bag around the book’s front and back covers. Ensure the folds are even and hold their shape.
Securing the Cover for a Snug Fit
Secure the paper bag cover for durability. Use tape or glue on the inner flaps to hold the cover in place. Check that the cover is tight but not too tight to prevent damage. For a cleaner finish, press the folds to remove wrinkles. A well-secured cover protects the book and stays intact during use.
Decorating Your Paper Bag Book Cover
Once your paper bag book cover is ready, it’s time to make it unique. Decorating your book cover allows you to showcase your personality and creativity. Here are some simple and exciting ways to do it.
Easy Ways to Personalize Your Book Cover
Personalizing your paper bag book cover is fun and effortless. Try these simple ideas:
Use Markers or Pens
- Exploring Artistic Patterns: Choose a variety of colors and styles when using markers or pens. You can create intricate patterns, whimsical doodles, or even geometric shapes that add a unique flair to your cover.
- Personal Expression: Drawing directly on your cover allows for a personal touch. This can be a reflection of your personality, interests, or current mood, turning your book cover into a mini canvas for self-expression.
- Experiment with Techniques: Try different techniques, such as shading or dot work, with your markers to give your designs depth. Layering colors can also lead to more visually appealing effects.
Add Stickers
- Selecting Stickers That Reflect You: Choose stickers that resonate with your interests or style. Whether they’re whimsical animals, motivational quotes, or vibrant florals, stickers can help you showcase your personality on your book cover.
- Mix and Match: Combine various stickers to create an eclectic look or use a theme to maintain consistency. For example, you might use only floral stickers for a cohesive garden theme.
- Create a Story: Consider selecting stickers that tell a story or represent different aspects of your life. This approach can turn a simple book cover into a conversation starter or a personal narrative.
Write Quotes or Names
- Incorporate Meaningful Quotes: Use colorful markers to write down your favorite quotes that inspire or motivate you. This addition can serve as encouragement whenever you glance at your book.
- Include Your Personal Touch: Adding your name or initials not only personalizes your book cover but also helps you identify your belongings easily, especially in shared spaces like classrooms or libraries.
- Decorate with Calligraphy: Try practicing calligraphy or fancy lettering styles when writing quotes or names. This adds sophistication and elegance, elevating the overall look of your cover.
Stamp Designs
- Quick and Easy Customization: Use stamps and ink pads to create beautiful patterns quickly. This approach saves time while still allowing for artistic flair on your book cover.
- Diverse Stamp Options: Experiment with different stamps—floral, geometric, seasonal, or thematic—to match your book’s content or your personal taste.
- Layering and Overlapping: Feel free to layer different stamped designs to create texture and depth. Overlapping colors can produce interesting visual contrasts and enhance the artistic appeal.
Apply Washi Tape
- Versatile Decoration Tool: Washi tape comes in various colors and patterns, making it a fun tool for decoration. You can easily peel and stick it without damaging the cover, allowing for easy changes.
- Creating Borders and Stripes: Use washi tape to create borders around the edges of your book cover or to form eye-catching stripes. This simple addition can significantly enhance the overall design.
- Personalized Flair: Combine different washi tape patterns and colors to create a unique, layered look. This customization can add a playful element that reflects your individuality.
Glue Paper Cutouts
- Adding a Layered Look: Cut out shapes or designs from craft paper that contrast or complement your book cover. Glueing these cutouts can create a three-dimensional effect that sets your book apart.
- Theme-Based Designs: Use paper cutouts that fit a specific theme—such as nature, music, or travel. This thematic approach allows you to showcase your interests directly on your book cover.
- Embed Texture and Color: Choose textured or colored papers to add visual interest. Layering different papers can create a more dynamic and engaging appearance, bringing your design to life.
These simple options transform your paper bag book cover into something truly yours.
Creative Design Ideas for Kids and Adults
For those who enjoy putting in extra effort, here are creative ideas for kids and adults alike:
- For Kids:
- Add cartoon illustrations or favorite characters.
- Use glow-in-the-dark stickers or glitter for a magical touch.
- Create a theme, such as superheroes, animals, or outer space.
- For Adults:
- Craft a minimalist design using neutral tones.
- Use pressed flowers or leaves for a natural look.
- Add printed photos, vintage newspaper pieces, or inspirational mood boards.
- Collaborative Art:
- Let friends or family contribute by signing or adding small doodles.
Decorated paper bag book covers not only protect books but also express creativity and joy. Whether you prefer simple or elaborate styles, the possibilities are endless.
Tips for Longevity and Maintenance
A paper bag book cover can last longer with proper care and reinforcement. Simple techniques can protect it against wear and tear.
How to Strengthen Your Paper Bag Cover
- Add tape to edges: Reinforce the corners and edges with clear packing tape.
- Laminate the cover: Use adhesive plastic sheets to make the cover water-resistant.
- Glue thicker paper layers: Add a second layer of paper for extra durability.
- Double-fold the seams: Fold seams twice to prevent tearing over time.
- Apply fabric strips: Attach fabric strips using glue for stronger flaps.
These methods ensure the cover stays intact and protects your books longer.
Cleaning and Preserving Your Book Cover
- Dust regularly: Use a soft cloth to wipe the cover gently.
- Avoid spills: Keep away from liquids to prevent damage or stains.
- Keep away from direct sunlight: Avoid prolonged exposure to sunlight to prevent fading.
- Repair damage promptly: Fix small tears with glue or tape immediately.
- Store books upright: Proper storage prevents bending and keeps the cover looking neat.
With consistent maintenance, your paper bag book cover will remain clean, durable, and stylish.
Alternative Uses
Paper bag book covers have more uses than just protecting books. Reusing them encourages creativity and reduces waste. Let’s explore alternative ways to make the most of your paper bag covers.
Turning Covers into Bookmarks and Labels
Old paper bag covers can serve as handy bookmarks or personalized labels. Here’s how:
- Bookmarks:
- Cut the paper bag into narrow strips.
- Decorate the strips with markers or stickers.
- Use them as bookmarks for your favorite reads.
- Labels:
- Trim the paper into small rectangles.
- Write names or descriptions on them.
- Attach them to jars, boxes, or school supplies.
These simple ideas give paper bag covers a second life while making everyday items more functional.
Reusing Paper Bags for Other Crafts
Paper bag covers can be repurposed for various DIY crafts. Here are creative ways to reuse them:
- Gift Wrapping:
- Cut the bag into flat sheets.
- Use them as unique wrapping paper.
- Add ribbons, stamps, or drawings for decoration.
- Paper Flowers:
- Fold and twist the paper into flower shapes.
- Glue them together for a pretty craft.
- Homemade Envelopes:
- Cut and fold paper into envelope shapes.
- Secure edges with tape or glue.
- Art Projects for Kids:
- Use scraps for collages or painting mats.
- Let kids explore their creativity using the recycled material.
These crafts keep paper bags out of the trash and inspire environmentally-friendly creations. By reusing paper bags, you contribute to sustainability while enjoying fun projects.
Conclusion: Make Your Books Stand Out!
Creating a paper bag book cover is not just a fun craft; it’s also a meaningful way to treat your books with care. By following the steps above, you can easily personalize any book to reflect your style. Engaging in this project promotes creativity while embracing eco-conscious principles. So, gather your materials, unleash your imagination, and turn those ordinary books into extraordinary pieces of art!
In summary, learning how to make a paper bag book cover allows you to customize it your way while protecting your beloved books, making this craft a perfect blend of functionality and creativity. Enjoy the journey of crafting, and let your unique personality shine through every design you create!