Introduction to Slab Construction
Slab construction is a popular technique in the ceramics world. It involves rolling out clay to a consistent thickness before shaping it into the desired form. This method offers great flexibility and allows for both intricate and simple designs. Complex geometries and sharp angles are possible, which may be hard to achieve with other methods like wheel throwing. In slab definition ceramics, a slab is essentially a flat piece of clay. The thickness can vary. It’s important to remember that the size and thickness play a role in the final product’s stability. For beginners, starting with slabs of uniform thickness is best. This ensures that pieces dry evenly and minimizes the risk of warping.
Slab building techniques include using either soft or leather-hard clay. The choice depends on the project. Soft slabs allow more flexibility but are also more fragile during handling. Leather-hard slabs, on the other hand, are stiffer and easier to join and carve.
Artists value slab construction for its adaptability. They can create a variety of shapes and sizes. It’s suited for making everything from plates and platters to sculptural forms. It’s also a technique that can be done with minimal tools which makes it accessible to novices. Nevertheless, the results can be as complex and detailed as the artist desires.
To achieve the best results, it’s important to master the basics. This includes rolling out slabs uniformly, cutting precise edges, and ensuring smooth joins. These fundamental skills pave the way for more advanced techniques and designs in slab-built ceramics.
Essential Tools for Slab Building
In slab definition ceramics and construction, having the right tools is key. Here are the tools every ceramist needs.
Rolling Tools
Rolling pins or slabs rollers are a must. They help create uniform slabs.
Cutting Tools
Knives or needle tools are used for cutting slabs. Wire clay cutters are also popular.
Ribs and Scrapers
Ribs, made of rubber or metal, smooth slabs. Scrapers remove excess clay.
Texture Tools
Stamps, lace, and combs add pattern to slabs before assembling.
Measuring Tools
Calipers measure slab dimensions. Straight edges ensure precise cutting.
To make slab-built pieces, you must start with well-equipped. The tools you use can greatly affect your ceramic work’s outcome. Remember to keep tools clean and in good condition for best results.
Preparing the Clay Slab
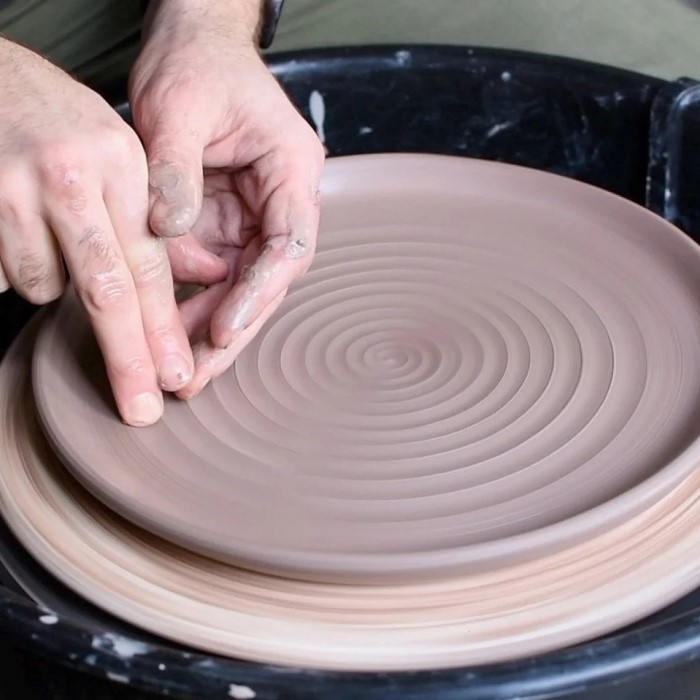
Preparing the clay slab is a crucial step in slab construction. Start with wedging the clay to remove air bubbles and create a uniform consistency. This step prevents potential cracks and weaknesses in the final piece. Once wedged, roll the clay out using a rolling pin or slab roller. Aim for even thickness throughout to ensure uniform drying and minimize distortion.
Use guide sticks on each side of the clay to achieve the desired thickness. These sticks act as guides for your rolling pin, providing a consistent slab height. After rolling, smooth out any texture or imperfections with a rib or scraper. Clean up the edges with cutting tools to get the precise shape needed for your project.
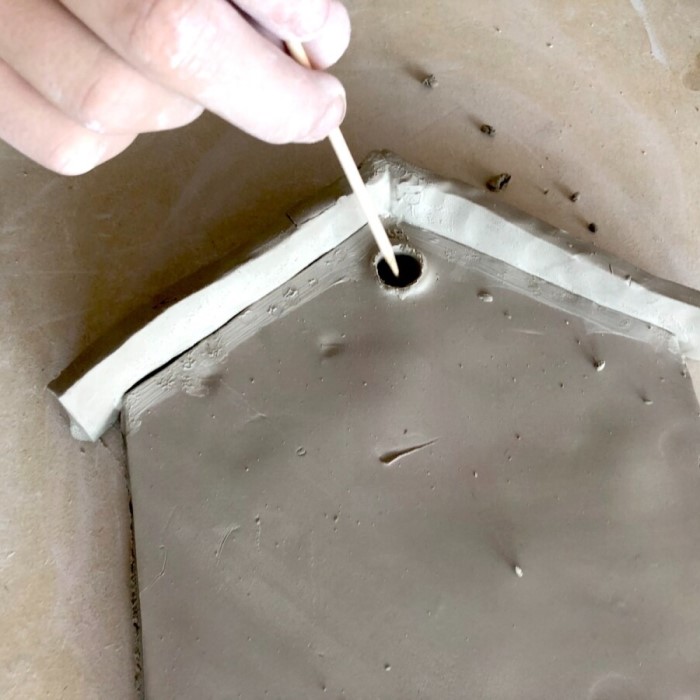
If additional pieces or details are necessary, cut them out now. Remember to score and slip all joints before attaching to prevent separation during the drying process. Scoring creates tiny grooves and slipping applies wet clay, which helps pieces stick together.
Lastly, let the slab sit until it reaches a leather-hard state. This is the optimal stage for assembly as it’s firm enough to hold its shape but still pliable for modifications or carving. Take care at this stage, handling slabs gently to maintain shape and integrity. The well-prepared slab is foundational for creating strong, durable ceramics that will survive the firing process.
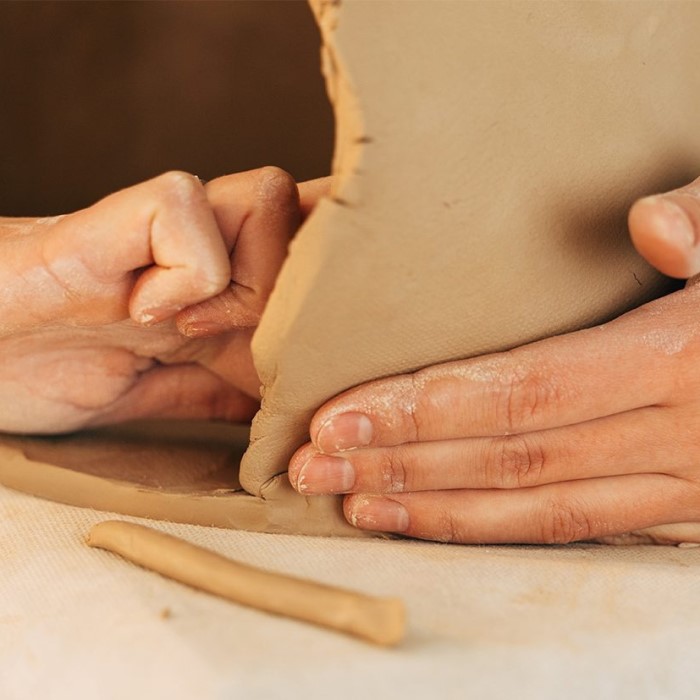
Techniques for Assembling Slabs
Assembling slabs is a critical phase of slab construction in ceramics. Below are steps and tips for connecting pieces effectively:
Scoring the Edges
Scoring is crucial for a strong bond. Use a serrated rib or a needle tool. Draw several lines across the surfaces you will join. Think of it like making Velcro for the clay pieces.
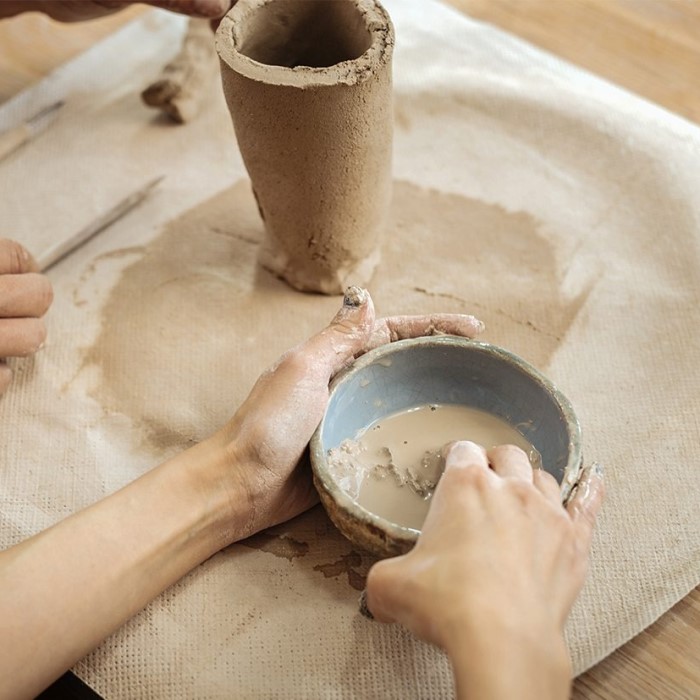
Applying Slip
After scoring, apply slip. This acts like glue between the clay surfaces. Use a brush to ensure all scored areas get covered. The slip should be creamy, not too thick.
Joining the Pieces
Now, align and firmly press the pieces together. Hold for a few seconds. Make sure the edges meet perfectly, with no gaps visible.
Reinforcing the Seams
To strengthen the join, go over it with a coil of clay. This is called reinforcing. Blend the coil into the seam, smoothing it out with your fingers or a rib.
Checking for Alignment
Keep a straight edge handy. Use it to check that the assembled pieces are level. Adjust gently if necessary. Correct alignment is key to stability and symmetry.
Cleaning and Smoothing
Finally, clean excess slip with a sponge. Smooth out any irregularities. This not only improves appearance but also contributes to the structure’s integrity.
It’s vital to be meticulous during slab assembly. This ensures the final piece is both aesthetically pleasing and structurally sound. Remember, patience and attention to detail are your best tools here.
Texturing and Decorating Slab-Built Pieces
After assembling the slabs, texturing and decorating are the next steps. This stage gives character to your ceramic pieces and can turn simple objects into works of art. Here are some techniques to enhance your slab-built ceramics.
Adding Texture
Texture can make a surface more visually interesting. Use different materials to press into the clay slab. Tools like stamps, lace, or combs create a variety of patterns. Make sure to texture your slab before it dries too much; the clay should be soft enough to take the impression.
Carving Designs
Carving is another way to add interest. Use a sharp tool to incise lines or shapes directly into the clay. This technique works best when the clay is leather-hard, holding detail without cracking.
Applying Underglaze
Underglazes are colored slips applied to a slab before the first firing. They come in a wide range of colors. Paint designs or coat entire pieces before the bisque firing. The color will show through the final glaze, making your designs pop.
Using Sgraffito
Sgraffito involves painting a layer of underglaze, then scratching away parts to reveal the clay’s original color. It creates a stark contrast and can be very effective for detailed designs.
Attaching Add-ons
You can attach additional clay elements post-texturing. Score and slip these add-ons to join them securely to your base slab. They should also be leather-hard to avoid any distortion.
The decoration phase is crucial for slab definition ceramics. It adds depth and personality to the piece. By following these decoration techniques, you can ensure your slab-built ceramics are not only well-crafted but also aesthetically engaging.
Drying and Bisque Firing Considerations
Drying and firing are steps that require care and knowledge. For slab definition ceramics, manage these processes well to avoid issues. Here’s how to handle them.
Drying Slabs Properly
Drying slabs evenly is critical. Place them on a wire rack or absorbent surface to dry. Turn them occasionally to allow air to reach all sides. Watch for cracking or warping. Slow drying is best, so cover slabs with plastic if needed. This prevents uneven drying speeds.
Bisque Firing Tips
Timing for Bisque Firing:
-
- Ensure that your clay slabs are completely bone dry before proceeding to bisque firing. This is crucial as any residual moisture can cause explosive reactions in the kiln.
- Bone dry means that the slabs have lost all visible moisture and are firm to the touch, indicating readiness for the first firing stage.
Purpose of Bisque Firing:
-
- Understand that bisque firing serves two main purposes: it eliminates all remaining water from the clay and transforms the clay into a more durable form, making it suitable for glazing.
- The process also prepares the slabs for additional surface treatment and artistic enhancements, facilitating better adhesion of glazes.
Moisture Check:
-
- Before loading your slabs into the kiln, perform a thorough inspection for any signs of moisture. This can be done by checking the weight and feel of the pieces, or visually inspecting for dampness.
- It’s advisable to leave the slabs to air dry in a controlled environment for a few extra hours if there’s any doubt about their dryness, as preventing explosions is paramount.
Slow Heating Process:
-
- When you are ready for bisque firing, plan to fire the kiln slowly. Rapid temperature increases can lead to thermal shock, which may cause cracks or breaks in the slabs.
- Gradually raising the temperature allows the moisture to escape safely and ensures structural integrity throughout the firing process.
Uniform Temperature Increase:
-
- It’s essential to ensure that the heat within the kiln increases evenly. Uneven heating can cause certain areas of the slabs to expand or contract at different rates, leading to potential damage.
- Pay attention to the overall temperature distribution in the kiln by utilizing kiln shelves and placing pieces strategically for even exposure.
Follow Kiln Guidelines:
-
- Always adhere to the manufacturer’s guidelines for the specific kiln you are using. These guidelines will provide critical information on the appropriate temperature settings and firing schedules for bisque firing.
- Temperature settings can vary between different types of clay and kilns, so understanding and following these instructions closely is integral to achieving successful results.
Monitor the Firing Process:
-
- If possible, monitor the firing process closely, especially during the initial stages. Keeping an eye on the temperature ramp can help you detect any issues early on.
- Use a kiln controller or thermometer to keep track of the temperature and make adjustments as needed to ensure a smooth firing experience.
Remember, slabs may crack or warp at this stage. Proper drying and a controlled bisque firing minimize these risks. These considerations ensure a successful transition from soft clay to a hardened ceramic piece ready for glazing.
Glazing and Finishing Slab-Built Ceramics
The final steps to complete slab-built ceramics are glazing and finishing. These processes enhance the piece’s durability and aesthetic appeal. Here is a simple guide for glazing and finishing your slab construction projects.
Selecting the Right Glaze
Choose a glaze that complements your ceramic’s form and texture. Test different glazes on small pieces first. This helps avoid unexpected results on your main piece.
Applying Glaze Evenly
Use a brush or dip the ceramic into the glaze. Aim for an even coating. Wipe off excess glaze from the bottom to prevent sticking to the kiln shelf.
Glaze Firing
Place your piece in the kiln for the glaze firing. This is typically at a higher temperature than bisque firing. Check the glaze manufacturer’s instructions for the correct firing range.
Inspecting After Firing
Once cooled, check your piece for any glaze defects. Look for bubbles, cracks, or uneven areas. If necessary, you can reglaze and refire.
Adding Final Touches
Attach hardware if making functional ware, like knobs or handles. For decorative items, consider felt pads to protect surfaces they will sit on.
By following these steps, you can ensure your slab definition ceramics are beautifully glazed and finished. This will show their true beauty and preserve them for years to come.
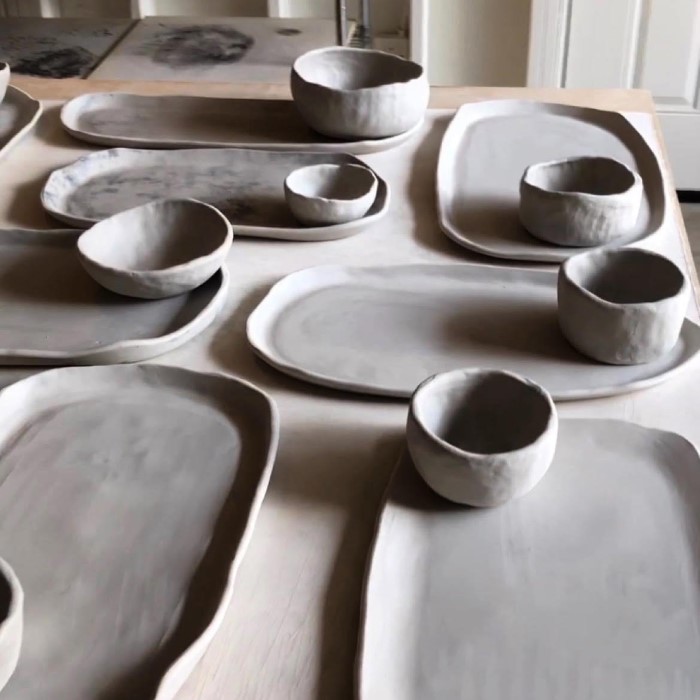
Examples of Slab Construction Projects
The versatility of slab construction allows for a plethora of creative projects. Here are some examples:
Functional Dishware
Craft plates, bowls, and mugs using slabs. They can be square, round, or any shape you envision.
Decorative Tiles
Create tiles with textures or carved patterns. They can adorn walls or serve as coasters.
Sculptural Forms
Use slabs to build figures or abstract sculptures. It’s ideal for large-scale works or intricate details.
Planters and Vases
Make unique containers for plants. Combine slabs with other techniques for interesting effects.
Custom Signs
Design signs with raised letters or symbols by cutting out or adding on slab elements.
Personalized Gifts
Craft custom pieces, like picture frames or jewelry trays, that make thoughtful presents.
Experimenting with slab construction can lead to personalized and distinctive ceramics. Trying different projects enhances skills and feeds creativity.
Conclusion: Elevating Your Artistic Journey with Slab Ceramics
In conclusion, mastering the slab definition ceramics opens a world of artistic possibilities. Slab construction is more than a technique; it is a means of expression that allows artists to combine creativity and functionality. By understanding the advantages, exploring various techniques, and avoiding common mistakes, every artist can enhance their skills and produce remarkable ceramic works.
Whether you are a beginner or a seasoned potter, slab ceramics offers endless opportunities for growth and creativity. Armed with this knowledge, you are well on your way to elevating your ceramic creations to new heights. Embrace the world of slabs and let your artistic journey flourish!