Introduction to Fabric Painting with Acrylics
If you’ve ever wanted to add your personal touch to clothing, home decor, or accessories, knowing how to paint on fabric permanently can be a game changer. Painting on fabric opens up endless possibilities for creativity and self-expression. Whether you’re enhancing a plain t-shirt, creating custom bags, or designing unique fabric art, understanding the right techniques ensures your designs last. This guide covers all the essentials you need to master permanent fabric painting successfully.
Essential Materials for Fabric Painting
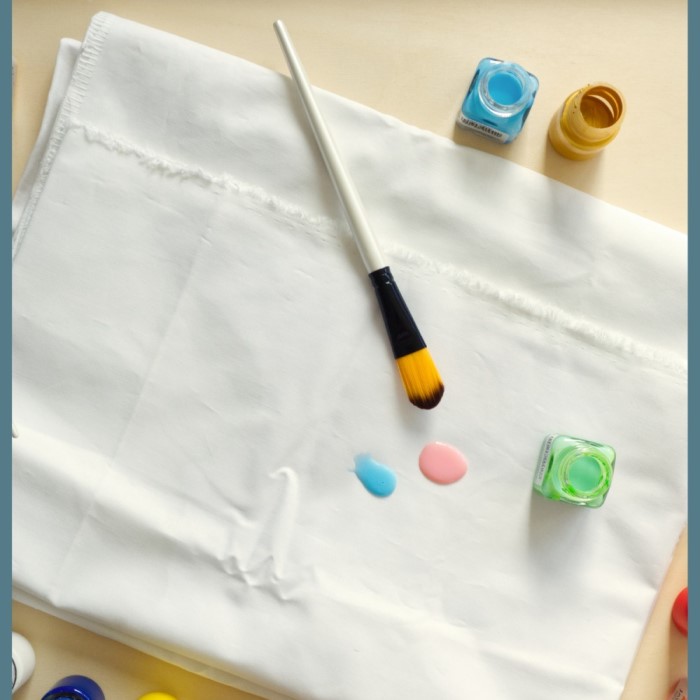
When diving into the creative world of fabric painting with acrylics, having the right materials is essential to crafting vibrant and long-lasting designs. Here, we’ll guide you through the crucial supplies you’ll need to make acrylic paint fabric-safe.
Preparing Your Acrylic Paint
Begin by selecting high-quality acrylic paint; its pigmentation and consistency play a pivotal role in the durability and appearance of your fabric painting projects. Ensure the paint is fresh and not clumpy, as this ensures smoother application.
Choosing the Right Fabric Medium
A fabric medium is vital in converting your acrylic paint from a standard paint to one suitable for fabric. This medium helps the paint adhere to the fabric and remain flexible and washable. Opt for a tried-and-tested brand like Martha Stewart or search for products with excellent reviews online. According to retrieved blog insights, fabric mediums often come with mixing instructions, like a common ratio of one part fabric medium to two parts acrylic paint. This mixture will help maintain the color intensity and prevent the fabric from stiffening once painted.
Step-by-Step Process to Make Acrylic Paint Fabric-Safe
Transforming acrylic paint into a fabric-safe medium isn’t as complex as it might seem. Follow this simple process to ensure your fabric painting projects remain vibrant and lasting.
Mixing the Paint and Medium
Start by choosing your desired acrylic paint color. Combine one part fabric medium with two parts acrylic paint. Mix thoroughly to combine. The medium thins the paint and ensures flexibility and washability of the fabric.
Application Techniques for Different Fabrics
Apply the paint-medium mixture to your fabric with a brush or sponge. Use even strokes for a smooth finish. For thicker fabrics, add more layers. Light fabrics may need a protective layer underneath to prevent paint bleed.
Methods for Heat Setting
After your design is completely dry, heat setting is crucial. Iron the fabric on medium heat for 3-5 minutes. Place a cloth between the painted fabric and the iron to protect it. Alternatively, tumble dry the fabric for about an hour.
Tips for Effective Heat Setting
Move the iron constantly to avoid scorching. Check the heat setting of the fabric before starting. Follow the fabric’s care instructions for the best results. Allow the fabric to cool down after heat setting.
Heat Setting Your Fabric Paint for Permanency
To make your fabric painting projects long-lasting, heat setting is a critical step. It ensures that your designs stay on the fabric even after multiple washes. Here’s how you can heat set your fabric paint to achieve permanent results.
Methods for Heat Setting
Once your fabric paint is thoroughly dry, which typically takes around 24 hours, you’ll need to heat set it. You have a couple of options for this:
- Iron Heat Setting: Place a protective cloth or parchment paper between the painted area and the iron to avoid direct contact. Iron on medium to high heat for 3-5 minutes, moving the iron constantly over the design to prevent burning the fabric.
- Dryer Heat Setting: If an iron isn’t your preferred method, you can place the painted fabric item in the dryer. Set it on a high heat setting for approximately an hour to bake the paint onto the fabric.
Tips for Effective Heat Setting
- Check Fabric Type: Before heat setting, confirm that the fabric can withstand high temperatures. Some fabrics may be more delicate and require a lower heat setting.
- Keep Moving: When using an iron, never let it sit still on the fabric. Constant movement prevents heat damage and ensures an even setting of the paint.
- Post Heat Setting Care: Allow the fabric to cool completely after heat setting. It’s advisable to wait about a week before washing the fabric again to ensure the design’s durability.
By following these steps, your fabric paint will become permanent, making your designs not just a creative expression, but a durable piece of art that withstands the test of time and use.
Troubleshooting Common Fabric Painting Issues
How to paint on fabric permanently? When venturing into fabric painting with acrylics, encountering specific challenges like paint bleed, fading, and cracking are common. Addressing these issues promptly enhances the durability and appearance of your projects.
Preventing Paint Bleed and Fade
To minimize paint bleed, always use a fabric medium mixed properly with your acrylic paint. Ensure you apply a barrier layer underneath light fabrics. For preventing fade, opt for high-quality pigmented paint and adhere to the correct heat setting methods described earlier.
Solutions for Cracking and Peeling
Cracking and peeling generally occur when fabric paint hasn’t been mixed well with the medium, or hasn’t been heat set properly. To avoid these issues:
- Mix Thoroughly: Make sure that the paint and fabric medium are mixed uniformly before application.
- Apply Evenly: Use consistent, even strokes when applying paint to prevent thick layers that can crack.
- Heat Set Correctly: Follow the heat setting instructions meticulously. Ensure the fabric is completely dry before heat setting.
By incorporating these strategies, your fabric painting projects will maintain their beauty and integrity even under frequent use and washes.
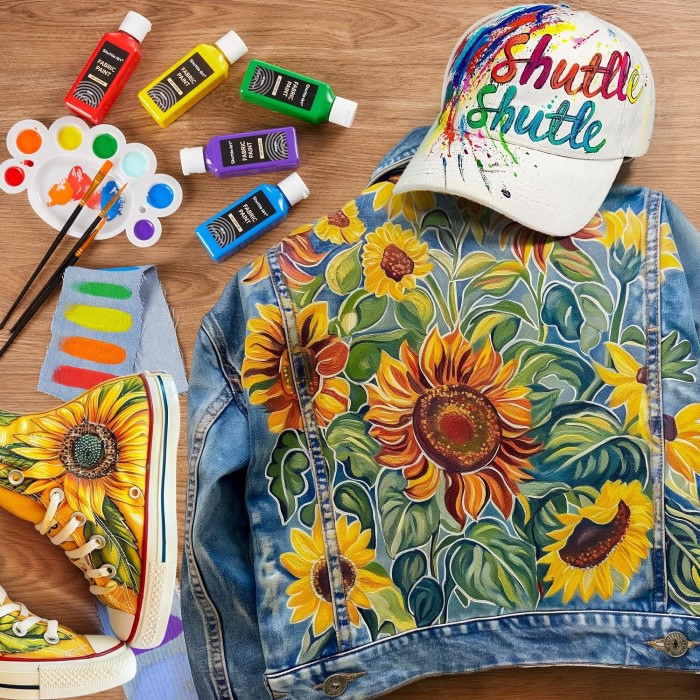
Creative Fabric Painting Project Ideas
How to paint on fabric permanently? Turning your acrylic paints into fabric-safe materials opens the door to a variety of creative endeavors. In this section, we’ll explore two fun project ideas: stamping and printing on fabric, and creating washable fabric paint designs that bring a personalized touch to any textile.
Stamping and Printing on Fabric
The art of stamping and printing on fabric is a fantastic way to add unique patterns and motifs to your textiles. Here is how you can start:
Choose a Stamp or Make Your Own
- Commercially Available Stamps: Explore local craft stores or online retailers for a variety of stamps. Look for designs that resonate with your project, whether they are geometric shapes, floral patterns, or thematic images. Make sure the size and detail of the stamp suit the fabric you’re using.
- Creating Handmade Stamps: If you prefer a personal touch, consider making your own stamps. A simple way to do this is by carving a design into a soft material such as a potato, rubber eraser, or foam.
- Selecting the Right Design: Think about the overall look you want to achieve on your fabric. Choose a stamp that reflects the desired aesthetic, ensuring it complements your color palette and project theme.
- Test Your Creativity: Don’t hesitate to combine multiple stamps for a unique effect. Layering stamps or using different patterns can enhance the visual interest of your fabric design.
Prepare Your Paint
- Choosing Your Colors: Select vibrant acrylic paint colors that align with your design vision. Consider complementary colors to make your stamped images stand out on the fabric.
- Using Fabric Medium: Depending on your paint’s formulation, mix it with a fabric medium as directed by the instructions. The fabric medium helps ensure that your paint adheres to the fabric and remains flexible, enhancing durability.
- Mixing Proportions: Use a clean mixing container to combine the paint and fabric medium thoroughly. Pay close attention to the recommended mixing ratio to achieve the best results.
- Consistency Check: Aim for a smooth, pourable consistency. If the paint seems too thick, add a bit more fabric medium; if too thin, adjust with more paint until you find the perfect texture for stamping.
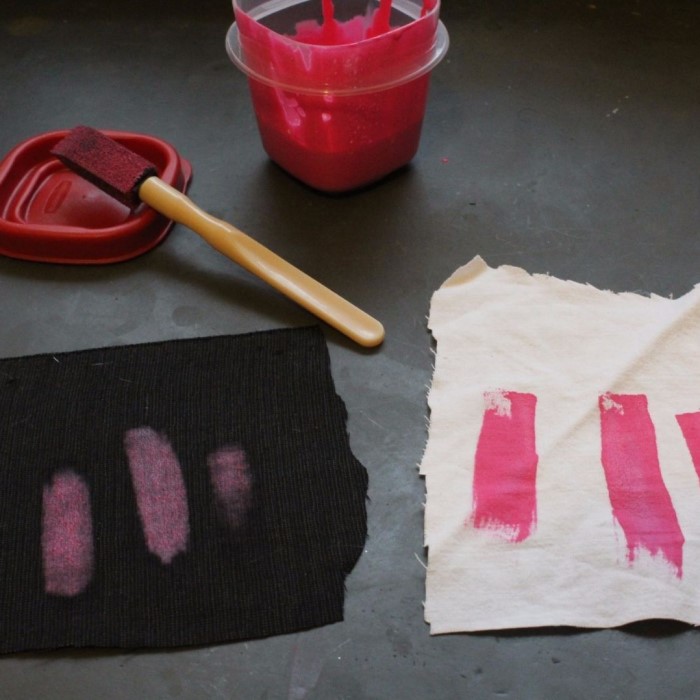
Test the Stamp
- Using Scrap Fabric: Before stamping on your final project, take a scrap piece of fabric for testing. This allows you to check how the paint interacts with the fabric and ensures your stamp design will be distinct.
- Stamping Technique: Apply an even amount of paint to the stamp without overloading it. Too much paint can lead to smudges, while too little might make your design faint.
- Evaluating Results: Press your test stamp onto the scrap fabric and lift it carefully. Examine the clarity and detail of the stamped design. If the result isn’t satisfactory, adjust the paint consistency or try different pressure when stamping.
- Fine-Tuning Your Approach: Use this test to refine your technique. Adjust the angle of the stamp or experiment with how firmly you press down to get the desired effect.
Start Stamping
- Choosing Your Fabric: Once satisfied with your test results, select the main fabric for stamping. This could be a tote bag, T-shirt, or pillowcase—whatever you envision for your project.
- Setting Up Your Workspace: Lay the chosen fabric flat on a clean, stable surface. Consider placing a protective layer underneath to prevent paint from seeping through.
- Begin Stamping: Start applying your stamp to the fabric, pressing down firmly but evenly. Create a pattern or design that flows well, whether it’s a random layout or a structured repeat.
- Spacing and Alignment: Be mindful of how you position each stamp. Leave enough space between impressions for a balanced look. Take your time to ensure each stamp is well-aligned and consistent.
- Final Touches: Once stamping is complete, allow the fabric to dry according to the paint’s instructions. Consider sealing the design with a heat-setting process afterward, as discussed previously, to enhance durability and washability.
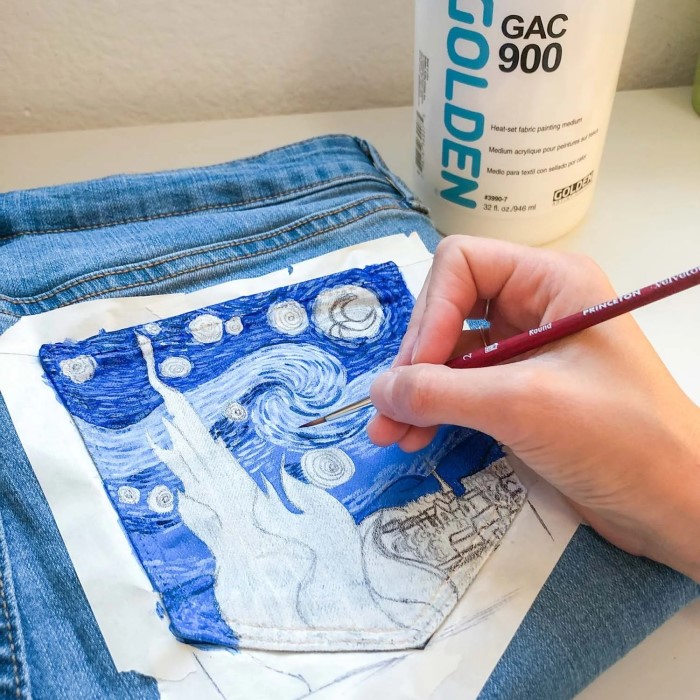
Creating Washable Fabric Paint Designs
How to paint on fabric permanently? For long-lasting, washable fabric paint designs, follow these simple steps:
Design Your Template
- Create Your Design: Start by sketching a design that you want to paint. This can be anything from abstract patterns to specific shapes or illustrations. Consider your skill level and choose a design that you feel comfortable with.
- Digital Options: If you’re not confident in drawing, you can also print a design from your computer. Use graphic design software or find templates online that fit your vision. Ensure the printed design is the right size for the fabric you will be working on.
- Transfer Method: If you prefer, consider using transfer paper to make it easier to transfer the design onto your fabric. This method minimizes mistakes and keeps your design neat and precise.
- Create a Cardboard Template: After finalizing your design, cut it out and affix it to a piece of cardboard. This will serve as a sturdy template that you can use to guide your painting efficiently, ensuring accurate placement.
Secure the Fabric
- Choose the Right Surface: Find a flat, well-lit workspace where you can easily maneuver your fabric and tools. A clean and organized area allows for smoother painting and minimizes mistakes.
- Position the Fabric: Lay your fabric out on the flat surface, making sure there are no wrinkles or creases that could distort your design. Smooth it out thoroughly to achieve an even painting surface.
- Use an Adhesive Spray: If necessary, use an adhesive spray to hold the cardboard template in place on the fabric. This helps prevent shifting while you paint, ensuring that your design remains intact.
- Securing Edges: Consider adding small weights or clips to the corners of your fabric to keep it from moving during the painting process. This is especially helpful if you’re working with larger pieces of fabric.
Paint Away
- Selecting Your Paint: Before you start painting, ensure your fabric paint is thoroughly mixed to achieve a consistent color. This helps avoid any patches or inconsistencies in your design.
- Applying the Paint: Using a brush or other painting tools, carefully fill in your design. Start from the center and work your way outward to prevent smudging.
- Achieving an Even Coat: Apply the paint in even layers to avoid clumping. Thin coats can be layered for better vibrancy without overwhelming the fabric.
- Avoiding Mistakes: If you accidentally paint outside the lines, immediately wipe away excess paint with a damp cloth before it dries. This helps maintain the integrity of your design.
Let It Dry and Heat Set
- Drying Process: Once you’ve finished painting, allow the design to air dry completely. This step is crucial to ensure that the paint adheres properly to the fabric and does not smudge.
- Heat Setting for Durability: After the paint has dried, follow the manufacturer’s instructions for heat setting. Typically, this involves placing a cloth over your design and using an iron on a low setting without steam to activate the fabric paint’s properties.
- Checking for Complete Dryness: Prior to heat setting, gently touch the painted area to ensure it is completely dry. If it feels tacky or cool, give it more time to dry.
- Final Touch: Once heat set, allow your fabric to cool down before handling it to ensure that the paint remains intact and durable. Proper heat setting guarantees that your design will withstand washing and wear over time.
By following these project ideas and utilizing the techniques outlined earlier, you’ll be on your way to creating beautiful, personalized fabric pieces that are permanent and washable.
Maintaining and Caring for Painted Fabrics
To ensure that your painted fabrics last long and remain vibrant, proper maintenance and care are crucial. Here are essential tips for washing and drying your fabric creations safely, along with recommendations for their long-term care.
Washing and Drying Tips
Proper washing is key to maintaining the quality of your painted fabrics. Here’s how you can do it effectively:
- Wash Gently: Use cold water and a gentle cycle on your washing machine. Avoid harsh detergents.
- Separate Colors: Wash painted fabrics separately to prevent color transfer.
- Air Dry: Whenever possible, air dry painted fabrics instead of using a dryer. This prevents heat damage and keeps the paint vibrant.
Long-Term Care Recommendations
To keep your painted fabrics looking their best over time, follow these guidelines:
- Avoid Direct Sunlight: Keep your painted fabrics out of direct sunlight to prevent fading.
- Iron on the Reverse: If you need to iron your painted fabric, always do so on the reverse side to protect the paint.
- Use Fabric Protectors: Consider using a fabric protector spray that can help shield painted surfaces from dirt and spills.
By following these simple maintenance and care instructions, your fabric painting projects will stay beautiful and enduring.
Conclusion
In summary, learning how to paint on fabric permanently opens up exciting avenues for creativity and self-expression. By understanding fabric types, gathering the right tools, and mastering various techniques, anyone can create stunning fabric art that lasts. With proper care, your painted fabrics will retain their beauty and vibrancy for years to come. Dive into the world of fabric painting and transform everyday items into extraordinary treasures. Unleash your creativity and let your imagination flourish through DIY fabric projects!