Introduction
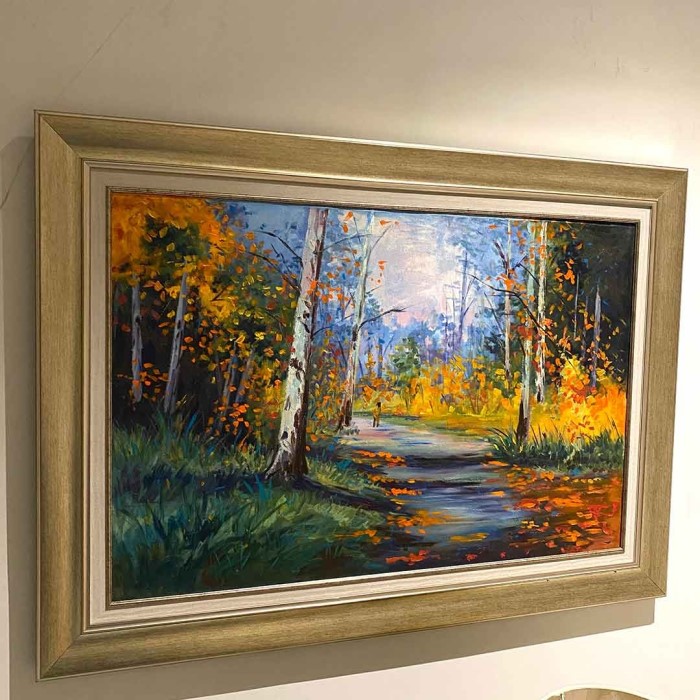
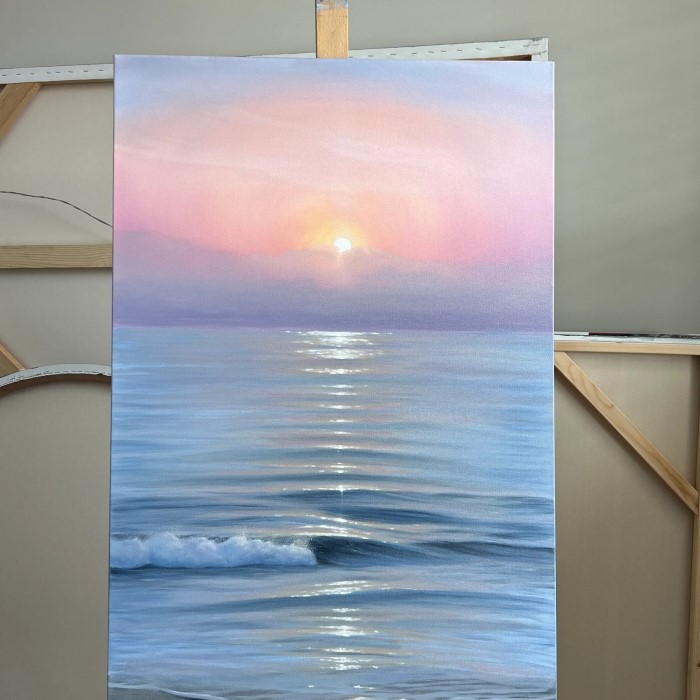
Oil painting on canvas is a timeless and popular art form. Its rich textures and vibrant colors captivate artists and viewers alike. In this section, we’ll explore its origins and why canvas is the preferred medium.
History and Evolution of Oil Painting
Oil painting dates back to ancient times, with early examples found in Afghanistan. However, it flourished during the European Renaissance in the 15th century. Artists like Leonardo da Vinci and Jan van Eyck popularized its use. The medium was valued for its versatility and slow drying time, which allowed for detailed work. Over centuries, techniques like glazing and impasto emerged, expanding artistic possibilities. Today, oil painting remains a favorite among artists for its depth and durability.
Why Choose Canvas as a Medium
Canvas became popular in the 16th century, replacing wooden panels. Its lightweight and flexible nature made transportation easier. It also supports the layering techniques unique to oil painting. Canvas absorbs the paint well, ensuring vibrant, long-lasting results. Additionally, its textured surface enhances brushwork and depth in the finished artwork. Both beginners and experts benefit from using canvas as a reliable and versatile medium for oil painting.
Essential Tools and Materials Needed
To create stunning oil paintings on canvas, you need the right tools and materials. This ensures that the process is smooth and the results are high-quality. Let’s cover the key essentials every artist needs.
Selecting the Right Canvas
Canvas is the foundation of your oil painting. Choose carefully to suit your style and needs.
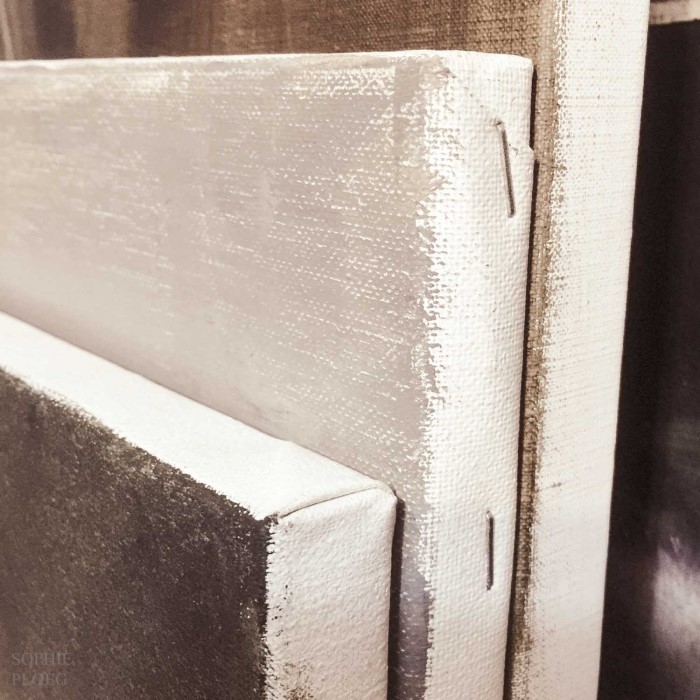
- Canvas Types: Two main options are pre-stretched canvases and canvas rolls. Pre-stretched canvases are ready to use, while canvas rolls let you customize size.
- Material: Canvases are usually made of cotton or linen. Cotton is affordable and good for beginners. Linen is more durable and favored by professionals.
- Canvas Texture: Smooth canvases work well for detailed work. Rough textures are ideal for expressive strokes.
- Primed vs. Unprimed: Primed canvases are pre-coated with gesso, making them ready for oil paint. Unprimed canvases need preparation before use.
Spend time selecting the right canvas, as it greatly influences the final artwork.
Choosing Oil Paints and Brushes
High-quality oil paints and brushes make a world of difference in your painting journey.
- Oil Paints: Start with artist-grade paints if your budget allows. They have richer pigments. Student-grade paints are more affordable but may have less vibrancy.
- Colors: A basic palette should include primary colors (red, blue, yellow), white, and black. Additional colors like earth tones can enhance your range.
- Brush Types: Different brushes create various effects. Round and liner brushes are good for details. Flat and fan brushes are great for blending and broad strokes.
- Brush Materials: Use natural bristle brushes for thick paint application. Synthetic brushes work well for smoother applications and detail work.
Investing in quality paints and brushes ensures better control and vibrant artworks.
Additional Tools and Accessories
Beyond paints and brushes, additional tools are crucial for oil painting on canvas.
- Palette: Use a glass or wood palette to mix colors easily and clean quickly.
- Paint Mediums: Linseed oil or other mediums thin paint and improve its flow. Try different mediums to find what suits your style.
- Palette Knives: Use these for mixing paint or creating textured effects directly on the canvas.
- Easel: A sturdy easel holds your canvas at a comfortable angle, making painting easier.
- Cleaning Supplies: Use turpentine or mineral spirits to clean brushes. Keep rags or paper towels handy for spills.
These tools ensure efficiency, precision, and comfort during your painting sessions.
By assembling these tools and materials, you set the stage for successful oil painting on canvas. Quality supplies not only improve results but also enhance your painting experience.
Preparing the Canvas for Oil Painting
Proper canvas preparation is key to achieving great results in oil painting. Preparing the canvas ensures paint adhesion, smooth application, and lasting artwork. Let’s explore the steps for priming, stretching, and surface preparation.
Priming and Stretching the Canvas
Priming and stretching the canvas create a solid base for oil painting.
- Stretching the Canvas: Secure pre-stretched canvases or stretch canvas rolls over wooden frames. Keep the surface taut.
- Why Priming Matters: Priming seals the fabric and prevents oil paint from damaging the canvas.
- Gesso Application: Most canvases come pre-primed with gesso. Apply additional gesso coats for smoother surfaces.
- Drying Time: Let each gesso coat dry fully before applying the next layer to avoid cracking.
A well-primed and stretched canvas ensures durability and enhances the final artwork.
Preparing the Surface for Smooth Application
Surface preparation ensures an even foundation, helping the paint glide smoothly and uniformly.
- Sanding the Canvas: Lightly sand the primed surface with fine-grit sandpaper for smoother brush strokes.
- Additional Coating: Apply another gesso coat after sanding for an ultra-smooth finish.
- Testing the Surface: Test with small paint strokes to ensure the texture meets your needs.
Prepared canvas surfaces make painting easier and enhance precision in your brushwork. Smooth textures are ideal for detailed pieces, while lightly textured surfaces create expressive effects.
By dedicating time to canvas preparation, artists set the stage for successful oil painting on canvas.
Fundamental Techniques of Oil Painting
Mastering fundamental techniques is essential to create stunning oil painting on canvas. Each technique adds depth, detail, and personality to your artwork.
Layering and Glazing Techniques
Layering and glazing build dimension and rich colors in oil painting. These techniques are flexible and effective.
- Layering Basics: Start with thin layers and gradually increase paint thickness for better texture.
- Glazing Overview: Apply thin, transparent layers over dried paint to enhance color depth.
- Drying Time: Allow each layer to dry fully before adding another to avoid smudging.
- Color Combinations: Experiment with glaze colors to create subtle shifts or vibrant overlays.
- Tools for Glazing: Use soft brushes to blend thin glazes smoothly into previous layers.
Layering and glazing add richness, making your artwork visually compelling.
Blending and Mixing Colors
Blending and color mixing allow artists to create seamless transitions and vibrant hues.
- Blending Techniques: Use clean brushes or fingers to softly transition between colors for smooth effects.
- Wet-on-Wet Blending: Blend colors directly on a wet base for organic transitions.
- Palette Mixing: Mix vibrant colors on a palette before application for better control.
- Brush Control: Use soft-bristle brushes to avoid disrupting previous layers while blending.
- Layer Drying: Work on wet layers for blending or wait for drying for cleaner strokes.
Efficient blending techniques create cohesive and harmonious works.
Creating Textures and Effects
Texture and effects bring life and dimension to your oil paintings. Explore methods to enhance visual interest.
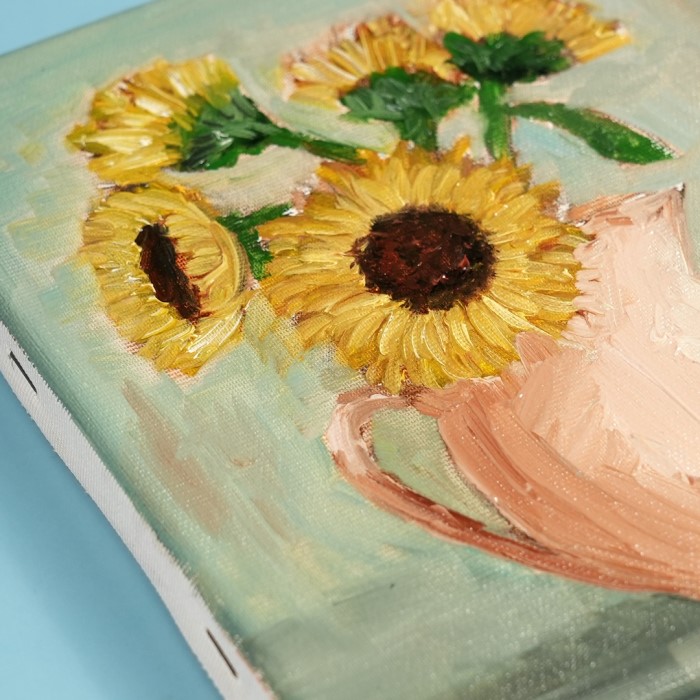
- Impasto Technique: Apply thick paint layers for bold, dynamic surfaces with a palette knife.
- Dry Brush Technique: Use minimal paint on dry brushes for rough, textured strokes.
- Sgraffito: Scratch through paint layers to reveal hidden colors for intricate details.
- Mottling Effects: Dab paint with sponges or cloth to create uneven, exciting surfaces.
- Textural Variations: Combine smooth and textured areas to guide the viewer’s attention.
Experiment with textures to make your canvas visually engaging and unique.
Step-by-Step Guide to Creating an Oil Painting
Creating an oil painting on canvas is an enriching journey. With careful planning and methodical steps, you can produce stunning artwork. This guide breaks the process down into manageable phases, from initial planning to adding final details.
Planning and Sketching Your Composition
Start your painting with a clear vision. Here’s how to plan and sketch effectively:
- Concept Development: Think of a subject or theme that inspires you.
- Thumbnail Sketches: Create small sketches to experiment with composition and layout.
- Final Sketch: Transfer your refined sketch onto the canvas using light pencil or charcoal.
- Focal Point: Identify one main focus to guide viewers through your artwork.
- Color Scheme Planning: Decide the palette you’ll use for a harmonious painting.
Good planning ensures a strong foundation for your painting process.
Building the Base Layers
Base layers set the tone and depth of your painting. Follow these steps:
- Block in Colors: Apply broad strokes to cover the entire canvas with base colors.
- Thin Paint: Use thinned paint at this stage to allow for easy adjustments.
- Background Work: Start with the background, building toward the midground and foreground.
- Outline Elements: Add faint outlines for major objects to maintain structure.
- Let Layers Dry: Allow each layer to dry before applying the next to avoid smudges.
Base layers provide structure and help establish the mood of the artwork.
Adding Details and Finishing Touches
Detailing and finishing add life and polish to your painting. Focus on:
- Enhancing Textures: Use techniques like glazing or impasto for variation and depth.
- Small Brushwork: Switch to smaller brushes for fine details and intricate lines.
- Adjust Colors: Refine hues and shades for consistent tonal values.
- Final Highlights: Add highlights or shadows to bring focus and realism.
- Clean Edges: Tidy up edges for a professional look.
Attention to detail ensures a striking final result.
Follow these steps to create an expressive oil painting on canvas that showcases your creativity and technical skills.
Common Challenges and How to Overcome Them
Oil painting on canvas is rewarding but comes with challenges. Overcoming those challenges ensures consistent progress and satisfaction.
Drying Times and Paint Consistency
Managing drying times and paint consistency is critical for oil painting success.
- Slow Drying: Oil paint dries slowly. Avoid painting over wet layers too soon.
- Solution: Use fast-drying mediums like alkyds or work on multiple pieces simultaneously.
- Paint Consistency Issues: Thick paint may cause uneven textures, while thin paint might lack coverage.
- Solution: Adjust paint viscosity using linseed oil for thickness or turpentine for thinning.
- Layering Problems: Improper drying can lead to blending issues and smudges.
- Solution: Test the layer’s dryness before adding new paint, ensuring smooth application.
Proper drying and consistency help maintain control and achieve desired effects.
Correcting Mistakes and Refining the Artwork
Mistakes are common but manageable. Simple corrections refine your painting and enhance its quality.
- Smudging: Accidental smudges or blending can ruin details.
- Solution: Use clean brushes to repair fine edges or scrape the error gently with a palette knife.
- Color Errors: Wrong color choices can disrupt harmony.
- Solution: Apply glazes to adjust colors or mix carefully for accurate shades.
- Excessive Paint: Overloaded canvas sections may cause cracking over time.
- Solution: Scrape excess paint off immediately and reapply thin layers.
- Composition Issues: Poor planning may lead to imbalance.
- Solution: Step back frequently to evaluate your composition and make adjustments.
By addressing mistakes early, artists enhance precision and achieve polished, professional results.
Understanding these challenges prepares you to handle them and create stunning oil paintings on canvas.
Caring for and Preserving Your Oil Paintings
Proper care keeps oil paintings vibrant and long-lasting. Let’s explore essential drying, storage, and cleaning practices.
Proper Drying and Storage Techniques
Drying and storing oil paintings the right way is crucial. Follow these tips:
- Drying Process: Allow the painting to dry in a dust-free space. This prevents unwanted particles from sticking.
- Ventilation: Ensure good airflow to aid even drying. Avoid direct sunlight to prevent fading.
- Avoid Smudging: Handle wet paintings carefully. Use spacers to keep them from touching surfaces.
- Storage Position: Store paintings upright. Lay them flat only if they are fully dry.
- Protective Layers: Use varnish for added protection. Apply once the painting is completely dry.
- Climate Control: Store in a room with stable humidity and temperature to prevent cracking or warping.
Proper drying and storage ensure the painting maintains its original brilliance for years.
Maintaining and Cleaning Your Paintings
Regular maintenance keeps your oil artworks looking pristine. Here’s how to clean and care for them:
- Dust Removal: Use a soft, dry microfiber cloth to gently dust the surface. Avoid using water.
- Deep Cleaning: For stubborn grime, consult a professional conservator. Avoid DIY cleaning methods with solutions.
- Avoid Chemicals: Keep paintings away from chemical cleaning products, as they can damage the surface.
- Frame Protection: Use a sturdy frame to protect edges and provide support for the painting.
- Inspect Regularly: Check for signs of mold, discoloration, or cracking. Address issues promptly to prevent damage.
- Handle with Care: Wear gloves when handling to prevent oils from your skin transferring onto the canvas.
Maintaining and cleaning your oil paintings preserves their beauty and artistic value over time.
By following these practices, you safeguard your oil paintings for generations to admire and enjoy.
Tips and Tricks for Beginners and Advanced Artists
Whether you’re just starting or refining your craft, useful tips can enhance your oil painting on canvas. Beginners can benefit from time-saving techniques, while advanced artists can find ways to elevate their unique style.
Time-Saving Techniques for Beginners
Starting with oil painting can feel overwhelming. Follow these efficient tips to progress faster:
- Limit Your Palette: Use a limited color palette to understand color relationships better and avoid overwhelm.
- Pre-Mix Key Colors: Mix commonly used shades in advance to save time during painting sessions.
- Work on Small Canvases: Begin with manageable sizes to practice without a daunting commitment.
- Use Quick-Drying Mediums: Add fast-drying agents like alkyd mediums to speed up drying times.
- Prep in Bulk: Prepare several canvases at once by priming and sketching multiple compositions.
- Break Tasks into Sessions: Divide your painting process into stages to maintain focus and reduce fatigue.
- Follow Layering Rules: Apply thin layers first, then thicker ones to prevent cracking and errors.
These tips help beginners develop confidence and foundational skills in a shorter time.
Advanced Tips for Refining Artistic Style
For seasoned artists, subtle refinements can add sophistication to your oil paintings. Explore these advanced ideas:
- Experiment with Glazes: Use transparent layers to create intricate depth and delicate color transitions.
- Add Custom Textures: Mix modeling paste or sand into paint for unique surface effects and dimension.
- Refine Brushwork: Use varied brushstrokes for expressive detail or smooth precision, as the artwork demands.
- Focus on Composition: Balance key elements and use leading lines to guide viewers naturally.
- Limit Overworking: Decide when to stop. Overworking can flatten dynamic areas and dull the piece.
- Study Master Painters: Analyze works by classical and contemporary masters to learn advanced techniques.
- Document Your Process: Photograph stages of your work to analyze progress and refine your methods.
By applying these advanced tips, artists can develop a personal style that stands out and evolves.
With dedication and these insights, beginners and professionals alike can create remarkable oil paintings on canvas.

Conclusion and Encouragement for Artists
Mastering oil painting on canvas is a fulfilling artistic journey. With dedication, all artists can improve.
Start by learning basic techniques and gradually explore advanced concepts like textures and glazing. Building foundational skills is key to success.
Experimentation is essential. Test new tools, mediums, and styles to expand your creative possibilities.
Embrace challenges. Mistakes are opportunities to learn, refine, and grow as an artist. Persevere through difficulties.
Caring for completed works preserves the effort and passion behind each piece. Safeguard your creations for years.
For beginners, patience and practice will yield progress. Stay consistent and don’t fear trying new ideas.
Experienced artists should keep refining their craft. Developing unique styles sets your work apart.
Remember, each painting is a reflection of your creativity and emotions. Celebrate your artistic journey.
Oil painting on canvas is an esteemed art form worth pursuing. Stay inspired and enjoy creating vibrant works.