Introduction
Handbuilding ceramics is an art form as ancient as civilization itself. It involves shaping clay by hand, without the use of a pottery wheel. This technique allows for a wide range of creativity and personal expression. It’s a process that can be therapeutic, meditative, and immensely satisfying.
In handbuilding, you have the freedom to construct objects in various shapes and sizes. It starts with a simple lump of clay. From there, the possibilities are endless. You can create everything from functional dinnerware to intricate sculptural pieces. The versatility of handbuilding is what makes it so popular among beginners and seasoned potters alike.
There are several foundational methods within handbuilding ceramics that potters use. These include the pinching, coil, and slab techniques. Each method has its unique charm and set of challenges. They can be used independently or combined to create complex pieces.
For those interested in exploring this rewarding craft, understanding the basic techniques and needed tools is essential. With practice, precision, and patience, anyone can master the art of handbuilding ceramics.
Essential Tools for Handbuilding
To delve into handbuilding ceramics, you will need an array of tools. These tools allow for precision, detail, and ease of creation. Here’s a list of essential tools that every handbuilder should have:
- Clay: This is the foundational material in handbuilding. Choose a clay body suitable for handbuilding, preferably one with good plasticity.
- Rolling Pin: A rolling pin is vital for flattening clay into sheets for the slab technique.
- Wire Clay Cutter: Use it to cut large chunks of clay and to remove finished pieces from the work surface.
- Rib Tools: Wooden, metal, or silicone ribs help in shaping, smoothing, and compressing the clay.
- Modeling Tools: Various wooden or metal tools are useful for adding detail and creating textures.
- Sponges: Sponges assist in smoothing surfaces and managing moisture content while working.
- Needle Tool: A sharp needle tool is essential for scoring clay and for fine detail work.
- Slip: A liquid form of clay acts as a glue to attach pieces of clay together.
- Cutting Wires: For slicing through blocks of clay or removing excess from built forms.
- Scoring Tool: A serrated rib or fork to score the clay before joining pieces, ensuring a strong bond.
Each tool plays a vital role in bringing your creative visions to life. They make the handbuilding process not just possible, but more enjoyable. With the right tools in hand, you can focus on perfecting your technique and creating unique ceramic works.
Techniques for Pinching Ceramics
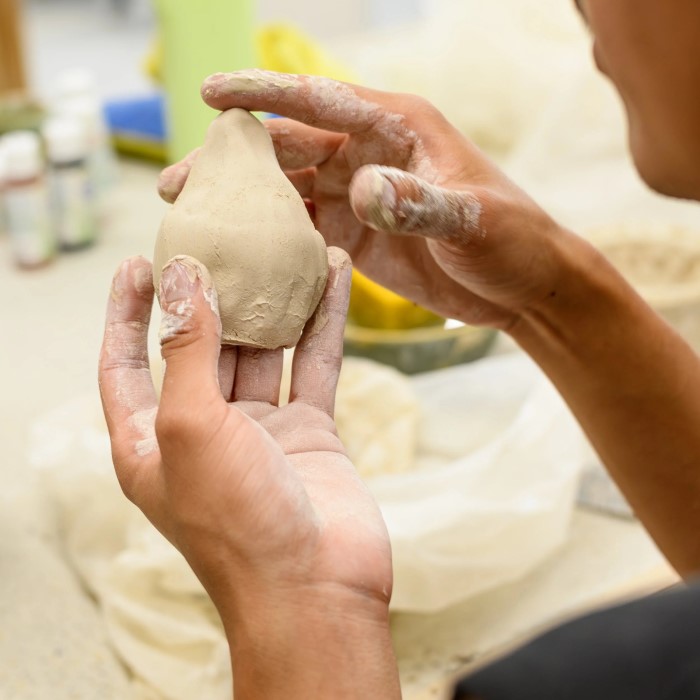
The pinching method is a basic yet profound form of handbuilding ceramics. It starts simply. Take a ball of clay, and then, using your fingers, press and shape it. This is how the pinching method unfolds, one gentle squeeze at a time.
To begin, you create a thumbprint in the center of your clay ball. Your thumb becomes your core tool. Around this indent, your fingers work in harmony. They pinch the walls of your form, slowly raising them. Even movement is key to ensure balanced walls.
With pinching, the thickness of the walls is crucial. Aim for even thickness to avoid cracks during drying or firing. Thick walls may also take too long to dry, risking damage. Thin walls might end up fragile and break easily.
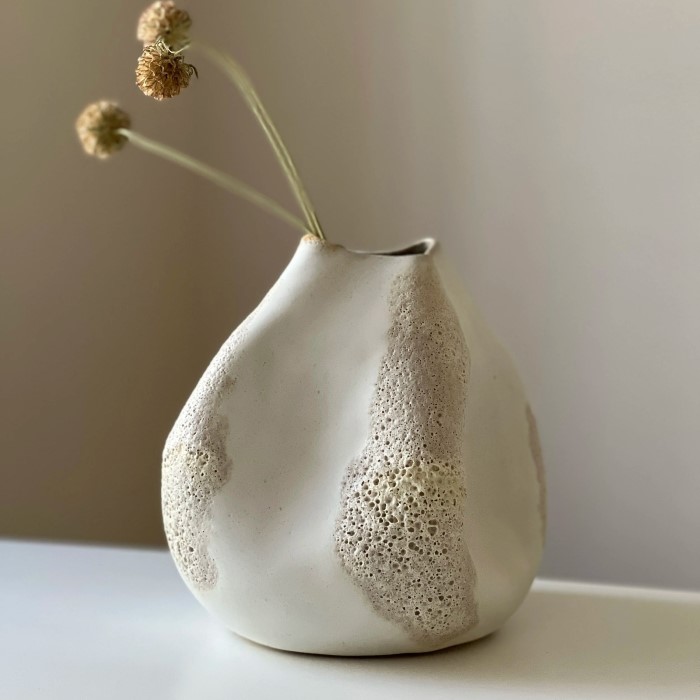
Craft small bowls, cups, or vases using this technique. It’s ideal for these items. Pinched items have a unique texture. They bear the mark of the creator’s touch. This texture adds to the charm and individuality of each piece.
Remember, patience is your companion in pinching. Rushing can lead to uneven thickness. Don’t hurry. Move with care and attention. Adjust the pressure you apply with your fingers to shape your piece exactly as you envision it.
For new handbuilders, mastering the pinch method is a milestone. It teaches hand control and clay behavior. As skills grow, even complex forms like teapots or figurines become possible. Yet, the pinch method remains a beloved basic. It’s a direct connection between the artist and the medium.
Coil Building Method Explained
Building with coils is a classic handbuilding ceramics technique. It offers versatility in form and size. The process begins by rolling out long ropes of clay, known as coils. You stack these coils one on top of the other. Join them together to build the walls of your vessel or sculpture.
Here are the steps to coil building:
- Rolling Coils: Start by rolling clay into long, snake-like ropes. Aim for uniform thickness.
- Building the Base: Flatten a piece of clay for the bottom. Place your first coil around the edge.
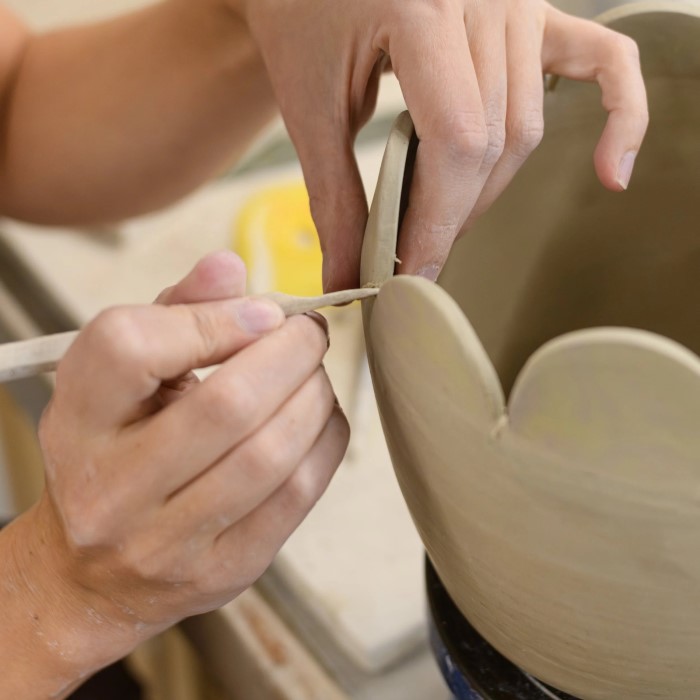
- Scoring and Slipping: Before adding a new coil, score the surface of the last coil. Apply slip to bond the coils.
- Adding Coils: Place the new coil on top of the scored and slipped area. Press gently to connect.
- Blending Seams: Smooth and blend the coils together. Use your fingers or a rib tool. Ensure strength and stability.
- Shaping: As you add more coils, shape the form. Apply even pressure to keep walls consistent.
- Finishing: Once at the desired height, smooth the surface. Add details or textures as you like.
As you work, keep the clay moist. Dry clay can cause your piece to crack. Coils allow for intricate designs. You can create anything from simple pots to complex figures. This method is great for both beginners and experts. It requires patience and a steady hand. The result is a well-crafted piece with a spiral texture, showing its handbuilt character.
Remember, every piece is unique. It reflects the maker’s style and technique. Take your time. Enjoy the process. With practice, the coil building will become a favorite in your handbuilding ceramics repertoire.
Slab Construction Technique
The slab construction technique is a versatile method in handbuilding ceramics. It involves rolling out clay into flat sheets, often called slabs. These slabs become the canvas for your creations. You can make a variety of shapes and forms, both functional and decorative.
Here’s how to use the slab technique:
- Rolling Slabs: Flatten clay into even sheets with a rolling pin. Keep thickness consistent.
- Cutting Shapes: Use a knife or cutting tool to trim the slabs into desired shapes.
- Joining Pieces: Score the edges of the slabs where they will join. Apply slip to bond.
- Building Forms: Assemble the cut shapes to make the walls of your piece. Attach slabs carefully.
- Smoothing Edges: Soften and smooth the joined seams with your fingers or a rib tool.
- Adding Texture: Create patterns or designs on the slab surface before assembling. Adds uniqueness.
- Drying: Dry your slab-built piece slowly and evenly to prevent warping or cracking.
This technique is perfect for making plates, platters, boxes, and tiles. With slabs, you have flat surfaces to decorate and manipulate. Slab construction offers clean lines and crisp edges that are hard to achieve with other techniques.
Patience is crucial as you work with slabs. Take care to support the slabs until they firm up. Remember to keep the clay at the right moisture level. Too dry and it will crack; too wet and it will slump. Slab construction opens up a world of possibilities in handbuilding ceramics.
Sculpting and Modeling Basics
Sculpting and modeling are key in handbuilding ceramics. They bring life to clay. This step is where depth, dimension, and detailed features are added to your work.
To start sculpting, you need a solid understanding of your material. Know how clay responds to touch. Start with a basic form, like a sphere or cube, from any handbuilding method. Then, use your fingers and tools to mold and shape it into your desired sculpture.
Here are some basic steps for sculpting and modeling:
- Understand Your Clay: Different clays have unique properties. Choose one that works well for modeling.
- Keep Clay Moist: Use a spray bottle or a damp sponge to keep clay workable.
- Add Details: Utilize modeling tools to carve and add fine details to your piece.
- Create Textures: Press objects into the clay, or use stamps to give texture.
- Work in Stages: Build up your form gradually. Allow parts to firm up before adding more.
- Smooth Surfaces: Use ribs and sponges to smooth out bumps and refine the shape.
During sculpting, a light touch is often best. Press too hard, and you may distort your piece. Take your time to refine the form. As you gain experience, you’ll learn how much pressure to apply. You’ll also discover when to add or remove clay to achieve the look you want.
Remember, sometimes less is more. Start with simple projects. As you develop your skills, tackle more complex sculptures. Patience, practice, and passion will help you master sculpting and modeling in handbuilding ceramics.
Surface Decoration and Glazing
Once you have shaped your ceramic pieces, it’s time to add personality. Surface decoration and glazing are where aesthetics come into play. They give your handbuilt ceramics their final appearance and protect them. Here’s how to approach this last creative stage:
- Understand Glaze Properties: Glazes add color and finish. They transform during firing, so know your glaze well.
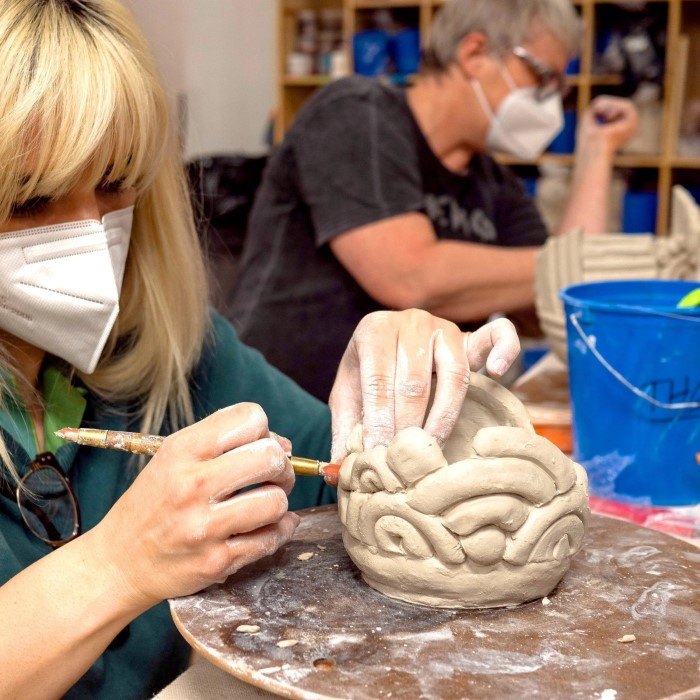
- Apply Underglaze for Designs: Before the first firing, use underglaze. It lets you paint intricate patterns. Overglaze comes after bisque firing.
- Experiment with Techniques: Try sgraffito or slip trailing. They add depth and texture to your work.
- Use Wax Resist: This technique keeps certain clay areas free of glaze. Apply wax to parts you want unglazed. It prevents glaze from adhering.
- Consider Glaze Combinations: Layer glazes for unique effects. But test them first; not all glazes blend well.
- Practice Safety: Always wear a mask when applying glazes. Some contain harmful particles.
- Glaze Firing: Fire your piece according to the glaze’s specific temperature range. This finishes the piece.
Remember, glazing is an art in itself. It requires trial and error. Be patient and keep trying different methods. Each piece is a learning opportunity. Your style will shine through in the colors and patterns you choose. Surface decoration and glazing are your chance to make a statement with your handbuilding ceramics.
Tips for Drying and Firing Your Creations
The final steps in handbuilding ceramics are drying and firing. These steps are vital. They turn your soft clay piece into a strong, durable creation. Here is a guide to help you through these processes.
Drying Your Ceramic Pieces
Before firing, pieces must be bone dry. This means the clay has no moisture. Drying happens slowly. Keep pieces away from drafts and direct heat. These can cause uneven drying and cracks. Cover your work with a cloth. It will dry uniformly.
Check the color of your clay. It will change as it dries. Also listen for a change. When you tap the clay, it should sound hollow if it’s dry. Be patient. Rushing can ruin your piece.
Firing Your Ceramic Works
After drying, it’s time to fire. Firing is done in a kiln. This heats the clay to high temperatures. It turns the clay hard and durable. The first firing is the bisque firing. After that comes the glaze firing if you choose to glaze.
The kiln must heat evenly. It should warm up and cool down slowly. This reduces the risk of cracking. Use a kiln shelf and props to ensure good air flow.
Check the temperature range suitable for your clay and glazes. Misfires can happen if you get this wrong. They can damage your piece. Always follow the manufacturer’s recommendations. Keep notes for future reference.
Remember, drying and firing are as crucial as shaping your ceramic pieces. Take care at each stage. It will ensure the success and beauty of your final handbuilt ceramics.

Conclusion: Mastering Handbuilding Ceramics Techniques
In conclusion, mastering handbuilding ceramics techniques opens the door to creating unique pottery pieces that reflect your design vision. From understanding essential techniques like pinching, coiling, and slab building to exploring tools and materials, the journey is incredibly enriching.
As you navigate through challenges and experiment with designs, remember that each piece you create contributes to your artistic growth. Embrace the creative freedom offered by handbuilding ceramics and let your imagination guide you. With dedication and practice, you’ll master the techniques necessary to create extraordinary pottery that stands out.