Introduction to Slab Building
Slab building is a foundational technique in the realm of ceramics. It involves the creation of flat pieces, or slabs, from clay. These slabs can be joined together to form a variety of shapes and structures. Unlike other techniques such as wheel throwing, slab construction offers more control over the size and form of the final piece. This makes it an excellent choice for artists looking to create geometric designs or larger works that would be challenging on a potter’s wheel.
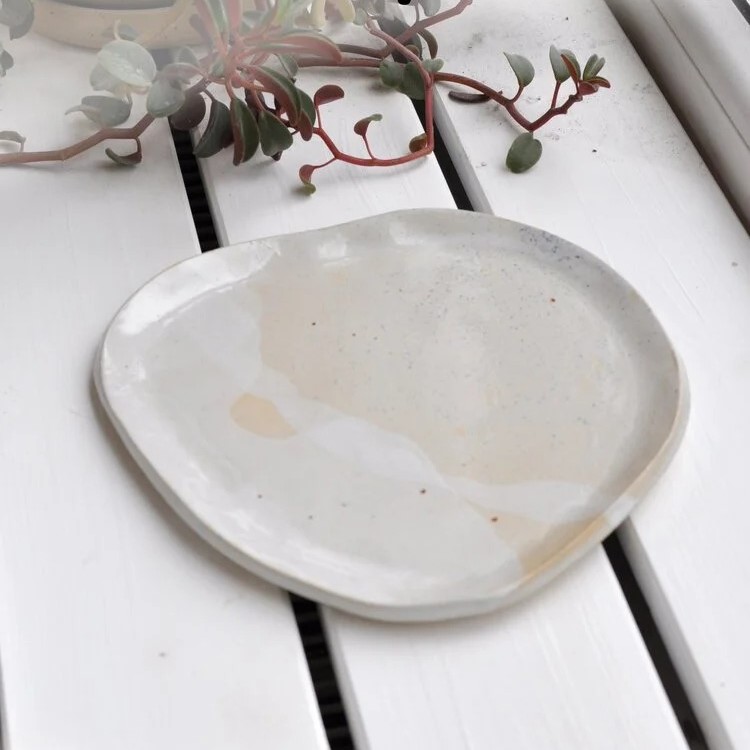
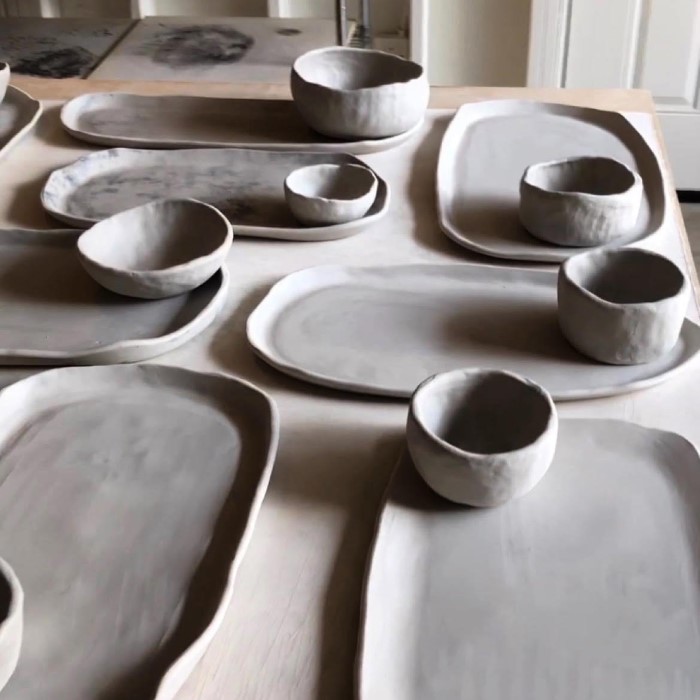
In slab building, the slab in ceramics acts as a blank canvas, providing the artist with a versatile starting point. This technique allows for the exploration of different textures, patterns, and embellishments. It is a method that calls for precision and patience, but also grants the freedom to experiment. Crafting objects from slabs can range from simplistic, functional ware like plates and tiles to intricate, sculptural artworks. One of the beauties of this technique is that it is accessible to both beginners and experienced ceramists alike.
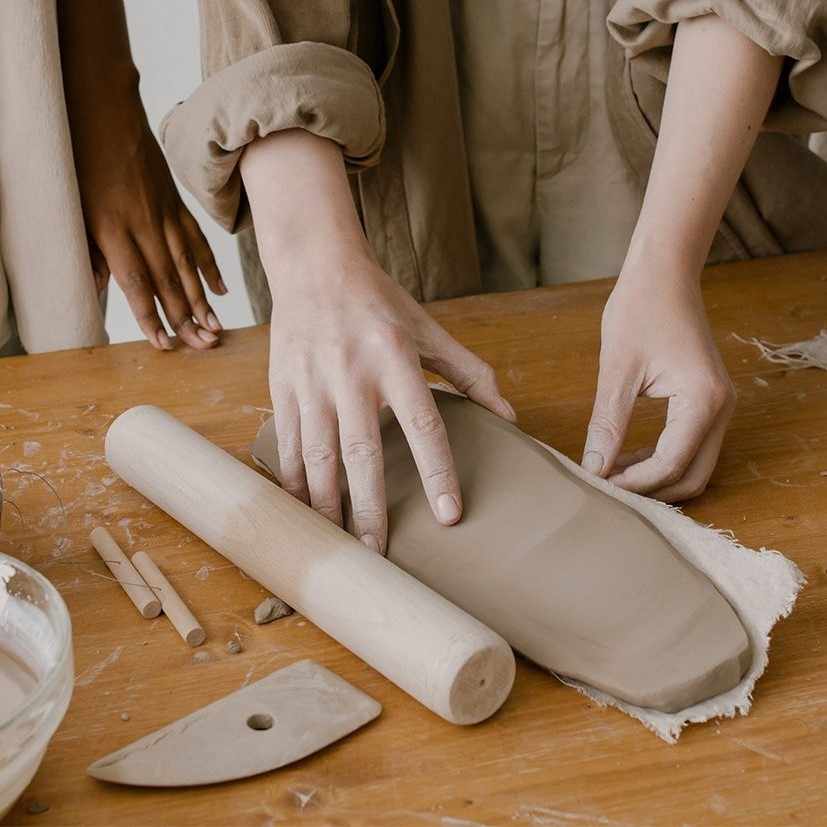
To begin slab construction, one must first prepare the clay by rolling it out to an even thickness. This uniformity is crucial for the stability and appearance of the final piece. Tools like rolling pins and slab rollers aid in this process, while templates can guide the dimensions and shapes cut from the clay. Once the slabs are shaped and smoothed, they are assembled using scoring and slip—a liquid mixture of clay used as a glue—to ensure strong bonds between the pieces.
The mastering of slab building unlocks a world of creative potential in ceramics. It encourages practitioners to explore the limits of their imagination, translating ideas into tangible, three-dimensional forms. As we delve further into the specifics of slab building, we will uncover the essential tools, methods, and techniques to elevate your ceramic projects to the next level.
Essential Tools and Materials for Slab Building
When diving into slab building, having the right set of tools is critical to your success. First, you need rolling pins or a slab roller. These ensure your clay slabs are uniform in thickness, which is vital for structural integrity and aesthetics. A good work surface is next; surfaces like canvas or a smooth, flat table are ideal. You will also need cutting tools, such as knives or needle tools, for trimming and cutting the slabs to the desired shape.
You can’t go without ribs and rubber scrapers; these help smooth out any imperfections and compress the slab. To measure and ensure evenness, a set of calipers comes in handy, alongside templates made of paper, wood, or plastic for guiding precise cuts. Scoring tools and brushes are necessary for applying slip, the binding agent, to join slabs together firmly.
Decorating tools like stamps, texture rollers, or combs are useful if you wish to add patterns to your slabs, before they are joined. Lastly, sponges and sandpaper help to finish the slabs by smoothing the surface and edges. Selecting quality materials like the right kind of clay—depending on factors like temperature and final use—is just as important. Ensure you have all these tools and materials on hand to explore the full spectrum of slab building possibilities in ceramics.
The Basics of Preparing a Ceramic Slab
The primary step towards mastering slab in ceramics is learning how to properly prepare the clay slab. Start by selecting quality clay that suits your project’s requirements. Aim for a clay body that matches your desired firing temperature and has the right balance of plasticity and strength.
Firstly, wedge your clay thoroughly. This removes air pockets and ensures consistency in the material. Wedging also realigns the clay particles, which will help in reducing warping during drying and firing. Use a wedging table or a sturdy surface that won’t wobble under the force.
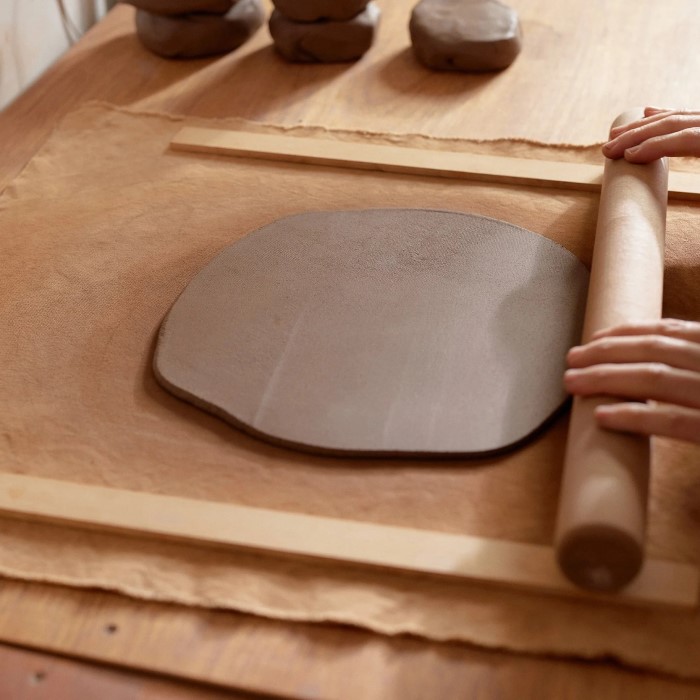
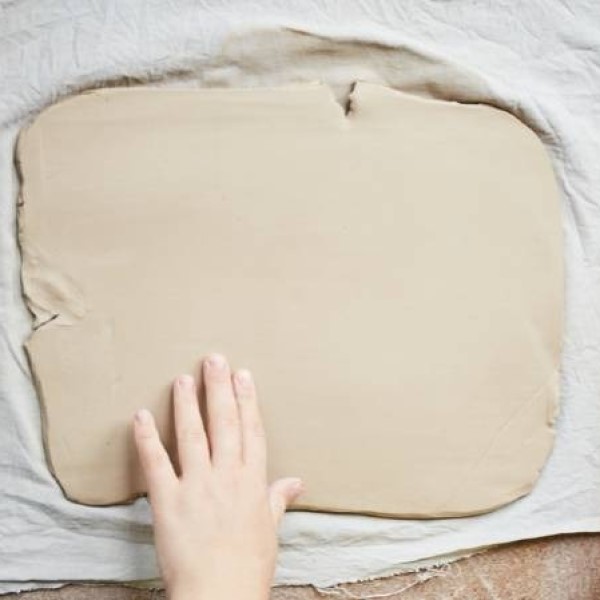
Once wedged, use a rolling pin or slab roller to flatten the clay. Begin with a thick chunk of clay and gradually apply consistent pressure to reach an even thickness. Consistency is key – aim for an even surface throughout the slab. Use guide sticks placed on either side of the clay to maintain uniform thickness as you roll.
After achieving the desired thickness, smooth out the surface of the slab. You can use flexible ribs made of metal or silicone to compress the clay, which helps in removing any canvas texture that may have transferred during rolling. This step contributes to the slab’s stability and final appearance.
Lastly, allow the slab to rest until it reaches a leather-hard state. This is essential before any sculpting or assembly occurs. Leather-hard clay is firm yet flexible, making it perfect for cutting and joining without collapsing or warping.
Remember, patience is critical in preparing a slab. Rushing can lead to cracks, warps, or weak seams in your finished piece. Take time to get this foundation right, and your slab-built ceramics will show the quality of your craftsmanship.
Techniques for Assembling Slab Structures
Building with slab in ceramics requires a careful approach to assembling the pieces. Once you have your slabs rolled out and smoothed, as previously discussed, it’s time to put them together. This step is essential in creating a stable and visually appealing ceramic piece. Here are some methods to ensure strong and neat assembly of slab structures.
First, always score the edges of the slabs where they will join. Scoring creates a rough surface that helps the slip, which is like ceramic glue, to adhere better. Use a serrated rib or a fork for this task. Be thorough, as good scoring is key to a strong bond.
Next, apply slip to the scored surfaces. You can use a brush to spread the slip evenly. Don’t skimp on the slip – it’s important for the slabs to stick together. Think of it as spreading jam on a slice of bread – cover the whole surface.
When joining slabs, be precise and gentle. Align the edges, then press them together firmly but not too hard. You want a good connection without squishing the clay.
Once joined, clean up any excess slip that oozes out of the seams. A rubber rib or your fingers are good tools for this. Smooth the seams to make sure your piece looks neat and has no weak spots.
For added strength, reinforce seams from the inside with coils of clay. Roll small coils and blend them into the seam, on the inside of the structure. This extra step can make a big difference in the durability of your piece.
Remember to always work with the clay at the right moisture level. If the clay is too wet, it might sag or collapse. If it is too dry, it might crack. Aim for a leather-hard consistency for best results.
Take your time with each step of the assembly process. Precision and patience will pay off with a beautifully crafted, sturdy slab-built ceramic creation.
Creative Design Ideas for Slab Construction
When working with slab in ceramics, the possibilities for creative design are nearly endless. Here are some inspiring ideas to get your creativity flowing:
- Geometric Shapes: Use precise cuts to create angular, geometric pieces. Think cubes, hexagons, and layered designs.
- Curved Forms: Soften the hard lines by curving your slabs. Create bowls, vases, or wave-like structures for a fluid look.
- Texture Exploration: Imprint textures onto the slab surface before assembly. Use lace, stamps, or natural items like leaves for unique patterns.
- Adding Depth: Layer multiple slabs with varying textures or colors. This adds depth and interest to the piece.
- Cut-Outs: Create negative space by removing parts of the slab. This can produce lanterns or decorative wall hangings.
- Relief Sculpture: Build up the surface with additional clay pieces for a 3D effect. Relief sculptures can be both decorative and narrative.
- Mixing Media: Incorporate other materials, such as glass or metal, into your slab pieces for a mixed media work of art.
- Integration with Wheel Thrown Elements: Combine slab-built components with wheel-thrown parts for a diverse range of forms.
- Functional Ware with a Twist: Apply these creative ideas to functional items like mugs or serving platters to make them stand out.
- Modular Designs: Create pieces that can be assembled in multiple ways, giving versatility and adaptability to the design.
Each of these ideas can be tailored to suit the individual artist’s style and the functional requirements of the piece. By experimenting with different slab construction techniques, unique textures, and exciting design concepts, artists can explore the full potential of slab in ceramics.
Decorating and Texturing Slabs
Once you have shaped your slabs in ceramics, decorating and texturing them adds a unique touch. Here’s how to infuse artistry into your slabs:
- Stamping: Press stamps into the clay to create repeated patterns. Choose stamps in shapes you like.
- Rolling Textures: Use textured rollers or found objects like lace to roll over the slab. This leaves a beautiful imprint.
- Carving: Carve designs into the clay with carving tools for a bas-relief effect. Be gentle to avoid going through the slab.
- Combing: Drag a comb or fork across the slab for linear textures. Experiment with different spacing and depths.
- Layering Slip: Paint layers of colored slip onto the slab. Use a brush or sponge to apply the slip creatively.
- Sgraffito: Apply a layer of slip and then scratch through to reveal the clay color. This is great for detailed designs.
- Stenciling: Place stencils on your slab and apply slip or underglazes. This technique is precise and works well for complex patterns.
- Adding Objects: Press small objects into the clay for unique textures. Objects like screws or mesh can make interesting marks.
Remember, the clay should be leather-hard when texturing. If it’s too wet, the slab may slump; too dry, and it might crack. These methods allow you to make every slab-built piece truly your own. With each texture and pattern, your work gains more character and depth. Try different techniques and find what suits your style best in slab ceramics.
Drying and Firing Slab-built Pieces
After sculpting and decorating your slab in ceramics, drying and firing are next. Proper drying is crucial. It prevents cracks and warping. Here’s the process:
- Even Drying: Make sure the slab dries evenly. Slow drying is best. Cover the piece with a cloth if necessary.
- Room Temperature: Let the slab dry at room temperature. Avoid hot spots or drafts that cause uneven drying.
- Turning Over: If possible, flip the slab during drying. This ensures all sides dry equally.
- Leather-Hard to Bone Dry: Wait until the slab changes from leather-hard to bone dry. This stage means no moisture feels cold to touch.
Next is firing the piece. It’s a two-step process:
- Bisque Firing: The initial firing, or bisque firing, transforms clay into ceramic. It’s fired at a lower temperature to drive out all water.
- Glaze Firing: After bisque firing and applying glaze, a second firing is done. This is at a higher temperature. It makes the piece strong and gives it a glass-like surface.
Remember, firing schedules depend on the clay type. Check the manufacturer’s recommendations. Proper drying and firing will ensure the quality and durability of your slab-built ceramics.
Troubleshooting Common Issues in Slab Building
Working with slab in ceramics can come with its own set of challenges. Here are some common issues you might encounter, with tips on how to fix them:
- Cracking: If your slab cracks, it may be too dry when you’re working with it. Make sure to use clay at a leather-hard stage for building. Keep it moist and cover work-in-progress with plastic.
- Warping: Slabs can warp when they dry unevenly. Flip your work occasionally as it dries. Shield it from drafts and slow down the drying process with a loose covering.
- Attachments Popping Off: If pieces come apart, it’s often because the slip wasn’t applied correctly. Always score the surfaces well and use enough slip. Press firmly to ensure a good bond.
- Uneven Thickness: Keep your rolling pin or slab roller moving uniformly. Use guide sticks to help achieve the same thickness across the slab.
- Air Bubbles: These happen when air is trapped during wedging. Wedge your clay carefully to push out the air.
- Firing Cracks: This could be due to rapid heating or moisture in the clay. Ensure your slab is bone dry before firing. Ramp up the kiln temperature slowly.
When issues arise, take a step back to identify the problem. Adjust your technique accordingly, and with practice, the number of problems you encounter will decrease. Remember, every challenge is a chance to learn and improve your skills in slab building ceramics.
Conclusion: Embrace the Art of Slab in Ceramics
In conclusion, mastering the slab in ceramics technique opens up a world of creative possibilities in pottery. By understanding the methods, tools, and techniques associated with slab building, you can transform basic clay into extraordinary art pieces. With practice, patience, and a willingness to experiment, the slabs you create will lead to beautiful, functional items that express your unique artistic voice. Dive into the world of ceramics and let your creativity shine!