What Are Oil Pastels?
Oil pastels are a vibrant and versatile art medium. They are made from pigment, wax, and non-drying oil. The unique composition gives them a soft and creamy texture. This allows artists to blend and layer colors easily. Unlike traditional pastels, oil pastel art never dry completely. This makes them ideal for creating rich, dynamic artwork.

History and Evolution of Oil Pastels
Oil pastels were introduced in the 1920s. They were initially created for children because of their ease of use. However, this medium gained popularity among professional artists over the years. In the 1940s, famous artists like Pablo Picasso played a significant role in their evolution. Picasso collaborated with manufacturers to create professional-grade oil pastels. Since then, oil pastels have been widely used by artists worldwide.
Difference Between Oil Pastels and Other Mediums
Oil pastels differ from other art mediums like crayons, soft pastels, and oil paints. Compared to crayons, oil pastels are softer and more pigmented. Unlike soft pastels, they produce less dust and are easier to handle. Oil paints require brushes and solvents, while oil pastels need no extra tools. They combine the portability of dry mediums with the blendability of paints.
Essential Tools and Materials for Oil Pastel Art
To excel at oil pastel art, it’s crucial to choose the right tools and materials. Using good-quality essentials enhances your artwork and makes the process enjoyable. From oil pastels to surfaces and extra tools, every choice impacts your creative results.
Types of Oil Pastels
Oil pastels come in various qualities to suit different artists. Here are the main types:
- Student-Grade Oil Pastels: Affordable and good for beginners. They produce decent colors but may lack vibrancy.
- Artist-Grade Oil Pastels: Ideal for professionals, these offer richer pigments and smoother application.
- Specialty Oil Pastels: Some brands offer water-soluble options, adding versatility to your art.
Pick oil pastels based on your skill level and type of artwork. High-quality oil pastels ensure vibrant, long-lasting colors.
Paper and Canvas Recommendations
Choosing the right surface influences how your oil pastels look. Below are popular options:
- Paper: Thick and textured paper works best. Look for pastel paper or watercolor pads.
- Canvas: Primed canvas is excellent for durability and blending. Ensure the surface is smooth.
Experiment with both to see what suits your style best. Textures add an interesting dimension to your art.
Additional Tools to Enhance Your Art
Though no extra tools are necessary, some accessories can enhance your oil pastel creations:
- Blending Tools: Use tortillons, cotton swabs, or even your fingers for smooth gradients.
- Fixatives: Spray fixatives help preserve your artwork and reduce smudging.
- Palette Knives: Great for adding texture and details through the sgraffito method.
Investing in these tools ensures cleaner designs and preserves your hard work. Perfect tools elevate your oil pastel art to a new level.
Basic Techniques for Beginners
Learning basic techniques is essential for mastering oil pastel art. These methods help you create smooth transitions, striking textures, and dynamic compositions. With practice, you’ll gain confidence and develop your unique style.
Blending and Smudging
Blending and smudging are key skills for creating soft transitions and natural effects. Here’s how to do it:
- Use Your Fingers: Gently spread colors by rubbing them with your fingers.
- Try Cotton Swabs: Use cotton swabs for precise blending in smaller areas.
- Experiment with Tortillons: Paper blending sticks are perfect for smooth gradients.
Practice blending two or more colors to see how they merge. This technique adds depth to your artwork.
Layering Colors Effectively
Layering allows you to create richer and more vibrant artwork. Follow these tips to master it:
- Start Light: Apply lighter colors first to avoid muddy tones.
- Build Gradually: Add multiple thin layers for better control and intensity.
- Mix Colors on Paper: Blend directly on the surface to create custom hues.
This method helps create complex and dimensional visuals. Use light pressure for smooth overlays.
Creating Gradients and Textures
Gradients and textures make your artwork dynamic and engaging. Here’s how to achieve them:
- Create Gradients: Blend from one color to another using your fingers or blending tools.
- Add Texture: Use the edge of the pastel stick for rough lines or dots.
- Experiment: Drag pastels over textured paper to produce unique effects.
Mastering these techniques can make your oil pastel art stand out. Practice consistently for the best results.
Advanced Oil Pastel Techniques
Elevate your oil pastel art with advanced techniques. These methods add detail, depth, and creativity.
Sgraffito Method
Sgraffito involves scratching through layers of oil pastels to reveal underlying colors. Follow these steps:
- Layer Colors: Apply at least two thick layers of oil pastel.
- Scratch the Top Layer: Use a palette knife or toothpick to scrape designs into the top layer.
- Experiment with Patterns: Try lines, dots, and shapes for unique effects.
This method adds texture and intricate details to your artwork. Use contrasting colors for dramatic results.
Using Solvents to Blend
Solvents can help blend oil pastels smoothly, creating a painted effect. Here’s how to use them:
- Choose a Solvent: Use turpentine, odorless mineral spirits, or rubbing alcohol.
- Apply Carefully: Dip a brush or cotton swab into the solvent.
- Blend Colors: Gently brush over the oil pastel to mix and soften edges.
This technique creates seamless gradients and professional finishes. Work in a ventilated area for safety.
Building Depth and Dimension
Depth and dimension make your artwork more dynamic. Use these strategies to achieve it:
- Layer Colors Gradually: Build up layers from light to dark tones.
- Add Highlights: Use white or lighter colors on raised areas for contrast.
- Create Shadows: Use darker shades to add shadow and depth.
Combined with other techniques, this approach makes your art lifelike and visually striking. Practice is key to refinement.
Tips for Creating Stunning Oil Pastel Artwork
Creating exceptional oil pastel art requires attention to detail and strategy. By avoiding common pitfalls, preserving your work correctly, and exploring innovative methods, you can achieve striking results. Here’s how to refine your skills.
Common Mistakes to Avoid
Avoiding mistakes is key to improving your oil pastel art:
- Too Much Pressure: Pressing too hard can cause uneven textures and smudges.
- Skipping Paper Quality: Using thin or smooth paper results in poor color hold.
- Neglecting Fixatives: Without fixatives, your artwork may smudge or lose vibrancy over time.
- Limited Color Experimentation: Not blending or layering enough reduces depth and creativity.
- Ignoring Safety: Ensure proper ventilation when using solvents.
Stay mindful of these points to ensure a smoother artistic process and better results.
How to Preserve Your Oil Pastel Creations
Preserving oil pastel artwork keeps it vibrant and intact for years. Here’s how:
- Use Fixatives: Spray a fixative to protect colors and reduce smudging.
- Frame Your Artwork: Place your piece behind glass to shield it from dust and damage.
- Store Carefully: Keep your art in a dry, cool place to avoid humidity effects.
- Handle with Care: Avoid touching the surface directly to prevent smudging.
These preservation steps maintain the integrity and brilliance of your artwork over time.
Experimenting with Mixed Media
Mixed media adds dimension and innovation to oil pastel art. Here’s how to explore:
- Combine with Watercolors: Use oil pastels for highlights over watercolor backgrounds.
- Use Charcoal and Graphite: Add dramatic outlines for depth and contrast.
- Incorporate Acrylics: Pair acrylics with oil pastels for rich textures and bold visuals.
- Layer Different Mediums: Experiment with layering chalk or markers for unique effects.
Mixed media opens the door to endless creative possibilities. Let your imagination guide you!
Inspirational Oil Pastel Projects
Exploring creative oil pastel projects can inspire unique artistic expressions. From landscapes to abstract art, these ideas suit beginners and experts alike. Here are some exciting projects to try:
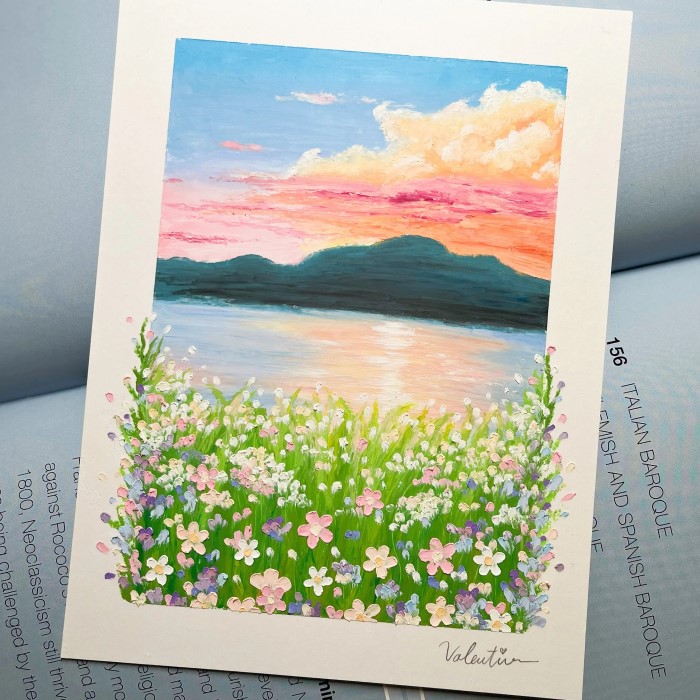
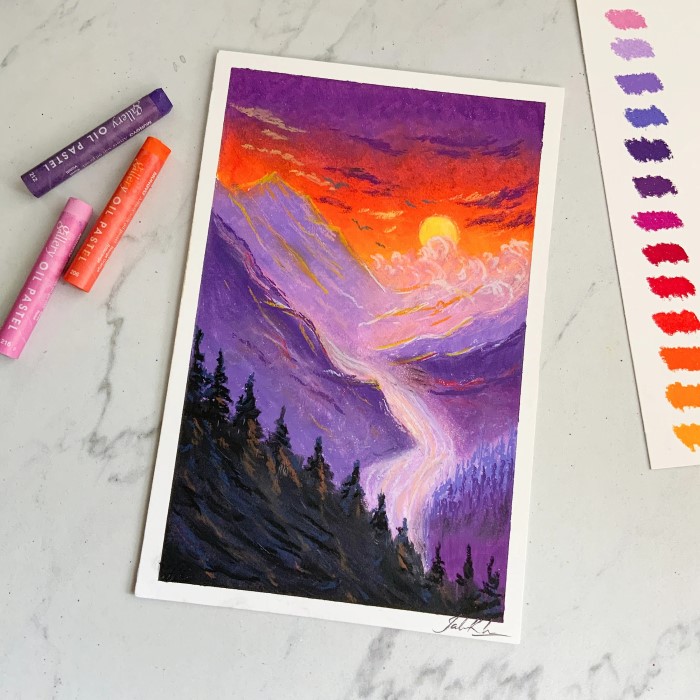
Landscape Drawings
Landscapes are popular in oil pastel art for their vibrant and dynamic imagery. Here’s how to create stunning scenes:
- Study Nature: Observe real landscapes like forests, mountains, or beaches for inspiration.
- Choose Vibrant Colors: Use bright, bold hues for skies, water, and vegetation.
- Blend for Depth: Smudge and layer colors to create realistic gradients and textures.
- Add Highlights: Use white or light tones to depict sunlight on water, leaves, or clouds.
Experiment with different perspectives, like sunsets or foggy mornings. Landscapes allow endless creativity and self-expression.
Portraits and Figures
Portraits and figures challenge your skills in detail and capturing emotions. Here are some tips:
- Start Light: Sketch basic outlines with light-colored oil pastels.
- Focus on Features: Pay attention to eyes, lips, and expressions for lifelike results.
- Layer Carefully: Use thin layers to build skin tones and shadows.
- Add Texture: Use fine strokes for hair, wrinkles, or clothing details.
Portraits can teach balance, proportion, and precision. Practice different face angles and postures to improve.
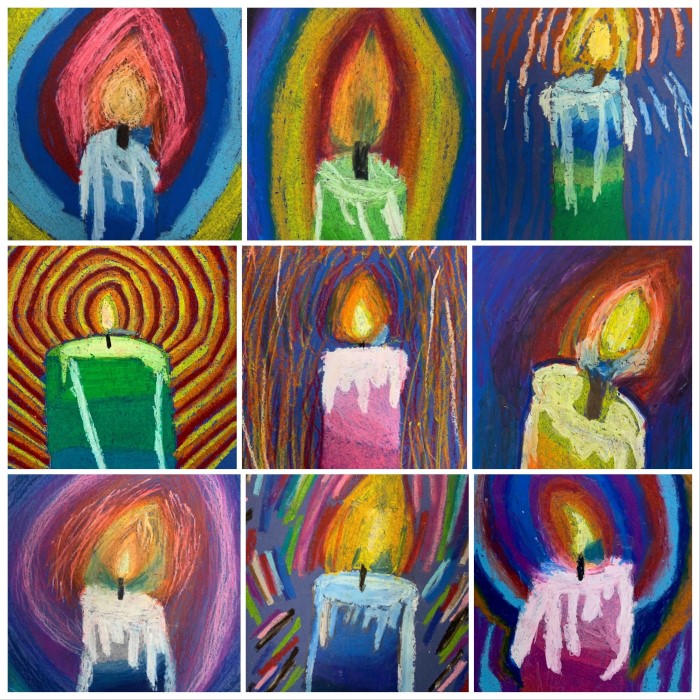
Abstract and Experimental Art
Abstract art offers freedom to explore textures, patterns, and ideas. Try these methods:
- Mix Colors Freely: Blend unusual combinations for bold, unexpected outcomes.
- Use Patterns: Experiment with lines, dots, and shapes for visual interest.
- Play with Tools: Use sponges, knives, or brushes for novel effects.
- Incorporate Layers: Add overlapping elements for complexity and depth.
Abstract art thrives on creativity and spontaneity. Let go of rules and explore unconventional techniques.
These projects showcase the versatility of oil pastels. Practice regularly and allow your imagination to guide your work.
Frequently Asked Questions About Oil Pastel Art
How to Start with Oil Pastel Art as a Beginner?
Starting with oil pastel art is easy and fun. Follow these simple steps:
- Choose Quality Materials: Use beginner-friendly tools like student-grade oil pastels and textured paper.
- Practice Basic Techniques: Learn blending, layering, and creating textures to build confidence.
- Experiment with Colors: Try combining colors to understand how they interact.
- Start Simple: Begin with basic shapes and patterns before moving on to complex projects.
Dedicate time to practice regularly. This helps develop skills and fosters creativity in your art journey.
Can You Paint Over Oil Pastels?
Yes, you can paint over oil pastels, but with some limitations:
- Water-Based Paints: Oil pastels are water-resistant. Watercolors or acrylics don’t adhere well over them.
- Oil Paints: Oil paints can be applied over oil pastels for layering and blending effects.
- Prevent Smudging: Seal your layer with a fixative before painting to reduce smudging.
Experiment to see how different mediums complement oil pastels in mixed media projects.
How Long Do Oil Pastels Last?
Oil pastels are long-lasting if stored and used properly:
Longevity of Sticks
- Durable Composition: Individual oil pastel sticks are made from a blend of pigments and binders that contribute to their durability. When used with care, these sticks can last for several years, allowing artists to enjoy their investment over time.
- Proper Handling: To maximize the longevity of oil pastel sticks, it is essential to handle them gently. Avoid applying excessive pressure when drawing or coloring, as this can cause the sticks to break or wear down prematurely.
- Storage Practices: Storing oil pastel sticks properly also increases their lifespan. Keeping them in a protective case or wrapper, away from direct sunlight and heat, helps maintain their integrity and prevents them from drying out or cracking.
Finished Artwork
- Vulnerability to Environmental Factors: While oil pastel artwork can showcase vibrant colors and textures, it is important to note that without the use of preservatives, the finished pieces may be susceptible to environmental factors over time.
- Potential for Smudging: One of the concerns with unprotected oil pastel art is that the surface may smudge easily. Touching or rubbing against the artwork can lead to unwanted marks and degradation of the image.
- Fading of Colors: Exposure to sunlight and air can cause the pigments in oil pastels to fade. Over time, this fading can diminish the visual impact of the artwork, resulting in a less vibrant appearance.
Preserve Your Artwork
- Use of Fixatives: One effective way to protect oil pastel artwork is to apply a fixative. Fixatives create a protective layer over the surface, reducing the risk of smudging and helping to preserve the colors for a longer period. It is important to follow the manufacturer’s instructions when applying fixatives.
- Framing Techniques: Framing your oil pastel pieces is another excellent preservation technique. Using glazing materials such as glass or acrylic can shield the artwork from dust and environmental damage, while also enhancing its presentation.
- Optimal Storage Conditions: Proper storage is essential for maintaining the quality of your completed artwork. Placing pieces in cool, dry spaces away from direct sunlight can help prevent fading and deterioration. Consider using acid-free materials for storage to further protect the artwork from degradation.
Proper care ensures both oil pastels and your artwork remain vibrant for years.
Conclusion: Start Your Oil Pastel Journey Today
In conclusion, oil pastel art is a vibrant and accessible medium that invites creativity and experimentation. By exploring the various techniques explained in this article, beginners can transform their ideas into stunning visual expressions. Remember, practice is essential, so don’t hesitate to try different blending methods, mark-making, and themes. As you delve into the world of oil pastel art, you will discover your unique style and artistic voice. Embrace the process, and enjoy creating with oil pastels! Additionally, keep in mind the helpful tips shared here to enhance your experience and outcomes. Happy creating!