Introduction
In today’s digital world, the charm of reading physical books remains alive and well. With an ever-increasing interest in crafting, origami corner bookmarks have become a favorite among book lovers, adding both functionality and artistry to the reading experience. An origami corner bookmark is not just a useful item but also a delightful way to express creativity. These unique bookmarks fit snugly over the corner of a book page and help mark the reader’s place without risking damage to the book itself.
In this article, you’ll learn how to create your very own origami corner bookmark. We’ll explore its history, the essential materials needed, step-by-step crafting techniques, tips for creativity, and how to get the whole family involved in this enjoyable activity. Whether you’re making one for yourself or gifting it, these bookmarks will surely impress.
The History of Origami and Bookmarks
Origami, the art of paper folding, has a rich history that dates back over a thousand years. The term “origami” comes from the Japanese words “oru” meaning to fold, and “kami” meaning paper. This traditional craft has evolved, inspiring artists and enthusiasts worldwide.
With its roots in Japan, origami originally served ceremonial and practical purposes. Over time, it became a popular art form, leading to a variety of techniques and designs. Bookmarks made using origami started gaining traction as a creative way to keep one’s place in books. As more people explore origami, these bookmarks have become a staple among readers looking for unique, personalized accessories.
Why Use an Origami Corner Bookmark?
Using an origami corner bookmark offers several benefits:
- Functional Design: Compared to traditional bookmarks, origami corner bookmarks stay securely on the corner of the page, reducing the risk of them falling out or getting lost.
- Personal Expression: You can create bookmarks that match your style or reflect your interests. With countless designs and themes, there’s a bookmark for everyone.
- Eco-Friendly: Engaging in origami promotes sustainability. You can use recycled paper or repurpose materials like old gift wrap or magazine pages, reducing waste.
- Fun and Therapeutic: Both adults and children can enjoy the calming activity of folding paper into beautiful shapes, promoting mindfulness and creativity.
- Ideal Gifts: Personalized origami bookmarks make thoughtful gifts for friends and family, particularly fellow book lovers.
Essential Materials for Creating an Origami Bookmark
Before diving into the origami folding techniques, let’s gather the materials you’ll need to craft your bookmarks:
- Square Paper: The most critical material. You can opt for origami paper, which comes in various colors and patterns. Alternatively, you can use colored printer paper, scrapbook paper, or even old greeting cards. A size of 6×6 inches is a good starting point for most bookmarks.
- Scissors: Depending on the size of your initial paper, you may need scissors to cut it into a perfect square if you aren’t starting with one.
- Ruler and Pencil: For more precision, a ruler can be useful when measuring and marking your squares.
- Bone Folder: This tool helps create crisp folds. If you don’t have one, the smoother edge of a ruler or a credit card can work just as well.
- Decorative Items: Once your bookmark is complete, you might want to personalize it further with stickers, washi tape, or markers.
- Patience and Creativity: While not a physical item, these are essential for success in any origami project!
Step-by-Step Guide
Now that you have your materials ready, it’s time to dive into the steps for creating your origami corner bookmark. Follow the instructions below carefully to achieve your desired results.
Step 1: Prepare Your Paper
Start with a square piece of paper. If you are cutting down a larger piece, ensure the sides are equal in length.
- Example Size: A square measuring 6×6 inches is a manageable size for a bookmark, but feel free to experiment with larger or smaller sizes if you prefer.
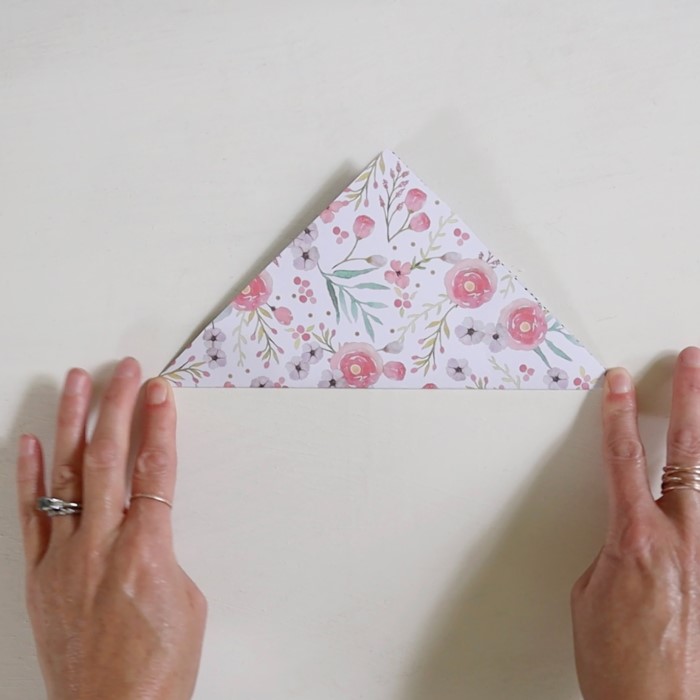
Step 2: Make the Initial Folds
- Create the First Triangle: Place the square paper with one corner pointing towards you. Fold the paper diagonally from the bottom left corner to the top right corner.
- Form a Triangle: You should now have a triangle shape. Press along the fold to create a sharp crease, then unfold the paper back to the square shape.
- Create the Second Triangle: Next, fold the other two corners—bottom right and top left—toward the center crease you made earlier. The result should appear as a triangle once again, with a straight top edge.
Step 3: Shape the Bookmark
- Fold Down the Top Point: Take the top point of the triangle and fold it downward toward the bottom point of the triangle. This fold creates the pocket of your corner bookmark.
- Flip the Bookmark: Keep the pocket facing down and flip the paper over. You should now see the edges of the triangle from the previous fold.
- Fold the Bottom Up: Carefully take the bottom of the triangle (the side with two open corners) and fold it upwards towards the top crease. Press down firmly to create a secure pocket for your bookmark.
Step 4: Finalize the Bookmark
- Create Crisp Edges: Make sure all folds are sharp by using your bone folder or another smoothing tool. This step will ensure that the edges stay neat and retain their shape.
- Decorate the Bookmark: At this point, you may want to personalize your corner bookmark. Use stickers, markers, or washi tape to add creative designs that reflect your personality or interests.
- Test the Fit: Try the finished corner bookmark in a book to see how it fits snugly over the page corner.
Advanced Origami Techniques for Corner Bookmarks
Once you’ve mastered the basic corner bookmark design, you can explore more intricate creations that offer a unique twist. Here are a few advanced techniques:
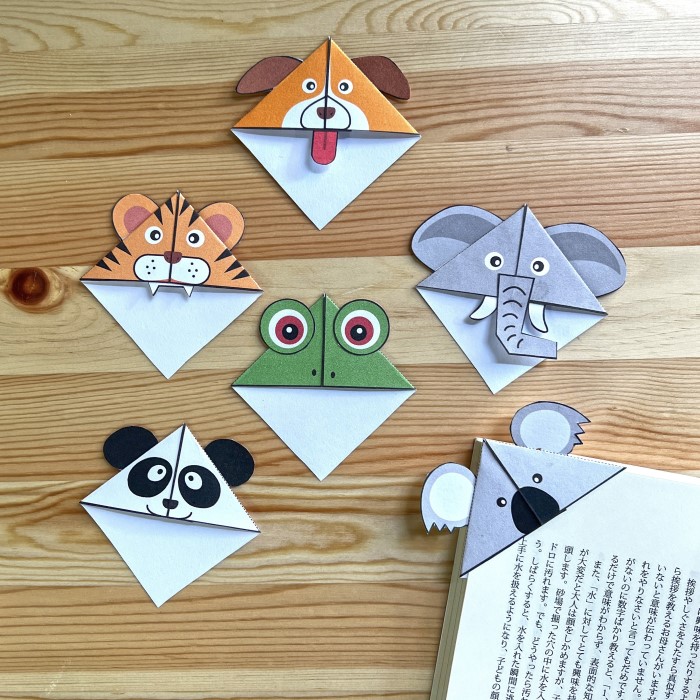
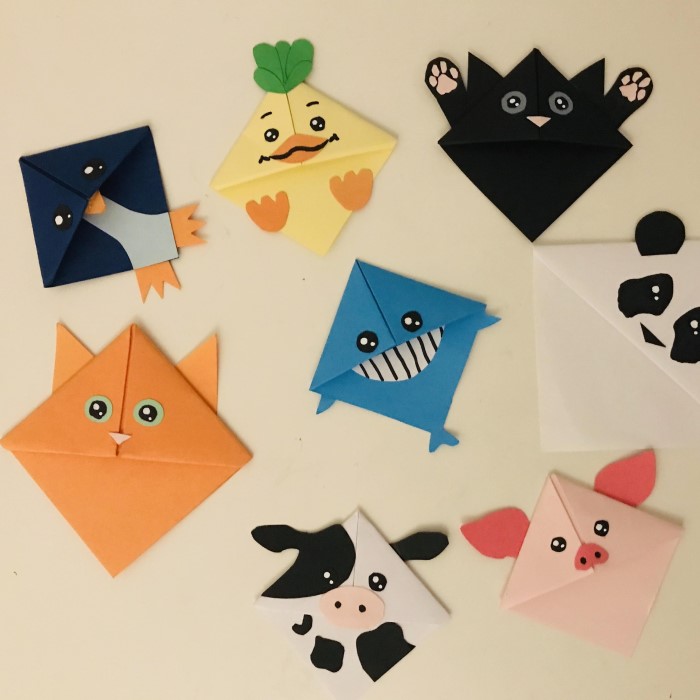
1. Animal-Shaped Corner Bookmarks
Transform your simple bookmark into an animal! Following the same folding techniques while incorporating additional steps can result in playful designs.
- Examples: Find tutorials for making bookmarks shaped like foxes, cats, or owls. These designs require pivotal folds but are mostly similar to the corner bookmark structure.
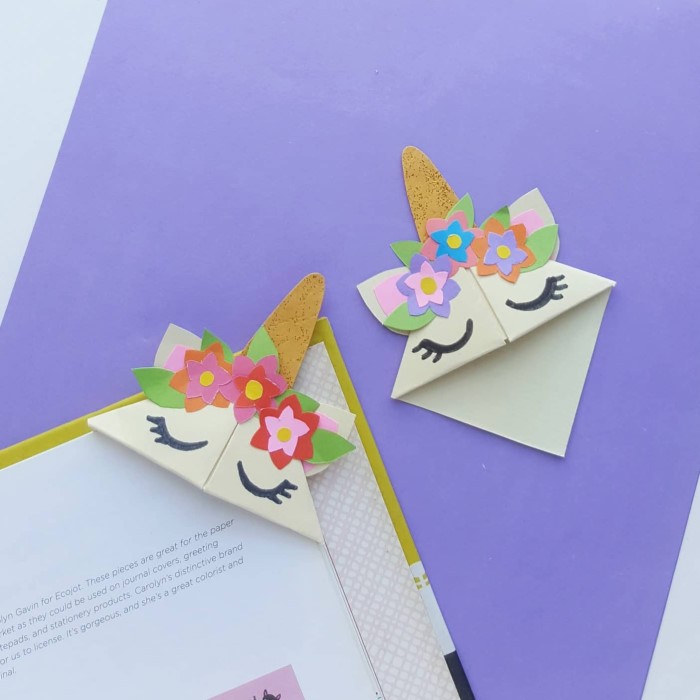
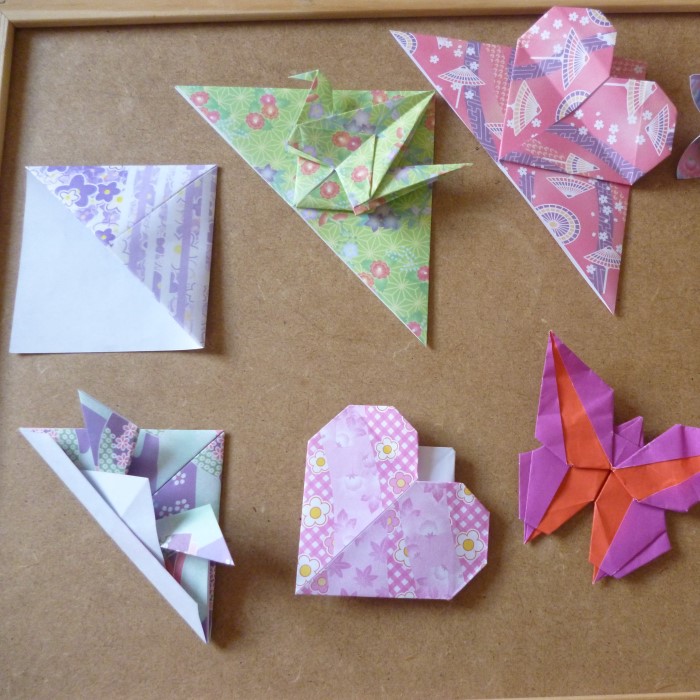
2. Floral Styles
Incorporating flowers into your bookmarks can add beauty, especially for those who enjoy gardening or floral aesthetics.
- Representative Techniques: Use particular folds that recreate petals while maintaining the corner piece functionality. Consider adding multiple flower colors for a vibrant look.
Engaging in Family and Community Activities
Creating origami corner bookmarks can be a delightful bonding experience for families, friends, and communities. Here are some ways to engage everyone:
- Family Craft Night: Dedicate an evening to making origami bookmarks together. Stock up on supplies, prepare some tasty snacks, and enjoy quality time while folding your bookmarks.
- Involve Children: Encourage children to let their creativity flow. Allow them freedom in decorating their bookmarks as they wish.
- Community Workshops: Consider organizing a community workshop to teach others the art of origami. Not only will this foster connections, but it will also promote the craft.
Tips for Successful Origami
To ensure your origami experience is rewarding and enjoyable, keep these tips in mind:
Practice Patience:
Origami is an art form that requires a great deal of focus and precision. As you embark on your origami journey, understand that mistakes are a natural part of the learning process.
It’s essential to be patient with yourself as you learn new techniques and patterns. Each fold is a step towards improvement, so embrace any errors as valuable learning experiences.
Remember to enjoy the process. The act of folding paper can be meditative and relaxing, allowing you to develop not only your skills but also a sense of tranquility.
Quality Materials:
The materials you choose can significantly affect the quality of your origami creations. Using high-quality paper can yield better results in both appearance and durability.
For projects like bookmarks, consider opting for thicker papers, as they provide extra sturdiness and ensure your creations last longer. This is especially important if children are involved in the folding process.
Experiment with different types of paper, such as origami paper, cardstock, or patterned papers, to see how they impact the final look of your creations.
Watch Video Tutorials:
If you find that you are a visual learner, watching video tutorials can be an invaluable resource. Online platforms, such as YouTube, are filled with tutorials that demonstrate folding techniques step by step.
These videos can provide real-time guidance, making it easier to understand complex folds or patterns that might be difficult to grasp from written instructions alone.
Additionally, many tutorials feature tips and tricks from experienced origami artists, helping you refine your techniques as you progress.
Join Origami Communities:
Engaging with fellow origami enthusiasts can offer significant encouragement and inspiration. Consider joining online forums, social media groups, or local origami clubs where you can interact with others who share your passion.
Being part of a community provides opportunities to exchange ideas, share projects, and receive constructive feedback on your work. This collaborative environment can spark new creative ideas and motivate you to try more challenging designs.
Participating in community events, such as workshops or competitions, can further enhance your skills and deepen your appreciation for the art of origami.
Set Realistic Goals:
As you progress in your origami practice, it’s important to set achievable goals. Start with simpler designs and gradually work your way up to more complex patterns.
This step-by-step approach will help build your confidence and ensure a solid foundation of skills that you can build upon.
Celebrate your achievements, no matter how small. Acknowledge the progress you’ve made, and use those successes to motivate yourself for future projects.
Experiment with Different Designs:
Don’t be afraid to explore various styles and designs within the art of origami. There are countless forms, from traditional models to modern interpretations, and each offers unique challenges and rewards.
Experimenting with different designs not only improves your skill set but also keeps the practice exciting and fresh. Try to create various items such as animals, flowers, and geometric shapes to broaden your capabilities.
Pushing the boundaries of your creativity can lead to innovative and personalized creations, making your origami experience even more fulfilling.
Document Your Progress:
Keeping a journal of your origami projects can be a rewarding way of tracking your progress. Take photos of each piece you create, along with notes on techniques you used or challenges you encountered.
This documentation will help you see how far you’ve come over time and serve as a reference for future projects. It can also provide inspiration for new designs based on what you’ve already accomplished.
Sharing your progress with others can foster a deeper connection within the origami community as they can cheer you on and offer helpful advice.
Stay Organized:
Keeping your workspace organized can significantly enhance your origami experience. Designate a specific area for your paper, tools, and completed projects to ensure a clutter-free environment.
Consider investing in storage solutions, such as boxes or folders, to keep papers of different sizes and types easily accessible and neatly arranged.
An organized space not only boosts motivation but also allows you to focus better on your folding projects without distractions.
Conclusion
In summary, creating an origami corner bookmark is an enjoyable and educational activity that both children and adults can appreciate. By starting early, involving kids in the crafting process, and utilizing creativity throughout, you can make personalized bookmarks that express your style and serve as functional reading tools.
This project reflects the essence of origami—combining craft, fun, and imagination in a simple yet rewarding manner. Whether for personal use or as a heartfelt gift, these bookmarks will bring charm to every book.
So grab your papers, gather your supplies, and immerse yourself in the creative world of origami. You’ll soon discover that crafting corner bookmarks can create lasting memories, spark creativity, and even foster deeper connections over a shared love of reading. Happy folding!