Introduction
White charcoal pencil has gained popularity among artists for their unique qualities. They are used to add highlights, details, and textures to drawings. These pencils work best on toned or dark paper, making the artwork stand out. Understanding their features and differences is key to mastering their use.
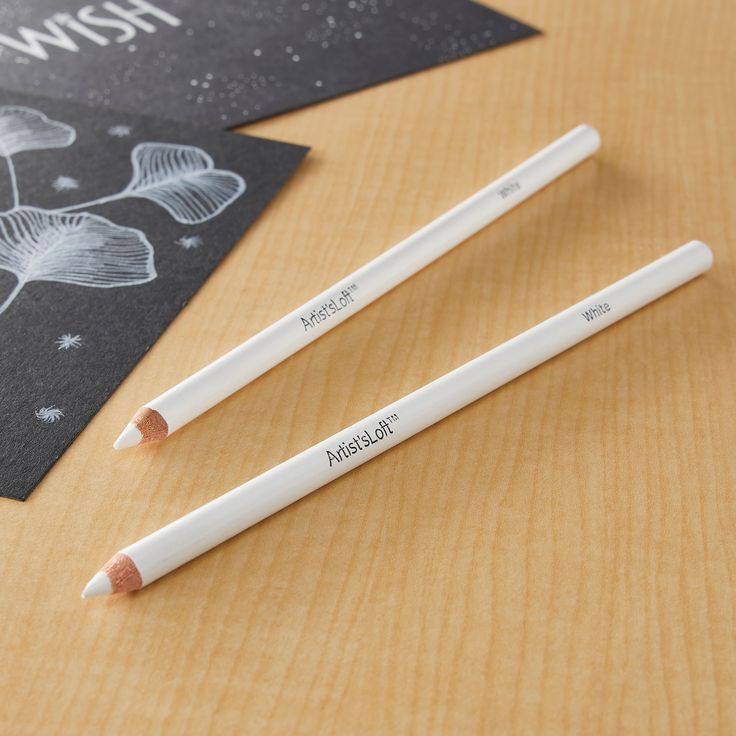
What is a White Charcoal Pencil?
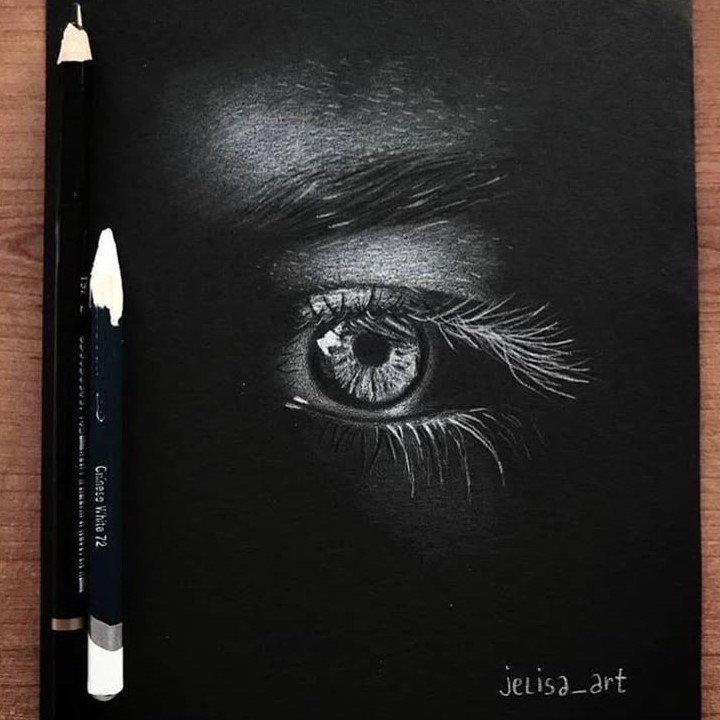
A white charcoal pencil is a drawing tool made with compressed white charcoal. Unlike traditional black charcoal, this pencil provides vibrant white lines and shading. Artists use it to create light areas and bring balance to their compositions. It offers better control compared to white pastels or chalk, making it ideal for detailed work. White charcoal pencils are also less messy, suitable for intricate designs.
Difference Between White Charcoal and Regular Charcoal
White charcoal and regular black charcoal differ in purpose and application. Black charcoal creates dark, bold tones, while white charcoal highlights light areas. Black charcoal is used for shadows and contrasts, whereas white charcoal adds brightness and clarity. White charcoal pencils are slightly harder, offering sharper lines and more precision. Additionally, they blend differently, requiring specific techniques for seamless effects. Understanding these differences helps artists achieve realistic results.
Essential Tools and Materials for Drawing
To create stunning art with a white charcoal pencil, having the right tools matters. The quality of your materials directly affects the final outcome. Choosing suitable paper and complementary tools is key to achieving the best results.
Paper Selection for White Charcoal Artwork
Your choice of paper is crucial when working with white charcoal pencils. These pencils shine brightest on toned or dark paper. Here are a few points to consider:
- Toned Paper: Toned paper provides contrast, making highlights stand out. Gray or tan papers are popular choices.
- Textured Paper: Choose paper with slight texture for better grip. This prevents slipping while drawing.
- Smooth Paper: Smooth paper works well for detailed work and clean lines.
Avoid overly glossy or slick surfaces. These can make it harder to deposit pigment evenly. Experiment with different papers to find what suits your style.
Complementary Tools to Enhance Your Drawing
In addition to the white charcoal pencil, several tools can enhance your artwork:
- Erasers: A kneaded eraser helps lighten areas without damaging the paper. A precision eraser is ideal for small details.
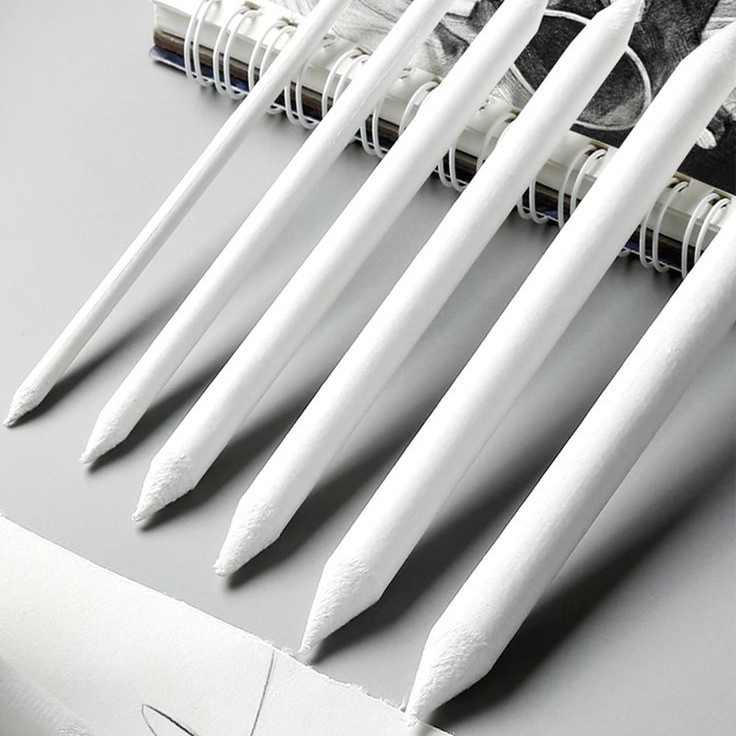
- Blending Stumps: These are used to blend white charcoal smoothly. They help in achieving soft gradients.
- Sharpeners: Always use a sharpener designed for delicate drawing pencils. This avoids breaking the charcoal.
- Fixatives: Fixatives lock your drawing in place and prevent smudging over time.
Combining the right tools and materials will elevate your white charcoal designs. Take time to gather and test what works best for you.
Techniques for Using
Mastering techniques is essential to create captivating white charcoal artwork. These methods enhance your work, helping you achieve stunning effects.
Building Highlights and Depth
White charcoal pencils excel at creating highlights and depth in drawings. Follow these tips:
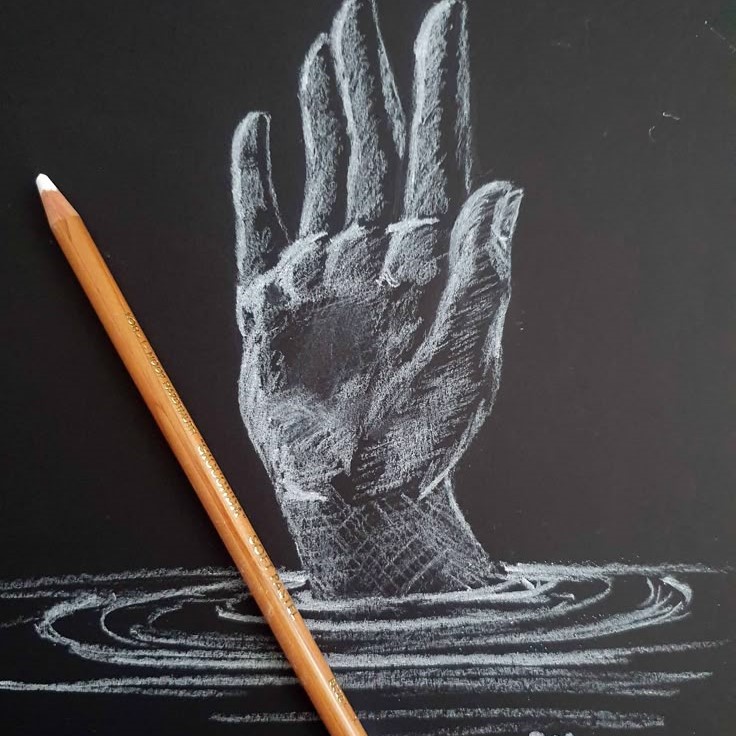
- Start with Dark Paper: Choose toned or dark paper to make highlights pop.
- Light Strokes First: Begin with light pressure to plan your composition. Adjust as needed.
- Layer Gradually: Build layers slowly to achieve brighter highlights. Avoid rushing for a smoother finish.
- Contrast for Depth: Combine dark shadows with white highlights for a three-dimensional effect.
Focus on balance between highlights and dark areas for realistic depth.
Layering and Blending for Realistic Effects
Layering and blending add realism to your artwork. Here’s how to do it effectively:
- Base Layer: Start with a thin layer of white charcoal.
- Blending Tools: Use blending stumps or fingers to soften harsh edges.
- Multiple Layers: Add layers to deepen tones. Build gradually for a seamless look.
- Blending Techniques: Blend in circular motions for a smooth gradient.
Practice blending to master soft transitions and achieve natural effects.
Creating Texture and Detailing
Textures and intricate details bring your drawing to life. Focus on the following methods:
- Sharp Pencil: Keep your white charcoal pencil sharp for precise detailing.
- Light Pressure: Use a light touch for delicate textures like fur or hair.
- Crosshatching: Create patterns or textures with overlapping strokes.
- Erasers for Contrast: Use a precision eraser to add tiny details or refine textures.
Experiment with textures and details to enhance your artwork’s uniqueness.
Step-by-Step Guides for Beginners
Learning to use a white charcoal pencil can feel daunting at first. Beginners should start with simple exercises. Basic shapes and foundational skills lay the groundwork for more complex drawings. Here are some helpful step-by-step guides.
Sketching Basic Shapes with White Charcoal
Beginner artists benefit from practicing basic shapes. White charcoal pencils are perfect for creating highlights and clean lines. Follow these steps to sketch shapes:
- Choose Toned or Dark Paper: Use gray or black paper for clear highlights.
- Start with Soft Outlines: Hold the pencil lightly for faint sketches of circles, squares, or triangles.
- Add Highlights Gradually: Layer white for lighter areas, using soft strokes.
- Focus on Edges: Define edges by increasing pressure near the shape’s outlines.
- Blend for Smoothness: Use a blending stump to soften internal lines and create volume.
- Refine Details: Sharpen your pencil for crisp edges or precise accents.
Through practice, basic shapes teach control and help build confidence. Repetition will improve your consistency over time.
Drawing Portraits and Landscapes
Once comfortable with shapes, move on to drawing portraits or landscapes. White charcoal enhances both styles by emphasizing highlights. Follow these steps for success:
For Portraits:
- Start with Simple Forms: Sketch the outline of a face or head structure lightly.
- Define Light Source: Decide where the light is coming from in your composition.
- Highlight Key Features: Add white to the nose bridge, cheekbones, and other light-catching areas.
- Blend for Skin Texture: Use blending tools for smooth tonal transitions.
- Add Details: Focus on intricate features like eyes, lips, and hair textures.
For Landscapes:
- Sketch Horizon and Landmarks: Draw outlines of hills, trees, or other elements first.
- Highlight Natural Light: Use white charcoal to accentuate sunlight on clouds, water, or tree tops.
- Add Depth with Layers: Build up layers to create realistic light and shadows.
- Blend Using Circular Strokes: Create a natural gradient between light and darker areas.
- Refine Features: Add fine details like ripples in water or textures in bark.
Practice regularly to master these techniques. Each finished piece will showcase your progress.
Advanced Techniques for Experienced Artists
White charcoal pencils offer exciting opportunities for experienced artists. Advanced techniques elevate your work and open creative possibilities. These methods focus on combining mediums and creating bold lighting effects.
Incorporating White Charcoal into Mixed Media Art
Mixed media art is a versatile form of expression. Using a white charcoal pencil adds dynamic elements to your work. Here’s how to incorporate it effectively:
- Pair with Ink or Graphite: Combine white charcoal with ink lines or graphite shading for contrast.
- Use Acrylic or Watercolor Backgrounds: Create a painted base layer, then add white highlights.
- Layer on Colored Paper: Use toned pastel papers to blend white charcoal with other mediums.
- Texture Techniques: Create textured areas with white charcoal over paint or collage materials.
- Experiment with Compositions: Try adding white charcoal as accents to abstract or surreal styles.
Adapt these approaches for specific projects. Test combinations to explore unique effects.
Using White Charcoal for Dramatic Lighting Effects
Dramatic lighting creates visual impact. White charcoal excels at enhancing light sources and contrasts. Follow these suggestions:
- Define a Light Source: Decide the direction and intensity of light in your artwork.
- Highlight Strong Areas: Use bold strokes to emphasize light on key elements.
- Contrast Shadows and Highlights: Combine dark tones with white charcoal to elevate depth.
- Layer Gradually: Build layers slowly for smooth transitions between light and shadow.
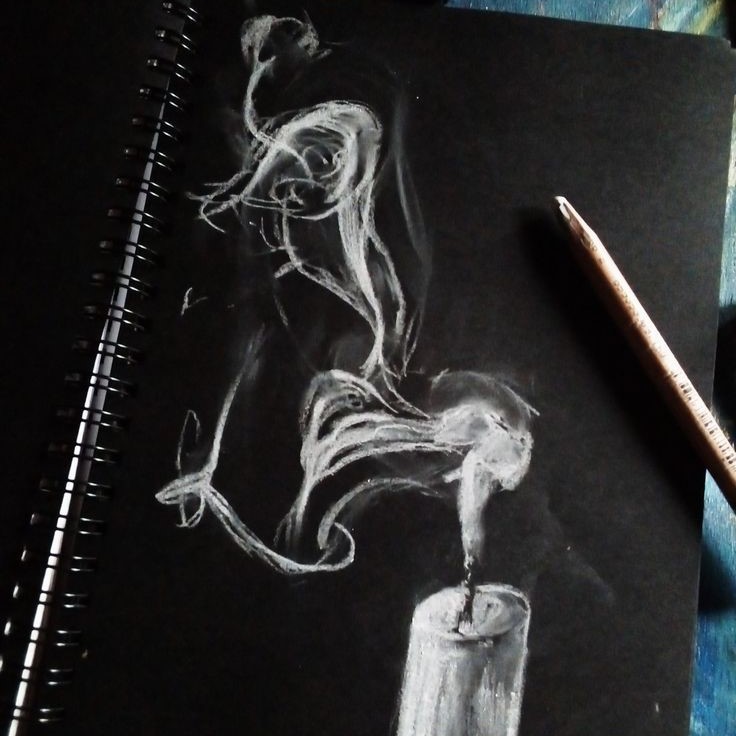
- Add Glow Effects: Blend white charcoal for soft lighting effects like glowing lamps or sunlight.
These techniques enhance realism and mood. Practice often to refine dramatic lighting skills for impactful art.
Maintenance and Care for Your White Charcoal Artwork
Proper maintenance ensures your artwork lasts and tools stay effective. Consider these steps for longevity and care.
Fixatives to Protect Your Drawings
Using fixatives is essential to preserve white charcoal art. Fixatives prevent smudging and fading over time.
- Choose the Right Fixative: Use fixatives designed for charcoal or pastel drawings.
- Apply in Layers: Spray fixative lightly and allow it to dry between applications.
- Test Before Use: Test fixative on a small paper sample to check compatibility.
- Work in Ventilated Areas: Spray fixatives outdoors or in well-ventilated spaces for safety.
- Protective Seal: Ensure fixative fully seals the artwork for lasting preservation.
A properly applied fixative keeps your art vibrant and protected from damage.
Cleaning and Storing Your Tools
Maintaining clean tools ensures consistent results and extends their lifespan. Follow these simple tips:
- Clean Immediately After Use: Remove remaining charcoal dust from pencils and blending tools.
- Use Gentle Methods: Wipe pencils with a soft cloth and clean blending stumps carefully.
- Organize Tools Properly: Store tools in a case to prevent damage or dust buildup.
- Avoid Moisture Exposure: Keep tools in dry areas to avoid warping or breaking.
- Sharpen Regularly: Use a specialized sharpener to maintain pencil points for precise work.
Proper care of your tools enhances their performance for future projects.
Inspiring Ideas for White Charcoal Art Projects
Creative ideas spark new ways to use a white charcoal pencil. Experiment with subjects and emotions to make engaging art. Below are some inspiring themes and concepts for your next artwork.
Popular Subjects for White Charcoal Artwork
Certain subjects work exceptionally well for white charcoal art. These projects emphasize contrast and details:
Animals:
When drawing animals, start by studying their anatomy and fur or feather textures. Observing real-life animals or high-quality photographs can provide insight into how to represent their natural forms.
Utilize both sharp and soft strokes to create realistic textures. For instance, use sharp, precise lines to depict the sleekness of a cat’s fur or the delicate feathers of a bird.
In contrast, softer, more blended strokes can be used to indicate areas of shadow and softness, giving depth to the animal’s form. Focus on areas such as the belly or under the wings to enhance the visual appeal.
Pay attention to essential details, such as the direction of fur or feather growth, to make your drawings more lifelike. Adding highlights with a white charcoal pencil can further enhance the texture and bring your animal subjects to life.
Portraits:
Begin your portrait by outlining the main facial features, ensuring correct proportions and placements for elements like the eyes, nose, and mouth.
Once the outline is established, focus on enhancing key areas, particularly around the cheekbones and eyes. Use light strokes to create soft shadows that define these features and give structure to the face.
Employ sharp contrasts between light and shadow to add drama and realism to your portraits. For example, intensifying the shadow under the cheekbones or the inner corners of the eyes can create a striking effect.
Use blending techniques to smooth out transitions while still allowing for noticeable highlights. Using white charcoal to accentuate the eyes or the bridge of the nose can create a luminous effect, drawing attention to these focal points.
Landscapes:
When creating landscapes, first consider the composition and focal points. Think about how you want to capture the setting, be it a serene lake, a bustling forest, or a dramatic mountain range.
Focus particularly on natural light; consider how sunlight interacts with various elements in your scene. Highlight the sunlight glinting off water or illuminating the tops of trees for a radiant effect.
Use shading techniques to indicate different times of day; for example, to depict dawn or dusk, use warmer tones in the foreground and cooler tones high above in the sky to create atmosphere.
Incorporate soft strokes to recreate the feel of clouds or the fluidity of water. Experiment with blending techniques to create gradients in the sky or reflections in the water, bringing depth and movement to your landscape.
Still Life:
Start your still-life arrangement by selecting interesting objects such as glassware, fruit, and ceramic pieces. The diversity in shape, color, and texture will add richness to your composition.
Position your objects in a way that creates visual balance, drawing the viewer’s eye to the focal point of the piece. Consider the interaction between the objects—how they reflect light and create shadows.
Create vibrant contrasts by choosing toned paper that complements the colors of your objects. Use white charcoal to highlight reflective surfaces, such as the sheen on glass or the wetness of fruit, emphasizing their textural differences.
Focus on capturing the subtleties of light and shadow—this will give your still-life composition depth and dimension. Experiment with different angles and arrangements to keep your artwork dynamic and engaging.
Fantasy Scenes:
When it comes to fantasy scenes, allow your imagination to run wild with mythical creatures and magical landscapes. Think beyond the ordinary to create extraordinary imagery.
Start by sketching out the main elements of your scene, whether it’s a dragon soaring through the sky or a serene valley draped in sparkling magical light.
Utilize white charcoal to create highlights that mimic the ethereal glow associated with fantasy worlds. This could include illuminating aspects of your creatures’ scales or the twinkling stars in the sky.
Experiment with different textures to convey the otherworldly aspects of your scene. This might involve combining sharp lines for detailed features of creatures with softer strokes for dreamy backgrounds.
Consider layering different elements within your fantasy scene, such as trees with mystical energy or enchanted waters. Highlights can draw attention to these elements, creating a captivating and immersive atmosphere.
Toned or dark backgrounds enhance these subjects, making highlights stand out. Select themes that match your style and refine your skills.
Using White Charcoal Pencil for Emotional Art Expressions
White charcoal art can convey powerful emotions. Use it to visualize feelings and moods effectively:
- Soft, Dreamy Aesthetics:
- Use light layers and blending for serene subjects, like moonlit skies or flowing water.
- Blur edges to create a soft, ethereal effect.
- Bold Drama:
- Focus on strong contrasts between highlights and shadows.
- Use bold, sharp strokes to emphasize intensity and tension.
- Loneliness or Melancholy:
- Draw isolated objects with sparse details on large, dark spaces.
- Use gradients to depict light fading into darkness.
- Joy and Vibrancy:
- Use dynamic strokes and brighter highlights to depict energy, like sunrise or dancing figures.
- Mystery and Surrealism:
- Add abstract elements or unexpected highlights for a surreal and thought-provoking atmosphere.
Push boundaries with emotional themes to connect with viewers. Experimenting with these subjects will unleash your creativity and refine your craft.