Introduction to Slip in Ceramics
Slip in ceramics is a liquid mixture of clay and water. It plays a crucial role in pottery and ceramic art. Understanding slip is key for both beginners and advanced potters. Let’s dive into the world of slip and explore its importance.
Firstly, slip has a creamy texture that is similar to heavy cream. It can be used in various ways during the ceramic process. This versatility makes it a favorite among artists. You can use slip for decoration, attaching parts, or even casting shapes.
To make slip, potters mix clay with water until it reaches the correct consistency. It is essential to note that various clay types result in different slip characteristics. Some slips are smooth and fine, while others are more textured.
Achieving the right slip consistency is important for your project’s success. Too thick, and it may not apply smoothly; too thin, and it may not adhere well. Learning to prepare the perfect slip mixture is a fundamental skill in ceramics.
Potters often color slips with oxides or stains, adding a creative touch. You can apply these colored slips to create patterns, images, or various effects on your ceramic pieces. The possibilities with slip are endless, making it a powerful tool in the ceramic artist’s toolkit.
We will explore how to prepare slip, apply it, and troubleshoot common slip issues. By mastering slip in ceramics, you will unlock a wide array of creative possibilities. Stay tuned as we delve deeper into slip techniques and their applications.
Preparing the Perfect Slip Mixture
Preparing the perfect slip mixture is a foundational skill for any ceramic artist. The process begins by selecting the right clay and carefully measuring the water until the slip achieves the desired consistency. Here are the essential steps to ensure your slip is just right for your ceramic projects.
- Choose Your Clay: The type of clay you select will impact your slip’s characteristics. Remember, different clays result in different textures.
- Measure Water Accurately: Start with less water than you think you’ll need. You can always add more as you mix.
- Mixing: Use a blunger or a mixing stick to combine the clay and water. Aim for a smooth and lump-free consistency.
- Consistency Check: The slip should flow like heavy cream. If it’s too thick, gradually add water. If too thin, add more clay.
- Sieve: Pass the mixture through a sieve to remove any impurities or lumps that could affect the application.
- Test Application: Apply a small amount to a test piece to ensure the slip holds well and displays the correct texture.
- Adjustments: Based on your test, adjust the mixture. You might need to add water, clay, or a deflocculant to get the right flow.
Remember, practice makes perfect. Do not be discouraged if your first few tries do not yield the exact consistency you want. With time and patience, you’ll learn to prepare the slip mixture that suits your ceramics best.
Basic Slip Application Techniques
Once you have prepared your slip with the right consistency, it’s time to apply it. Here are some basic techniques you’ll want to master in applying slip in ceramics:
- Brushing: Use a brush to apply slip to the surface. This method works well for detailed work.
- Trailing: A slip trailer or squeeze bottle can create fine lines and intricate patterns.
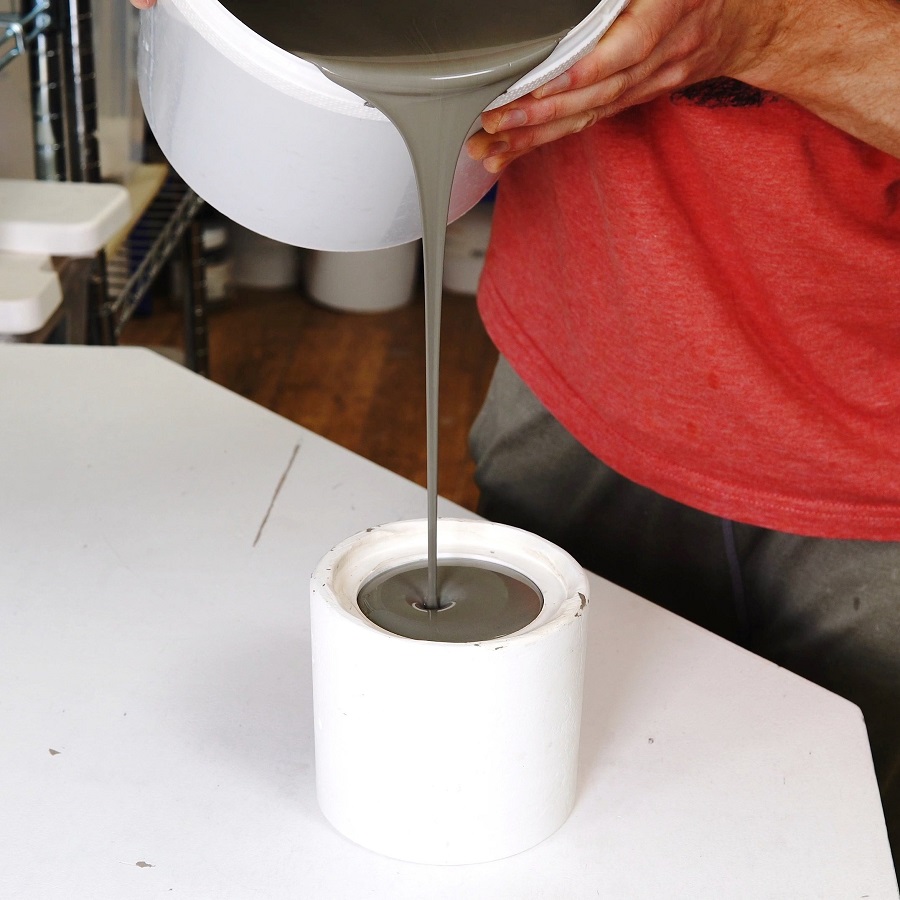
- Pouring: For larger areas or a more fluid design, pour the slip over the piece.
- Dipping: Immerse your piece into a container of slip to coat it quickly.
- Splattering: Flick the slip with a brush for a splattered effect; control the size and direction of splatters.
Each method serves a different purpose and can vary depending on the piece you’re working on. It’s important to try different techniques to find what best suits your project. Remember, too, that slip’s thickness can affect the result. A thinner slip layer usually appears more subtle once fired, while a thicker layer provides a more textured finish.
Take your time with each application method. Ensure the slip adheres properly before adding subsequent layers or colors. With practice, you’ll gain confidence and start to see improved results in your ceramic creations.
Creative Slip Decoration Methods
With the fundamentals in hand, let’s explore the artistic side of using slip in ceramics. Creative decoration with slip can elevate a simple piece to a work of art. Here are some methods to infuse creativity into your ceramics with slip.
- Layering: Apply multiple layers of slip to build up texture or color gradients on your piece. Let each layer dry slightly before adding the next.
- Sgraffito: Coating the piece with slip and then scratching away parts to reveal the clay body underneath creates contrasting images or patterns.
- Marbling: Mix different colored slips together just slightly, then apply for a marbled effect. Be careful not to overmix to maintain distinct swirls of color.
- Feathering: Drag a tool, like a feather or a stick, through wet slip to make intricate patterns. The technique gets its name from the feather-like designs that can be created.
- Stenciling: Place stencils on the clay body and apply slip over them. Once the slip dries, remove the stencil to reveal the design.
- Inlay: Fill incised lines or textures in the clay with slip, then wipe away the excess. Once fired, the slip in the grooves contrasts with the clay color.
- Slip Trailing: As mentioned earlier, you can use a slip trailer to create raised lines and dots for a decorative effect.
These methods open a realm of possibilities for decorating with slip in ceramics, allowing for personal expression and innovative designs. Experimenting with these techniques will not only enhance your skills but also add unique character to your ceramic pieces.

Using Slip for Ceramic Joining
Slip in ceramics is not just for decoration; it also serves as a ‘glue’ to bind pieces together. The beauty of ceramic slip is its strength when it dries, providing a sturdy bond that is essential in ceramics. When using slip for joining, here are key steps to follow:
- Score the surfaces: Rough up the areas that you plan to join. This helps the slip grip better.
- Apply slip to both surfaces: Use a brush or your fingers to coat both the scored areas.
- Press pieces together: Join the pieces firmly to ensure a good bond. Adjust the position as necessary.
- Remove excess slip: Wipe away slip that oozes out from the join with a sponge or a tool.
- Dry and check: Allow the piece to dry slowly. Later, inspect the join to confirm a solid bond.
Mastering this technique is crucial for creating larger or more complex ceramic pieces. A strong joint will withstand firing and give your work durability. Practice with different clays and slips to find the best combination for your projects. Remember, the slip should be of good consistency, not too thin or thick, for successful joining.
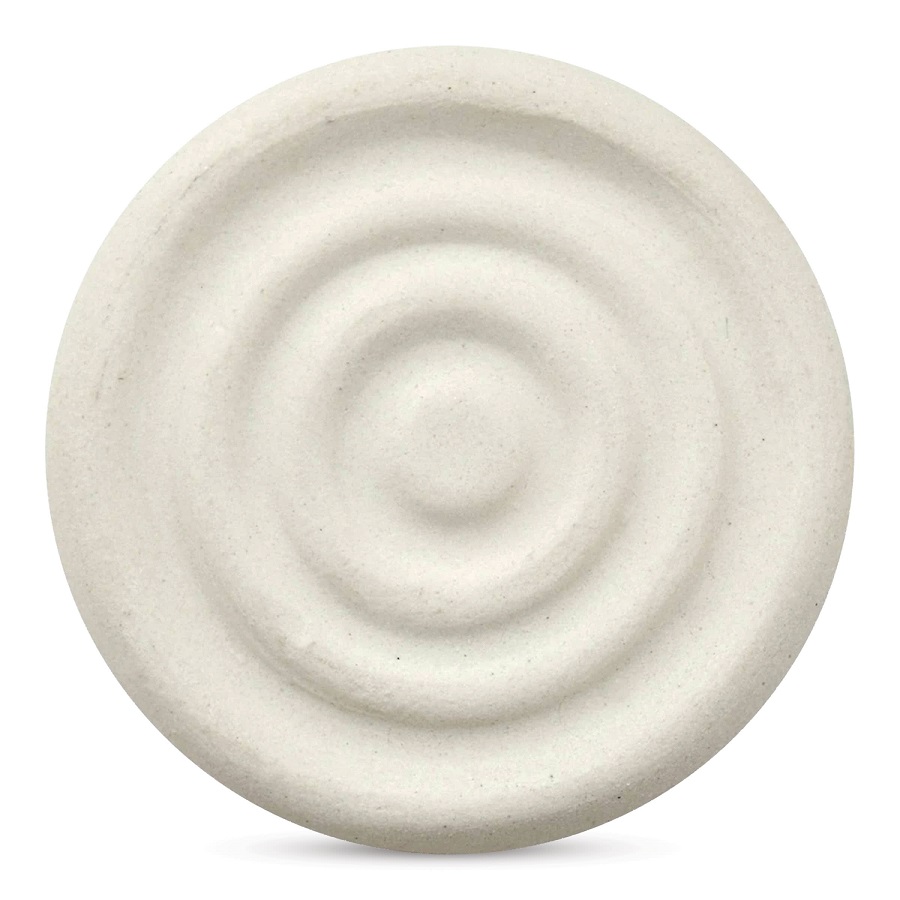
Slip Casting: A Step-by-Step Guide
Slip casting is an advanced technique that requires precision. It’s used to create identical shapes from molds. Follow these simple steps to master slip casting in ceramics:
- Prepare the Molds: Clean the mold and make sure it’s free of debris. A clean mold ensures a smooth cast.
- Mix Slip: Prepare your slip mixture according to previous instructions. It should be creamy and lump-free.
- Pouring the Slip: Fill the mold with slip. Pour steadily to avoid air bubbles.
- Draining Excess Slip: After a set time, pour out excess slip. The remaining slip forms the walls of your piece.
- Allowing to Set: Leave the mold still so the slip can form a hard layer. Be patient, and don’t move the mold.
- Opening the Mold: Once set, carefully separate the mold to release your piece.
- Cleaning: Use a sponge or tool to clean the edges. Make sure the piece looks neat.
- Drying: Place the piece in a safe area to dry completely.
- Firing: Once dry, your piece is ready to be bisque fired. Follow the appropriate firing schedule for your clay type.
Remember to practice. Slip casting might take a few tries before you get perfect results. Be meticulous with each step for the best outcome. This technique can vastly improve efficiency for producing multiple pieces. Enjoy the process and learn from each attempt.
Troubleshooting Common Slip Issues
Even with careful preparation and application, potters may face challenges with slip in ceramics. Here are common slip issues and how to solve them.
- Cracking: If slip applied to a piece cracks, the slip may be too thick or drying too fast. Try thinning the slip or allowing slower drying.
- Curling: Curling occurs when a slip-coated piece bends or warps. To prevent this, ensure even application and consistent drying conditions.
- Bubbling: Bubbles can form if air is trapped in the slip or during application. Stir the slip gently before use and pour slowly to avoid this problem.
- Peeling: Slip that peels off may indicate improper bonding. Score the surface more or apply slip to a drier clay body for better adhesion.
- Discoloration: Color changes can happen if slips are contaminated or improperly mixed. Use clean tools and follow mixing guidelines to maintain consistency.
- Uneven Texture: An inconsistent texture usually means uneven slip application or mixing. Apply evenly and mix thoroughly to avoid this issue.
By identifying and addressing these issues promptly, potters can ensure a smoother, more reliable slip application process. Remember, troubleshooting is as much a part of the ceramic process as creating. Don’t hesitate to experiment and adjust your techniques as needed.
Advanced Slip Techniques for Professional Potters
For professional potters looking to refine their slip techniques, advanced methods can unlock new artistic horizons. Mastering these can make your work stand out and introduce sophisticated effects.
- Colored Slip Layering: Use multiple colored slips in layers for a complex look. The key is to let each layer dry partially before adding the next to avoid blending.
- Slip Inlay Expansion: Expand upon the basic inlay technique by carving deeper and broader channels into the clay. Then, fill them with contrasting slip before cleaning the surface for a bold design.
- Stenciling Over Sgraffito: Combine stenciling with sgraffito. Apply a stencil after the first sgraffito design, adding another dimension to your piece.
- Slip Transfers: Create slip designs on a flat surface, let them dry into leather-hard ‘stickers,’ and then transfer them onto your piece. This allows for precise placement and layering.
- Textural Additions: Mix additives like grog, sand, or crushed glass into your slip for unique textural effects. Test different ratios to achieve the desired finish.
- Slip Trailing with Precision Tools: For intricate slip trailing, use precision applicators like syringes or very fine tip trailers to create detailed imagery or text.
- Engobes: Make engobes with a mix of slip and colorants for a less fluid texture. They provide a matte finish and adhere well to the pottery’s body.
- Mixed Media Approach: Incorporate other materials with slip, like embedding fibers, papers, or even metal foils into the surface before the slip is applied. It creates an unusual, multimedia effect.
Remember, these techniques require practice. Take time to explore the nuances of slip in ceramics. Stay patient and persistent, and your craftsmanship will reach new artistic levels.