Introduction to Bisque Ceramics
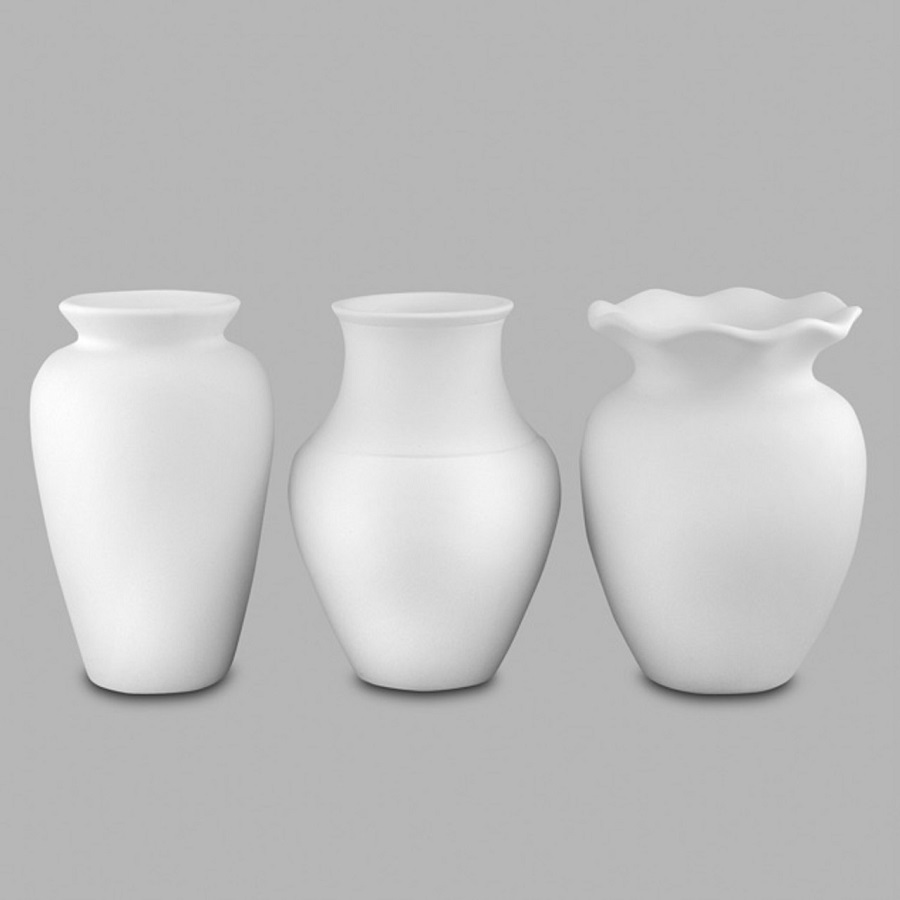
Bisque ceramics are a unique form of pottery. They undergo a specific type of firing, known as ‘bisque firing.’ This initial firing changes greenware, which is unfired clay, into durable bisqueware. The process removes all moisture from the clay. This strengthens the pottery piece and prepares it for glazing or further decoration.
Bisque ceramics are loved for their porous texture. This quality makes them ideal for absorbing glazes. As a beginner, mastering bisque ceramics will involve learning the complete firing cycle. You will also need to understand the properties of clay and various decorating techniques. Starting out, you might feel overwhelmed. But, with practice and patience, you can create beautiful bisque ceramic pieces.
The appeal of bisque ceramics lies not just in their functionality. They offer a canvas for artistic expression. Whether you’re painting, glazing, or carving, your creativity can truly shine. Many practitioners of bisque ceramics enjoy the tactile experience. It connects you directly to the earthy material. The craft is both ancient and forever new, as each piece holds its unique touch. As we delve deeper into the world of bisque ceramics, you’ll learn the essential skills needed. These will help you craft your own bisque ceramic masterpieces. So grab your tools, and let’s get started on this exciting journey.
Essential Tools and Materials for Working with Bisque Ceramics
Working with bisque ceramics requires a specific set of tools and materials. As a beginner, knowing what you need before you start is essential. First, you’ll need clay. It’s the base of all your bisque ceramic projects. Look for high-quality, fine-grain clay that suits bisque firing. Next, you’ll need pottery tools. These may include rolling pins, which help in flattening the clay, and rib tools, ideal for shaping. You should also have carving tools on hand. They let you trim and add fine details.
For the firing process, kilns are indispensable. They heat the clay pieces to the correct temperature for bisque firing. Make sure you have kiln shelves and posts. These allow you to stack your pieces efficiently. Additionally, kiln wash is necessary to protect your kiln’s shelves from glaze drips. Temperature control tools, like pyrometers or cones, are also crucial. They help monitor the firing process to prevent over or under-firing.
In terms of safety, always wear protective gear. This includes heat-resistant gloves and a dust mask. These protect your hands and lungs from heat and clay particles.
Finally, for glazing your bisque ceramics, you will need brushes, sponges, and the glazes themselves. Choose a variety of glazes to experiment with color and texture on your bisqueware.
By gathering these essential tools and materials, you will be well-equipped to start working with bisque ceramics. The right tools will not only make the process smoother but also allow for better craftsmanship and artistic expression. Remember to start simple and expand your toolkit as you gain more experience.
The Basics of Bisque Firing: Understanding the Process
Bisque firing is key in ceramics. It transforms clay into bisqueware, a type of pre-glazed pottery. This step is vital for making ceramics strong and durable. It’s done before the piece is glazed.
Understanding bisque firing starts with the basics. The process follows these steps:
- Prepare Your Greenware: Shape your clay into the desired form. Make sure it’s dry.
- Initial Firing: Place your greenware in the kiln. Slowly heat to a specified temperature, usually between 1730°F and 1940°F (945°C and 1060°C).
- Monitoring: Use a pyrometer or cones to monitor the temperature. It ensures even firing.
- Cooling Phase: After reaching the target temperature, let the kiln cool. Cooling must be gradual to avoid cracking.
- Transformation to Bisqueware: The cooling concludes the process. Your pottery is now bisqueware, ready for glazing.
Proper bisque firing time varies. It depends on the clay type and kiln. Typically, it takes between 8-12 hours.
Remember to always safety check. Wear protective gloves and a dust mask when handling the kiln. Proper ventilation is essential due to fumes during firing.
Bisque firing can be fascinating. It’s the moment clay changes into a canvas for your creativity. With each firing, gain insight into this transformative craft. Starting out, make notes of your firing outcomes. This helps refine your process for consistent results.
Through understanding the basics of bisque firing, you lay the foundation for success in bisque ceramics. Hands-on practice leads to mastering this crucial step. Keep experimenting and learning. That’s how you’ll become proficient in the art of bisque ceramics.
Designing and Decorating Bisqueware
After mastering the basics of bisque firing, the next step is designing and decorating your bisqueware. This stage is where bisque ceramics start to take on character and individual style. As you begin, keep your designs simple. Learn to feel the material and understand its response to different treatments. Here are some tips for getting started:
- Sketch Your Designs: Before applying anything to your bisqueware, sketch your ideas. Use paper to plan the decoration or design layout on your ceramics. This helps you visualize the finished product and avoid errors.
- Underglaze Pencils: These pencils are great for drawing on bisqueware. They come in various colors, allowing you to outline designs or add details easily.
- Stencils and Stamps: Create repeating patterns or add textured designs using stencils and stamps. These tools can make decorating more efficient, especially for beginners.
- Sgraffito: This technique involves scratching through a surface layer to reveal the clay underneath. Use a pointed tool to etch fine lines or patterns into the clay, creating a distinctive contrast.
- Slip Trailing: Slip trailing lets you add raised designs onto your bisqueware. Use a slip trailer, a bottle with a nozzle, to apply liquid clay over the surface in unique patterns.
Remember to let your decorated bisqueware dry completely. Once dry, it’s ready for the glazing process. Each method offers a different result, so experiment to see what works best for your artistic vision. Ensure you practice safety by wearing a dust mask during the decorating stage to protect yourself from inhaling any fine particles. With practice, your designs will become increasingly complex and your skills more refined. Bisque ceramics allow for endless creativity, so let your imagination guide you.
Glazing Techniques for Bisque Ceramics
After creating your bisqueware, it’s time to add color and shine through glazing. Proper glazing techniques can take your bisque ceramics from ordinary to extraordinary. Here’s how you can get started:
- Choose Your Glazes: Pick from a range of glazes. Consider colors and finishes when making your choice.
- Prepare the Glaze: Stir the glaze well to ensure consistency. Some glazes may require thinning with water.
- Apply the Glaze: Use brushes or sponges to apply glaze evenly. You can also dip or pour it over the ceramics.
- Use Wax Resist: Apply wax resist to areas you want free of glaze. It prevents glazing those spots.
- Glaze Firing: Once glazed, the bisqueware goes through another firing. This melts the glaze to form a glassy surface.
- Monitor the Kiln: Keep an eye on temperatures as glaze firing often requires higher heat than bisque firing.
- Cooling Down: Let the kiln cool. It ensures the glaze sets properly and prevents cracking.
- Safety Measures: Always wear gloves and protective eyewear when glazing to avoid skin and eye irritation.
By following these steps, and with steady hands and creative vision, your bisqued pieces will come alive with vibrant glazes. It’s a chance to highlight the texture and shape of your ceramics. Always remember to use the keywords ‘bisque ceramics’ to guide your process. The glazing stage is crucial, so take care, and don’t rush. With practice, your technique will improve, and your bisque ceramics will start to reflect your unique style and artistry.
Common Challenges When Working with Bisque Ceramics and How to Overcome Them
Working with bisque ceramics offers many rewards. Yet, it comes with challenges too. Here we’ll explore common issues and how to solve them.
- Cracking: This can happen during drying or firing. Make sure your clay is evenly thick. Dry it slowly and evenly to prevent cracks.
- Warping: Items may warp if not supported properly. Use kiln shelves and posts to keep pieces stable.
- Glaze Defects: Sometimes glazes bubble or don’t settle right. Always stir glazes well. Apply them evenly with brushes or sponges.
- Adhesion Problems: Glaze might not stick to your bisqueware. Ensure the surface is clean. Avoid touching it with oily hands before glazing.
- Uneven Firing Temperatures: This can lead to under or over-fired pieces. Monitor temperatures with pyrometers or cones to keep heat consistent.
- Color Issues with Glazes: If colors are off, your glaze may need adjustment. Test glazes on small pieces. Note any changes needed for future work.
- Dust and Particles: Small dust particles can ruin the finish. Clean your workspace. Wear a dust mask when handling bisqueware.
Confronting these challenges head-on will enhance your bisque ceramics. Address each issue with patience and practice. Over time, your skills will grow, and setbacks will lessen. Keep learning and exploring the art of bisque ceramics.
Advanced Techniques in Bisque Ceramics for Experienced Crafters
Once you have a solid grasp of the basics, it’s time to explore advanced techniques in bisque ceramics. These methods can add depth and intricacy to your work, setting your pieces apart as truly artisanal creations.
- Layering Glazes: For depth in your colors, try layering different glazes. Apply one, let it dry, then add another.
- Mishima Technique: Carve fine lines into your bisqueware and fill them with contrasting colored slip. Clean the surface to reveal a sharp design.
- Cuerda Seca: Apply wax or a greasy substance to outline designs, then add colored glazes. The wax repels the glaze, creating a ‘dry line’.
- Lustre Overglazes: After your initial glaze firing, apply lustre overglazes for metallic effects. Remember, these need a third firing at a lower temperature.
- Combining Hand Painting and Stencils: Use stencils for base designs, then add hand-painted details for a custom look.
- Image Transfer: Use special transfer papers to apply printed images onto your ceramics before the final glaze firing.
- Multi-Firing Techniques: Some designs may require multiple firings. It allows layers of design to build up without blending or running.
- Salt and Soda Firing: Introduce salt or soda into the kiln during firing for unique surface textures and colors.
- Raku Firing: This is a rapid firing method that results in unpredictable and striking surface patterns.
Embracing these advanced techniques requires patience and practice. But the results can be extraordinary. Your bisque ceramics will not only showcase your skill but also your artistic vision and innovation.
As you venture into these advanced methods, keep the keywords ‘bisque ceramics’ in mind. It will help you stay on track and ensure that every creation is a testament to your dedication and craft.
Caring for and Maintaining Bisque Ceramic Pieces
Caring for bisque ceramics is crucial for their longevity. Whether they are decorative or functional, proper maintenance ensures they last. Here is a concise guide to keeping your bisque ceramic pieces in top shape:
- Cleaning: Gently clean bisque ceramics with a soft, damp cloth. Avoid harsh chemicals that can damage the glaze.
- Storage: Store your bisque ceramic pieces in a dry, cool place. Pile them carefully to prevent chipping.
- Handling: Handle bisque ceramics with care. Their glazed surfaces can be slippery. Ensure your hands are dry and clean when moving them.
- Regular Checks: Examine your bisque ceramics regularly for any cracks or chips. Early detection can help prevent further damage.
- Repairing: If a piece gets damaged, consider professional repair. Some adhesives can fix chips without being noticeable.
- Avoid Sudden Temperature Changes: Don’t expose bisque ceramics to rapid temperature shifts. This can lead to cracking.
- Use Protective Pads: When placing bisque ceramic items on hard surfaces, use felt pads. These prevent scratches and provide extra grip.
Taking care of your bisque ceramics is as important as creating them. By following these tips, you’ll ensure their beauty and function for years to come. Remember, each bisque ceramic piece is not just an object, but a piece of art that requires attention and care.