The Art of Coil Pottery: A Brief Introduction
Coil pottery is an ancient art. To this day, it captivates many. By simply rolling clay into snake-like coils, you can build pots, vases, and more. No fancy equipment needed. It’s hands-on and quite therapeutic. Coil ceramics ideas often start simple. From a coil pinch pot to intricate sculptural forms, the possibilities expand. The coils are layered one atop another and blended. This creates the walls of the piece. Versatility is key here. You can shape the clay coils into almost any form. It’s about creativity and patience. As the coils go up, the shape takes form. With each layer, the creation grows. The process is slow but rewarding. Every coil addition is a chance to refine your vision. Whether a beginner or seasoned artist, coil pottery offers a unique journey. Precision matters. Uneven coils lead to weak structures.
Essential Tools and Materials for Coil Ceramics
To begin coil pottery, gather key tools and materials. Start with clay. Choose air-dry or kiln-fired based on your setup. Next, find a clay cutter to slice even coils. A rolling pin is useful. It flattens clay for uniform thickness. Remember to get blending tools. Rubber ribs or wooden tools work well. They smooth coil joins. To add texture or patterns, grab carving tools. Texture is vital in design. Don’t forget a needle tool. Use it to score the clay before joining coils. This helps ensure a strong bond. For shaping, use your fingers, sponges, or simple molds. Support the form as it grows. Keep a wire cutter handy. It removes finished pieces from the work surface. For the firing process, if applicable, ready a kiln. Choose a suitable glaze to complete your piece. Waterproof and enhances appearance.
Step-by-Step Guide to Creating Your First Coil Pot
Creating your first coil pot is a rewarding experience. Let’s break down the process step by step to ensure your success.
Choose Your Clay
Start by selecting your clay. Air-dry clay works well for beginners, as it doesn’t require a kiln.
Roll Your Coils
Take a piece of clay and roll it between your hands or against a flat surface. Aim for even, snake-like coils.
Begin Building
Once you have enough coils, start stacking them. Place one coil at a time on a base slab of clay.
Blend the Coils Together
Use your fingers or a tool to smooth out where the coils join. This strengthens the pot’s walls.
Shape Your Pot
As you add coils, shape the pot. Use a mold or your hands to guide the form.
Add Texture or Designs
With carving tools, add designs or texture. This step is optional but adds uniqueness to your piece.
Let It Dry
Allow your coil pot to dry thoroughly. If you’re using air-dry clay, this may take a few days.
Final Touches
Once dry, you can paint or seal your pot. This enhances your coil pot’s appearance and durability.
Following these steps will help you create your first coil pot successfully. Remember, coil ceramics ideas develop with practice. Enjoy the process and let your creativity flow!
Exploring Different Coil Techniques and Styles
Delving into the world of coil ceramics, you’ll find a myriad of techniques and styles to experiment with. To dig deeper, let’s explore a few.
Pinch and Roll Technique
This blend of pinch pottery and coil techniques can add uniqueness to your work. Start by forming a pinch pot as a base. Then, add coils to build the walls. With each layer, pinch the clay. This merges the coil with the base, creating a seamless transition.
Stacking and Smoothing
The classic coil method involves stacking coils atop one another. Then, blend the coils carefully using fingers or tools. This technique produces smooth-walled ceramics with uniformity.
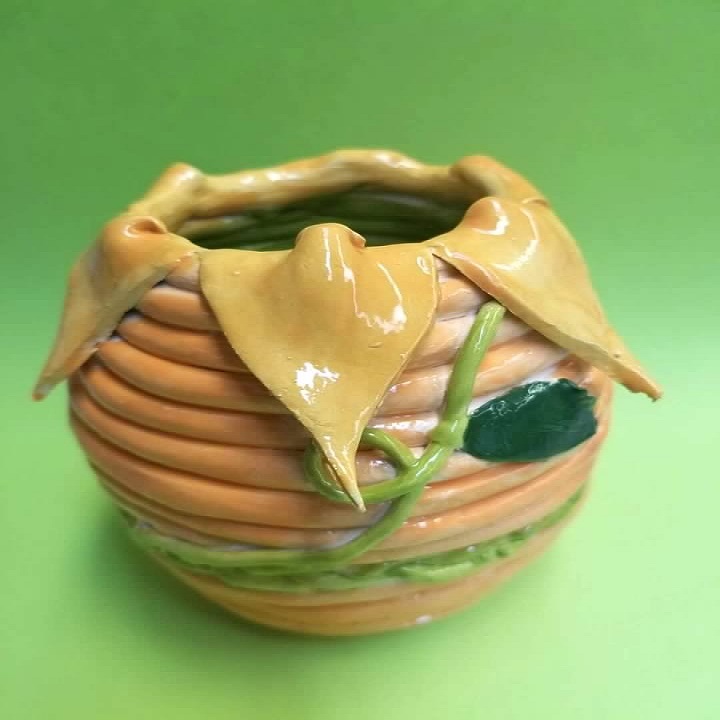
Textured Coils
If you aim for character-rich pieces, focus on texture. Create dimples, patterns, or even leave the coil marks visible for a rustic look. Textured coils add depth and a tactile quality to your ceramics.
Asymmetric and Freeform Styles
Break free from symmetry. Allow the coils to meander and shape your ceramic piece into an organic form. Freeform styles capture a fluid, natural aesthetic that’s eye-catching.
Decorative Techniques
Include decorative techniques such as slipping, carving, or adding sprigs. Slipping involves applying a thin clay layer to decorate or strengthen joints. Carving enhances details with fine lines or patterns. Sprigs are small, molded clay pieces attached to a pot for decoration.
Each technique, from pinch and roll to freeform styles, presents a chance to hone your skills. Remember, consistency is key for stable structures. Yet, don’t shy away from integrating textures and decorations. They add life and personality to your coil ceramics ideas. Keep practicing. Over time, your personal style will shine through your work.
Creative Coil Ceramic Projects to Try
Coil ceramics ideas abound for creative minds seeking to experiment. It’s time to put those skills you’ve learned to good use. Here are some unique projects to try that blend artistry and craftsmanship.
Create a Set of Nested Bowls
Start small and scale up. Make a series of bowls that fit within each other. It’s perfect for saving space and showcases your ability to create consistent forms.
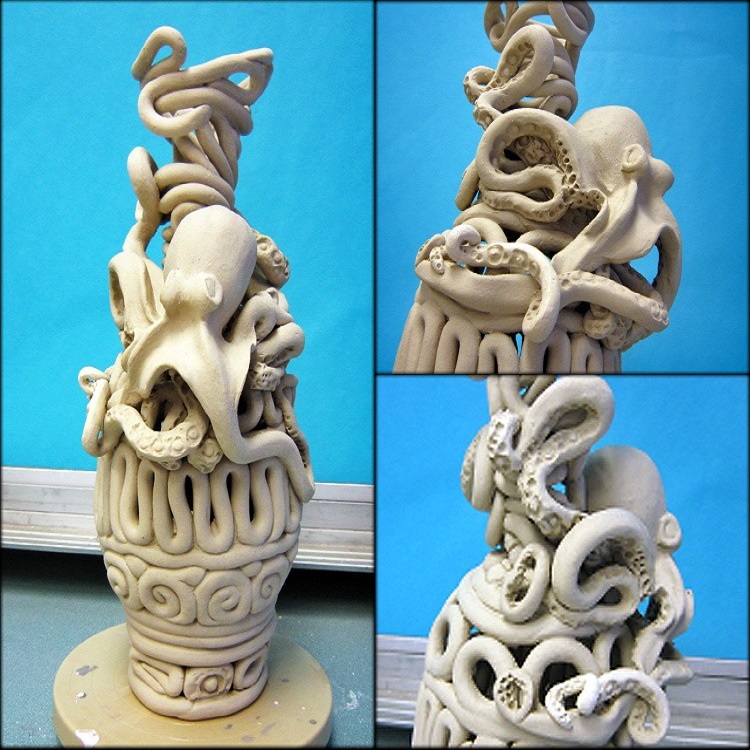
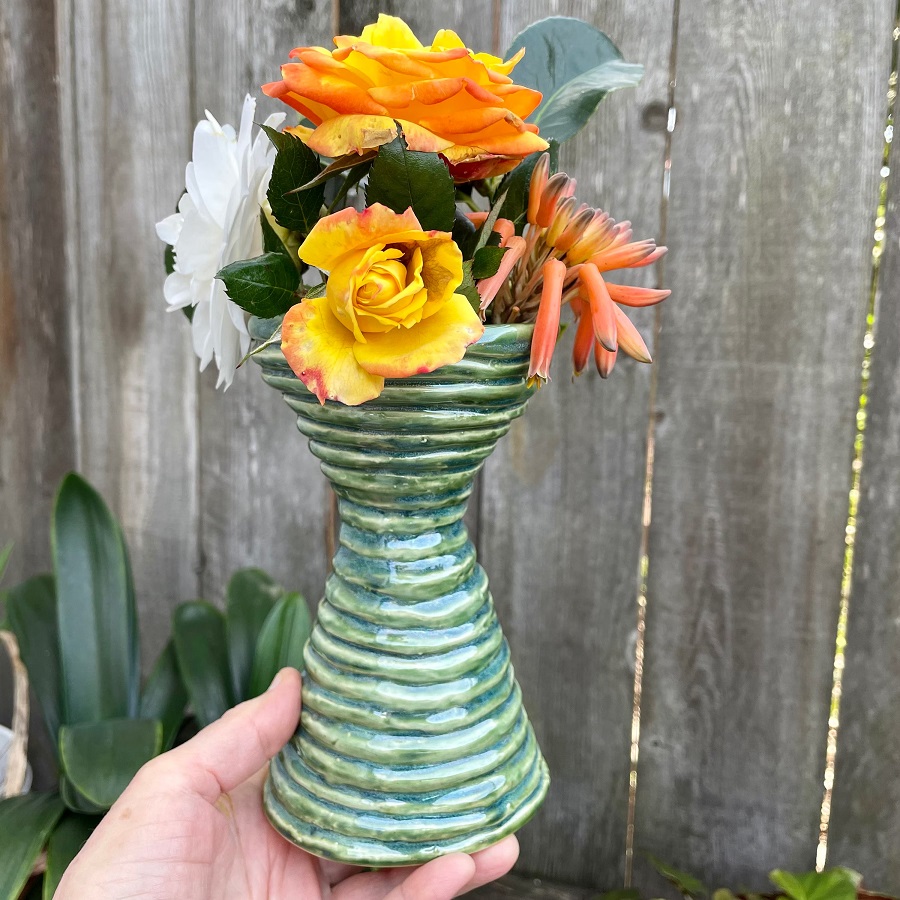
Design an Intricate Vase
Challenge yourself by crafting a vase with a detailed design. Use textured coils and a variety of techniques for a show-stopping piece.
Construct a Coil Ceramic Mural
Think beyond the potter’s wheel. Build a wall-mounted ceramic mural. Piece together various coil shapes and sizes to form a stunning visual collage.
Fashion a Coil Ceramic Lamp Base
Light up a room with a coil ceramic lamp base. The coils can form the structure, offering both function and artistic value.
Assemble a Garden Sculpture
Move your work outdoors. Design a weather-resistant coil ceramic sculpture for the garden. This could be a practical planter or a purely ornamental piece.
Crafting a Ceramic Coil Jewelry Holder
Create a useful yet decorative jewelry holder. Shape small dishes and posts to hold various jewelry pieces.
Remember to weave in your unique style into each project. Try combining different techniques or developing a distinctive texture. With each project you undertake, your coil ceramics ideas and skills will flourish.
Tips for Perfecting Your Coil Building Skills
To improve your coil ceramics ideas and skills, consider these practical tips. Each one will help you create sturdier, more attractive ceramic pieces.
Stay Consistent with Coil Thickness
One key to coil pottery is uniform coil thickness. Even coils provide strength and visual harmony. Use a rolling pin or coil roller. Measure coils often to check their consistency.
Keep the Clay Moist
Don’t let your clay dry out as you work. Dried clay can crack and weaken your structure. Spray a fine mist of water or cover with a damp cloth when needed.
Work Slowly and Patiently
Rushing can lead to mistakes. Take your time when rolling coils, smoothing seams, and shaping your creation.
Practice Different Joining Techniques
A strong bond between coils is a must. Learn to score and slip. Try different blending tools to find what feels right.
Support the Inside Structure
As your piece grows taller, it might become unstable. Use internal supports or allow lower sections to firm up before adding more coils.
Refine the Finished Form
After the basic shape is done, step back and review. Smooth bumps, adjust curves, and perfect the overall form with careful attention.
Sharpen Your Trimming Skills
Once leather-hard, trim the base and edges of your piece for a polished look. Use a sharp tool for precision.
These tips will help you build better coil pottery. Remember, practice is essential. Enjoy the process and learn from every piece you create.
Finishing Techniques for Coil Ceramics
Once you’ve shaped and molded your coil ceramic piece, it’s time to think about finishing. Implementing proper finishing techniques is critical to ensure that your creations not only look polished but are also durable. Here are key methods to complete your coil ceramics projects.
Dry Your Creation Evenly
Ensure your work dries evenly to avoid cracks. Turn the piece regularly to expose all sides to air. This prevents warping and ensures structural integrity.
Smooth the Surface
Use a damp sponge to smooth the outer surface of your piece. A smooth finish is crucial for applying glaze or paint evenly later on.
Bisque Firing
If you’re using kiln-fired clay, bisque firing is the next step. It hardens the clay and prepares the surface for glazing.
Glazing Techniques
Select a glaze that complements your piece. Apply it carefully for a uniform coat. You can dip, pour, or brush on the glaze. Multiple layers may be required for depth of color.
Final Firing
The final firing sets the glaze and vitrifies the clay. This makes the piece strong and waterproof. Monitor the kiln temperature closely to avoid mishaps.
Cold Finishing
Not all finishing involves heat. Cold finishing can include painting with acrylics or sealing with a clear lacquer. This is an ideal option for air-dry clays.
Employing these techniques will elevate the quality of your coil ceramics ideas and finished products. Every step, from drying to the final touches, impacts the aesthetic and longevity of your craft. Take your time, be methodical, and you’ll see your skills and results improve with each project.
Inspirational Ideas from Contemporary Ceramic Artists
Gleaning inspiration from contemporary ceramic artists is a fantastic way to evolve your coil ceramics ideas. Many artists today push the boundaries of traditional techniques, resulting in stunning and innovative creations. Seeing how these artists can challenge the norms of coil pottery will invigorate your approach to your projects.
Study the Works of Masters
Begin by exploring the portfolios of well-known ceramicists. Marvel at how they manipulate clay coils into breathtaking forms. Their works often showcase a mastery of texture, form, and finishing techniques. Analyze their use of rhythm and flow in each piece.
Embrace Modern Styles
Contemporary artists might blend traditional coil techniques with modern designs. They experiment with asymmetry, bold colors, and unexpected textures. Draw on these elements to infuse your work with a modern twist.
Learn From Their Process
Many artists share their journey through blogs, videos, or workshops. Delve into their process. Learn how they envision, plan, and execute their pieces from start to finish. This insight can offer ways to streamline your workflow.
Push Your Limits with New Techniques
Use their experimentation as a challenge. Try methods that are new to you. You may blend different clay bodies or incorporate unusual materials. These explorations can lead to unique coil ceramics ideas of your own.
Attend Exhibitions and Workshops
Lastly, attend local exhibitions or workshops led by professional ceramicists. Engaging with the community and participating in live demonstrations can be hugely influential. It’s also an excellent opportunity to ask questions and gather firsthand tips.
In sum, let the creativity of contemporary ceramic artists fuel your love for coil ceramics. Their ingenuity can lead you to new techniques, aesthetics, and approaches to your work that you may never have considered. Embrace their influence to enhance and diversify your own coil ceramics ideas. Be bold and see where your creativity takes you!