The Origins of Pinch Pot Ceramics
Pinch pot ceramics are a form of hand-built pottery. Artisans have used this technique for thousands of years. Many believe the method dates back to the earliest civilizations. It is one of the simplest ways to shape clay. Its history spans across different cultures and continents.
Before the potter’s wheel, people would form pots in their hands. They would pinch the clay to create various shapes. This method was ideal for making bowls, cups, and small pots. Ancient pinch pots often held food, water, and even acted as cooking vessels. Though simple, pinch pot ceramics demonstrate the innovation of early artisans.
In some cultures, these pots carried not just practical uses but also cultural significance. Tribes would craft them for rituals and offerings. They were part of both daily life and spiritual practices. Pinch pots connected communities and expressed their artistic skills.
Today, pinch pot ceramics blend tradition with modern creativity. They are now a popular craft for both beginners and experienced potters. People appreciate their organic look and the personal touch they carry. As we explore and create with this ancient method, we honor the hands that shaped clay before us.
Essential Materials for Creating Pinch Pots
Before diving into the craft of pinch pot ceramics, gather some essential materials. You only need a few items to start, making this a highly accessible craft for newcomers. Here is what you’ll need:
- Clay: Choose a high-quality clay that is soft and pliable yet holds its shape well once formed. Earthenware, stoneware, or a clay blend designed for hand-building is ideal.
- Work Surface: A sturdy table or a board to work on will do. Cover your surface with canvas or a non-stick mat to prevent the clay from sticking.
- Water: Keep a small bowl of water nearby. You will use it to smooth the surface of your pinch pots and to keep the clay moist.
- Tools: While hands are your primary tools, a few simple tools like wooden ribs, loop tools, and needle tools can help refine the shape and add details.
- Sponge: A slightly damp sponge helps in smoothing the surface of your clay and in cleaning your hands.
- Towels or Cloths: Have these on hand for wiping down surfaces and drying your hands.
With these basic materials, you’re ready to begin your journey with pinch pot ceramics. Embrace the simplicity of this ancient craft and enjoy the process of creating something unique with your own two hands.
Step-by-Step Guide to Making Your First Pinch Pot
Making your first pinch pot ceramics can be an exciting and rewarding experience. Let’s go through the process step by step to help you create a beautiful handmade piece. Remember to have all your essential materials from our previous section ready before you start.
- Prepare Your Clay: Begin by kneading your clay to remove air bubbles. This will make the clay more malleable and prevent cracking.
- Shape the Clay Ball: Roll the clay into a smooth ball, ideally the size of an orange. This will be the foundation of your pinch pot.
- Create the Opening: Press your thumb into the center of the ball to create an opening. Be careful not to push all the way through.
- Form the Walls: With your thumb in the center, use your other hand to pinch the clay. Work your way around the ball, thinning the walls to an even thickness.
- Smooth the Surface: Using a damp sponge, gently smooth the surface of your pot. This will help remove fingerprints and give a clean finish.
- Refine the Shape: If needed, use your tools to refine the shape and smooth out any irregularities.
- Let the Pot Dry: Set your pot aside to dry on a non-stick surface or a piece of cloth. Wait until it’s completely dry before firing.
- Fire the Pot: Follow the specific firing instructions for your type of clay. Usually, this involves a kiln, but alternative methods are available.
- Inspect Your Work: Once cooled, inspect your pot for cracks or imperfections. Sometimes, a second firing may be necessary.
- Celebrate Your Creation: Congratulations! You’ve just made your first pinch pot. Take pride in your work and the skills you’ve developed.
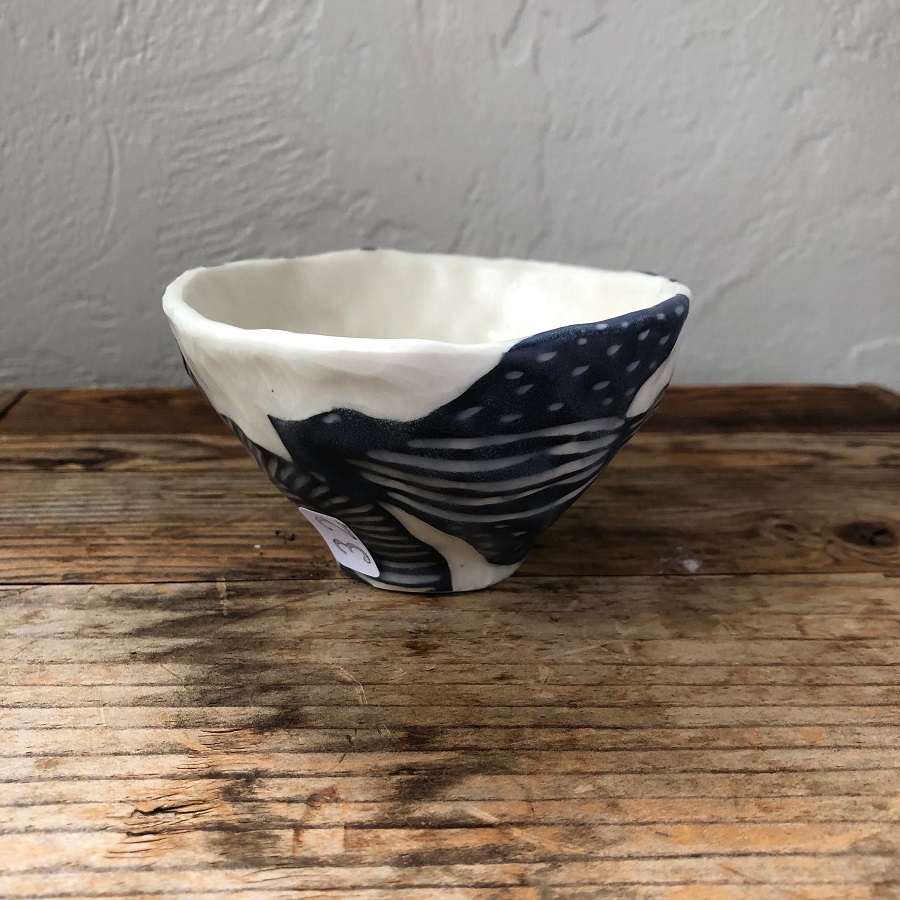
Techniques to Enhance Your Pinch Pot Designs
Improving your pinch pot designs can be fun and fulfilling. As you get more comfortable with the basics, try these techniques to add character to your pots:
- Pattern Creation: Press various items like leaves, lace, or stamps into the clay to create unique patterns.
- Texture Tools: Use tools like forks, combs, or toothpicks to make textures on the pot surface.
- Adding Coils: Roll extra clay into thin coils and apply them to the pot for more intricate designs.
- Joining Pieces: Create multiple pots or clay pieces and join them to create more complex forms.
- Carving Details: After the basic shape dries slightly, carve into the clay with needle tools for detailed designs.
- Experiment with Shape: Go beyond the traditional round form. Pinch the clay to create square, oval, or abstract shapes.
With these techniques, your pinch pot ceramics will gain a new level of sophistication. Remember to let your creativity flow, and don’t be afraid to try new ideas. Each piece you create should be a reflection of your personal style, adding pride to your pottery collection.
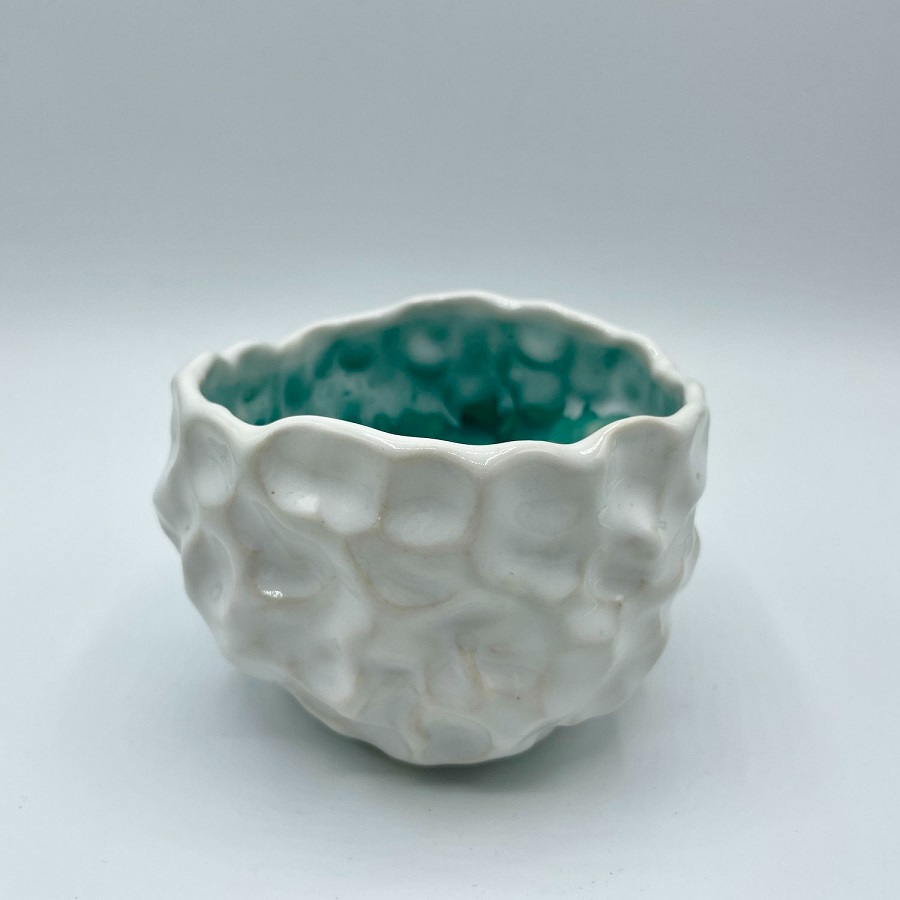
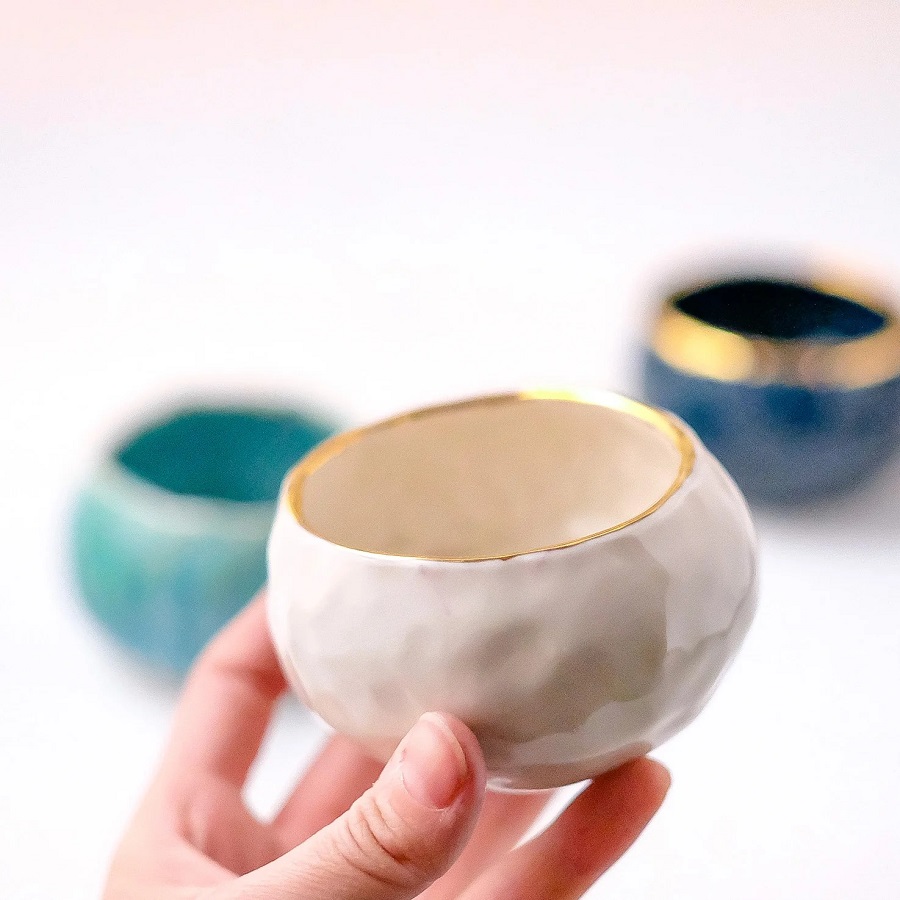
Glazing and Firing: Finishing Your Pinch Pots
Once you’ve shaped and smoothed your pinch pot ceramics, glazing and firing are the next steps. These processes give your pot durability and a finished look. Here’s what to do.
Choose Your Glaze
Glaze acts as a sealant and provides color or texture to your pinch pots. Select a glaze that’s compatible with your clay body. Test on a small piece before applying to your entire pot.
Apply the Glaze
Use a brush to apply the glaze evenly. Be careful around edges and details. Let it dry as per instructions. Usually, it’s best to apply two to three coats.
Prepare for Firing
Once glazed, it’s time to fire your pot. Ensure your kiln is clean. Place your pot inside on stilts to prevent sticking.
Firing Process
Follow your clay’s firing schedule. Fire up the kiln slowly. This might take several hours. The temperature usually goes up to about 1800°F to 2200°F for bisque firing. Then, let the kiln cool completely.
Inspect After Firing
After cooling, inspect your pot. Look for any glaze defects or imperfections. Sometimes a pot might need to go through a second firing.
Final Touches
Once satisfied, your pinch pot is complete! It’s now ready to use or display. Remember to note down any lessons learned for next time.
By mastering glazing and firing, you add life to your pinch pots. These finishing touches are as crucial as the initial shaping. They protect and beautify your creation. Happy potting!
Creative Ideas and Inspirations for Pinch Pot Projects
Creative projects infused with imaginative flair will help evolve your pinch pot ceramics journey. Whether you’re an amateur or a seasoned potter, these ideas are sure to inspire:
- Personalized Giftware: Craft pinch pots as unique gifts. Customize them with the recipient’s initials or favorite colors.
- Garden Ornaments: Create pinch pots in whimsical shapes to brighten up your garden space.
- Desk Organizers: Your pots can hold more than just plants. Design them to organize pencils, clips, or business cards.
- Kitchenware: Make holders for salt, pepper, or spices. These practical items add a rustic touch to any kitchen.
- Aromatherapy Burners: Carve out spaces to fit tea lights and add essential oils on top. Use as a soothing aroma source.
- Wall Hangings: Attach a string to small pinch pots and hang them as decorative pieces on walls.
- Water Features: Combine pots with a pump to create a simple, relaxing tabletop fountain.
These projects not only refine your skills but also extend the functionality of pinch pot ceramics. Get crafty and let your clay creations be a testament to your unbound creativity.
Caring for Your Pinch Pot Ceramics
Taking care of your pinch pot ceramics is key to their longevity. Even though they might seem sturdy, they need proper handling. Here are tips to ensure your pottery lasts for many years.
Handling with Care
Always lift your pinch pots with both hands. Avoid holding by the rim or any decorative extensions. This prevents stress on weaker areas.
Cleaning Your Pottery
Wash pinch pots with a soft sponge and mild soap. Do not use abrasive cleaners. They can scratch or wear down the glaze.
Storing Properly
Store pots in a safe place where they won’t tip over. Stack them with care, using padding between each if necessary.
Avoiding Extremes
Keep your ceramics away from extreme temperatures. Do not use them in ovens or expose them to freezing conditions. Sudden changes in temperature can cause cracking.
Regular Inspections
Check regularly for any cracks or chips. Small issues can lead to bigger problems if left unattended.
Repairing Damage
If a pot gets damaged, there are ways to repair it. Use adhesive designed for ceramics, following product instructions closely.
By following these care tips, your pinch pot ceramics will stay beautiful and functional. Handle them gently, clean correctly, and store with thought. This way, you’ll enjoy your handmade pieces for a very long time.
Joining the Ceramic Community: Workshops, Classes, and Resources
As you delve deeper into the world of pinch pot ceramics, engaging with the ceramic community can be greatly beneficial. Workshops, classes, and various resources can enhance your skills and inspire your creativity. Here’s how you can get involved:
Enroll in Workshops
Workshops provide hands-on experience with guidance from expert potters. They often focus on specific techniques or projects. Look for local art centers or pottery studios offering such sessions.
Take Ceramic Classes
Regular classes can offer structured learning and more in-depth knowledge. These classes might range from beginner to advanced levels. Community colleges, art schools, or special ceramic studios are good places to start.
Join Pottery Groups or Clubs
Connecting with fellow enthusiasts can provide support and motivation. Pottery groups or clubs allow for sharing ideas, tools, and even participating in group projects.
Attend Pottery Fairs and Exhibitions
Exhibitions and fairs showcase a variety of work. They are excellent for seeing new trends, meeting artists, and even purchasing unique pottery pieces.
Follow Online Tutorials and Forums
The internet is a treasure trove of information. Online tutorials can help you learn at your own pace, and forums are a great place to ask questions and get advice.
Use Social Media
Platforms like Instagram and Pinterest are full of visual inspiration and community engagement. Follow ceramic artists, share your work, and join the global pottery conversation.
Read Ceramic Books and Magazines
Printed materials such as books and magazines can offer detailed insights into techniques and the history of pottery. They also feature interviews with seasoned potters.
By integrating into the ceramic community, you not only advance your pinch pot ceramics practice but also join a supportive network of creators. Participating in workshops, classes, and leveraging various resources will boost your knowledge and open up new possibilities for this timeless craft.