Introduction to Ceramics and Clay
Ceramics clay, a versatile and ancient material, sparks creativity and connects us to the past. Clay’s journey from earth to art has enthralled people for thousands of years. In this section, we delve into what ceramics clay is and what makes it so special. Clay, essentially, comes from the earth. It is a natural substance that transforms through water, shaping, and heat. Many cultures have left their marks on history through their unique clay works. Today, working with ceramics clay offers a blend of tradition, innovation, and personal expression.
Ceramics clay has distinct properties that make it ideal for crafting. These properties include malleability, durability once fired, and a unique tactile experience. For beginners, understanding these characteristics is key to mastering the craft. Crafting with clay goes beyond just creating objects. It’s about understanding the material’s response to touch and its behavior under various conditions. As a beginner, you’ll learn to recognize the stages of clay: from plastic to leather-hard to bone dry. Each stage demands different handling techniques. Working with ceramics clay evokes a sense of wonder and discovery. As you shape and mould, you learn about the material and yourself. Your first touch of ceramics clay is the start of a transformative process—a dance between imagination and creation. Let’s begin our journey into the world of ceramics clay, and uncover the skills needed to bring your visions to life.
Different Types of Ceramics Clay
As a beginner in the world of ceramic arts, knowing the different types of ceramics clay is crucial. Various clays have different characteristics and uses, and choosing the right one can make a significant difference in your projects. Here are the main types you should be familiar with:
Earthenware Clay
Earthenware clay is one of the oldest and most commonly used types of ceramics clay. It’s known for its rich, red or orange tones, which come from the iron content in the clay. Earthenware is easy to work with and is ideal for hand-building, sculpting, and pressing techniques. It fires at a lower temperature than other types of clay, generally between 1,000°C and 1,150°C.
Stoneware Clay
Stoneware clay is incredibly durable and is often used for functional items like dishes and stoneware pottery. It comes in a variety of colors, depending on the minerals present in the mix. Stoneware is less porous than earthenware once fired and is generally fired at temperatures between 1,200°C and 1,300°C.
Porcelain Clay
Porcelain clay, known for its delicate and smooth qualities, is the most refined type of ceramics clay. It can be a bit challenging for beginners due to its fineness and the need for precision in working with it. Porcelain is fired at high temperatures, usually above 1,300°C, which gives it a translucent and glass-like finish.
Ball Clay
Ball clay is a highly plastic type of ceramics clay that retains its shape well and is good for intricate work. However, it is rarely used alone due to its high shrinkage rate when drying and firing. It’s typically mixed with other clays to improve their plasticity and workability.
Understanding the properties of each type of ceramics clay will help you choose the right one for your creative endeavor. Consider factors like the desired finish, the method you intend to use, and the final product’s functionality when selecting your clay.

Essential Tools for Working with Ceramics Clay
Working with ceramics clay can be deeply satisfying. Yet, the right tools are what truly enable the transformation of a simple lump of earth into a piece of art. Whether you are hand-building, throwing pots on a wheel, or sculpting, having the proper equipment can enhance your experience and the quality of your work. Here is a list of essential tools that every beginner working with ceramics clay should consider:
Basic Tool Kit
A basic tool kit often includes wire clay cutters, ribs (for shaping and smoothing), needle tools (for cutting and scoring), loop or ribbon tools (for trimming and carving), and sponges (for wetting and smoothing clay). These are the foundational items that will help you manipulate and refine your creations.
Work Surface
A sturdy work surface, like a heavy wooden table or a canvas-covered board, is essential for rolling out slabs of clay, hand-building, and sculpting. A non-stick surface helps prevent the clay from adhering to the table and makes cleanup easier.
Rolling Tools
A rolling pin or slab roller is vital for flattening your clay to an even thickness. For textured effects, textured rollers or stamps can imprint patterns into your clay slab.
Cutting Tools
Clay knives or fettling knives are necessary for cutting and carving clay. For precise works, exacto knives can be beneficial as well.
Brushes and Applicators
Brushes are needed for applying water, slip for joining pieces, and glazes for coloring and finishing your pottery. Applicators can range from sponges to bulb syringes, depending on the desired effect.
Pottery Wheel
For those interested in wheel-throwing, a pottery wheel is a significant investment. Although not a ‘tool’ in the traditional sense, it’s an indispensable piece of equipment for creating symmetrical works.
Kiln
A kiln is required for firing your clay pieces. Although access to a kiln may be through a shared studio for many beginners, understanding its importance is crucial for the ceramics process.
Each tool has a specific purpose, and learning how to use them will help you master the art of ceramics clay. As you progress, you may discover additional tools that cater to your unique style and techniques. Start with these essentials, and you’ll be well on your way to creating beautiful ceramic pieces.
Techniques for Preparing and Conditioning Clay
Proper preparation and conditioning of ceramics clay are critical for successful projects. Here’s how to get your clay ready for use:
Wedging the Clay
Wedging is the process of kneading clay to remove air bubbles and create a uniform texture. Place your clay on a canvas or wooden surface. Press and fold the clay, using your body weight. Rotate the clay and repeat this process for about 5-7 minutes. This technique helps prevent cracking and warping after firing.
Slaking Down Dry Clay
If you have dry or hard clay, slaking it down is necessary. Break the dry clay into small pieces and cover it with water. Let it sit until the clay absorbs the water and turns into a slushy consistency. Drain excess water, then wedge the clay to even out its moisture.
Drying Out Too-Wet Clay
Clay that’s too wet can be difficult to work with. Spread the clay on a plaster batt or a dry, absorbent surface. The plaster or absorbent material will pull moisture from the clay. Check consistency regularly and wedge it once it reaches a workable state.
Aging the Clay
Some artists prefer to age their clay, believing it improves plasticity. To age clay, store it in a cool, damp place for a few weeks. Ensure it’s wrapped or covered to prevent drying. When ready, wedge the clay to refresh its consistency.
Each step in the preparation and conditioning process ensures the ceramics clay is ready for forming and shaping. Remember, patience is key in working with clay—rushing can lead to issues later in the crafting process.
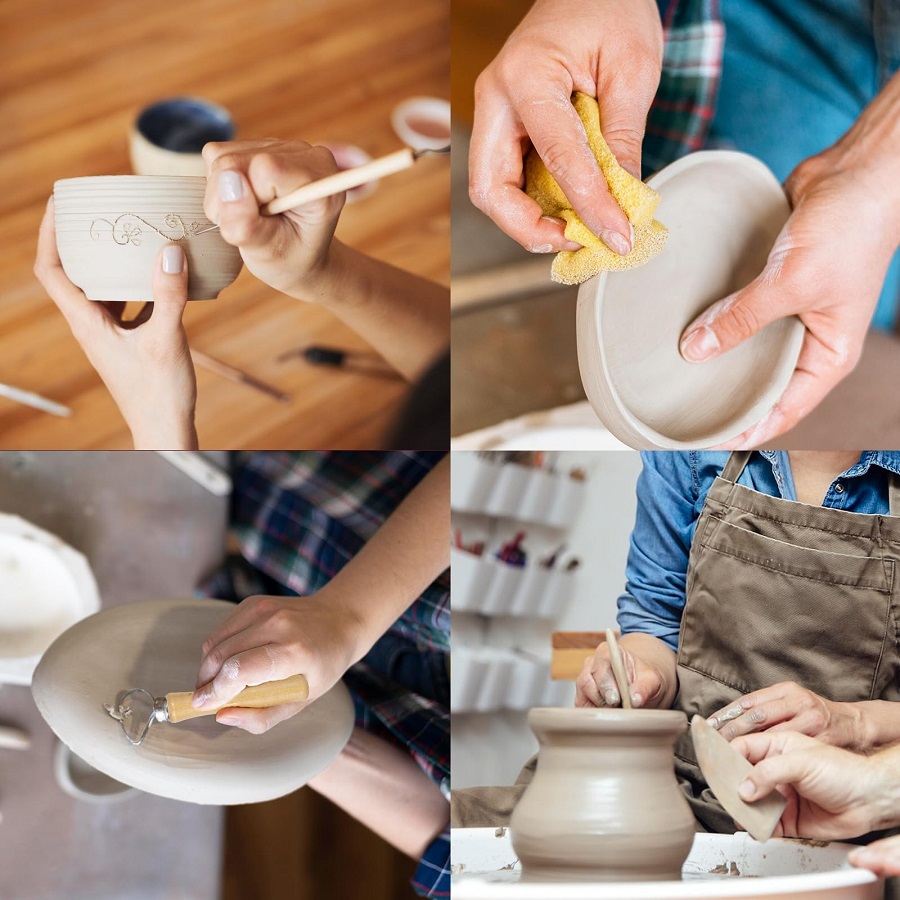
Basic Hand-Building Techniques
Once you have prepared and conditioned your ceramics clay, it’s time to shape it into something special. Hand-building is a basic forming method every beginner should learn. It includes several straightforward techniques that don’t require complex tools or equipment. Here’s what you need to know to get started:
Pinch Method
The pinch method is as simple as it sounds. Start with a ball of clay. Press your thumb into the center. Gently pinch the walls while rotating the ball. This action creates bowls, cups, or pots. Keep the thickness even to avoid cracks.
Coil Building
Coils are long, snake-like rolls of clay. Layer them to build the walls of a vessel. Blend the coils together on the inside and outside to strengthen the structure. This technique is great for creating textured surfaces.
Slab Construction
Roll out a flat piece of clay using a rolling pin. Cut it into shapes and join them at the edges. Use slip as an adhesive. This method works well for angular forms like boxes or platters.
As you explore these techniques, remember to keep the design simple. Focus on learning how the clay reacts. Make sure your pieces are smooth and connected well. The joy of hand-building lies in the direct contact with the clay. It allows for a unique expression of creativity. Embrace the imperfections, as they add character to your work.
Introduction to the Pottery Wheel
The pottery wheel is a captivating tool for ceramists, offering the ability to create symmetrical and rounded forms. Transitioning from hand-building techniques to the wheel opens up a new realm of possibilities for ceramics clay crafting. As a beginner, the pottery wheel can be intimidating, but it is a skill worth mastering due to the precision and uniformity it provides.
Getting Started with the Pottery Wheel
Starting with a pottery wheel involves a few initial steps. Selecting the right wheel is crucial; there are various types, from manual kick wheels to electric ones. Beginners might find an electric wheel easier to use, as it offers consistent speed control. Your introduction to the wheel will begin with centering clay, a fundamental step whereby the clay is placed at the center of the wheel head and is made symmetrical.
After centering, you will learn to open the ball of clay. This involves pressing down in the center to create a well. The next stage is drawing the clay up and out to form the walls of your pot or bowl. This action requires a steady hand and an eye for evenness to ensure the walls are the same thickness.
Common Challenges on the Pottery Wheel
As with any new skill, you’ll face challenges with the pottery wheel. These might include clay that’s too wet, leading to collapses, or accidental distortions when shaping. Overcoming these challenges involves practice and a delicate balance between hands and the wheel’s speed.
Key to mastering the wheel is patience and persistent effort. You’ll often need to start over, but each attempt brings more understanding of the clay’s behavior on the wheel. Embrace this learning curve as a journey toward refining your pottery skills.
With the use of a pottery wheel, your designs are not just formed; they are brought to life as functional art. From vases and bowls to intricate sculptural pieces, the wheel offers a breadth of creative potential. Mastery of both hand-building and wheel-throwing will make you a versatile and skilled ceramic artist, capable of tackling numerous projects with confidence.
Glazing and Firing: The Final Touches
After shaping your ceramics clay, glazing and firing are vital steps. These processes transform your artwork into a finished product, enhancing durability and aesthetics.
Understanding Glazing
Glazing involves applying a glass-like coating to your clay piece. It serves multiple purposes: it waterproofs your piece, adds color, and affects texture. Start by choosing a glaze that complements your work. Brushes or dipping methods help apply glaze evenly. Ensure the glaze is smooth and covers all surfaces. Let the glaze dry before firing.
The Firing Process
Firing is the heating process that hardens ceramic clay. It happens in two stages. The first, bisque firing, hardens the clay. It’s done at lower temperatures and sets your piece for glazing. The second, glaze firing, melts the glaze onto the piece. This requires higher temperatures. Timing and temperature control are crucial. They vary based on the type of clay and glaze used.
Safety Precautions
Firing can be dangerous. Always follow safety instructions for your kiln. Use protective gear, ensure good ventilation, and never leave a kiln unattended while in use.
Inspecting the Resultsa
After firing, inspect your piece for any defects. Look for an even glaze coating and absence of cracks. Sometimes, you may need to sand rough spots or reglaze and refire.
Glazing and firing can be complex, but they are rewarding. They seal your artistic efforts, making your ceramic creations lasting treasures. Practice these techniques, and you’ll soon master the final touches to your clay projects.
Tips for Preserving and Maintaining Your Clay Projects
After pouring your heart into making ceramics clay artwork, it’s crucial to know how to preserve and maintain them. Here are some useful tips to ensure your creations stand the test of time.
Handle With Care
Always use both hands when picking up your pottery. Avoid grabbing fragile parts, like handles or rims. Be gentle to prevent chips or cracks.
Cleaning Methods
Dust your pieces with a soft, dry cloth. For deeper cleaning, use water and mild soap. Avoid harsh chemicals or abrasive scrubbers that can damage glaze and clay.
Storage Solutions
Store pieces in a cool, dry place. Stack them with care, using padding between each piece to avoid scratches. Don’t overcrowd shelves to prevent accidents.
Avoid Extremes
Keep your pottery away from extreme temperatures. Sudden changes can cause cracking. This means no oven use or leaving pieces outside in freezing weather.
Repairing Breaks
If a piece breaks, use a food-safe adhesive for repairs. Apply glue to clean, dry edges. Press firmly, then wipe away any excess. Allow ample time to dry.
By following these simple tips, your ceramics clay projects will stay beautiful and intact for years to come. Remember, regular care and gentle handling are keys to longevity.