Introduction to Coil Pot Ceramics
Coil pot ceramics are a timeless art form. Crafters shape clay into rope-like strands, called coils. They stack and join them to create vessels of all sizes. This technique is one of the earliest forms of pottery making. It offers both simplicity and versatility in design and creation.
Beginners and seasoned artists use coil methods to produce functional and decorative pieces. The process begins with soft clay. You form it into long coils by rolling. These are then layered and smoothed to build the pot’s walls. Patience and a steady hand are key in coil pot construction.
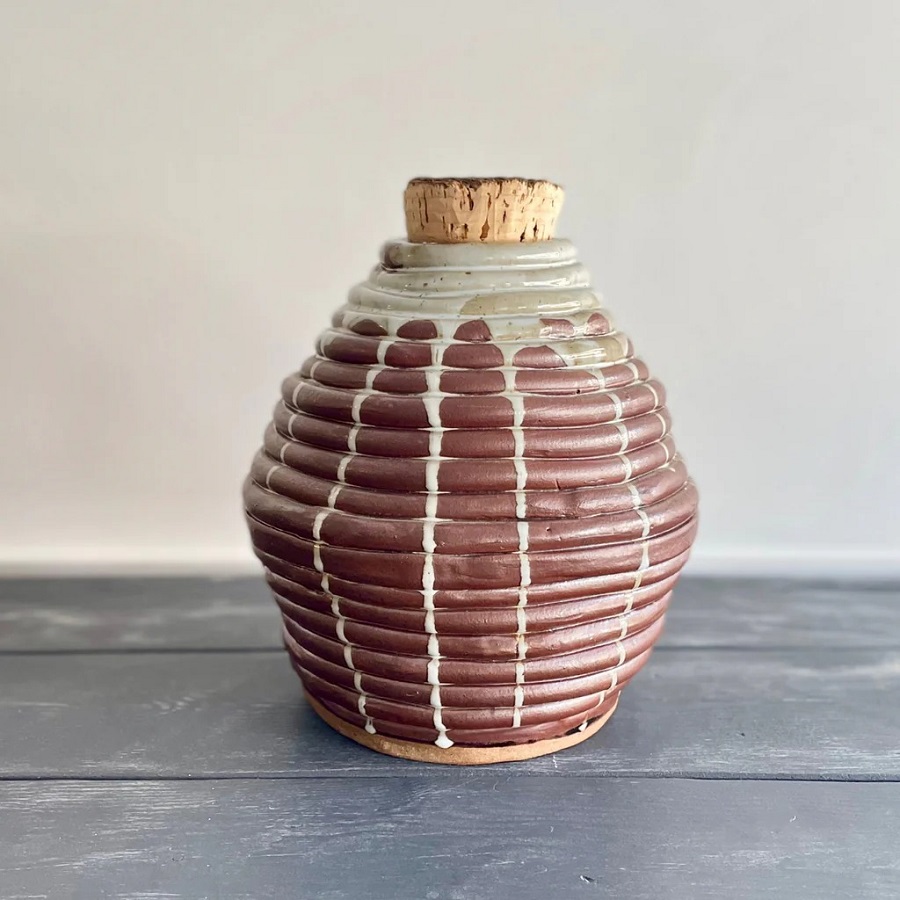
The beauty of coil pottery lies in its hand-built nature. Each coil pot has its own unique texture and character. With coil pot ceramics, there are endless possibilities for creativity. You can experiment with various shapes, sizes, and decorative techniques.
In upcoming sections, we will delve into the rich history of coil pot making. We’ll cover the essential tools and materials needed. We’ll also explore basic techniques, design tips, and drying and firing processes. For those looking to push their skills further, we’ll discuss advanced projects and inspirations.

The History of Coil Pot Making
Coil pot ceramics have ancient origins. Historians trace them back thousands of years. Cultures around the world practiced this craft. Ancient civilizations in Africa, Asia, and the Americas used coil pots. They served both daily use and ceremonial purposes. The method was simple yet effective for early potters. They had no potter’s wheel, only their hands and natural materials.
Early pots show a variety of styles. Some bear intricate patterns. Others have a simple, rustic charm. Coil pots were not just for storage. They were part of social and religious rituals. This craft has stood the test of time. It bridges the gap between the ancient and the modern world. Today, artists keep the tradition alive. They produce works that honor this historic method.
Each culture left its mark on the coil pot technique. Design elements and shapes show regional differences. They reflect local traditions and resources. Coil pots tell stories of their makers and their times. Studying them helps us understand past societies.
The survival of coil pot ceramics is a testament to their versatility. They adapt to different eras and uses. Modern coil pot makers draw inspiration from history. They combine traditional methods with contemporary designs. This results in unique and beautiful pieces. Coil pot making connects us with our ancestors. It invites us to explore creativity in a fundamental form.
Essential Tools and Materials for Coil Pottery
To start your journey in coil pot ceramics, you need the right tools and materials. Here’s what to gather before you begin:
- Clay: The foundational material for all pottery, clay comes in various types. Find one that’s pliable and holds its shape well.
- Canvas or Work Surface: A sturdy canvas or a smooth, flat table will serve you as a work surface. It makes rolling coils easier.
- Clay Cutting Tools: Use these to cut your coils to the desired length. Wire clay cutters are especially handy.
- Rolling Pin: Essential for flattening clay and creating even coils. You can use a standard kitchen rolling pin.
- Ribs and Scrapers: These tools help to smooth and shape the clay. They come in wood, metal, or silicone.
- Water: Keep a small bowl of water nearby to moisten your hands and the clay, ensuring good adhesion.
- Sponges: Use a damp sponge to smooth out the coil joints and surface of the pot.
- Needle Tool: A sharp needle tool allows you to score the clay for better coil connection.
- Modeling Tools: These are for adding details and refining the shape of your pot.
With these essential tools and materials, you’re set to start crafting coil pots. Remember to keep your work area tidy and your tools clean. This will make the process smoother and your experience more enjoyable. Coil pot ceramics is a creative endeavor where having the right tools at hand is key to success.
Basic Techniques in Coil Pot Construction
Coil pot construction begins with simple steps. Start with soft, pliable clay. Roll this clay between your hands or on a work surface. Your goal is to form long, rope-like strands – these are your coils. Make sure they are even in thickness for consistency in your pot’s walls.
For the base, create a flat disc of clay. This will serve as the foundation. Attach your first coil to the edge of the base. Do this by scoring the surfaces with a needle tool. Then, press them together firmly. To help the coils adhere, add a little water with your fingers.
Build the walls by stacking coils one atop another. Take care to align them well. Blend each coil into the one below by smoothing the inside and outside with your fingers or a rib tool. Continue adding and smoothing coils until the pot reaches your desired height.
As you work, check for symmetry. Gently shape the pot to prevent leaning or bulging. Remember, maintaining an even wall thickness is crucial for stability. If your pot starts to warp, slow down. Allow the clay to set a bit before adding more coils.
These are the basic techniques for coil pot ceramics. With practice, they lay the groundwork for more complex projects. Remember to keep the process slow and steady. Patience is key in achieving a well-crafted coil pot.
Tips for Creating Symmetrical and Stable Pots
Creating symmetrical and stable coil pots requires focus and a methodical approach. Follow these tips for best results:
- Start with Even Coils: Consistent coil thickness leads to stability and symmetry. Measure your coils for uniformity.
- Keep a Level Base: Check that the base of your pot is flat. Use a spirit level if needed.
- Score Thoroughly: When joining coils, score the ends deeply. This helps create a strong bond.
- Smooth Carefully: Use fingers or a rib tool to blend coils inside and out. This prevents weak spots.
- Check the Symmetry Often: Pause regularly to inspect the pot’s shape. Adjust as you go to keep the form even.
- Slow Down the Process: Don’t rush. Let the clay stiffen slightly between adding coils for better control.
- Support the Walls: If the pot grows tall, support the walls with your other hand as you work.
- Use a Template: For more precise symmetry, use a paper or cardboard template as a guide.
Following these guidelines, you can achieve pots that are both lovely and lasting. Practice patience and attentiveness to master the art of coil pot ceramics.
Designing and Decorating Your Coil Pots
Designing your coil pot is where creativity truly shines. Start by planning the pot’s shape. Will it be tall and slender or wide and rounded? Sketch it out. A visual guide helps during the building process. Next, consider the surface. Will you carve designs, add appliques, or glaze with vibrant colors? Decoration can turn a simple pot into a work of art.
Here are some ideas to inspire your coil pot decorations:
- Texturing: Use tools to create patterns on the clay. Combs, stamps, and even natural objects like leaves or shells can imprint unique textures.
- Carving: When the clay is leather-hard, carve into it. This subtractive technique can reveal intricate designs.
- Applique: Add small pieces of clay onto the surface. These can be figurative shapes or abstract decorations. Score and slip them on for best adhesion.
- Glazing: Choose glazes that complement your design. Consider how colors change during firing. Test them to find the perfect fit.
- Slip Painting: Before your pot dries, paint on a thin layer of colored clay, called slip. Use different colored slips for a multi-hued effect.
Remember, less can be more. Simple designs often make strong statements. As you decorate, think about balance and how the design fits the pot’s form.
Designing and decorating your coil pots are central to their charm. Each choice reflects your style. With these tips and your imagination, your coil pottery will come to life. Remember, patience and practice can lead to stunning results.
Drying and Firing Processes for Coil Pottery
Once you have shaped and decorated your coil pot, the next essential steps are drying and firing. This stage transforms the clay into a durable ceramic piece. Here is what to consider during these processes:
- Slow Drying: Allow the coil pot to dry slowly. Rapid drying can cause cracks. Keep it in a dry, well-ventilated space away from direct sunlight.
- Even Drying: Turn the pot regularly. This helps prevent warping and promotes even drying.
- Bone Dry Stage: Wait for the pot to become ‘bone dry’. It should have a pale color and feel warm when touched. This means all moisture is gone.
- Bisque Firing: Once dry, the pot goes through a first firing called bisque firing. This makes it hard and ready for glazing.
- Glazing: If you plan to glaze your pot, now is the time. Apply glaze evenly. Use brushes or dipping methods.
- Final Firing: The last step is the glaze firing. This final firing sets the glaze and gives the pot its glassy surface.
Remember, patience is crucial in both drying and firing. Speeding up these processes can ruin your coil pot ceramics. Take your time and ensure each step is done with care. Once fired, your coil pot will be ready for use or display!
Advanced Coil Pot Projects and Inspirations
For those who have mastered the basics, advanced coil pot projects can be exciting challenges. Complex forms and detailed decorations can push your skills to new heights. Here are some advanced projects and inspirations to consider:
- Large-scale Coil Pots: Build bigger pots to make a statement. Support the structure as it grows to prevent collapse.
- Double-Walled Pots: Create an inner and outer wall. Join them for interesting effects and added strength.
- Intricate Patterns: Plan and execute complex patterns. They require patience and precise tool use.
- Mixing Clay Types: Experiment with different clays. Blend them to achieve unique textures and finishes.
- Incorporating Other Media: Add materials like glass or metal to your pots. This creates striking contrasts.
Find inspiration in daily life, nature, and art. Museums showcase ancient coil pots. These can spark ideas for modern adaptations. Look to contemporary artists for cutting-edge designs. Consider how you can apply these to your coil pot projects.
Remember, advancing your coil pot ceramics requires practice. Test new techniques on small pieces. Once comfortable, apply them to larger works. Your creativity is the limit. Take risks and create coil pots that reflect your growth as an artist.