Valentine’s Day is a time to express love and appreciation, and what better way to do that than with a heartfelt, handmade gift? Creating ceramic products is not only a unique and personal way to show your affection, but it also allows you to infuse your creation with thought and care. This article will guide you through the process of making ceramic gifts, from choosing the right materials to finishing touches, ensuring that your Valentine’s Day present is as special as your relationship.
Choosing the Right Ceramic Project
Understanding the Basics of Ceramics
Before diving into the creative process, it’s important to understand the basics of ceramics. Ceramics are made from clay, which is shaped, dried, and then fired in a kiln. The type of clay and the firing temperature can affect the final product, so it’s essential to choose the right materials and techniques for your project.
- Types of Clay:
- Earthenware: Easy to work with and fires at lower temperatures (1742-2012°F or 950-1100°C).
- Stoneware: Durable and fires at higher temperatures (2192-2372°F or 1200-1300°C).
- Porcelain: Fine and delicate, requiring high firing temperatures (2264-2428°F or 1240-1330°C).
- Tools and Equipment:
- Clay Tools: Rib tools, loop tools, wire cutters, and sponges.
- Pottery Wheel: For throwing (shaping) clay on a spinning wheel.
- Kiln: An oven used to fire the clay, available in electric, gas, and wood-fired varieties.
Selecting a Project
Choosing the right project depends on your skill level and the recipient’s preferences. Here are some ideas:
- Mugs and Cups: Perfect for coffee or tea lovers, these can be personalized with names, dates, or designs.
- Vases: Ideal for displaying flowers, vases can be simple or intricately designed.
- Jewelry Dishes: Small, decorative dishes for holding rings, earrings, or other small items.
- Sculptures: Create a figurine or a sculpture that holds sentimental value, such as a pet or a shared memory.
Preparing Your Workspace
Setting Up Your Studio
Creating a dedicated workspace is crucial for a successful ceramic project. Ensure you have enough space to work comfortably and safely.
- Work Surface: A sturdy table or countertop, covered with a plastic sheet or canvas for easy cleanup.
- Storage: Shelves or cabinets to store your clay, tools, and finished pieces.
- Ventilation: Good air circulation, especially if you plan to use glazes or paints that may emit fumes.
Safety Measures
Ceramics involve working with sharp tools, dust, and heat. Follow these safety guidelines to protect yourself:
- Wear Protective Gear: Gloves, aprons, and masks to prevent skin and respiratory irritation.
- Handle Tools Carefully: Keep tools organized and out of reach of children or pets.
- Fire Safety: If using a kiln, ensure it is properly installed and follow all manufacturer instructions.
Advanced Hand-Building Techniques
- Sculpting:
- Use clay to create three-dimensional forms, such as figurines or decorative objects.
- Tools like sculpting knives, loop tools, and ribs can help you achieve fine details.
- Slip Trailing:
- Mix clay with water to create a slip (a liquid clay).
- Use a slip trailer (a small bottle with a fine nozzle) to apply decorative lines and patterns on your piece.
- Texturing:
- Use various tools, stamps, or natural objects (like leaves or shells) to add texture to your clay.
- This can enhance the visual and tactile appeal of your piece.
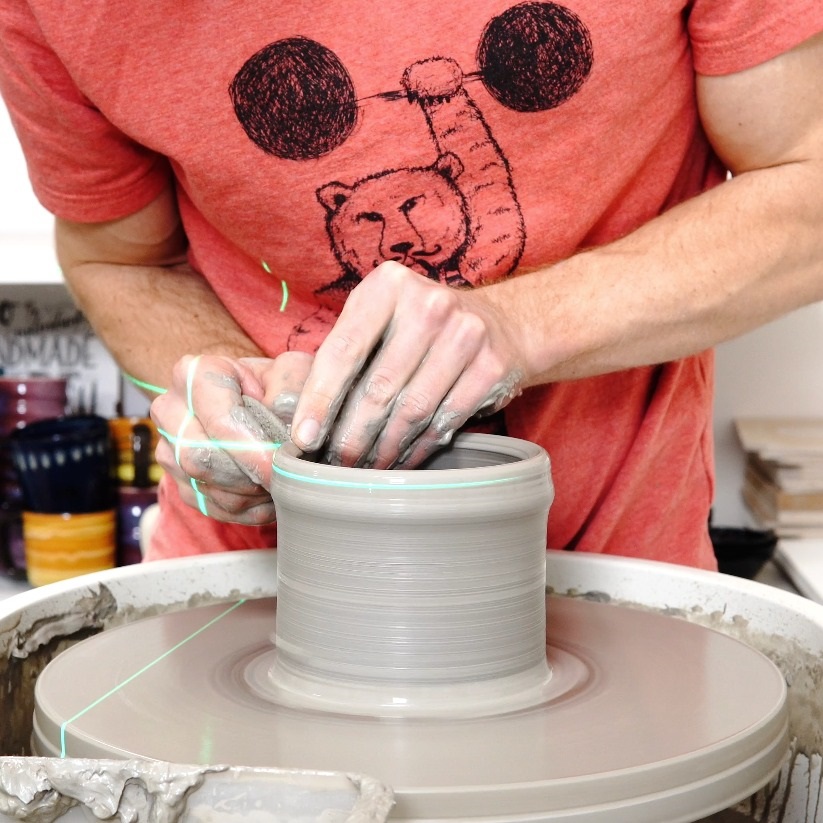
Wheel Throwing Tips
- Centering:
- Wet your hands and the clay to reduce friction.
- Use a combination of downward and inward pressure to center the clay on the wheel head.
- Opening:
- Make sure the opening is centered and not too wide.
- Keep your thumbs parallel to each other and use a gentle, steady pressure.
- Pulling Up the Walls:
- Use wet fingers and a steady, upward motion.
- Apply even pressure to avoid thin spots or uneven walls.
- Trimming and Smoothing:
- Use a rib tool to smooth the inside and outside of the piece.
- Trim excess clay from the bottom using a trimming tool to create a clean, flat base.
Drying and Bisque Firing
- Drying:
- Allow your piece to dry slowly and evenly to prevent cracking.
- Cover it with a plastic sheet to slow down the drying process if needed.
- Bisque Firing:
- Place your pieces in the kiln carefully, ensuring they do not touch.
- Follow the recommended firing schedule for your specific clay type.
- The bisque firing typically occurs at a lower temperature (around 1800-1900°F or 980-1040°C) to make the clay porous and ready for glazing.
Getting Started with Your Ceramic Project
Preparing the Clay
Before you begin shaping your clay, it needs to be prepared. Kneading the clay, also known as wedging, removes air bubbles and ensures a uniform consistency.
- Wedging Techniques:
- Slam Wedging: Slam the clay onto a hard surface to remove air bubbles.
- Ram’s Head Wedging: Fold the clay over itself repeatedly to create a smooth, consistent texture.
Shaping the Clay
The method you choose to shape your clay depends on the project and your skill level. Common techniques include hand-building, wheel-throwing, and slip casting.
- Hand-Building:
- Pinch Pots: Shape the clay by pinching and molding it with your hands.
- Coil Building: Roll the clay into long ropes and stack them to form the desired shape.
- Slab Construction: Roll the clay into flat sheets and cut and join them to create forms.
- Wheel-Throwing:
- Center the clay on the pottery wheel and use your hands and water to shape it into a symmetrical form.
- This technique requires practice and patience, but the results can be stunning.
- Slip Casting:
- Pour liquid clay (slip) into a plaster mold, allowing it to set before removing the mold and trimming the piece.
Adding Personal Touches
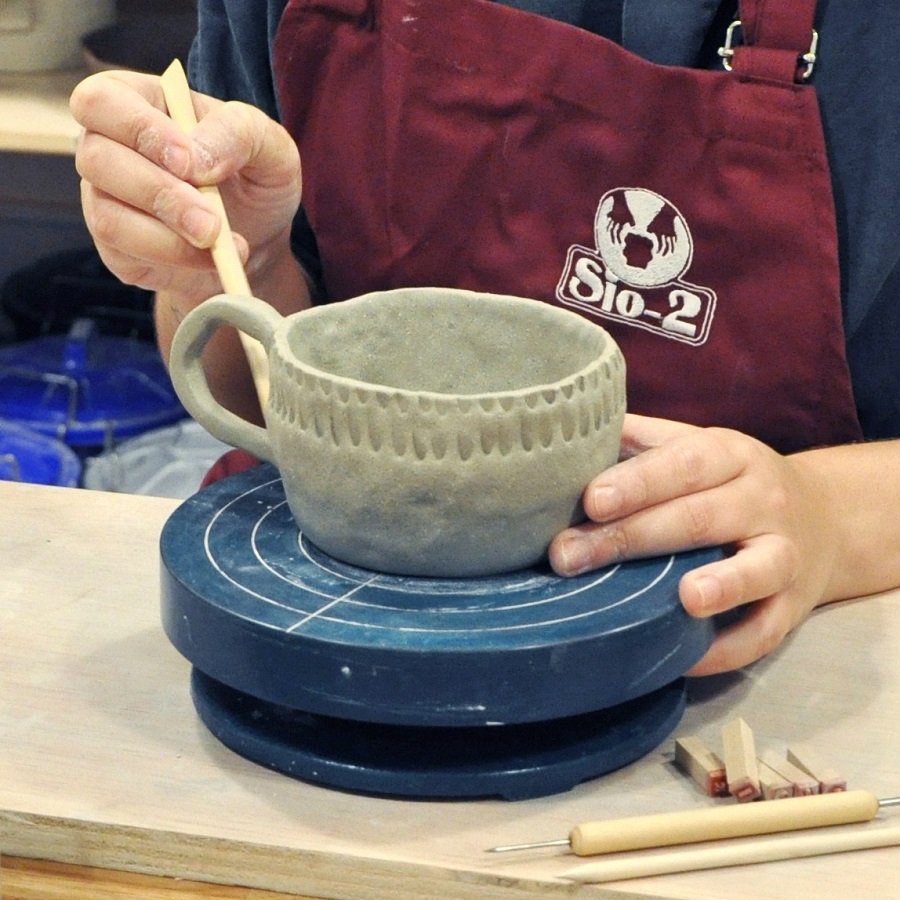
Carving and Texturing
Once your clay is shaped, you can add details and textures to make your piece more unique.
- Carving: Use loop tools and rib tools to carve patterns, letters, or designs into the clay.
- Texturing: Press textured objects, like lace or leaves, into the clay to create intricate patterns.
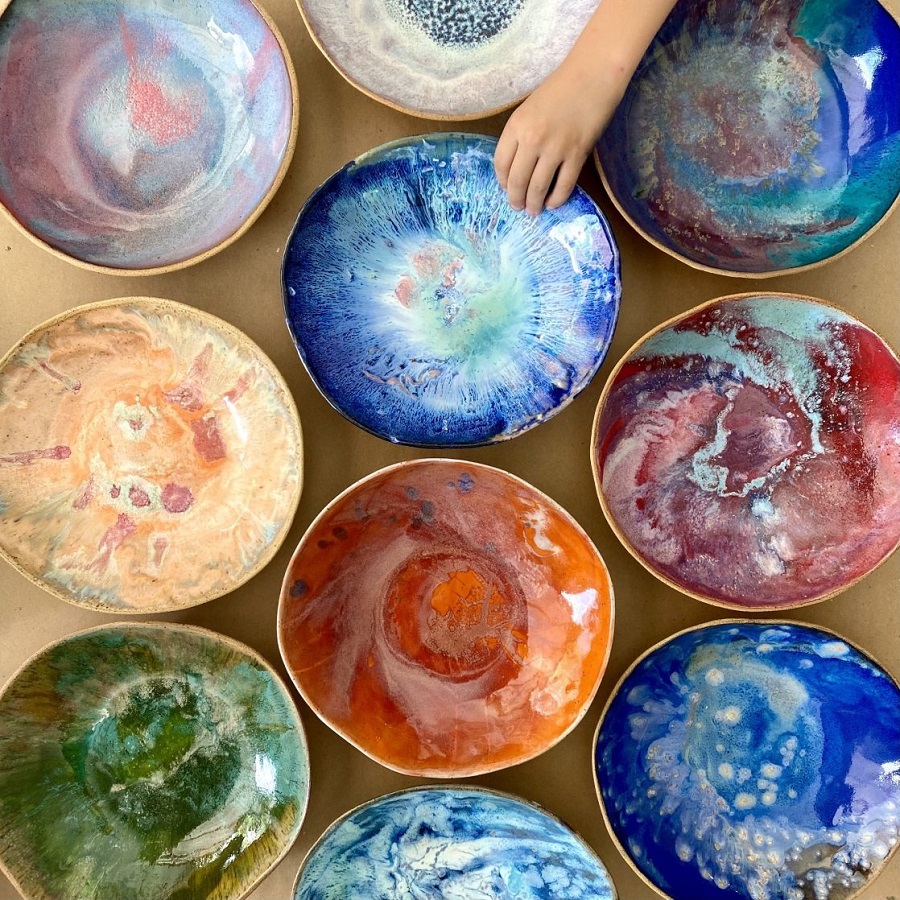
Glazing and Painting
Glazing and painting are the final steps to give your ceramic piece its color and finish.
- Underglaze: Apply underglaze to add color before the first firing. This can be done with brushes, sponges, or stamps.
- Glazing: After the first firing, apply a glaze to seal and protect the piece. Glazes come in a variety of colors and finishes, including matte, glossy, and metallic.
- Painting: Some artists prefer to paint their pieces after the final firing, using acrylics or ceramic paints.
Firing and Finishing Your Ceramic Piece
The Firing Process
Firing is a critical step in the ceramic-making process. It transforms the clay into a durable, permanent form.
- Bisque Firing: The first firing, which hardens the clay but leaves it porous. This is typically done at a lower temperature (1742-2012°F or 950-1100°C).
- Glaze Firing: The second firing, which melts the glaze and seals the piece. This is done at a higher temperature (2192-2372°F or 1200-1300°C).
Cooling and Inspection
After firing, allow the piece to cool slowly in the kiln. Once cooled, inspect it for any imperfections or cracks. Minor flaws can often be fixed with additional glazing and firing.
Presenting Your Gift
Packaging and Presentation
The way you present your ceramic gift can enhance its overall impact. Consider the following packaging options:
- Gift Box: Place the ceramic piece in a decorative box lined with tissue paper or bubble wrap.
- Ribbon and Card: Add a personal touch with a ribbon and a handwritten card expressing your feelings.
- Display Stand: For sculptures or decorative pieces, include a stand to showcase the item.
Sharing the Experience
If possible, involve your partner in the process. Share the story of how you created the piece, the inspiration behind it, and the effort you put into making it. This adds a layer of emotional depth to your gift and makes it even more meaningful.
Conclusion
Creating a ceramic gift for Valentine’s Day is a beautiful and thoughtful way to show your love. From choosing the right project and materials to adding personal touches and presenting your gift, every step is an opportunity to express your affection. Whether you’re a seasoned ceramicist or a beginner, the joy of giving a handmade gift is unmatched. So, roll up your sleeves, get your hands dirty, and create something truly special for your loved one this Valentine’s Day.