Introduction to Ceramics and its Various Forms
Ceramics is a versatile medium, known for both its beauty and functionality. It dates back thousands of years, spanning various cultures and continents. This art form involves shaping and firing clay into durable pieces. From simple earthenware pots to delicate porcelain, ceramics has many forms.
Earthenware is the oldest and simplest form. It’s fired at lower temperatures and is often reddish-brown. Stoneware is another form, known for its strength and waterproof qualities. It’s ideal for daily use items like mugs and bowls. Porcelain, with its fine texture and translucency, is prized for its elegance. It requires a high firing temperature.
Other forms include terracotta, known for its earthy tone and used for plant pots and sculptures. Bone china, a type of porcelain, is strong and chip-resistant. Then there’s Raku, known for its distinctive crackled glaze and often used in decorative art.
Each kind of ceramic has its own qualities, uses, and firing temperatures. They also require different techniques, which we will explore in this blog. Whether you join ceramics classes or learn on your own, understanding these forms is the first step in mastering ceramics.
Essential Tools and Materials for Ceramic Work
To get started with ceramic work, you’ll need some key tools and materials. First, clay is the fundamental material. Choose a type suited to your project; earthenware, stoneware, or porcelain, as mentioned earlier. For shaping, clay tools such as wire cutters, rib tools, and loop tools are vital. They help to cut, smooth, and carve the clay.
A potter’s wheel is optional but necessary for throwing. It allows you to shape rounded ceramics like bowls and vases. For those preferring hand-building, consider a slab roller to even out large clay pieces. A kiln is non-negotiable; it’s the high-temperature oven that will fire your pieces. Make sure to pick one that reaches the required temperatures for your chosen type of clay.
Other essentials include glazes, which give your ceramics color and finish, and brushes for their application. Work surfaces, like canvas or a wooden board, provide a place to work your clay without sticking. Finally, a sponge and a bowl of water are simple but crucial for smoothing and shaping clay during the forming process. These tools and materials are your foundation in any ceramics class or self-led project.
Fundamental Techniques of Hand-Building
Hand-building is a foundational skill in ceramics. It involves creating shapes without a potter’s wheel. There are three main techniques in hand-building. These are pinch, coil, and slab methods. Let’s dive into each method.
Pinch Method: Start with a ball of clay. Press your thumb into the center. Then gently pinch and turn the clay to create a pot. This technique is perfect for small items like bowls and cups.
Coil Method: Roll out long ropes of clay. Stack and smooth them to form walls. This method works well for larger pieces like vases and jars. Don’t forget to blend the coils together well. This will give strength to your piece.
Slab Method: Use a rolling pin or slab roller to flatten clay. Cut out shapes and join them to create objects. This method is ideal for geometric pieces. Use slip as a ‘glue’ to bond the clay pieces.
With practice, these techniques can be mixed and refined. Hand-building is great for beginners in ceramics classes. It allows for a lot of flexibility and creativity. As you master these skills, your handmade ceramics will gain uniqueness and character.
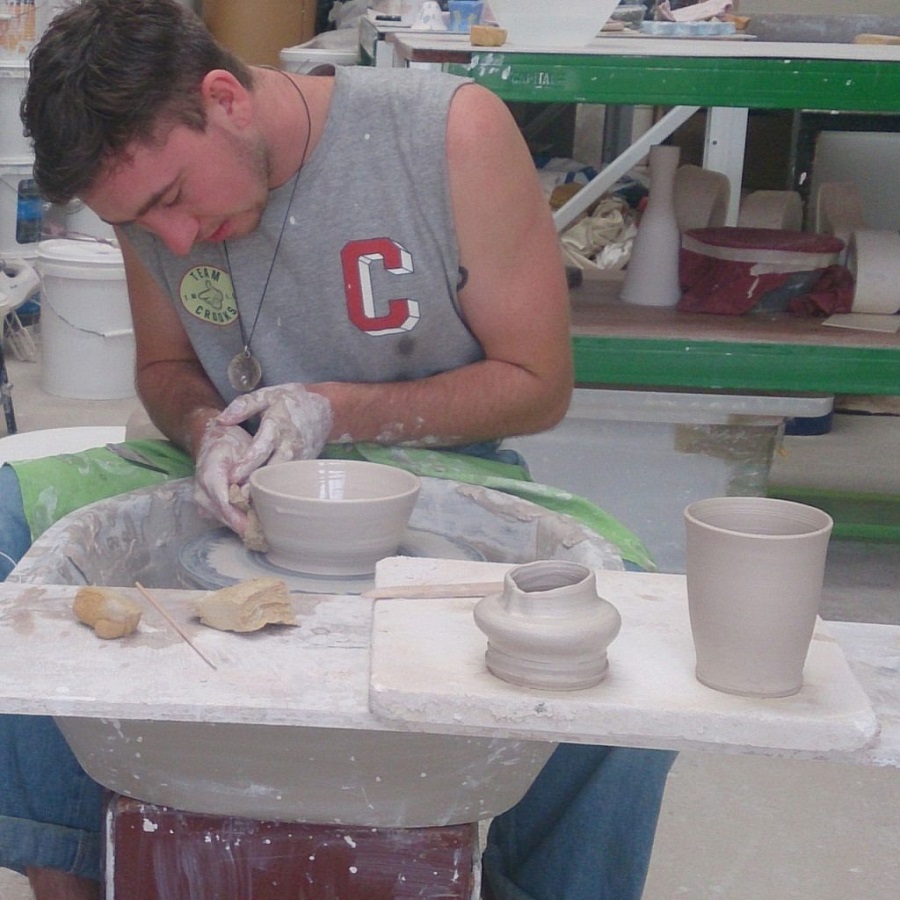
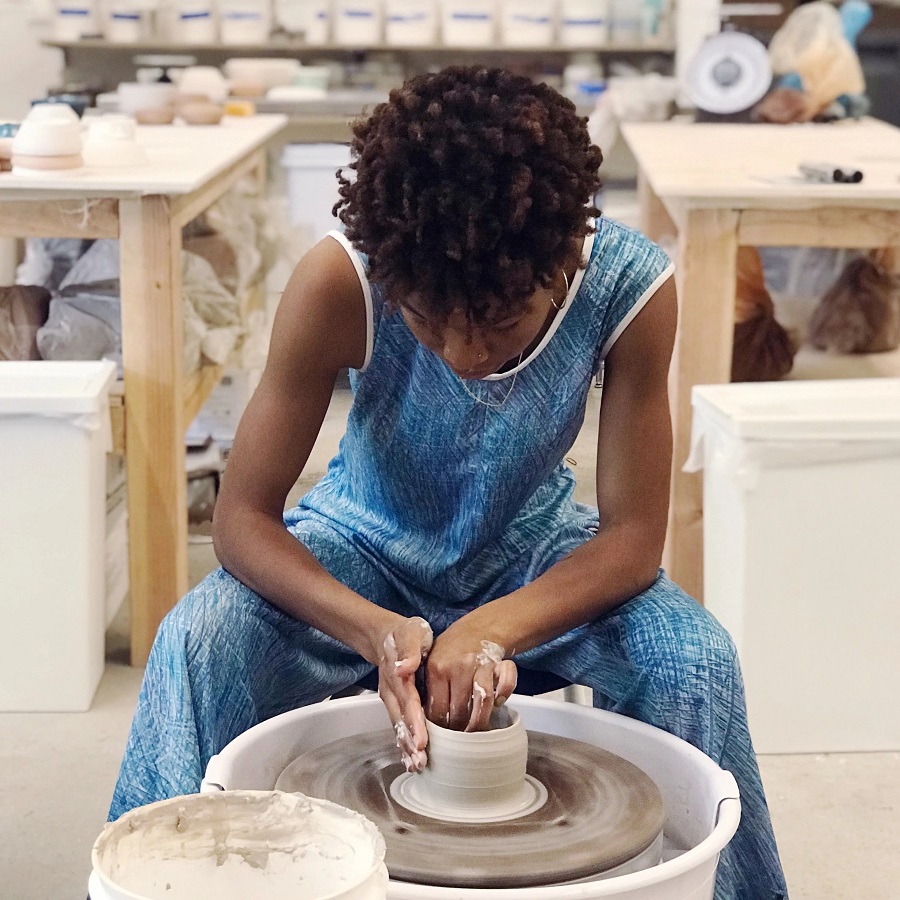
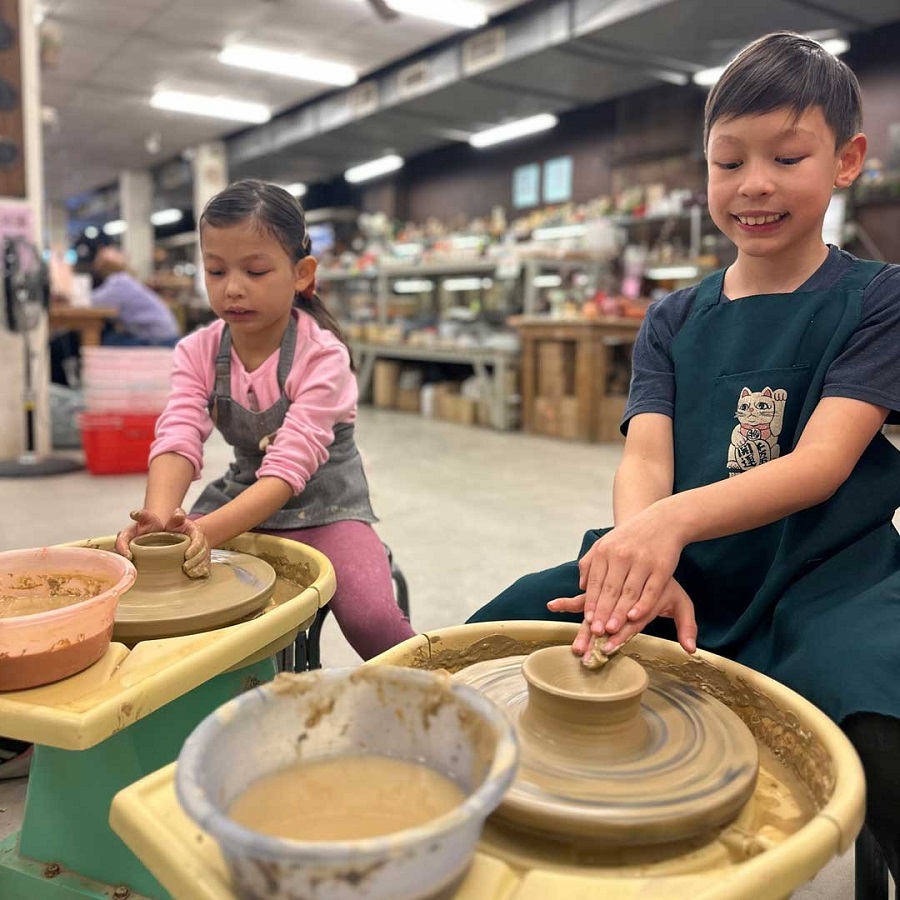
The Art of Throwing on the Wheel
Throwing is a captivating part of ceramics. It requires a potter’s wheel, a powerful tool. Ceramics classes often begin with this skill. A spinning wheel lets you shape symmetrical vessels. Think bowls, mugs, and plates. To start, you need a centered clay ball. Use steady hands and gentle pressure. Your fingers guide the clay as the wheel turns. This creates the walls and base of your piece.
Here are the basic steps in throwing:
- Wedge the clay to remove air bubbles. This step prevents cracks later on.
- Center the clay on the wheel. Use firm but gentle pressure to align it.
- Open the center of the clay ball. Control is key to maintain symmetry.
- Pull up the walls. Consistent thickness is important for a balanced final product.
- Shape the outside. Use tools for precision and smoothing.
- Trim the bottom and foot. A careful cut defines the base.
Ceramics classes provide guidance on each step. They emphasize technique and body posture. Patience is important. So is regular practice. Throwing on the wheel can be tricky. You’ll often find misshaped pots at first. Don’t let this discourage you. Each attempt improves your skill.
When your pieces are shaped, they need to dry. Afterward, they undergo bisque firing. This process hardens them for glazing and the final firing.
Advanced throwing techniques can add flair. Lids, handles, and intricate designs elevate your work. Time spent mastering the wheel is worth it. It transforms simple clay into functional art and allows your creativity to take physical form.
Sculpting and Adding Detail to Your Ceramic Pieces
Adding detail to ceramic pieces brings them to life. The process of sculpting and detailing is where the personality of your work shines through. Here are some methods to add charm to your ceramics.
Carving and Incising: Using sharp tools, carve into the clay. These create textures or intricate designs. Clear, precise movements are best. Try sgraffito, where you scratch through a surface layer to reveal a contrasting color beneath.
Applique: Add clay shapes onto your piece. This method is great for decorative elements like flowers or figures. Make sure to score and slip the surfaces. This helps them adhere well.
Stamping and Rolling: Press objects into the clay. This leaves imprints. Textured rolling pins can create patterns across the surface. Experiment with different materials to find unique textures.
Sculpting: Build up areas of your piece. It’s not just about shape, but also depth and dimension. Work slowly and pay attention to detail. This is especially important for figurative work.
Smoothing: Use a sponge and water to smooth out rough spots. This helps to blend the different parts of your piece seamlessly.
All these techniques require patience and steady hands. Ceramics classes often include tutorials on sculpting and adding details. If you’re learning at home, practice is key. Start simple and work your way up to more complex designs. With time, your signature style will emerge, distinguishing your ceramics from others.
Glazing and Firing: Finishing Your Ceramic Art
Glazing and firing are crucial in ceramic art. They transform your work’s look and strength. Applying a glaze can add color, texture, and shine. It also seals your piece, making it food-safe and waterproof. Choose glaze colors and finishes that match your vision. You can brush on the glaze or dip your piece into it. Ensure a smooth, even application for the best results.
Firing is done in a kiln, the high-temperature oven for ceramics. There are two important firing stages. The first is the bisque firing. This hardens the clay into a permanent shape. After glazing, you’ll do a second firing, the glaze firing. This melts the glaze onto the piece, finishing it beautifully. Pay attention to your kiln’s temperature limits. Fire earthenware, stoneware, and porcelain at their specific temperatures.
Remember, every glaze has its own firing range. Note these details when you buy or mix your glazes. Always measure the kiln’s temperature with a pyrometer. Monitor the firing process to prevent accidents or damage.
In ceramics classes, experts will guide you through glazing and firing. They provide tips tailored to the type of clay and glaze you use. If you’re exploring on your own, practice makes perfect. Test your glazes and firing times on small pieces first. Learn from each experience. Soon, you’ll find the perfect finish for your ceramic art projects.
Troubleshooting Common Ceramic Problems
When working with ceramics, issues often arise, but knowing how to address them is key. Here are common problems and how to fix them.
Cracking: Sometimes, your clay may crack during drying or firing. To prevent this, ensure even thickness throughout your piece and dry slowly. If cracks appear, use slip to fill them and smooth the area before firing.
Warping: Pieces can warp if not dried evenly. Turn the pieces regularly when air drying to promote even drying. For flat pieces, dry them on absorbent surfaces, like plaster bats.
Glaze Issues: Runs, bubbles, and crazing can occur. Apply the glaze evenly and do not make it too thick. Check the glaze compatibility with your clay body and the firing temperature to avoid such issues.
Stuck Lids: If a lid gets stuck after firing, next time, leave a slight gap between the lid and the body during glazing. This will prevent them from fusing together.
Exploding in Kiln: Air trapped within the clay can cause explosions. Thoroughly wedge your clay to remove air pockets before you begin shaping.
By addressing these common issues, your work in ceramics classes will improve. Keep practicing, and don’t let setbacks discourage you. Every problem has a solution, and every mistake is a learning opportunity.
Advancing Your Ceramic Skills: Workshops and Community Classes
To take your ceramic skills to the next level, consider joining workshops and community classes. These settings offer hands-on learning and direct feedback from experienced instructors. Even if you’ve been learning alone, group sessions can introduce you to new techniques and ideas.
Workshops: These are intensive sessions focused on specific techniques or projects. They are often led by experts in the field. Workshops can last a few hours to several days. They allow for deep dives into advanced skills or new ceramic styles.
Community Classes: Local art centers or schools may offer ceramics classes. These classes run over weeks or months. They provide a steady environment to practice and improve. Regular meetings allow for step-by-step guidance and slow, careful learning.
In these classes, you will likely have access to better equipment. Think advanced kilns or specialized tools. You can experiment with a range of clays and glazes. Collaboration and input from fellow students can inspire creative growth.
Networking is an added benefit. You can connect with others who share your passion. Some may have insights on selling your art or expanding your craft into a business. Learning in a community also offers moral support. It’s invaluable for keeping your motivation high.
Many ceramics classes also include exhibits or sales. These can be chances to showcase your work. Feedback from the public is a great way to understand the appeal of your pieces. It also helps in gauging pricing if you aim to sell your work.
Remember, practice is key in ceramics. Community learning offers a regular schedule for this practice. It pushes you to keep creating and trying new things. With each class or workshop, your skills will sharpen, and your art will flourish.