Introduction to Slip Ceramics
Slip ceramics is a term that may sound unfamiliar to the uninitiated, but it’s a fundamental aspect of pottery and ceramics that have been around for centuries. Slip is essentially liquid clay. We can use this versatile material in various ways in the ceramists’ toolkit. It can serve as a glue to bind different pieces of clay, it’s the basis of slip casting techniques, it can be used for decorative purposes, and it can subtly alter the color and texture of the ceramic surface.
To start with, slip ceramics involves mixing clay with water. The result is a creamy, thick liquid that’s malleable enough to take on various shapes and designs. It’s important to achieve the right consistency; if the slip is too thick, it won’t flow well, and if it’s too thin, it won’t adhere properly. Once you’ve mastered the consistency, the creative possibilities are endless.
Working with slip requires patience and practice. Beginners might find it challenging at first, but as you gain experience, you’ll see that slip can transform the look of your ceramics. From coating entire pieces to adding fine details, slip can do it all. Stay tuned as we explore various slip ceramics techniques in depth, including slip casting, slip trailing, sgraffito, and the use of engobe. These methods will enhance the aesthetic and tactile qualities of your ceramic pieces, making them stand out as uniquely handcrafted works of art.
Types of Slip Used in Ceramics
Ceramic artists use various types of slip to achieve desired effects. The main difference among slips lies in the clay body used to create them. Here, we discuss some common types of slip.
- Earthenware Slip: This slip is compatible with low-fire projects and usually has a red or brown color. It’s popular for its rich, warm tones.
- Stoneware Slip: Stoneware slips are typically used for mid to high-range firing temperatures. They offer more durability and are often seen in functional pottery.
- Porcelain Slip: With its fine particle size, porcelain slip creates a smooth, white surface that’s ideal for delicate work and high-definition details.
- Engobe: A slip known as engobe contains additional ingredients like feldspar or silica to adjust the properties of the slip. It’s used to alter color and texture beneath glazes.
Some artists even make custom slips by adding oxides or stains to alter the color or to achieve specific design qualities. It is essential to choose the right type of slip for your project, taking into account the firing temperature and the final aesthetic you aim to achieve. When you use slip appropriately, it can massively influence the look and feel of your ceramic work.
Preparing Slip for Ceramic Techniques
Preparing slip for ceramic techniques is a vital step to ensure your final product is high-quality.
- Measure Clay and Water: Begin by measuring the right proportions of clay and water.
- Mix Thoroughly: Combine them until the mixture reaches a creamy, homogenous consistency.
- Sieve the Slip: Pass the mixture through a sieve to remove any lumps, ensuring a smooth slip.
- Consistency Check: The slip should be neither too thick nor too thin. Adjust with water or clay as needed.
- Let it Settle: Allow the slip to rest after mixing. This lets any air bubbles rise and escape.
- Test the Slip: Apply it to a test piece of ceramics to guarantee proper adhesion and texture.
Each of these steps plays an essential role in the success of the slip ceramics you aim to create. Patience and precision in this stage will save you time and effort in later stages of your ceramic projects.
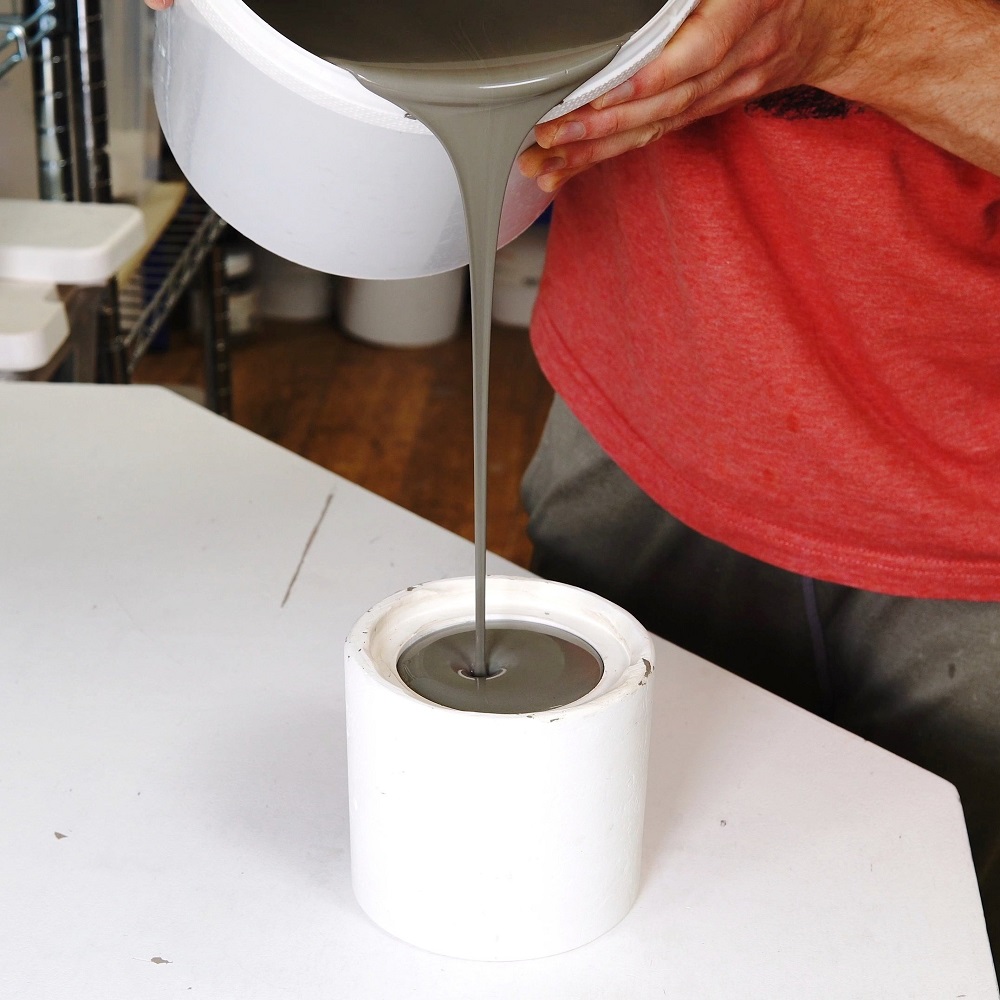
Slip Casting Process
Creating ceramics via slip casting is a unique and intricate process. It starts with pouring slip into a plaster mold. The plaster absorbs water from the slip, forming a solid clay layer against the mold’s walls. Once the clay layer reaches the desired thickness, you drain the excess slip.
Next, you need to wait. The clay needs time to dry and harden within the mold. Patience is key here. After it dries, you gently separate the plaster mold to reveal your ceramic form. An essential thing to remember is the quality of slip used. It needs to be free of air bubbles and of the right consistency for optimal results.
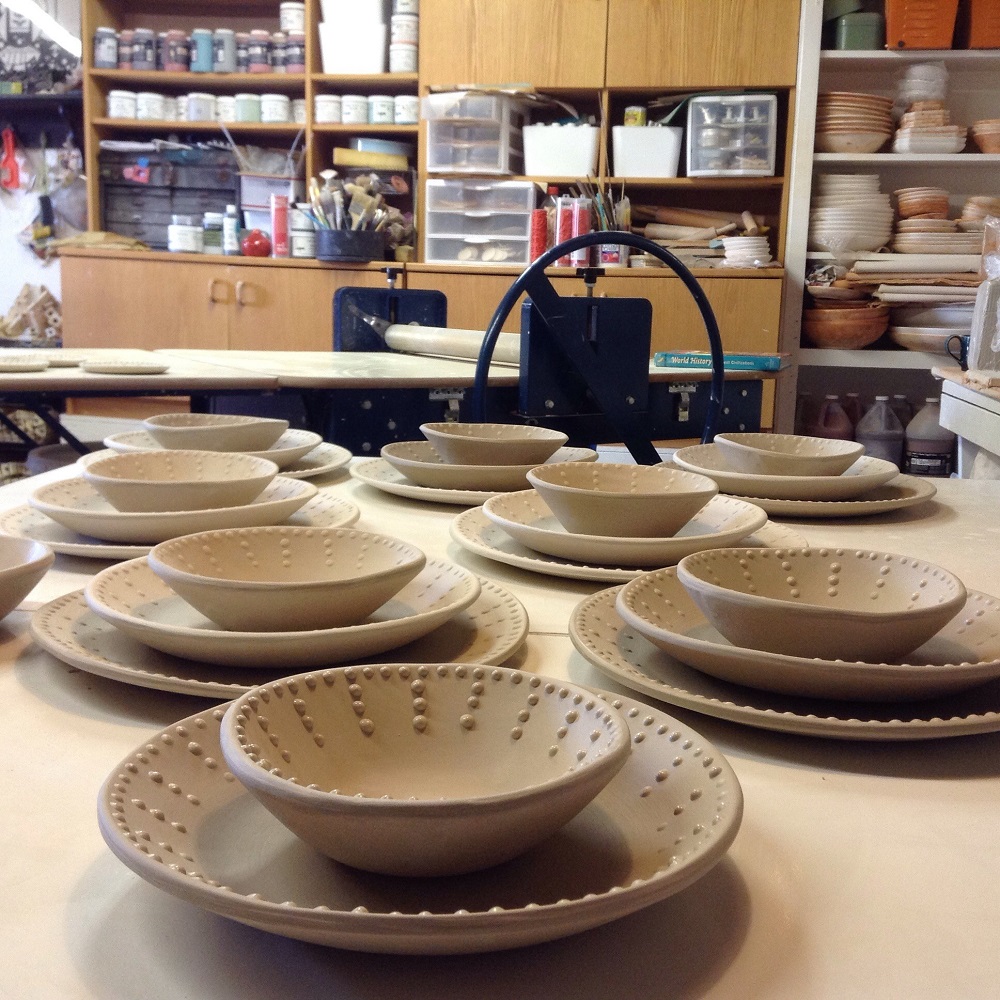
The slip casting method is excellent for reproducing detailed shapes and intricate designs. It’s popular in creating identical pieces, like dishes or figurines. This technique requires precision and care to ensure each piece’s consistency and quality. When done correctly, slip casting can yield beautifully crafted ceramics.
As you explore slip ceramics further, keep these steps in mind for slip casting. It is an effective way to achieve uniformity and detail in your ceramic creations. The key is in the preparation, timing, and quality of the slip used.
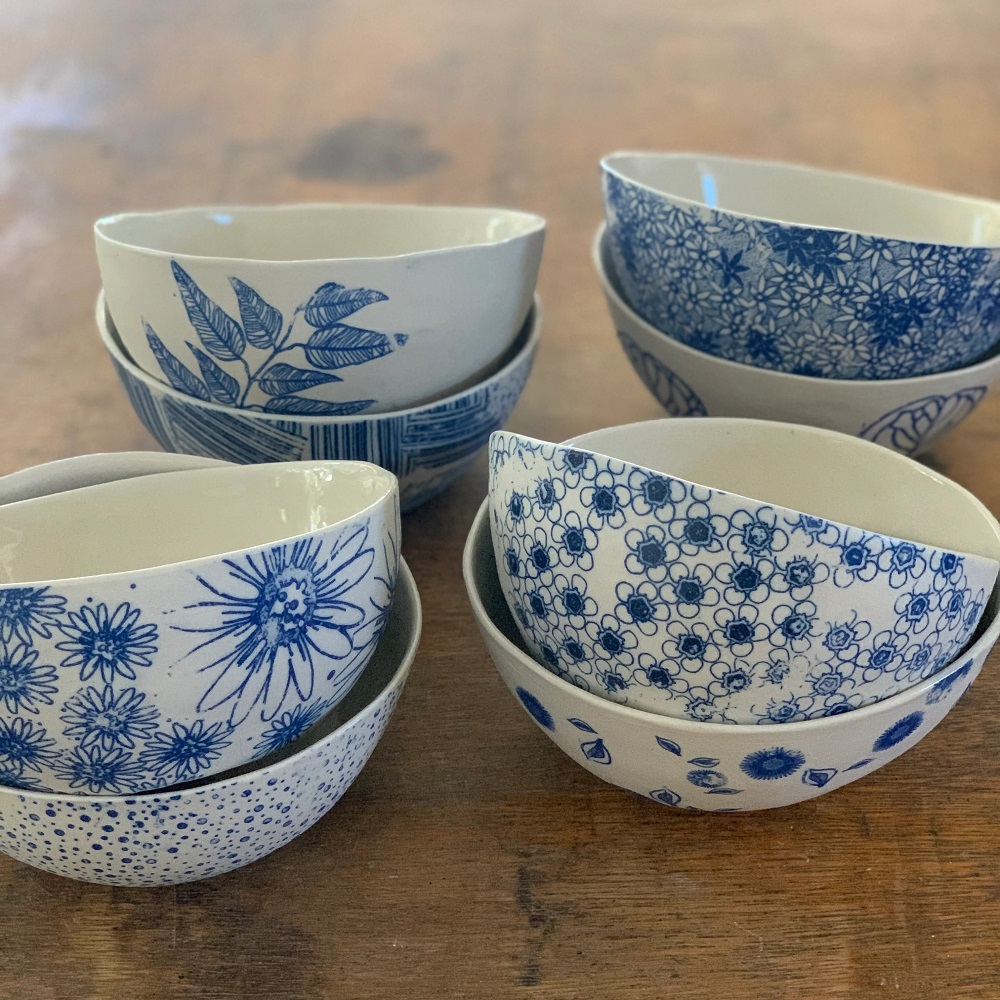
Slip Trailing: Design and Application
Slip trailing is a decorative method that can give ceramics unique patterns and textures. It involves squeezing slip out of a bottle or tool with a nozzle, much like icing a cake. Artists meticulously apply lines, dots, and other shapes onto a clay body’s surface using this technique. Here’s how to utilize slip trailing to enhance your ceramic pieces:
- Choose the Right Slip: For effective slip trailing, pick a slip with the suitable consistency. It should flow smoothly through your tool without clogging.
- Select Appropriate Tools: Trailers, rubber bulbs, or squeeze bottles with various nozzle sizes help create different effects.
- Plan Your Design: Before you start, sketch out your design. This planning step ensures you have a clear vision for your trailing.
- Practice Makes Perfect: Try your hand at simpler designs before moving on to complex patterns.
- Apply to Leather-Hard Clay: Slip trailing works best when the clay body is leather-hard. This stage provides a firm surface for your design to adhere.
- Drying Time: Allow your slip-trailed piece to dry slowly. Rapid drying can cause the slip to crack.
- Fire the Ceramic: After drying, fire your ceramic piece to make the slip trailing permanent.
Slip trailing creates raised designs on ceramics, adding dimension and tactile interest. With practice, you can master this technique and create standout pieces. Remember, the thickness, flow, and drying time of slip are critical factors in successful slip trailing.
Sgraffito Technique with Slip
Sgraffito is a captivating technique in slip ceramics that allows artists to scratch away layers to reveal intricate designs. To begin this process, you first coat your piece with a thick layer of slip. Choose a contrasting color to make your design pop. Then, once the slip reaches a leather-hard state, you can commence scratching. Employ tools like needles, knives, or even combs to etch your design into the slip. This will expose the different-colored clay body underneath.
The simplicity or complexity of your design is up to you. Simple geometric shapes can look stunning, as can elaborate scenes or patterns. When your sgraffito artwork is complete, allow it to dry thoroughly. Take care with drying, as too fast may cause undesirable cracking. Finally, fire your piece in a kiln. This step fuses the slip to the clay body and makes your art permanent.
Artists love sgraffito for its versatility and the striking visual contrast it can create. The technique’s name comes from the Italian word “sgraffire,” meaning “to scratch,” and that’s exactly what you do to bring your designs to life. Remember, sgraffito with slip is not just about scratching the surface; it’s about uncovering the hidden beauty beneath, adding texture and depth to your ceramic creations.
Engobe: Understanding Slip as an Underglaze
Engobe is a special type of slip used in ceramics. It is an underglaze that can transform the look and functionality of ceramic pieces. Engobe acts like a canvas. It sets the stage for the glazes applied over it. It has similar properties to slip but with added ingredients. These might include feldspar or silica. They enhance the slip’s qualities, making it suitable for decorative work under the glaze. Here’s what you need to know about engobe.
- Composition: Engobe contains clay and water, like regular slip, plus additional materials. This tweak in the recipe adjusts its melting point and texture.
- Color Range: By adding oxides or stains, artists can create a wide palette of colors with engobe.
- Application: You brush or spray engobe onto a piece before it’s bisque-fired. This sets the stage for further glazing and decoration.
- Benefits: Engobe can create a smooth surface or add visual depth to designs. It can help prevent glazes from running during firing.
- Compatibility: Make sure the engobe fits the clay body. It should also suit the glaze that will cover it. The right match avoids issues like cracking or peeling.
- Firing Temperature: Engobe firing temperatures must align with the clay and glaze. This ensures all layers mature correctly during the kiln process.
Understanding how to use engobe can elevate the quality and appearance of your ceramic art. It requires practice to master. But once you do, the possibilities for creativity are vast. Use engobe to enhance your pieces with depth, texture, and color beneath the glaze. It can be the difference between a good piece and a great one.
Tips for Working with Slip
Working with slip ceramics requires know-how for the best results. Below are some key tips:
- Test Consistency: Always test your slip’s consistency. It should feel like heavy cream. Thick slips can cause issues, and watery ones may not adhere well.
- Avoid Air Bubbles: Before using, stir the slip gently to release trapped air. This prevents defects in your finished pieces.
- Clean Surfaces: If joining two pieces, ensure both surfaces are free from dust. Clean surfaces help the slip bond stronger.
- Apply Evenly: When coating or joining, spread the slip evenly. This avoids weak spots.
- Temperature Matters: Work in a space with stable temperature. Extreme changes can affect how slip behaves.
- Keep a Damp Cloth Handy: Quickly fix mistakes by wiping them with a damp cloth before the slip dries.
- Timing is Crucial: Apply decorative slip techniques like sgraffito or trailing when the clay is leather-hard. This timing allows for the best adherence and detail.
- Fire Appropriately: Fire your piece at the right temperature for your slip type. This prevents problems like melting or not fusing properly.
Practice and patience are your allies in mastering slip ceramics. With these tips, you can refine your slip working techniques.